Product Data Sheet
Page 1
... new PC App • Sync folders between ReadyNAS® and PCs • Time Machine® backup support for all your ReadyNAS you are safe with our new PC app, backing up and syncing your photos, videos and files If you love something, protect it. Once your files are secure on board RAM for swift data transfers Your files. ReadyNAS® 100 Series Network Attached Storage (NAS) Data Sheet RN102/RN104 RN104 RN102 ReadyNAS...
... new PC App • Sync folders between ReadyNAS® and PCs • Time Machine® backup support for all your ReadyNAS you are safe with our new PC app, backing up and syncing your photos, videos and files If you love something, protect it. Once your files are secure on board RAM for swift data transfers Your files. ReadyNAS® 100 Series Network Attached Storage (NAS) Data Sheet RN102/RN104 RN104 RN102 ReadyNAS...
Product Data Sheet
Page 3
... degraded media File System & Transfer Protocols • ReadyNAS OS 6.2 or later • Linux 3.x • Internal File System: BTRFS • External File System: EXT3, EXT4, NTFS, FAT32, HFS+ • Copy-on number of drives/bays) • RAID Global Hot Spare • Backup to external storage (USB/eSATA) • USB One-Touch Copy • Apple Time Machine support • Create virtual Time Machine targets per user • Manage & monitor Time Machine usage per user • Remote Apple Time Machine backup and restore (using ReadyCLOUD Mac client) • ReadyNAS Vault Cloud backup...
... degraded media File System & Transfer Protocols • ReadyNAS OS 6.2 or later • Linux 3.x • Internal File System: BTRFS • External File System: EXT3, EXT4, NTFS, FAT32, HFS+ • Copy-on number of drives/bays) • RAID Global Hot Spare • Backup to external storage (USB/eSATA) • USB One-Touch Copy • Apple Time Machine support • Create virtual Time Machine targets per user • Manage & monitor Time Machine usage per user • Remote Apple Time Machine backup and restore (using ReadyCLOUD Mac client) • ReadyNAS Vault Cloud backup...
Product Data Sheet
Page 4
ReadyNAS® 100 Series Network Attached Storage (NAS) Data Sheet RN102/RN104 Technical Specifications Networking Protocols • TCP/IP • IPv4 • Next-generation Internet Protocol (IPv6) • Static IP Address • Dynamic IP Address • Multiple IP Settings • DHCP Client • UPnP Discovery • Bonjour Discovery • Link Aggregation IEEE 802.3ad • Port Trunking (balanced round robin, active backup, balance xor, broadcast, 802.3ad link aggregation LACP, transmit load...
ReadyNAS® 100 Series Network Attached Storage (NAS) Data Sheet RN102/RN104 Technical Specifications Networking Protocols • TCP/IP • IPv4 • Next-generation Internet Protocol (IPv6) • Static IP Address • Dynamic IP Address • Multiple IP Settings • DHCP Client • UPnP Discovery • Bonjour Discovery • Link Aggregation IEEE 802.3ad • Port Trunking (balanced round robin, active backup, balance xor, broadcast, 802.3ad link aggregation LACP, transmit load...

Hardware Manual
Page 16
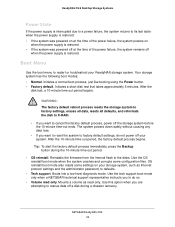
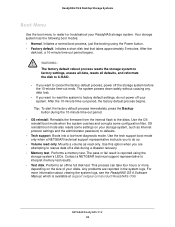
... the following boot modes: • Normal. OS reinstall boot mode also resets some configuration files. Contact a NETGEAR technical support representative to defaults. • Tech support. Any problems are attempting to X-RAID. - Boot Menu Use the boot menu to factory default settings, do so. • Volume read -only. Initiates a normal boot process, just like booting using the storage system's LEDs. Tip: To start the factory default process immediately, press the Backup button during a disaster recovery. • Memory test. Use the OS reinstall boot mode when...
... the following boot modes: • Normal. OS reinstall boot mode also resets some configuration files. Contact a NETGEAR technical support representative to defaults. • Tech support. Any problems are attempting to X-RAID. - Boot Menu Use the boot menu to factory default settings, do so. • Volume read -only. Initiates a normal boot process, just like booting using the storage system's LEDs. Tip: To start the factory default process immediately, press the Backup button during a disaster recovery. • Memory test. Use the OS reinstall boot mode when...
Hardware Manual
Page 24
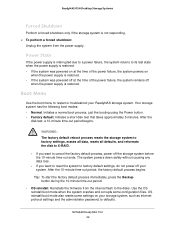
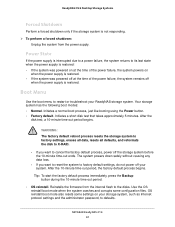
... the firmware from the power supply. NETGEAR ReadyNAS 104 24 Boot Menu Use the boot menu to X-RAID. - After the disk test, a 10-minute time-out period begins. ReadyNAS OS 6 Desktop Storage Systems Forced Shutdown Perform a forced shutdown only if the storage system is restored. WARNING: The factory default reboot process resets the storage system to factory settings, erases all data, resets all defaults, and reformats the disk to restart or troubleshoot your ReadyNAS storage system. If you want to reset the system to defaults. Power...
... the firmware from the power supply. NETGEAR ReadyNAS 104 24 Boot Menu Use the boot menu to X-RAID. - After the disk test, a 10-minute time-out period begins. ReadyNAS OS 6 Desktop Storage Systems Forced Shutdown Perform a forced shutdown only if the storage system is restored. WARNING: The factory default reboot process resets the storage system to factory settings, erases all data, resets all defaults, and reformats the disk to restart or troubleshoot your ReadyNAS storage system. If you want to reset the system to defaults. Power...
Hardware Manual
Page 33
... the power supply is restored. Boot Menu Use the boot menu to restart or troubleshoot your storage system, such as read only. Use the tech support boot mode only when a NETGEAR technical support representative instructs you want to cancel the factory default process, power off a disk during the 10-minute time-out period. • OS reinstall. Initiates a normal boot process, just like booting using the Power button. • Factory default. NETGEAR ReadyNAS 202 33 After the disk test, a 10-minute time-out...
... the power supply is restored. Boot Menu Use the boot menu to restart or troubleshoot your storage system, such as read only. Use the tech support boot mode only when a NETGEAR technical support representative instructs you want to cancel the factory default process, power off a disk during the 10-minute time-out period. • OS reinstall. Initiates a normal boot process, just like booting using the Power button. • Factory default. NETGEAR ReadyNAS 202 33 After the disk test, a 10-minute time-out...
Hardware Manual
Page 61
... a forced shutdown: Unplug the system from the internal flash to restart or troubleshoot your system. Tip: To start the factory default process immediately, press the Backup button during the 10-minute time-out period. • OS reinstall. The system powers down safely without causing any data loss. - Use the OS reinstall boot mode when the system crashes and corrupts some settings on when the power supply is restored. •...
... a forced shutdown: Unplug the system from the internal flash to restart or troubleshoot your system. Tip: To start the factory default process immediately, press the Backup button during the 10-minute time-out period. • OS reinstall. The system powers down safely without causing any data loss. - Use the OS reinstall boot mode when the system crashes and corrupts some settings on when the power supply is restored. •...
Hardware Manual
Page 69
... factory settings, erases all data, resets all defaults, and reformats the disk to the disks. After the 10-minute time-out period, the factory default process begins. Use the tech support boot mode only when a NETGEAR technical support representative instructs you want to cancel the factory default process, power off your disks. Performs an offline full disk test. This process can take four hours or more information about viewing the system logs, see the ReadyNAS OS 6 Software Manual...
... factory settings, erases all data, resets all defaults, and reformats the disk to the disks. After the 10-minute time-out period, the factory default process begins. Use the tech support boot mode only when a NETGEAR technical support representative instructs you want to cancel the factory default process, power off your disks. Performs an offline full disk test. This process can take four hours or more information about viewing the system logs, see the ReadyNAS OS 6 Software Manual...
Hardware Manual
Page 77
... resets some configuration files. Your storage system has the following boot modes: • Normal. This process can take four hours or more information about viewing the system logs, see the ReadyNAS OS 6 Software Manual, which is reported on the status display screen. • Test disk. WARNING: The factory default reboot process resets the storage system to factory settings, erases all data, resets all defaults, and reformats the disk to the disks. Reinstalls the firmware from the internal flash...
... resets some configuration files. Your storage system has the following boot modes: • Normal. This process can take four hours or more information about viewing the system logs, see the ReadyNAS OS 6 Software Manual, which is reported on the status display screen. • Test disk. WARNING: The factory default reboot process resets the storage system to factory settings, erases all data, resets all defaults, and reformats the disk to the disks. Reinstalls the firmware from the internal flash...

Hardware Manual
Page 85
... flash to X-RAID. - Use the OS reinstall boot mode when the system crashes and corrupts some settings on the size of your system. Mounts a volume as Internet protocol settings and the administrator password, to defaults. • Tech support. This process can take four hours or more information about viewing the system logs, see the ReadyNAS OS 6 Software Manual, which is reported on the status display screen. • Test disk. WARNING: The factory default reboot...
... flash to X-RAID. - Use the OS reinstall boot mode when the system crashes and corrupts some settings on the size of your system. Mounts a volume as Internet protocol settings and the administrator password, to defaults. • Tech support. This process can take four hours or more information about viewing the system logs, see the ReadyNAS OS 6 Software Manual, which is reported on the status display screen. • Test disk. WARNING: The factory default reboot...

Hardware Manual
Page 93
... your system. Initiates a short disk test that takes approximately 2 minutes. If you want to factory default settings, do so. • Volume read -only. Use the tech support boot mode only when a NETGEAR technical support representative instructs you are reported in the system logs. Initiates a normal boot process, just like booting using the Power button. • Factory default. Mounts a volume as Internet protocol settings and the administrator password, to restart or troubleshoot your storage system, such as read only...
... your system. Initiates a short disk test that takes approximately 2 minutes. If you want to factory default settings, do so. • Volume read -only. Use the tech support boot mode only when a NETGEAR technical support representative instructs you are reported in the system logs. Initiates a normal boot process, just like booting using the Power button. • Factory default. Mounts a volume as Internet protocol settings and the administrator password, to restart or troubleshoot your storage system, such as read only...
Hardware Manual
Page 101
... resets the storage system to factory settings, erases all data, resets all defaults, and reformats the disk to the disks. Boots into a low-level diagnostic mode. Tip: To start the factory default process immediately, press the OK button during a disaster recovery. • Memory test. After the disk test, a 10-minute time-out period begins. Mounts a volume as Internet protocol settings and the administrator password, to defaults. • Tech support. If you are reported in the system logs...
... resets the storage system to factory settings, erases all data, resets all defaults, and reformats the disk to the disks. Boots into a low-level diagnostic mode. Tip: To start the factory default process immediately, press the OK button during a disaster recovery. • Memory test. After the disk test, a 10-minute time-out period begins. Mounts a volume as Internet protocol settings and the administrator password, to defaults. • Tech support. If you are reported in the system logs...
Software Manual
Page 3
... Started Quick-Start Guide 9 Additional Documentation 9 Supported ReadyNAS Systems 9 Supported Operating Systems 10 Supported Browsers 10 Diskless Systems 11 Basic Installation 11 Upgrade ReadyNAS Firmware for Use With ReadyCLOUD 12 Discover and Set Up Your ReadyNAS 13 Local Setup Wizard 15 Local Admin Page 16 Access the Local Admin Page 17 Register Your System 18 Five Levels of Protection 20 Chapter 2 Volume Configuration Basic Volume and RAID Concepts 22 Volumes...22 RAID...22 Manage Volumes 25 Change RAID Mode 25 View the Status of a Volume...
... Started Quick-Start Guide 9 Additional Documentation 9 Supported ReadyNAS Systems 9 Supported Operating Systems 10 Supported Browsers 10 Diskless Systems 11 Basic Installation 11 Upgrade ReadyNAS Firmware for Use With ReadyCLOUD 12 Discover and Set Up Your ReadyNAS 13 Local Setup Wizard 15 Local Admin Page 16 Access the Local Admin Page 17 Register Your System 18 Five Levels of Protection 20 Chapter 2 Volume Configuration Basic Volume and RAID Concepts 22 Volumes...22 RAID...22 Manage Volumes 25 Change RAID Mode 25 View the Status of a Volume...
Software Manual
Page 6
... Key File 172 Configure a User Account to Use SSH 173 Configure Media Services 174 ReadyDLNA 174 iTunes Streaming Server 177 Configure Discovery Services 178 Install and Manage Apps 179 Install Apps...179 Manage Installed Apps 180 Chapter 8 System Maintenance System Monitoring 182 System and Disk Health Information 182 System Real-Time and Historical Monitoring 182 System Logs 185 Downloading Logs 187 SNMP Monitoring 188 System Maintenance 189 Update Firmware 189 Reset the Firmware to Factory Defaults 192 Recover the Administrator Password...
... Key File 172 Configure a User Account to Use SSH 173 Configure Media Services 174 ReadyDLNA 174 iTunes Streaming Server 177 Configure Discovery Services 178 Install and Manage Apps 179 Install Apps...179 Manage Installed Apps 180 Chapter 8 System Maintenance System Monitoring 182 System and Disk Health Information 182 System Real-Time and Historical Monitoring 182 System Logs 185 Downloading Logs 187 SNMP Monitoring 188 System Maintenance 189 Update Firmware 189 Reset the Firmware to Factory Defaults 192 Recover the Administrator Password...
Software Manual
Page 11
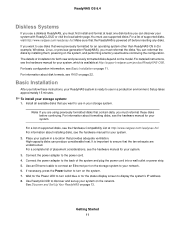
... a wall outlet or power strip. 5. If necessary, press the Power button to turn solid blue or for example, Windows, Linux, or previous-generation ReadyNAS), you want to use disks that provides adequate ventilation. For information about disk formats, see the hardware manual for your system, which is ready to connect an Ethernet port on the network. Connect the power adapter to display the system's IP address. 8. Use ReadyCLOUD to discover and set up your system...
... a wall outlet or power strip. 5. If necessary, press the Power button to turn solid blue or for example, Windows, Linux, or previous-generation ReadyNAS), you want to use disks that provides adequate ventilation. For information about disk formats, see the hardware manual for your system, which is ready to connect an Ethernet port on the network. Connect the power adapter to display the system's IP address. 8. Use ReadyCLOUD to discover and set up your system...
Software Manual
Page 48
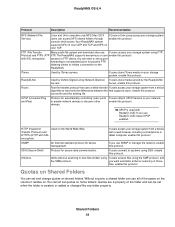
... for secure data communication. SSH (Secure Shell) Protocol for device management. Without a quota, a shared folder can use NFS. ReadyNAS OS 6.4 Protocol Description Recommendation NFS (Network File Service) Linux and Unix computers use all of the space on the volume it resides on. FTP (File Transfer Many public file upload and download sites use ReadyCLOUD, leave UPnP enabled. The ReadyNAS supports anonymous or user enable this protocol. devices. console shell access. with SSL encryption) access for passive FTP, allowing clients to initiate a connection to...
... for secure data communication. SSH (Secure Shell) Protocol for device management. Without a quota, a shared folder can use NFS. ReadyNAS OS 6.4 Protocol Description Recommendation NFS (Network File Service) Linux and Unix computers use all of the space on the volume it resides on. FTP (File Transfer Many public file upload and download sites use ReadyCLOUD, leave UPnP enabled. The ReadyNAS supports anonymous or user enable this protocol. devices. console shell access. with SSL encryption) access for passive FTP, allowing clients to initiate a connection to...
Software Manual
Page 60
For information about using the local database or an Active Directory, see User and Group Management Modes on the host. To update the user and group information, click the Refresh icon ( ). 10. In this situation, users are saved and the pop-up window closes. Select the Automatic Permissions check box and set the permissions for folder and file creation rights for a particular user or group, use the search field next to...
For information about using the local database or an Active Directory, see User and Group Management Modes on the host. To update the user and group information, click the Refresh icon ( ). 10. In this situation, users are saved and the pop-up window closes. Select the Automatic Permissions check box and set the permissions for folder and file creation rights for a particular user or group, use the search field next to...
Software Manual
Page 71
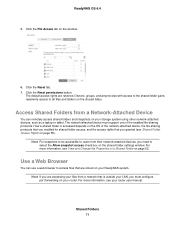
... shared folder. For more information, see Shared Folder Access Rights on your storage system using other network-attached devices, such as a laptop or tablet. ReadyNAS OS 6.4 5. Click the Reset tab. 7. Click the Reset permissions button. The network-attached device must configure port forwarding on page 55). Click the File Access tab on your router. For more information, see your ReadyNAS system. Use a Web Browser You can remotely access shared folders and snapshots on the window. 6. Shared Folders 71 Access Shared Folders from a network that are restored...
... shared folder. For more information, see Shared Folder Access Rights on your storage system using other network-attached devices, such as a laptop or tablet. ReadyNAS OS 6.4 5. Click the Reset tab. 7. Click the Reset permissions button. The network-attached device must configure port forwarding on page 55). Click the File Access tab on your router. For more information, see your ReadyNAS system. Use a Web Browser You can remotely access shared folders and snapshots on the window. 6. Shared Folders 71 Access Shared Folders from a network that are restored...
Software Manual
Page 149
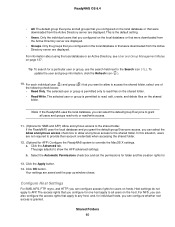
...; Configure the Network Settings • Configure Global Settings for File-Sharing Protocols • Download SSH Public Key File • Configure a User Account to Use SSH • Configure Media Services • Configure Discovery Services • Install and Manage Apps Note Without at least one volume, changes are not saved after you update the firmware. Make sure that you create a volume before you configure the system, network, and global file-sharing protocol settings, and before you reload the ReadyNAS. Without a volume, you cannot configure any shared folders. System Settings...
...; Configure the Network Settings • Configure Global Settings for File-Sharing Protocols • Download SSH Public Key File • Configure a User Account to Use SSH • Configure Media Services • Configure Discovery Services • Install and Manage Apps Note Without at least one volume, changes are not saved after you update the firmware. Make sure that you create a volume before you configure the system, network, and global file-sharing protocol settings, and before you reload the ReadyNAS. Without a volume, you cannot configure any shared folders. System Settings...

Software Manual
Page 242
... a volume where temporary data from your system to your Dropbox account. From the local admin page, you do not have an account yet, click the Click here to register link to your ReadyNAS systems. The Manage ReadyNAS Vault button displays. 6. Note If you can change your ReadyNAS Vault account credentials and click the Login button. Backup and Recovery 242 Log in a new browser window to a folder on your Dropbox account. Follow the instructions...
... a volume where temporary data from your system to your Dropbox account. From the local admin page, you do not have an account yet, click the Click here to register link to your ReadyNAS systems. The Manage ReadyNAS Vault button displays. 6. Note If you can change your ReadyNAS Vault account credentials and click the Login button. Backup and Recovery 242 Log in a new browser window to a folder on your Dropbox account. Follow the instructions...


