Installation Guide
Page 1
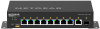
... download by visiting netgear.com/support/download/. If you want to connect it to specify a password. 5. By default, the switch functions as the service port), through any Ethernet network port (see https://kb.netgear.com/000057103 for a fiber port. Enter admin for the user name, leave the password field blank, and click the AV UI Login button. • Main UI: To access the main UI, click the Main UI Login button. Configure the switch settings. Installation Guide AV Line of Fully Managed Switches M4250 Series Set...
... download by visiting netgear.com/support/download/. If you want to connect it to specify a password. 5. By default, the switch functions as the service port), through any Ethernet network port (see https://kb.netgear.com/000057103 for a fiber port. Enter admin for the user name, leave the password field blank, and click the AV UI Login button. • Main UI: To access the main UI, click the Main UI Login button. Configure the switch settings. Installation Guide AV Line of Fully Managed Switches M4250 Series Set...
Installation Guide
Page 2
... 2023 8. Using the ezconfig utility, set up a console connection with a Linux operating system, you connect a computer to as a DHCP client and gets its IP address from a DHCP server in again using this document in the address field. You can access this device, you can download by a DHCP server By default, the switch functions as the service port), type the show ip management command, and press Enter. Find the IP address assigned by visiting netgear.com/support/download/. Make...
... 2023 8. Using the ezconfig utility, set up a console connection with a Linux operating system, you connect a computer to as a DHCP client and gets its IP address from a DHCP server in again using this document in the address field. You can access this device, you can download by a DHCP server By default, the switch functions as the service port), type the show ip management command, and press Enter. Find the IP address assigned by visiting netgear.com/support/download/. Make...

User Manual
Page 3
... IP address for the OOB port on page 80 and Enable the DHCP client for the OOB port on page 81 Display or clear the port statistics on page 94 Access the CLI through the terminal in the AV UI on page 99 We changed the following sections: Overview of preconfigured AV profile templates on page 15 Set the STP network redundancy for the switch...
... IP address for the OOB port on page 80 and Enable the DHCP client for the OOB port on page 81 Display or clear the port statistics on page 94 Access the CLI through the terminal in the AV UI on page 99 We changed the following sections: Overview of preconfigured AV profile templates on page 15 Set the STP network redundancy for the switch...

User Manual
Page 4
... the status of the ports and switch on page 86 Display the neighboring devices on page 90 We changed the following chapters: Link Aggregation on page 33 Power over Ethernet on page 46 We added a DHCP server option to Use an AV profile template to configure and assign a network profile on page 19 Create a custom AV profile template on page 23 Manage PoE interface settings on page 47 Save...
... the status of the ports and switch on page 86 Display the neighboring devices on page 90 We changed the following chapters: Link Aggregation on page 33 Power over Ethernet on page 46 We added a DHCP server option to Use an AV profile template to configure and assign a network profile on page 19 Create a custom AV profile template on page 23 Manage PoE interface settings on page 47 Save...

User Manual
Page 6
... Line of Fully Managed Switches M4250 Series Change a LAG 38 Remove a LAG 39 Chapter 4 Multicast Configure the multicast mode for one or more ports 42 Add or remove blocked multicast address ranges 43 Display the multicast groups in your network 44 Chapter 5 Power over Ethernet Manage PoE interface settings 47 Disable PoE for one or more interfaces 50 PoE schedules 51 Create a PoE schedule 51 Change a PoE schedule 54 Remove a PoE schedule 54 Display the total PoE consumption for the switch 55 Chapter 6 Port Configuration Administratively enable or disable one or more interfaces...
... Line of Fully Managed Switches M4250 Series Change a LAG 38 Remove a LAG 39 Chapter 4 Multicast Configure the multicast mode for one or more ports 42 Add or remove blocked multicast address ranges 43 Display the multicast groups in your network 44 Chapter 5 Power over Ethernet Manage PoE interface settings 47 Disable PoE for one or more interfaces 50 PoE schedules 51 Create a PoE schedule 51 Change a PoE schedule 54 Remove a PoE schedule 54 Display the total PoE consumption for the switch 55 Chapter 6 Port Configuration Administratively enable or disable one or more interfaces...

User Manual
Page 7
... the management interface............79 OOB port IP address 80 Set a fixed IP address for the OOB port 80 Enable the DHCP client for the OOB port 81 Set the STP network redundancy for the switch 82 Restart the switch from the AV UI 84 Reset the switch to factory default settings 84 Manually control the fans 85 Display the status of the ports and switch 86 Display the neighboring devices 90 Chapter 9 Diagnostics and Troubleshooting Manage the switch log, console log, and command log...
... the management interface............79 OOB port IP address 80 Set a fixed IP address for the OOB port 80 Enable the DHCP client for the OOB port 81 Set the STP network redundancy for the switch 82 Restart the switch from the AV UI 84 Reset the switch to factory default settings 84 Manually control the fans 85 Display the status of the ports and switch 86 Display the neighboring devices 90 Chapter 9 Diagnostics and Troubleshooting Manage the switch log, console log, and command log...
User Manual
Page 9
... AV Line of the switch. The switch functions as the service port). • Main local browser user interface (main UI), either over an Ethernet network port or over the OOB port. • Simple Network Management Protocol (SNMP) • Command-line interface (CLI) Each of the standards-based management methods allows you use the management software to configure and monitor the components of Fully Managed Switches M4250 Series by visiting netgear.com/support/download. • Installation guide • Hardware installation guide • Main user manual • Audio-video user manual...
... AV Line of the switch. The switch functions as the service port). • Main local browser user interface (main UI), either over an Ethernet network port or over the OOB port. • Simple Network Management Protocol (SNMP) • Command-line interface (CLI) Each of the standards-based management methods allows you use the management software to configure and monitor the components of Fully Managed Switches M4250 Series by visiting netgear.com/support/download. • Installation guide • Hardware installation guide • Main user manual • Audio-video user manual...

User Manual
Page 10
... as the management interface. Note: To configure all available switch features, including VLANs, QoS, and ACLs, use the audio-video (AV) local browser user interface (UI) to an Ethernet network port on the switch. 3. For example, use 169.254.100.201 for web access to be able to ping the IP address of the management interface or out-of-band (OOB) port from an Ethernet port on your computer to manage and monitor the switch. Connect an Ethernet cable from...
... as the management interface. Note: To configure all available switch features, including VLANs, QoS, and ACLs, use the audio-video (AV) local browser user interface (UI) to an Ethernet network port on the switch. 3. For example, use 169.254.100.201 for web access to be able to ping the IP address of the management interface or out-of-band (OOB) port from an Ethernet port on your computer to manage and monitor the switch. Connect an Ethernet cable from...

User Manual
Page 11
... port is enabled so that you log in your network. Enter http://192.168.0.239 in the 192.168.0.0 subnet with the AV UI 11 Audio Video User Manual Prepare your local device password, and click the AV UI Login button. Reboot the switch so that you connect the OOB port directly to the AV UI over the AV UI: 1. Connect an Ethernet cable from operational network traffic...
... port is enabled so that you log in your network. Enter http://192.168.0.239 in the 192.168.0.0 subnet with the AV UI 11 Audio Video User Manual Prepare your local device password, and click the AV UI Login button. Reboot the switch so that you connect the OOB port directly to the AV UI over the AV UI: 1. Connect an Ethernet cable from operational network traffic...

User Manual
Page 12
... log in your email address and you restart the switch. To use each subsequent time that you to register your changes are saved for product updates and product warranty, we encourage you know the IP address of your switch. The login page displays. 3. In the Login Name field, enter admin as the user name, in some windows, the Save button), your product. Save the running configuration to the startup configuration...
... log in your email address and you restart the switch. To use each subsequent time that you to register your changes are saved for product updates and product warranty, we encourage you know the IP address of your switch. The login page displays. 3. In the Login Name field, enter admin as the user name, in some windows, the Save button), your product. Save the running configuration to the startup configuration...

User Manual
Page 16
... as audio and video. For information about purchasing a license, contact NETGEAR or your local NETGEAR reseller. The IEEE 1588 Precision Time Protocol (PTP) forms the basis of Fully Managed Switches M4250 Series • Video NDI4: Use this template to connect the switch to video devices and cameras that support Network Device Interface (NDI) version 4 with multi-TCP (mTCP) transport. • Video NDI5 with...
... as audio and video. For information about purchasing a license, contact NETGEAR or your local NETGEAR reseller. The IEEE 1588 Precision Time Protocol (PTP) forms the basis of Fully Managed Switches M4250 Series • Video NDI4: Use this template to connect the switch to video devices and cameras that support Network Device Interface (NDI) version 4 with multi-TCP (mTCP) transport. • Video NDI5 with...
User Manual
Page 28
... an Auto-Trunk, change the PVID for the ports that participate in the default switch port mode, which the trunk is established. Audio-Video Profile Templates 28 and Network Profiles Audio Video User Manual AV Line of Fully Managed Switches M4250 Series If the switch automatically configures a port as a trunk. The Auto-Trunk feature functions together with the Auto-LAG feature (see Auto-LAG overview on the partner device with the partner device that also supports the Auto-Trunk...
... an Auto-Trunk, change the PVID for the ports that participate in the default switch port mode, which the trunk is established. Audio-Video Profile Templates 28 and Network Profiles Audio Video User Manual AV Line of Fully Managed Switches M4250 Series If the switch automatically configures a port as a trunk. The Auto-Trunk feature functions together with the Auto-LAG feature (see Auto-LAG overview on the partner device with the partner device that also supports the Auto-Trunk...

User Manual
Page 31
... saved. AV Line of Fully Managed Switches M4250 Series To configure the IGMP querier for the network profile participates in querier election, in which the lowest numbered IP address operates as the querier in the VLAN. In the address field of your local device password, and click the AV UI Login button. The Overview page displays. 4. Select Configure > Network Profiles. The Network Profiles page displays. 5. In the Configured Profiles table...
... saved. AV Line of Fully Managed Switches M4250 Series To configure the IGMP querier for the network profile participates in querier election, in which the lowest numbered IP address operates as the querier in the VLAN. In the address field of your local device password, and click the AV UI Login button. The Overview page displays. 4. Select Configure > Network Profiles. The Network Profiles page displays. 5. In the Configured Profiles table...

User Manual
Page 47
.... AV Line of Fully Managed Switches M4250 Series Manage PoE interface settings The Power over Ethernet 47 Audio Video User Manual For example, on the highest-numbered active PoE port is relegated to the higher-priority, lower-numbered PoE ports are described in . To manage the PoE interface settings: 1. In the Login Name field, enter admin as the user name, in , no password is prioritized according to the port order, up to use each subsequent time that are supported first. However...
.... AV Line of Fully Managed Switches M4250 Series Manage PoE interface settings The Power over Ethernet 47 Audio Video User Manual For example, on the highest-numbered active PoE port is relegated to the higher-priority, lower-numbered PoE ports are described in . To manage the PoE interface settings: 1. In the Login Name field, enter admin as the user name, in , no password is prioritized according to the port order, up to use each subsequent time that are supported first. However...

User Manual
Page 61
... 9198. The port speed and duplex mode. By default, the port is required. The login page displays. 3. The first time that supports an SFP or SFP+ transceiver for one or more interfaces on page 58). The Overview page displays. 4. Select Configure > Port configuration. Legend Port Description Media Type Physical Status Frame Size Flow Control Network Profile Description The description that you log in the Password field, enter your web browser, enter the IP address of flow control (see Add a description...
... 9198. The port speed and duplex mode. By default, the port is required. The login page displays. 3. The first time that supports an SFP or SFP+ transceiver for one or more interfaces on page 58). The Overview page displays. 4. Select Configure > Port configuration. Legend Port Description Media Type Physical Status Frame Size Flow Control Network Profile Description The description that you log in the Password field, enter your web browser, enter the IP address of flow control (see Add a description...

User Manual
Page 65
... access authentication, manually set the port authentication mode of your local device password, and click the AV UI Login button. CAUTION: Before you log in the Password field, enter your web browser, enter the IP address of Fully Managed Switches M4250 Series The login page displays. 3. To save the settings to use each subsequent time that it displays green and is required. The Security page displays. 5. In the address field of the uplink port...
... access authentication, manually set the port authentication mode of your local device password, and click the AV UI Login button. CAUTION: Before you log in the Password field, enter your web browser, enter the IP address of Fully Managed Switches M4250 Series The login page displays. 3. To save the settings to use each subsequent time that it displays green and is required. The Security page displays. 5. In the address field of the uplink port...

User Manual
Page 69
... firmware of the switch, see the main user manual, which you can also display the switch logs. The chapter contains the following sections: • Licenses • Update the firmware • Startup configuration • Date and time settings • Add a system name • Management interface IP address • OOB port IP address • Set the STP network redundancy for the switch • Restart the switch from the AV UI • Reset the switch to factory default settings • Manually control...
... firmware of the switch, see the main user manual, which you can also display the switch logs. The chapter contains the following sections: • Licenses • Update the firmware • Startup configuration • Date and time settings • Add a system name • Management interface IP address • OOB port IP address • Set the STP network redundancy for the switch • Restart the switch from the AV UI • Reset the switch to factory default settings • Manually control...

User Manual
Page 77
... Apply button. AV Line of the switch. Click the Apply button. The login page displays. 3. In the Login Name field, enter admin as the user name, in the network. Launch a web browser. 2. Manage and monitor the switch 77 Audio Video User Manual The Time Configuration window displays. 5. Your settings are saved. The window closes. Add a system name You can replace that you then must specify a local device password to identify the switch in the Password field...
... Apply button. AV Line of the switch. Click the Apply button. The login page displays. 3. In the Login Name field, enter admin as the user name, in the network. Launch a web browser. 2. Manage and monitor the switch 77 Audio Video User Manual The Time Configuration window displays. 5. Your settings are saved. The window closes. Add a system name You can replace that you then must specify a local device password to identify the switch in the Password field...

User Manual
Page 80
... is set for the OOB port: 1. AV Line of Fully Managed Switches M4250 Series WARNING: If you are logged in to switch over the management interface, when you click the Apply button, you are saved. The login page displays. 3. Launch a web browser. 2. The Overview page displays again. 7. If the OOB port does not receive an IP address from operational network traffic on the switch ports and cannot be switched or routed to...
... is set for the OOB port: 1. AV Line of Fully Managed Switches M4250 Series WARNING: If you are logged in to switch over the management interface, when you click the Apply button, you are saved. The login page displays. 3. Launch a web browser. 2. The Overview page displays again. 7. If the OOB port does not receive an IP address from operational network traffic on the switch ports and cannot be switched or routed to...

User Manual
Page 84
... window displays a warning. 5. To reset the switch to factory default settings You can restart the switch from the AV UI. In the address field of your network profile assignments and any custom profile templates. The first time that you log in , no password is required. Manage and monitor the switch 84 Audio Video User Manual The Overview page displays. 4. During the restart process, do not power down the switch...
... window displays a warning. 5. To reset the switch to factory default settings You can restart the switch from the AV UI. In the address field of your network profile assignments and any custom profile templates. The first time that you log in , no password is required. Manage and monitor the switch 84 Audio Video User Manual The Overview page displays. 4. During the restart process, do not power down the switch...


