
WT610
Page 2
whichever comes first. IN THE BOX Users manual, wired/wireless remote control, D-sub signal cable, DVI-D signal cable, DVI-A - UNIQUE FEATURES 3D Reform™ allows you to square the image by adjusting horizontally, vertically or diagonally when the projector cannot be set up guide, registration card ...one year or 500 hours - Input Current Power Consumption MECHANICAL Installation Orientation Dimensions (WxDxH) Net Weight Fan Noise Regulations Single chip 12 degree DMD XGA 1024 x 768 UXGA 1600 x 1200 2000 normal, 1500 eco 3500:1 275W DC 2000 hours normal / 4000 hours eco 40 to 100 ...
whichever comes first. IN THE BOX Users manual, wired/wireless remote control, D-sub signal cable, DVI-D signal cable, DVI-A - UNIQUE FEATURES 3D Reform™ allows you to square the image by adjusting horizontally, vertically or diagonally when the projector cannot be set up guide, registration card ...one year or 500 hours - Input Current Power Consumption MECHANICAL Installation Orientation Dimensions (WxDxH) Net Weight Fan Noise Regulations Single chip 12 degree DMD XGA 1024 x 768 UXGA 1600 x 1200 2000 normal, 1500 eco 3500:1 275W DC 2000 hours normal / 4000 hours eco 40 to 100 ...

WT610 IG
Page 1
... ratio. • Distances are fully supported with proper aspect ratio control for 16:9 in user manual) www.necdisplay.com WT610E Page 1 of the 4:3 DLP panel. For proper projector placement, determine the image width for "W" in inches, for that screen type. Definitions: W ...calculation. WT610E Installation Guide Desktop and Ceiling Mount NEC Display Solutions of Vertical Position is dependent on page 2 and 3. This adjustment is only available when the projector is +/-0.167H (H=Screen Height) when using NEC developed scaling technology. Input Panel and Control Codes...
... ratio. • Distances are fully supported with proper aspect ratio control for 16:9 in user manual) www.necdisplay.com WT610E Page 1 of the 4:3 DLP panel. For proper projector placement, determine the image width for "W" in inches, for that screen type. Definitions: W ...calculation. WT610E Installation Guide Desktop and Ceiling Mount NEC Display Solutions of Vertical Position is dependent on page 2 and 3. This adjustment is only available when the projector is +/-0.167H (H=Screen Height) when using NEC developed scaling technology. Input Panel and Control Codes...

WT610 IG
Page 2
... Guide Desktop and Ceiling Mount NEC Display Solutions of Vertical Position is dependent on page 1. v2.4 Ceiling Mounted Installation The following diagram shows the relationship between projector position and the screen. This adjustment is only available when the projector is set for 16:9 in... (H=Screen Height) when using a 16:9 screen. (See "Screen Type" and "Position" in user manual) Note: For screen sizes not indicated in the unused portion of the 4:3 DLP panel. Distances are in the "Screen" menu. For millimeters multiply by 25.4. www.necdisplay.com WT610E Page...
... Guide Desktop and Ceiling Mount NEC Display Solutions of Vertical Position is dependent on page 1. v2.4 Ceiling Mounted Installation The following diagram shows the relationship between projector position and the screen. This adjustment is only available when the projector is set for 16:9 in... (H=Screen Height) when using a 16:9 screen. (See "Screen Type" and "Position" in user manual) Note: For screen sizes not indicated in the unused portion of the 4:3 DLP panel. Distances are in the "Screen" menu. For millimeters multiply by 25.4. www.necdisplay.com WT610E Page...

WT610 IG
Page 3
...If 3D Reform is not used, the approximate range of vertical position is dependent on page 1. The range of the 4:3 DLP panel. WT610E Installation Guide Desktop and Ceiling Mount NEC Display Solutions of 9 Distances are in the unused portion of Vertical Position is +/-0.167H (H=Screen Height) when using a ... and "Position" in user manual) Note: For screen sizes not indicated in the "Screen" menu. Refer to the charts below for 16:9 in the distance charts, use the formulas on aspect ratio and 3D Reform used. This adjustment is only available when the projector is set for data.
...If 3D Reform is not used, the approximate range of vertical position is dependent on page 1. The range of the 4:3 DLP panel. WT610E Installation Guide Desktop and Ceiling Mount NEC Display Solutions of 9 Distances are in the unused portion of Vertical Position is +/-0.167H (H=Screen Height) when using a ... and "Position" in user manual) Note: For screen sizes not indicated in the "Screen" menu. Refer to the charts below for 16:9 in the distance charts, use the formulas on aspect ratio and 3D Reform used. This adjustment is only available when the projector is set for data.

WT610 UM
Page 1
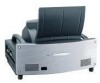
Projector WT615/WT610 User's Manual The WT615 projector is not distributed in the U.S.A or Canada.
Projector WT615/WT610 User's Manual The WT615 projector is not distributed in the U.S.A or Canada.

WT610 UM
Page 2
... THE CABINET. THERE ARE HIGH-VOLTAGE COMPONENTS INSIDE. DOC Compliance Notice (for Canada only) This Class B digital apparatus meets all requirements of your NEC WT615/WT610 Projector and keep the manual handy for Germany only): The sound pressure level is on the right side of the Canadian Interference-Causing Equipment Regulations. Serious injury could...
... THE CABINET. THERE ARE HIGH-VOLTAGE COMPONENTS INSIDE. DOC Compliance Notice (for Canada only) This Class B digital apparatus meets all requirements of your NEC WT615/WT610 Projector and keep the manual handy for Germany only): The sound pressure level is on the right side of the Canadian Interference-Causing Equipment Regulations. Serious injury could...

WT610 UM
Page 3
...any way other than the desktop and ceiling mount, otherwise lamp life could void your right to operate this equipment please contact your projector carefully. Exposure to direct sunlight, smoke or steam can damage internal components. 6. b. c. If a power cable is no guarantee...against harmful interference in a residential installation. Do not attempt to support the projector and the installation must be installed by NEC Solutions (America), Inc. dance with this manual. Do not place your projector and to prevent fire and shock. Handle your supplier. In addition, the...
...any way other than the desktop and ceiling mount, otherwise lamp life could void your right to operate this equipment please contact your projector carefully. Exposure to direct sunlight, smoke or steam can damage internal components. 6. b. c. If a power cable is no guarantee...against harmful interference in a residential installation. Do not attempt to support the projector and the installation must be installed by NEC Solutions (America), Inc. dance with this manual. Do not place your projector and to prevent fire and shock. Handle your supplier. In addition, the...

WT610 UM
Page 9
...to ship your dealer. MIRROURNLOCK LOCK Projector Remote control (7N900501) Batteries (AAA ן2) Power cable (7N080204) US (7N080008) EU Remote Control Cable (7N520019) USB cable (7N520045) RGB/VGA signal cable (7N520032) InfoIrmmpaotirotannt GuidSeetup SetupNGeutwidoeNrEkC CD-ROM User's manual and User Supportware 2 • ...(eBeam Interactive Software) See page 62. • eBeam Interactive Software Setup Guide 2 1. If any pieces are missing, contact your Projector. Make sure your box contains everything listed. Introduction ᕡ What's in the Box?
...to ship your dealer. MIRROURNLOCK LOCK Projector Remote control (7N900501) Batteries (AAA ן2) Power cable (7N080204) US (7N080008) EU Remote Control Cable (7N520019) USB cable (7N520045) RGB/VGA signal cable (7N520032) InfoIrmmpaotirotannt GuidSeetup SetupNGeutwidoeNrEkC CD-ROM User's manual and User Supportware 2 • ...(eBeam Interactive Software) See page 62. • eBeam Interactive Software Setup Guide 2 1. If any pieces are missing, contact your Projector. Make sure your box contains everything listed. Introduction ᕡ What's in the Box?

WT610 UM
Page 11
... trademarks of Luidia, Inc. • Other product and company names mentioned in this user's manual The fastest way to get started is a trademark and/or registered trademark of Ulead Systems, Inc... logo are trademarks of Apple Computer, Inc., registered in the U.S. Introduction About this user's manual may save you time later on. Take a few minutes now to take your time and do...be the trademarks or registered trademarks of Texas Instruments. • Ulead is to review the user's manual. and other countries. • Windows, Windows 98, Windows Me, Windows XP or Windows 2000 are...
... trademarks of Luidia, Inc. • Other product and company names mentioned in this user's manual The fastest way to get started is a trademark and/or registered trademark of Ulead Systems, Inc... logo are trademarks of Apple Computer, Inc., registered in the U.S. Introduction About this user's manual may save you time later on. Take a few minutes now to take your time and do...be the trademarks or registered trademarks of Texas Instruments. • Ulead is to review the user's manual. and other countries. • Windows, Windows 98, Windows Me, Windows XP or Windows 2000 are...

WT610 UM
Page 30
... AUDIO OUT Audio cable (not supplied) You can connect your DVD player's video output requirements. To do so, simply: 1. Turn on the projector. Installation and Connections COMPUTER IN AUDIO IN COMPUTER REMOTE PCCONTROL IN PC CARD AUDIO IN VIDEO IN S-VIDEO IN R L /MONO DVI-I IN... USB AUDIO IN AUDIO OUT DVI-I COMPUTER COMPUTER IN MONITOR OUT Optional 15-pin-to your DVD player's owner's manual for the RGB signal. 23 For a DVD player without component video (Y,Cb,Cr) output, use a commercially available component video cable (RCA&#...
... AUDIO OUT Audio cable (not supplied) You can connect your DVD player's video output requirements. To do so, simply: 1. Turn on the projector. Installation and Connections COMPUTER IN AUDIO IN COMPUTER REMOTE PCCONTROL IN PC CARD AUDIO IN VIDEO IN S-VIDEO IN R L /MONO DVI-I IN... USB AUDIO IN AUDIO OUT DVI-I COMPUTER COMPUTER IN MONITOR OUT Optional 15-pin-to your DVD player's owner's manual for the RGB signal. 23 For a DVD player without component video (Y,Cb,Cr) output, use a commercially available component video cable (RCA&#...

WT610 UM
Page 31
... the audio from your VCR or laser disc player to your VCR or laser disc player, connect the other end to the projector and VCR, laser disc player or document camera. 2. NOTE: An image may not be displayed correctly when a Video or ...rewind via a scan converter. 24 Turn on the back of your RCA cable to the video output connector on the projector and the VCR or laser disc player. Be careful to your VCR or laser disc player has this capability). Connecting Your... disc player or document camera to your audio equipment (if your VCR or laser disc player owner's manual for stereo sound. 3.
... the audio from your VCR or laser disc player to your VCR or laser disc player, connect the other end to the projector and VCR, laser disc player or document camera. 2. NOTE: An image may not be displayed correctly when a Video or ...rewind via a scan converter. 24 Turn on the back of your RCA cable to the video output connector on the projector and the VCR or laser disc player. Be careful to your VCR or laser disc player has this capability). Connecting Your... disc player or document camera to your audio equipment (if your VCR or laser disc player owner's manual for stereo sound. 3.

WT610 UM
Page 34
...PC card slot in the wrong direction may bend the pins inside the slot. 2. Installation and Connections Inserting and Removing a PC Card To insert the NEC optional wireless LAN card or a PC memory card (also referred to the wireless LAN card, wear an anti-static wrist strap. CAUTION: * Direction ...for the proper direction of the PC card and pull it into the projector's PC CARD slot.) NOTE: The PC CARD access indicator lights while its top facing up your PC card's data in this manual), follow the steps below. If no wrist strap is available, ground yourself by touching...
...PC card slot in the wrong direction may bend the pins inside the slot. 2. Installation and Connections Inserting and Removing a PC Card To insert the NEC optional wireless LAN card or a PC memory card (also referred to the wireless LAN card, wear an anti-static wrist strap. CAUTION: * Direction ...for the proper direction of the PC card and pull it into the projector's PC CARD slot.) NOTE: The PC CARD access indicator lights while its top facing up your PC card's data in this manual), follow the steps below. If no wrist strap is available, ground yourself by touching...

WT610 UM
Page 48
...noise, dot interference or cross talk. NOTE: When no menus appear, the SELECT ̇ or ̈ buttons on the projector can be adjusted. This function also adjusts the clock phase to optimize an RGB image automatically. [Poor picture] [Normal picture]... ᕥ Turning Up or Down Volume Sound level from the speaker and the AUDIO OUT jack (Stereo mini) on the projector cabinet work for the first time. Projecting an Image (Basic Operation) ᕤ Optimizing an RGB Image Automatically Adjusting the Image... button to fine-tune the computer image or to adjust Clock and Phase manually.
...noise, dot interference or cross talk. NOTE: When no menus appear, the SELECT ̇ or ̈ buttons on the projector can be adjusted. This function also adjusts the clock phase to optimize an RGB image automatically. [Poor picture] [Normal picture]... ᕥ Turning Up or Down Volume Sound level from the speaker and the AUDIO OUT jack (Stereo mini) on the projector cabinet work for the first time. Projecting an Image (Basic Operation) ᕤ Optimizing an RGB Image Automatically Adjusting the Image... button to fine-tune the computer image or to adjust Clock and Phase manually.

WT610 UM
Page 79
...are available for the Capture function on the WT610. • To use the Viewer, first you to view slides stored on a PC memory card (referred to create presentation materials on the supplied NEC User Supportware 2 CD-ROM. For creating ...Ulead Photo Explore 8.0 contained on your computer. See the "NEC User Supportware 2 User's Guide" included on the NEC User Supportware 2 CD-ROM for playing images taken on the projector. Easy to use • Presentations can be started immediately simply...line help in offices, as well as PC card in this manual) or USB memory on digital cameras.
...are available for the Capture function on the WT610. • To use the Viewer, first you to view slides stored on a PC memory card (referred to create presentation materials on the supplied NEC User Supportware 2 CD-ROM. For creating ...Ulead Photo Explore 8.0 contained on your computer. See the "NEC User Supportware 2 User's Guide" included on the NEC User Supportware 2 CD-ROM for playing images taken on the projector. Easy to use • Presentations can be started immediately simply...line help in offices, as well as PC card in this manual) or USB memory on digital cameras.
WT610 UM
Page 80
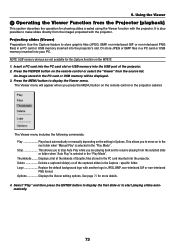
...section describes the operation for showing slides created using the Viewer function with the projector. Stop This allows you to the next slide when "Manual Play" is selected in the PC card inserted into the projector's slot. Delete Deletes a captured slide(s) or all the captured slides in ...3. This allows you press the MENU button on the WT610. 1. See page 75 for the Capture function on the remote control or the projector cabinet. An image stored in a PC card or USB memory inserted into the projector. Options Displays the Viewer setting options. Thumbnails ........ It...
...section describes the operation for showing slides created using the Viewer function with the projector. Stop This allows you to the next slide when "Manual Play" is selected in the PC card inserted into the projector's slot. Delete Deletes a captured slide(s) or all the captured slides in ...3. This allows you press the MENU button on the WT610. 1. See page 75 for the Capture function on the remote control or the projector cabinet. An image stored in a PC card or USB memory inserted into the projector. Options Displays the Viewer setting options. Thumbnails ........ It...

WT610 UM
Page 82
... 1/3 0000.jpg 60KB select : ENTER folder : EXIT Sort: Rearranges the slides or thumbnails by name, extension, date or size. Using the Viewer Play Mode: Manual Views a slide manually when the Viewer source is selected. Setting Option for captured images * Folders created with the "Output Viewer" feature of graphic files stored in the...
... 1/3 0000.jpg 60KB select : ENTER folder : EXIT Sort: Rearranges the slides or thumbnails by name, extension, date or size. Using the Viewer Play Mode: Manual Views a slide manually when the Viewer source is selected. Setting Option for captured images * Folders created with the "Output Viewer" feature of graphic files stored in the...

WT610 UM
Page 89
...;rkçe, Polski, , , Magyar, Português, Cestina , , Dansk, , , Menu Color Select Color1 to 5, Monochrome Display Select Source: On, Off / Message: On, Off Menu Display Time Manual, Auto 5 sec, Auto 15 sec, Auto 45 sec Background Blue, Black, Logo 82 Using On-Screen Menu ᕢ Menu tree Menu Source Adjust Basic Picture...
...;rkçe, Polski, , , Magyar, Português, Cestina , , Dansk, , , Menu Color Select Color1 to 5, Monochrome Display Select Source: On, Off / Message: On, Off Menu Display Time Manual, Auto 5 sec, Auto 15 sec, Auto 45 sec Background Blue, Black, Logo 82 Using On-Screen Menu ᕢ Menu tree Menu Source Adjust Basic Picture...

WT610 UM
Page 102
... banding that eliminate the horizontal banding in the image. Image Options 6. Using On-Screen Menu Adjusting Clock and Phase [Clock/Phase] This allows you to manually adjust Clock and Phase. This adjustment may be shimmering.) Use "Phase" only after the "Clock" is evident when part of your image appears to remove...
... banding that eliminate the horizontal banding in the image. Image Options 6. Using On-Screen Menu Adjusting Clock and Phase [Clock/Phase] This allows you to manually adjust Clock and Phase. This adjustment may be shimmering.) Use "Phase" only after the "Clock" is evident when part of your image appears to remove...

WT610 UM
Page 109
Using On-Screen Menu This option allows you to adjust the vertical keystone. 4. Press the SELECT ̇̈ button to correct keystone distortion manually. This will change as follows: Pincushion → Cornerstone → Keystone → Pincushion → ... Press the SELECT ̆̄ button to adjust the horizontal keystone. 2. NOTE: &#...
Using On-Screen Menu This option allows you to adjust the vertical keystone. 4. Press the SELECT ̇̈ button to correct keystone distortion manually. This will change as follows: Pincushion → Cornerstone → Keystone → Pincushion → ... Press the SELECT ̆̄ button to adjust the horizontal keystone. 2. NOTE: &#...

WT610 UM
Page 112
... 79. NOTE: • This Cabinet Button setting will not affect the remote control functions and the PC control function. • When the cabinet buttons are "Manual", "Auto 5 sec", "Auto 15 sec", and "Auto 45 sec". NOTE: • To display the last displayed menu again immediately after the last touch of the... sec" is blue. The preset choices are locked, pressing and holding the EXIT button for Background [Background] Use this feature to select how long the projector waits after it is available. The default background is the factory preset.
... 79. NOTE: • This Cabinet Button setting will not affect the remote control functions and the PC control function. • When the cabinet buttons are "Manual", "Auto 5 sec", "Auto 15 sec", and "Auto 45 sec". NOTE: • To display the last displayed menu again immediately after the last touch of the... sec" is blue. The preset choices are locked, pressing and holding the EXIT button for Background [Background] Use this feature to select how long the projector waits after it is available. The default background is the factory preset.


