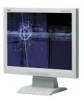
AccuSync 2 Series User's Manual
Page 7
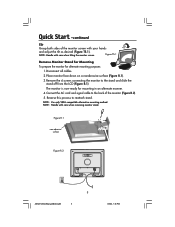
... tilt as desired (Figure TS.1). NOTE: Use only VESA-compatible alternative mounting method. Disconnect all cables. 2. Connect the AC cord and signal cable to the stand and slide the stand off from the LCD (Figure R.1). Quick Start -continued Tilt Grasp both sides of the monitor (Figure R.2). 5. Reverse this process to reattach stand. Figure...
... tilt as desired (Figure TS.1). NOTE: Use only VESA-compatible alternative mounting method. Disconnect all cables. 2. Connect the AC cord and signal cable to the stand and slide the stand off from the LCD (Figure R.1). Quick Start -continued Tilt Grasp both sides of the monitor (Figure R.2). 5. Reverse this process to reattach stand. Figure...
AccuSync 2 Series User's Manual
Page 17
...color accuracy of America, Inc. 15 AS52V72V92VManual080404.p65 15 8/5/04, 7:46 PM OSM® (On-Screen Manager) Controls: Allow you to another. No-touch Auto Adjust™: No-touch Auto Adjust automatically adjusts the monitor to your monitor energy costs, reducing emissions and ...easily adjust all elements of your monitor to use on-screen menus. The monitor's small footprint and low weight allow the monitor to shift to any third party compliant device. VESA® Standard Mounting Interface: Allows users to connect their AccuSync monitor to a lower power consumption level...
...color accuracy of America, Inc. 15 AS52V72V92VManual080404.p65 15 8/5/04, 7:46 PM OSM® (On-Screen Manager) Controls: Allow you to another. No-touch Auto Adjust™: No-touch Auto Adjust automatically adjusts the monitor to your monitor energy costs, reducing emissions and ...easily adjust all elements of your monitor to use on-screen menus. The monitor's small footprint and low weight allow the monitor to shift to any third party compliant device. VESA® Standard Mounting Interface: Allows users to connect their AccuSync monitor to a lower power consumption level...