
User Guide
Page 4
... 75. Close the lid tightly until the clamps click. Use with the following optional accessories. Manufacturer's name: NEC Plasma Display Corporation Speakers: PX-50SP1U, PX-50SP1U/S Stand: PX-ST1U, PX-ST1U/S, PX-50XM1U-ST Please contact NEC Solutions (America), Inc. If you connect a computer to this monitor, use an RGB cable including the...
... 75. Close the lid tightly until the clamps click. Use with the following optional accessories. Manufacturer's name: NEC Plasma Display Corporation Speakers: PX-50SP1U, PX-50SP1U/S Stand: PX-ST1U, PX-ST1U/S, PX-50XM1U-ST Please contact NEC Solutions (America), Inc. If you connect a computer to this monitor, use an RGB cable including the...
User Guide
Page 13
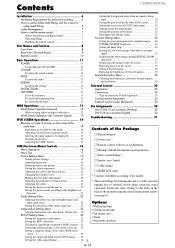
Options • Wall mount unit • Ceiling mount unit • Tilt mount unit • Stand • Attachable speakers 5 4-13 Fasten the safety fittings to the holes in the picture 19 Setting the color temperature 20 Adjusting the color to the desired level 20 ...
Options • Wall mount unit • Ceiling mount unit • Tilt mount unit • Stand • Attachable speakers 5 4-13 Fasten the safety fittings to the holes in the picture 19 Setting the color temperature 20 Adjusting the color to the desired level 20 ...

User Guide
Page 17
...23) RGB2: You can connect DVDs, High Definition sources, Laser Discs, etc. Connect the (positive) speaker wire to the EXT SPEAKER terminal and the (negative) speaker wire to your speaker's owner's manual. H DVD3/ HD3, RGB3 (DVI) Connect a digital signal (TMDS) from a source...AC IN Connect the included power cord here. Rear View/ Terminal Board C D E F G H I EXTERNAL CONTROL (D-Sub) This terminal is selectable. B EXT SPEAKER L and R Connect speakers (optional) here. C VIDEO1, 2, 3 (BNC, RCA, S-Video) Connect VCR's, DVD's or Video Cameras, etc. E DVD1 / HD1 Connect DVD's, High ...
...23) RGB2: You can connect DVDs, High Definition sources, Laser Discs, etc. Connect the (positive) speaker wire to the EXT SPEAKER terminal and the (negative) speaker wire to your speaker's owner's manual. H DVD3/ HD3, RGB3 (DVI) Connect a digital signal (TMDS) from a source...AC IN Connect the included power cord here. Rear View/ Terminal Board C D E F G H I EXTERNAL CONTROL (D-Sub) This terminal is selectable. B EXT SPEAKER L and R Connect speakers (optional) here. C VIDEO1, 2, 3 (BNC, RCA, S-Video) Connect VCR's, DVD's or Video Cameras, etc. E DVD1 / HD1 Connect DVD's, High ...
User Guide
Page 39
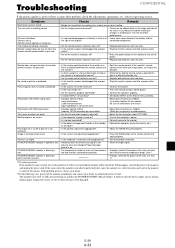
... too high and has activated the protector. ------ • Point the remote control at the minimum? • Is the mute mode set? • Are the speakers properly connected? • Is AUDIO INPUT set at the monitor's remote control sensor when pressing buttons, or remove the obstacle. • Eliminate the light by...? • Is the monitor's power cord plugged into a power outlet. • Increase the volume. • Press the remote control's MUTE button. • Connect the speakers properly. • Set AUDIO INPUT on screen. Part of the display? Input impedance is pressed.
... too high and has activated the protector. ------ • Point the remote control at the minimum? • Is the mute mode set? • Are the speakers properly connected? • Is AUDIO INPUT set at the monitor's remote control sensor when pressing buttons, or remove the obstacle. • Eliminate the light by...? • Is the monitor's power cord plugged into a power outlet. • Increase the volume. • Press the remote control's MUTE button. • Connect the speakers properly. • Set AUDIO INPUT on screen. Part of the display? Input impedance is pressed.
User Guide
Page 51
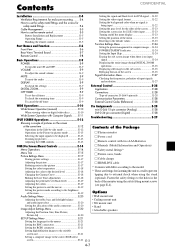
... level (black level E-19 back of the audio connectors ........ E-20 Image Adjust Settings Menu E-20 Adjusting the Position, Size, Fine Picture, • Stand • Attachable speakers Picture Adj E-20 SET UP Settings Menu E-21 Setting the language for DVI signal .... Contents CONFIDENTIAL Installation E-4 Ventilation Requirements for S1/S2 video input .......... E-23...
... level (black level E-19 back of the audio connectors ........ E-20 Image Adjust Settings Menu E-20 Adjusting the Position, Size, Fine Picture, • Stand • Attachable speakers Picture Adj E-20 SET UP Settings Menu E-21 Setting the language for DVI signal .... Contents CONFIDENTIAL Installation E-4 Ventilation Requirements for S1/S2 video input .......... E-23...

User Guide
Page 55
... terminals. • For SCART, this unit provides three ways to connect: · SCART1: Connect R/G/B to the EXT SPEAKER terminal on both LEFT and RIGHT channels. to your speaker's owner's manual. E DVD1 / HD1 Connect DVD's, High Definition or Laser Discs, etc. C VIDEO1, 2, 3 (...BNC, RCA, S-Video) Connect VCR's, DVD's or Video Cameras, etc. B EXT SPEAKER L and R Connect speakers (optional) here. Please refer to the VIDEO1 terminal. · SCART3: Connect R/G/B + composite sync. This input can be set for use with a...
... terminals. • For SCART, this unit provides three ways to connect: · SCART1: Connect R/G/B to the EXT SPEAKER terminal on both LEFT and RIGHT channels. to your speaker's owner's manual. E DVD1 / HD1 Connect DVD's, High Definition or Laser Discs, etc. C VIDEO1, 2, 3 (...BNC, RCA, S-Video) Connect VCR's, DVD's or Video Cameras, etc. B EXT SPEAKER L and R Connect speakers (optional) here. Please refer to the VIDEO1 terminal. · SCART3: Connect R/G/B + composite sync. This input can be set for use with a...
User Guide
Page 77
... out? • Is the monitor's power cord plugged into a power outlet. • Increase the volume. • Press the remote control's MUTE button. • Connect the speakers properly. • Set AUDIO INPUT on when the remote control's power button is produced. No sound or picture is disturbed. Image is not centered. See... picture is too large or too small. • Is the remote control pointed at the minimum? • Is the mute mode set? • Are the speakers properly connected? • Is AUDIO INPUT set directly in the standby or off .
... out? • Is the monitor's power cord plugged into a power outlet. • Increase the volume. • Press the remote control's MUTE button. • Connect the speakers properly. • Set AUDIO INPUT on when the remote control's power button is produced. No sound or picture is disturbed. Image is not centered. See... picture is too large or too small. • Is the remote control pointed at the minimum? • Is the mute mode set? • Are the speakers properly connected? • Is AUDIO INPUT set directly in the standby or off .

User Guide
Page 85
... E-12 Troubleshooting E-29 Showing a couple of the audio connectors ........ E-20 Image Adjust Settings Menu E-20 Adjusting the Position, Size, Fine Picture, • Stand • Attachable speakers Picture Adj E-20 SET UP Settings Menu E-21 Setting the language for DVI signal .... E-4 How to use the safety metal fittings and the screws for...
... E-12 Troubleshooting E-29 Showing a couple of the audio connectors ........ E-20 Image Adjust Settings Menu E-20 Adjusting the Position, Size, Fine Picture, • Stand • Attachable speakers Picture Adj E-20 SET UP Settings Menu E-21 Setting the language for DVI signal .... E-4 How to use the safety metal fittings and the screws for...

User Guide
Page 89
... an analog RGB signal from the audio menu screen. Please refer to the EXT SPEAKER terminal on both LEFT and RIGHT channels. Connect the (positive) speaker wire to the EXT SPEAKER terminal and the (negative) speaker wire to your speaker's owner's manual. C VIDEO1, 2, 3 (BNC, RCA, S-Video) Connect VCR...AC IN Connect the included power cord here. This input can connect DVDs, High Definition sources, Laser Discs, etc. B EXT SPEAKER L and R Connect speakers (optional) here. E DVD1 / HD1 Connect DVD's, High Definition or Laser Discs, etc. to the DVD2 terminals and composite sync.
... an analog RGB signal from the audio menu screen. Please refer to the EXT SPEAKER terminal on both LEFT and RIGHT channels. Connect the (positive) speaker wire to the EXT SPEAKER terminal and the (negative) speaker wire to your speaker's owner's manual. C VIDEO1, 2, 3 (BNC, RCA, S-Video) Connect VCR...AC IN Connect the included power cord here. This input can connect DVDs, High Definition sources, Laser Discs, etc. B EXT SPEAKER L and R Connect speakers (optional) here. E DVD1 / HD1 Connect DVD's, High Definition or Laser Discs, etc. to the DVD2 terminals and composite sync.

User Guide
Page 111
... Plug the monitor's power cord into a power outlet. • Increase the volume. • Press the remote control's MUTE button. • Connect the speakers properly. • Set AUDIO INPUT on the AUDIO menu correctly. • Adjust picture control as needed . Try another location for 60 minutes. See*1. &#... is caused by closing curtains, pointing the light in front or at the minimum? • Is the mute mode set? • Are the speakers properly connected? • Is AUDIO INPUT set directly in a different direction, etc. • Replace both batteries with new ones. • Plug...
... Plug the monitor's power cord into a power outlet. • Increase the volume. • Press the remote control's MUTE button. • Connect the speakers properly. • Set AUDIO INPUT on the AUDIO menu correctly. • Adjust picture control as needed . Try another location for 60 minutes. See*1. &#... is caused by closing curtains, pointing the light in front or at the minimum? • Is the mute mode set? • Are the speakers properly connected? • Is AUDIO INPUT set directly in a different direction, etc. • Replace both batteries with new ones. • Plug...


