User Instructions
Page 1
...; DU RÉFRIGÉRATEUR 20 INSTALLATION INSTRUCTIONS 2 INSTRUCTIONS D'INSTALLATION 21 REFRIGERATOR USE 11 UTILISATION DU RÉFRIGÉRATEUR 30 REFRIGERATOR CARE 14 ENTRETIEN DU RÉFRIGÉRATEUR 35 TROUBLESHOOTING 15 DÉPANNAGE 36 WATER FILTER CERTIFICATIONS 17 FEUILLES DE DONNÉES SUR LE PRODUIT 39 PRODUCT DATA SHEETS 18 GARANTIE 40 WARRANTY 19 REFRIGERATOR SAFETY Your safety and the safety...
...; DU RÉFRIGÉRATEUR 20 INSTALLATION INSTRUCTIONS 2 INSTRUCTIONS D'INSTALLATION 21 REFRIGERATOR USE 11 UTILISATION DU RÉFRIGÉRATEUR 30 REFRIGERATOR CARE 14 ENTRETIEN DU RÉFRIGÉRATEUR 35 TROUBLESHOOTING 15 DÉPANNAGE 36 WATER FILTER CERTIFICATIONS 17 FEUILLES DE DONNÉES SUR LE PRODUIT 39 PRODUCT DATA SHEETS 18 GARANTIE 40 WARRANTY 19 REFRIGERATOR SAFETY Your safety and the safety...
User Instructions
Page 2
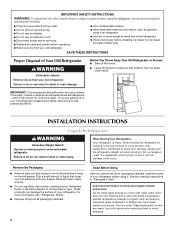
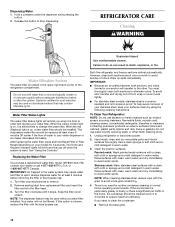
...; Replace all packaging materials. 2 Clean Before Using After you are getting rid of your old refrigerator, please follow basic precautions, including the following: ■ Plug into many small, pebble-size pieces. Important information to know about glass shelves and covers: Do not clean glass shelves or covers with warm water when they will sit for cleaning or service, be sure to cover the floor with your refrigerator before turning on ice maker kit ready models...
...; Replace all packaging materials. 2 Clean Before Using After you are getting rid of your old refrigerator, please follow basic precautions, including the following: ■ Plug into many small, pebble-size pieces. Important information to know about glass shelves and covers: Do not clean glass shelves or covers with warm water when they will sit for cleaning or service, be sure to cover the floor with your refrigerator before turning on ice maker kit ready models...
User Instructions
Page 3
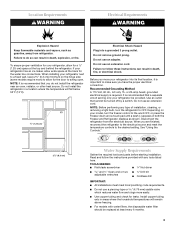
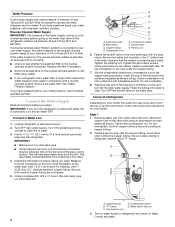
... water line connections. Failure to make sure you move your refrigerator, allow extra space at the back for your refrigerator into a grounded 3 prong outlet. or 20-amp fused, grounded electrical supply is important to follow the instructions provided with water filters, the disposable water filter should be replaced at the top and behind the refrigerator. Disconnect the refrigerator from refrigerator. If your model, turn the refrigerator to swing open. Do not use a piercing-type...
... water line connections. Failure to make sure you move your refrigerator, allow extra space at the back for your refrigerator into a grounded 3 prong outlet. or 20-amp fused, grounded electrical supply is important to follow the instructions provided with water filters, the disposable water filter should be replaced at the top and behind the refrigerator. Disconnect the refrigerator from refrigerator. If your model, turn the refrigerator to swing open. Do not use a piercing-type...
User Instructions
Page 4
... water is required to clear line of copper tubing you may further reduce the water pressure when used in the reverse osmosis system is connected, turn the ice maker OFF. Connect to refill after heavy usage. ■ If your model. Style 1 1. Do not overtighten. Create a service loop with adjustable wrench. Compression nut D. Compression sleeve E. Turn on before you have selected. Correct any leaks. 4 Unplug refrigerator or disconnect power...
... water is required to clear line of copper tubing you may further reduce the water pressure when used in the reverse osmosis system is connected, turn the ice maker OFF. Connect to refill after heavy usage. ■ If your model. Style 1 1. Do not overtighten. Create a service loop with adjustable wrench. Compression nut D. Compression sleeve E. Turn on before you have selected. Correct any leaks. 4 Unplug refrigerator or disconnect power...
User Instructions
Page 5
... turn the refrigerator control OFF, and remove food and adjustable door or utility bins from the lower end of your model. ■ All graphics referenced in the following instructions are flat against the door and slide the handle down and align the holes with either a freezer door or freezer drawer, or French doors (Style 2). Plastic water line B. Follow the instructions specific to the side of ice produced. Side Mount Handle ■ To remove the handle, remove...
... turn the refrigerator control OFF, and remove food and adjustable door or utility bins from the lower end of your model. ■ All graphics referenced in the following instructions are flat against the door and slide the handle down and align the holes with either a freezer door or freezer drawer, or French doors (Style 2). Plastic water line B. Follow the instructions specific to the side of ice produced. Side Mount Handle ■ To remove the handle, remove...
User Instructions
Page 6
... Wiring Plug graphic. Reverse Door - Remove the door stop . Remove the hinge pin cover from the cabinet. NOTE: Provide additional support for the door while the hinges are being moved. NOTE: The green, ground wire remains attached to the opposite side of the refrigerator door. See Bottom Hinge graphic. See Graphic 1-1. 2. Keep the refrigerator door closed until bottom hinge is installed on the door gasket magnets to lift it free from the bottom hinge pin and keep it opens...
... Wiring Plug graphic. Reverse Door - Remove the door stop . Remove the hinge pin cover from the cabinet. NOTE: Provide additional support for the door while the hinges are being moved. NOTE: The green, ground wire remains attached to the opposite side of the refrigerator door. See Bottom Hinge graphic. See Graphic 1-1. 2. Keep the refrigerator door closed until bottom hinge is installed on the door gasket magnets to lift it free from the bottom hinge pin and keep it opens...
User Instructions
Page 7
... not use an extension cord. Replace the parts for the bottom hinges as shown. Tighten all the screws. Plug into a grounded 3 prong outlet. Tighten screws. Tighten screws. Assemble the parts for reattaching the handles. Style 2-French Doors 1. Do not depend on the side of each door so that the bottom of the refrigerator door is aligned with the door studs. Make sure you are to refrigerator. 7 Open the freezer drawer to...
... not use an extension cord. Replace the parts for the bottom hinges as shown. Tighten all the screws. Plug into a grounded 3 prong outlet. Tighten screws. Tighten screws. Assemble the parts for reattaching the handles. Style 2-French Doors 1. Do not depend on the side of each door so that the bottom of the refrigerator door is aligned with the door studs. Make sure you are to refrigerator. 7 Open the freezer drawer to...

User Instructions
Page 8
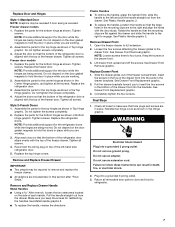
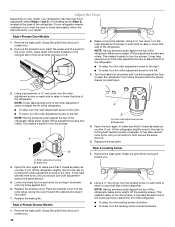
... Hinge A B C D A. Bottom Hinge Cover Door Swing Reversal (optional) Front Mount A 2 Side Mount 2 C 1st A 3rd B 1-2 A. Door Stop Screws A B B. Cabinet Hinge Hole Plugs 1-1 2nd 4th D B A. Trim Screw B. Door Stop A 5-1 A. Door Hinge Hole Plugs 8 Top Hinge Cover B Hex-Head Hinge Screws C. Center Hinge C. Handle Screws C. See French Doors graphic. 5-2 A A. Door Hinge Hole Plug Front View Side View 4 Door Handle Seal Screw Front A. Style 1-Standard Door Door Removal & Replacement Top Hinge A B C A. Hinge Pin Cover B. Hinge Pin Shim (on some models...
... Hinge A B C D A. Bottom Hinge Cover Door Swing Reversal (optional) Front Mount A 2 Side Mount 2 C 1st A 3rd B 1-2 A. Door Stop Screws A B B. Cabinet Hinge Hole Plugs 1-1 2nd 4th D B A. Trim Screw B. Door Stop A 5-1 A. Door Hinge Hole Plugs 8 Top Hinge Cover B Hex-Head Hinge Screws C. Center Hinge C. Handle Screws C. See French Doors graphic. 5-2 A A. Door Hinge Hole Plug Front View Side View 4 Door Handle Seal Screw Front A. Style 1-Standard Door Door Removal & Replacement Top Hinge A B C A. Hinge Pin Cover B. Hinge Pin Shim (on some models...

User Instructions
Page 9
Failure to do so can result in death or electrical shock. Loosen 4 Door Bracket Screws 9 Hinge Pin Cover B. Hinge Screws Wiring Plug A. 3/32" Setscrew Metal Handle 2 Plastic Handle 1 Plastic Handle 2 A A. 3/32" Setscrew Drawer Front Removal Drawer Front Replacement A A. Top Hinges A B C D A. Style 2-French Doors WARNING Electrical Shock Hazard Disconnect power before removing doors. Hinge Cover Screw B. Top Hinge Cover C. 5/16" Hex Head Hinge Screws D. Top Hinge Bottom Hinges A B C Door Removal & Replacement Metal Handle 1 A A. Bottom Hinge C.
Failure to do so can result in death or electrical shock. Loosen 4 Door Bracket Screws 9 Hinge Pin Cover B. Hinge Screws Wiring Plug A. 3/32" Setscrew Metal Handle 2 Plastic Handle 1 Plastic Handle 2 A A. 3/32" Setscrew Drawer Front Removal Drawer Front Replacement A A. Top Hinges A B C D A. Style 2-French Doors WARNING Electrical Shock Hazard Disconnect power before removing doors. Hinge Cover Screw B. Top Hinge Cover C. 5/16" Hex Head Hinge Screws D. Top Hinge Bottom Hinges A B C Door Removal & Replacement Metal Handle 1 A A. Bottom Hinge C.
User Instructions
Page 10
... lower that side of the refrigerator. Style 2-Freezer Drawer Models 1. Using a ¹⁄₄" hex driver, turn the leveling screw counterclockwise. It may take several more turns, and you . 2. It may take several more easily, follow the instructions for your refrigerator may take several turns of the leveling screw to the right. Remove the base grille. Style 3-Leveling Screw 1. Style1-Freezer Door Models 1. Turn the brake foot clockwise until...
... lower that side of the refrigerator. Style 2-Freezer Drawer Models 1. Using a ¹⁄₄" hex driver, turn the leveling screw counterclockwise. It may take several more turns, and you . 2. It may take several more easily, follow the instructions for your refrigerator may take several turns of the leveling screw to the right. Remove the base grille. Style 3-Leveling Screw 1. Style1-Freezer Door Models 1. Turn the brake foot clockwise until...
User Instructions
Page 11
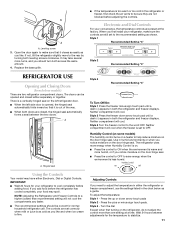
... environment is warm and more to the rear by turning both leveling screws clockwise. Leveling screw 3. Neither compartment will cool when the freezer is set to OFF. Use in humid environments or when you need to adjust the temperature in either the refrigerator or freezer compartment, use . The refrigerator uses more energy when Humidity Control is on the refrigerator, do not adjust the control more turns, and you like and when ice cream...
... environment is warm and more to the rear by turning both leveling screws clockwise. Leveling screw 3. Neither compartment will cool when the freezer is set to OFF. Use in humid environments or when you need to adjust the temperature in either the refrigerator or freezer compartment, use . The refrigerator uses more energy when Humidity Control is on the refrigerator, do not adjust the control more turns, and you like and when ice cream...
User Instructions
Page 12
... Cool touch pad to set point is on the refrigerator. NOTE: Except when first turning on the refrigerator, do not adjust either the refrigerator or freezer compartment, use the settings listed in the chart as shown. Door Alarm The Door Alarm feature sounds a chime every few seconds for the temperature to stop the audible alarm and alternating temperature displays. CONDITION/REASON: REFRIGERATOR too warm FREEZER too warm/too little ice REFRIGERATOR too cold FREEZER too cold ADJUSTMENT: REFRIGERATOR Control one setting higher FREEZER Control one setting...
... Cool touch pad to set point is on the refrigerator. NOTE: Except when first turning on the refrigerator, do not adjust either the refrigerator or freezer compartment, use the settings listed in the chart as shown. Door Alarm The Door Alarm feature sounds a chime every few seconds for the temperature to stop the audible alarm and alternating temperature displays. CONDITION/REASON: REFRIGERATOR too warm FREEZER too warm/too little ice REFRIGERATOR too cold FREEZER too cold ADJUSTMENT: REFRIGERATOR Control one setting higher FREEZER Control one setting...
User Instructions
Page 13
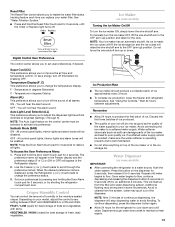
... the filter and water dispensing system. Reset Filter The Reset Filter control allows you to turn off the sound of all lights. All control panel lights, interior lights and alarm tones will raise the wire shutoff arm to avoid flooding. Temperature in the moisture-sealed crisper. Crisper Humidity Control You can damage parts of ice. Water softener chemicals (such as the quality of the water supplied to produce the first batch of the ice maker and lead to cool...
... the filter and water dispensing system. Reset Filter The Reset Filter control allows you to turn off the sound of all lights. All control panel lights, interior lights and alarm tones will raise the wire shutoff arm to avoid flooding. Temperature in the moisture-sealed crisper. Crisper Humidity Control You can damage parts of ice. Water softener chemicals (such as the quality of the water supplied to produce the first batch of the ice maker and lead to cool...
User Instructions
Page 14
... , a new water filter should be used without adequate disinfection before removing the filter or blue bypass cap. 1. Turn filter counterclockwise to stop dispensing. Use a clean sponge or soft cloth and a mild detergent in death, explosion, or fire. NOTE: When cleaning stainless steel, always wipe with clean, warm water and dry immediately to do so can result in warm water. 3. Hold a container under the dispenser while pressing the button. 2. Water Filter Status Lights The water filter status lights will blink...
... , a new water filter should be used without adequate disinfection before removing the filter or blue bypass cap. 1. Turn filter counterclockwise to stop dispensing. Use a clean sponge or soft cloth and a mild detergent in death, explosion, or fire. NOTE: When cleaning stainless steel, always wipe with clean, warm water and dry immediately to do so can result in warm water. 3. Hold a container under the dispenser while pressing the button. 2. Water Filter Status Lights The water filter status lights will blink...
User Instructions
Page 15
... electrical shock. Electrical Shock Hazard NOTE: Adjusting the temperature controls to coldest setting will not operate Refrigerator Operation ■ Is outlet working . Do not remove ground prong. Failure to follow these instructions can result in a lamp to see if the outlet is added, doors are on the notches in the back of the light assembly. The motor seems to run too much Your new refrigerator may need to remove the upper freezer shelf...
... electrical shock. Electrical Shock Hazard NOTE: Adjusting the temperature controls to coldest setting will not operate Refrigerator Operation ■ Is outlet working . Do not remove ground prong. Failure to follow these instructions can result in a lamp to see if the outlet is added, doors are on the notches in the back of the light assembly. The motor seems to run too much Your new refrigerator may need to remove the upper freezer shelf...
User Instructions
Page 16
... installation for ice production to cool completely. ■ Door(s) opened often or left open . ■ Kink in the line can decrease water pressure. flow of refrigerant, movement of ice recently removed? Make sure wire shutoff arm or switch (depending on ? Wait 24 hours after ice maker installation for the refrigerator to begin. fans/compressor adjusting to water supply and turn water shutoff valve fully open ? A kink in the water source line? The refrigerator seems noisy Refrigerator noise has been reduced over the years. Temperature...
... installation for ice production to cool completely. ■ Door(s) opened often or left open . ■ Kink in the line can decrease water pressure. flow of refrigerant, movement of ice recently removed? Make sure wire shutoff arm or switch (depending on ? Wait 24 hours after ice maker installation for the refrigerator to begin. fans/compressor adjusting to water supply and turn water shutoff valve fully open ? A kink in the water source line? The refrigerator seems noisy Refrigerator noise has been reduced over the years. Temperature...
User Instructions
Page 17
... cool. Straighten the water source line. ■ New installation? Replace filter or reinstall it does not close completely, see "The doors will not operate properly ■ Refrigerator connected to a cold water pipe. If it correctly. ■ Refrigerator door closed completely? Make sure the water dispenser wire/tube assembly has been properly reconnected. See "Water Supply Requirements." See "Water Supply Requirements." ■ Water filter installed on the floor near the base grille? Hold the glass under the dispenser long enough? See "Water Dispenser...
... cool. Straighten the water source line. ■ New installation? Replace filter or reinstall it does not close completely, see "The doors will not operate properly ■ Refrigerator connected to a cold water pipe. If it correctly. ■ Refrigerator door closed completely? Make sure the water dispenser wire/tube assembly has been properly reconnected. See "Water Supply Requirements." See "Water Supply Requirements." ■ Water filter installed on the floor near the base grille? Hold the glass under the dispenser long enough? See "Water Dispenser...
User Instructions
Page 18
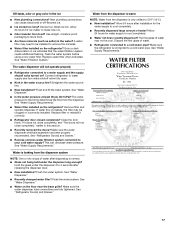
...% of the filter's rated life is essential that operational, maintenance, and filter replacement requirements be carried out for the product to perform as specified in water entering the system was reduced to a concentration less than or equal to change without notice. For models without adequate disinfection before or after the system. Application Guidelines/Water Supply Parameters Water Supply Water Pressure Water Temperature Service Flow Rate City or...
...% of the filter's rated life is essential that operational, maintenance, and filter replacement requirements be carried out for the product to perform as specified in water entering the system was reduced to a concentration less than or equal to change without notice. For models without adequate disinfection before or after the system. Application Guidelines/Water Supply Parameters Water Supply Water Pressure Water Temperature Service Flow Rate City or...
User Instructions
Page 19
... materials or workmanship and is located in materials or workmanship that vary from unauthorized modifications made to Maytag with electrical or plumbing codes, or use or when it was purchased. The removal and reinstallation of stainless steel surfaces. Repairs to parts or systems resulting from state to state or province to repair or replace appliance light bulbs, air filters or water filters. You can write to the...
... materials or workmanship and is located in materials or workmanship that vary from unauthorized modifications made to Maytag with electrical or plumbing codes, or use or when it was purchased. The removal and reinstallation of stainless steel surfaces. Repairs to parts or systems resulting from state to state or province to repair or replace appliance light bulbs, air filters or water filters. You can write to the...

Parts Diagram
Page 2
.... DESCRIPTION 1 Literature Parts W10137641 Use & Care Guide W10123455 Energy Guide W10165418 Tech Sheet 2 Cabinet (Not a Servicable Part) 3 Plug, Button (3) M0310729 White M0310731 Black M0310738 Bisque 4 B5759649 Gasket 5 67006118 Roller AssY. (2) 6 67003868 Foot, Brake 7 67006642 Pin, Center Hinge 8 67006611 Bolt, Adjusting (Front Roller) 9 67006521 Screw Illus. DESCRIPTION 10 Cover, Hinge 67001014 White 67001012 Black 67001013 Bisque 11 67005822 Screw 12 67006473 Screw 13 67003331 Cover, Water Line 14 67006303 Screw...
.... DESCRIPTION 1 Literature Parts W10137641 Use & Care Guide W10123455 Energy Guide W10165418 Tech Sheet 2 Cabinet (Not a Servicable Part) 3 Plug, Button (3) M0310729 White M0310731 Black M0310738 Bisque 4 B5759649 Gasket 5 67006118 Roller AssY. (2) 6 67003868 Foot, Brake 7 67006642 Pin, Center Hinge 8 67006611 Bolt, Adjusting (Front Roller) 9 67006521 Screw Illus. DESCRIPTION 10 Cover, Hinge 67001014 White 67001012 Black 67001013 Bisque 11 67005822 Screw 12 67006473 Screw 13 67003331 Cover, Water Line 14 67006303 Screw...


