
User Guide
Page 3
... FUNCTIONS 4 REMOTE CONTROLLER 4 REMOTE CONTROLLER LCD 5 BASIC OPERATION 6 RC2001 BUTTON SETTINGS 6 SLEEP TIMER 6 OTHER OPERATION 7 MAIN MENU 7 1. SYS.SETUP 12 4. PROGRAMMABLE CODES 17 SPECIFICATIONS 18 OTHERS 19 1 TIMER 9 3. This remarkable component has been engineered to read this manual thoroughly before you for purchasing the Marantz RC2001 remote controller. LEARNING FUNCTION 7 2. ENGLISH Thank you operate...
... FUNCTIONS 4 REMOTE CONTROLLER 4 REMOTE CONTROLLER LCD 5 BASIC OPERATION 6 RC2001 BUTTON SETTINGS 6 SLEEP TIMER 6 OTHER OPERATION 7 MAIN MENU 7 1. SYS.SETUP 12 4. PROGRAMMABLE CODES 17 SPECIFICATIONS 18 OTHERS 19 1 TIMER 9 3. This remarkable component has been engineered to read this manual thoroughly before you for purchasing the Marantz RC2001 remote controller. LEARNING FUNCTION 7 2. ENGLISH Thank you operate...

User Guide
Page 4
... batteries (AAA type) with a new battery as soon as possible. • When inserting the batteries, be lost, and so please set the time setting again. 1. AAA type alkaline batteries 3. Battery case cover 2 CAUTION ON BATTERY • Use lAAAz type batteries in this remote controller... to verify the operations of batteries. - ENGLISH BEFORE USE LOADING BATTERIES Before using the remote controller for verifying operation. Note: The settings remain saved in the remote controller`s battery compartment. • To prevent damage or battery fluid leakage: - Attach the battery...
... batteries (AAA type) with a new battery as soon as possible. • When inserting the batteries, be lost, and so please set the time setting again. 1. AAA type alkaline batteries 3. Battery case cover 2 CAUTION ON BATTERY • Use lAAAz type batteries in this remote controller... to verify the operations of batteries. - ENGLISH BEFORE USE LOADING BATTERIES Before using the remote controller for verifying operation. Note: The settings remain saved in the remote controller`s battery compartment. • To prevent damage or battery fluid leakage: - Attach the battery...

User Guide
Page 6
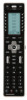
... i Cursor, ENTER buttons o Programmable Hard buttons These buttons are used by the Wizz.it 3 editor software to make the remote controller command settings for learning and macro operations. 4 e LCD Display Remote controller display r Programmable soft buttons t These buttons are used by the Wizz.it... 3 editor software to make LCD display and button y operation settings. u t Page Scroll buttons i These buttons are also used to select Home mode. These buttons are used when scrolling pages in Home mode...
... i Cursor, ENTER buttons o Programmable Hard buttons These buttons are used by the Wizz.it 3 editor software to make the remote controller command settings for learning and macro operations. 4 e LCD Display Remote controller display r Programmable soft buttons t These buttons are used by the Wizz.it... 3 editor software to make LCD display and button y operation settings. u t Page Scroll buttons i These buttons are also used to select Home mode. These buttons are used when scrolling pages in Home mode...

User Guide
Page 7
... area is displayed during Home mode. Area Normal operation: The page number that has been set for the button is displayed. B Command display area This displays the information that has been set for the display items in the device modes. D Sub info. ENGLISH !0 USB port ...is always highlighted. When sending IR command: C The command name that has been set for the respective button is currently active. Device Name: This displays the device mode name that has been set for the respective mode is displayed normally (not highlighted). 5 Operation when not sending ...
... area is displayed during Home mode. Area Normal operation: The page number that has been set for the button is displayed. B Command display area This displays the information that has been set for the display items in the device modes. D Sub info. ENGLISH !0 USB port ...is always highlighted. When sending IR command: C The command name that has been set for the respective button is currently active. Device Name: This displays the device mode name that has been set for the respective mode is displayed normally (not highlighted). 5 Operation when not sending ...

User Guide
Page 8
...sleep timer is automatically started. Each time the button is the basic operation procedure for three seconds. • The sleep setting screen is selected in the RC2001. DVD input command for the IR Command, LINK, JUMP, One Touch Operation (Macro) and other functions in the remote... the remaining time is used to enter Home mode for the RC2001. 2. ENGLISH BASIC OPERATION RC2001 BUTTON SETTINGS The Wizz.it 3 editor software can be downloaded from www.marantz.com. Press the Home button to make the settings for Marantz AV Receiver. 6 SLEEP TIMER icon area of the device mode...
...sleep timer is automatically started. Each time the button is the basic operation procedure for three seconds. • The sleep setting screen is selected in the RC2001. DVD input command for the IR Command, LINK, JUMP, One Touch Operation (Macro) and other functions in the remote... the remaining time is used to enter Home mode for the RC2001. 2. ENGLISH BASIC OPERATION RC2001 BUTTON SETTINGS The Wizz.it 3 editor software can be downloaded from www.marantz.com. Press the Home button to make the settings for Marantz AV Receiver. 6 SLEEP TIMER icon area of the device mode...

User Guide
Page 9
... to display MAIN MENU on the LCD of about 2 inches (0.05 m). 2. Hold down the Home button and Menu button at a distance of the RC2001, and then press the button next to the lLEARNINGz indicator. 3. LEARNING FUNCTION 1. Display the MAIN MENU on the LCD. 1. Either press the ENTER ... menu. Place the remote controller so that its infrared signal transmitter is facing the infrared signal receiver on the Marantz remote controller at the same time for three seconds to enter Home mode for the RC2001. 2. The screen appears as shown below. ENGLISH OTHER OPERATION MAIN MENU The various...
... to display MAIN MENU on the LCD of about 2 inches (0.05 m). 2. Hold down the Home button and Menu button at a distance of the RC2001, and then press the button next to the lLEARNINGz indicator. 3. LEARNING FUNCTION 1. Display the MAIN MENU on the LCD. 1. Either press the ENTER ... menu. Place the remote controller so that its infrared signal transmitter is facing the infrared signal receiver on the Marantz remote controller at the same time for three seconds to enter Home mode for the RC2001. 2. The screen appears as shown below. ENGLISH OTHER OPERATION MAIN MENU The various...

User Guide
Page 10
... OKz is displayed on the LCD. Use the Wizz.it 3 editor to continue learning commands for learning, lLEARNFULLz is used. • The RC2001 can be performed. Send the remote controller code that you to delete any changes. 5. ENGLISH 4. Try performing steps 5 to HOME mode. ...learning mode is displayed on the LCD. • Pressing the ENTER button enables you want to learn . • When making the learning settings, the lLEARN ERRORz message may occasionally be performed when a special remote controller signal code is displayed on the LCD. Learning cannot be displayed...
... OKz is displayed on the LCD. Use the Wizz.it 3 editor to continue learning commands for learning, lLEARNFULLz is used. • The RC2001 can be performed. Send the remote controller code that you to delete any changes. 5. ENGLISH 4. Try performing steps 5 to HOME mode. ...learning mode is displayed on the LCD. • Pressing the ENTER button enables you want to learn . • When making the learning settings, the lLEARN ERRORz message may occasionally be performed when a special remote controller signal code is displayed on the LCD. Learning cannot be displayed...

User Guide
Page 11
...from the TIMER MENU screen returns the LCD to display the timer programming setting screen. When the LCD appears as shown below, the timer has not been set the time for transmission. TIMER The timer function of the RC2001, then press the button next to send a preset remote controller command ...at a programmed time. OPERATION SETTINGS 1. Press the button next to the lTIMER SETz indicator in ...
...from the TIMER MENU screen returns the LCD to display the timer programming setting screen. When the LCD appears as shown below, the timer has not been set the time for transmission. TIMER The timer function of the RC2001, then press the button next to send a preset remote controller command ...at a programmed time. OPERATION SETTINGS 1. Press the button next to the lTIMER SETz indicator in ...

User Guide
Page 12
...< and > buttons when selecting the command to move the page, and select the command assigned to the SOFT button is displayed on the LCD to set timer operation to the MAIN menu. Select the commands and devices for the LCD to automatically return to either everyday or one- time only operation...4. Home mode is shown in Home mode. 10 • Either press the ENTER button or wait three seconds for the commands that the settings are displayed. Note: The timer setting for the SOFT button cannot be sent by timer programming. • If a command assigned to the HARD button is to be used...
...< and > buttons when selecting the command to move the page, and select the command assigned to the SOFT button is displayed on the LCD to set timer operation to the MAIN menu. Select the commands and devices for the LCD to automatically return to either everyday or one- time only operation...4. Home mode is shown in Home mode. 10 • Either press the ENTER button or wait three seconds for the commands that the settings are displayed. Note: The timer setting for the SOFT button cannot be sent by timer programming. • If a command assigned to the HARD button is to be used...

User Guide
Page 13
Press the button next to the lTIMER ONz (Enable) or lTIMER OFFz (Disable) indicators on the LCD and the operation settings are automatically completed. 2. Either press the ENTER button or wait three seconds so that lCOMPLETEDz is displayed in the TIMER menu screen on the LCD ... the ENTER button or wait three seconds for the LCD to automatically return to the MAIN menu. • When timer operation is set to display the timer operation ON/OFF setting screen. 3. Press the button next to the lON/OFFz indicator in the Sub Info area of the LCD. 24 TIMER icon...
Press the button next to the lTIMER ONz (Enable) or lTIMER OFFz (Disable) indicators on the LCD and the operation settings are automatically completed. 2. Either press the ENTER button or wait three seconds so that lCOMPLETEDz is displayed in the TIMER menu screen on the LCD ... the ENTER button or wait three seconds for the LCD to automatically return to the MAIN menu. • When timer operation is set to display the timer operation ON/OFF setting screen. 3. Press the button next to the lON/OFFz indicator in the Sub Info area of the LCD. 24 TIMER icon...

User Guide
Page 14
...• CLOCK (Clock setting) • BACK LIGHT (Backlight illumination time setting) • LCD (LCD setting) • BEEP (Beep sound setting) • MEM CLEAR (Initialization setting) 3. SYS.SETUP Display the MAIN MENU on the LCD of sync over time. The items below can become out of the RC2001, then press the button ...next to the MAIN MENU. Notes: The clock can be set the current time. CLOCK (CLOCK SETTING) This sets the clock for the LCD to automatically return to the SYS.SETUP menu....
...• CLOCK (Clock setting) • BACK LIGHT (Backlight illumination time setting) • LCD (LCD setting) • BEEP (Beep sound setting) • MEM CLEAR (Initialization setting) 3. SYS.SETUP Display the MAIN MENU on the LCD of sync over time. The items below can become out of the RC2001, then press the button ...next to the MAIN MENU. Notes: The clock can be set the current time. CLOCK (CLOCK SETTING) This sets the clock for the LCD to automatically return to the SYS.SETUP menu....

User Guide
Page 15
...the button next to the lBACKLIGHTz indicator in the SYS.SETUP menu screen in 1-second intervals from 0 to 60 seconds. The time can be set the illumination time. The message lCOMPLETEDz is displayed on the LCD to indicate that the backlight does not turn on even when the LIGHT button ... to the SYS.SETUP menu. • Pressing the Home button returns the LCD to the MAIN MENU. 2. ENGLISH BACK LIGHT (BACKLIGHT ILLUMINATION TIME SETTING) Press the LIGHT button on the RC2001 to turn on the backlight, then set the time until the backlight turns off the backlight so that the illumination time...
...the button next to the lBACKLIGHTz indicator in the SYS.SETUP menu screen in 1-second intervals from 0 to 60 seconds. The time can be set the illumination time. The message lCOMPLETEDz is displayed on the LCD to indicate that the backlight does not turn on even when the LIGHT button ... to the SYS.SETUP menu. • Pressing the Home button returns the LCD to the MAIN MENU. 2. ENGLISH BACK LIGHT (BACKLIGHT ILLUMINATION TIME SETTING) Press the LIGHT button on the RC2001 to turn on the backlight, then set the time until the backlight turns off the backlight so that the illumination time...

User Guide
Page 16
... that the LCD remains on, after a button is not activated. When there are no operations and the LCD is displayed on again. After deciding the settings, press the ENTER button. • Either press the ENTER button or wait three seconds for the LCD to automatically return to the SYS.SETUP menu... lCOMPLETEDz is turned off by the LCD timer, pressing any of the buttons on the RC2001. The LCD setting menu is displayed, and so press the button next to indicate that the display time setting is turned off , this setting will turn it on the LCD to lLCD TIMERz in the LCD. Note: If...
... that the LCD remains on, after a button is not activated. When there are no operations and the LCD is displayed on again. After deciding the settings, press the ENTER button. • Either press the ENTER button or wait three seconds for the LCD to automatically return to the SYS.SETUP menu... lCOMPLETEDz is turned off by the LCD timer, pressing any of the buttons on the RC2001. The LCD setting menu is displayed, and so press the button next to indicate that the display time setting is turned off , this setting will turn it on the LCD to lLCD TIMERz in the LCD. Note: If...

User Guide
Page 17
...The message lCOMPLETEDz is completed. 3. Either press the ENTER button or wait three seconds so that the setting is displayed on the LCD to the SYS. BEEP (BEEP SOUND SETTING) This sets the built-in beep sound in the LCD display. 2. Press the button next to the lBEEPz ...to your viewing environment. 1. SETUP menu. • Pressing the Home button returns the LCD to lCONTRASTz in the RC2001. 1. The LCD setting menu is displayed on the LCD to display the beep setting screen. 2. Press the side buttons (right: +, left: -) to be adjusted. ENGLISH CONTRAST (LCD CONTRAST ADJUSTMENT...
...The message lCOMPLETEDz is completed. 3. Either press the ENTER button or wait three seconds so that the setting is displayed on the LCD to the SYS. BEEP (BEEP SOUND SETTING) This sets the built-in beep sound in the LCD display. 2. Press the button next to the lBEEPz ...to your viewing environment. 1. SETUP menu. • Pressing the Home button returns the LCD to lCONTRASTz in the RC2001. 1. The LCD setting menu is displayed on the LCD to display the beep setting screen. 2. Press the side buttons (right: +, left: -) to be adjusted. ENGLISH CONTRAST (LCD CONTRAST ADJUSTMENT...

User Guide
Page 18
ENGLISH MEM CLEAR (INITIALIZATION SETTING) This returns the settings made in the LCD to display the initialization setting screen. 2. Note: The LEARNING and CLOCK settings are shown below. • TIMER SETUP • BACK LIGHT TIMER • LCD • BEEP 16 Pressing the NO button automatically ... to the SYS.SETUP menu. Press the button next to the lMEM CLEARz indicator in the SYS.SETUP menu screen in the RC2001 to their initial settings. The setting items that are initialized are not initialized. 1. Press the button next to the lNOz (Disable) or lYESz (Enable) indicators ...
ENGLISH MEM CLEAR (INITIALIZATION SETTING) This returns the settings made in the LCD to display the initialization setting screen. 2. Note: The LEARNING and CLOCK settings are shown below. • TIMER SETUP • BACK LIGHT TIMER • LCD • BEEP 16 Pressing the NO button automatically ... to the SYS.SETUP menu. Press the button next to the lMEM CLEARz indicator in the SYS.SETUP menu screen in the RC2001 to their initial settings. The setting items that are initialized are not initialized. 1. Press the button next to the lNOz (Disable) or lYESz (Enable) indicators ...

User Guide
Page 19
... 1. Performing a reset does not erase the settings in the MAIN MENU and the status of the RC2001, then press the button next to 8000 codes...memory 4M bit (512KB) that the LCD returns to reset the RC2001. The actual number of the items below to the MAIN MENU... RESET If the RC2001 is for up to the lSTATUSz indicator. 2. STATUS INDICATOR This displays the settings made in the RC2001. 1. PROGRAMMABLE CODES... memory • Remaining macro steps • LCD timer setting • Backlight timer setting • Beep setting • Firmware version • Current clock time Either press...
... 1. Performing a reset does not erase the settings in the MAIN MENU and the status of the RC2001, then press the button next to 8000 codes...memory 4M bit (512KB) that the LCD returns to reset the RC2001. The actual number of the items below to the MAIN MENU... RESET If the RC2001 is for up to the lSTATUSz indicator. 2. STATUS INDICATOR This displays the settings made in the RC2001. 1. PROGRAMMABLE CODES... memory • Remaining macro steps • LCD timer setting • Backlight timer setting • Beep setting • Firmware version • Current clock time Either press...