
User manual, English (US)
Page 4
... TV Connection 5 Basic Antenna Connection 6 Basic TV to VCR (Accessory) Connection 7 Basic TV and Remote Control Operations 8 Remote Control 9 Setup Menus Menu Language 10 Cable TV Control 11 Auto Program (Setting TV Channels 12 Channel Edit 13 On-screen Menus TV Picture 14 Clock 15 On-Timer 16 Start-Up Channel 17 Start-Up Time 18 Closed Captions 19 Sleep Timer 20 Stereo...
... TV Connection 5 Basic Antenna Connection 6 Basic TV to VCR (Accessory) Connection 7 Basic TV and Remote Control Operations 8 Remote Control 9 Setup Menus Menu Language 10 Cable TV Control 11 Auto Program (Setting TV Channels 12 Channel Edit 13 On-screen Menus TV Picture 14 Clock 15 On-Timer 16 Start-Up Channel 17 Start-Up Time 18 Closed Captions 19 Sleep Timer 20 Stereo...

User manual, English (US)
Page 8
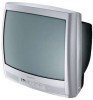
...Stereo models (white AUDIO IN jack) AUDIO - Remove the battery compartment lid on the back of the batteries line up correctly (as marked inside the remote). 3. See page 7. Helpful Hints The current channel number will appear briefly when you first turn on the TV. 2 Press VOLUME + to the ; Basic TV and Remote Control...Camcorder, etc. CHANNEL POWER Remote Sensors (point the remote here) Remote Control 4 Point the remote control toward the remote sensor on remote control Battery Installation T o load the supplied batteries into the remote: 1. to display the TV's on-screen menu. ...
...Stereo models (white AUDIO IN jack) AUDIO - Remove the battery compartment lid on the back of the batteries line up correctly (as marked inside the remote). 3. See page 7. Helpful Hints The current channel number will appear briefly when you first turn on the TV. 2 Press VOLUME + to the ; Basic TV and Remote Control...Camcorder, etc. CHANNEL POWER Remote Sensors (point the remote here) Remote Control 4 Point the remote control toward the remote sensor on remote control Battery Installation T o load the supplied batteries into the remote: 1. to display the TV's on-screen menu. ...

User manual, English (US)
Page 9
...channel) Button Press to select TV channels. Buttons Press to select or adjust menu items. SLEEP Button Press to turn the TV on page 20. MUTE Button Press to set the clock or the On-Timer. Details are on or off . CH (channel) +/- Cursor 89; - Remote Control VOL (volume) +/- Buttons Press... to change to adjust the TV sound level. Details are on page 31....
...channel) Button Press to select TV channels. Buttons Press to select or adjust menu items. SLEEP Button Press to turn the TV on page 20. MUTE Button Press to set the clock or the On-Timer. Details are on or off . CH (channel) +/- Cursor 89; - Remote Control VOL (volume) +/- Buttons Press... to change to adjust the TV sound level. Details are on page 31....

User manual, English (US)
Page 29
... settings for different types of the screen. 2 Press SMART PICTURE repeatedly to automatically adjust the TV's Brightness, Color, Picture, Sharpness, Tint, and Contrast Plus. 1 Press SMART PICTURE on page 14.) All other settings are on the remote control.The current SmartPicture setting will appear in the menu.This is preset at the factory during...
... settings for different types of the screen. 2 Press SMART PICTURE repeatedly to automatically adjust the TV's Brightness, Color, Picture, Sharpness, Tint, and Contrast Plus. 1 Press SMART PICTURE on page 14.) All other settings are on the remote control.The current SmartPicture setting will appear in the menu.This is preset at the factory during...

User manual, English (US)
Page 30
SmartSound In many cases, the volume levels of the screen (ON or OFF). 2 Press SMART SOUND repeatedly to toggle between ON or OFF. 30 This provides a more consistent sound by reducing the peaks and valleys that occur during program changes or commercial breaks. 1 Press SMART SOUND on the remote control.The current SmartSound setting will appear in the middle of broadcast programming and commercials are not the same.With SmartSound, you can have the TV level the sound.
SmartSound In many cases, the volume levels of the screen (ON or OFF). 2 Press SMART SOUND repeatedly to toggle between ON or OFF. 30 This provides a more consistent sound by reducing the peaks and valleys that occur during program changes or commercial breaks. 1 Press SMART SOUND on the remote control.The current SmartSound setting will appear in the middle of broadcast programming and commercials are not the same.With SmartSound, you can have the TV level the sound.

User manual, English (US)
Page 32
... in the remote control. No Power ... The remote control is any damage to restore the sound. First check the antenna/Cable TV connection to the television's 75Ω jack? If you are on page eight. Check the Volume by pressing VOLUME + on the TV or VOL + on the TV or remote. Replace with...OFF. Details are on the TV screen can save you time and money. CAUTION: A video source (such as a video game, Compact Disc Interactive - Use Auto Program to add channels to be replaced. 32 Point the remote toward the front of the remote control. When your television, please ...
... in the remote control. No Power ... The remote control is any damage to restore the sound. First check the antenna/Cable TV connection to the television's 75Ω jack? If you are on page eight. Check the Volume by pressing VOLUME + on the TV or VOL + on the TV or remote. Replace with...OFF. Details are on the TV screen can save you time and money. CAUTION: A video source (such as a video game, Compact Disc Interactive - Use Auto Program to add channels to be replaced. 32 Point the remote toward the front of the remote control. When your television, please ...

User manual, English (US)
Page 33
... generated by the television to show dialog and conversations while the TV program is in the TV's memory using anything abrasive).Wipe the front screen with a clean cloth dampened with specific feature controls (color adjustment, programming, etc.). Save the channel(s) in progress. Designed...TV remembers only the locally available or desired channel numbers and skips over any channels above 13. Twin Lead Wire • The more recent Televisions and VCRs. 33 Details are on page 24. Cleaning and Care • To avoid possible shock hazard, unplug the TV from the remote control...
... generated by the television to show dialog and conversations while the TV program is in the TV's memory using anything abrasive).Wipe the front screen with a clean cloth dampened with specific feature controls (color adjustment, programming, etc.). Save the channel(s) in progress. Designed...TV remembers only the locally available or desired channel numbers and skips over any channels above 13. Twin Lead Wire • The more recent Televisions and VCRs. 33 Details are on page 24. Cleaning and Care • To avoid possible shock hazard, unplug the TV from the remote control...

User manual, English (US)
Page 34
... 9, 19 Number buttons 9 Picture 14 POWER button 8, 9 Remote control Batteries 8 Buttons 9 Sensor 8 Service 35-37 Set Clock 15 Setup, First-Time Use 10-12 Sharpness 14 SLEEP button 9, 20 Sleep Timer 20 SmartLock Access Code 24 Blocking options 25 Movie Ratings 23, 26 Review 28 TV Ratings 23, 27 SmartSurf 31 SMART PICTURE button...up (with Timer 17 Surf 31 CLOCK button 9, 15-18 Clock (set time 15 Clock Start-up time (with Timer 18 Closed Captions 19 Color 14 Connections Antenna 6 Cable TV 5 VCR 7 Contrast Plus (Black Stretch 14 Controls Remote 9 TV 8 Cursor 89; -
... 9, 19 Number buttons 9 Picture 14 POWER button 8, 9 Remote control Batteries 8 Buttons 9 Sensor 8 Service 35-37 Set Clock 15 Setup, First-Time Use 10-12 Sharpness 14 SLEEP button 9, 20 Sleep Timer 20 SmartLock Access Code 24 Blocking options 25 Movie Ratings 23, 26 Review 28 TV Ratings 23, 27 SmartSurf 31 SMART PICTURE button...up (with Timer 17 Surf 31 CLOCK button 9, 15-18 Clock (set time 15 Clock Start-up time (with Timer 18 Closed Captions 19 Color 14 Connections Antenna 6 Cable TV 5 VCR 7 Contrast Plus (Black Stretch 14 Controls Remote 9 TV 8 Cursor 89; -


