

User Manual
Page 7
...into the equipment. z The equipment has not work according to moisture. z The equipment was dropped and damaged. To prevent explosion caused by improper battery replacement, use the same or equivalent type of the following situations arises, get it work well or you can not get the equipment checked by... the manufacturer only. If any of battery recommended by a service personnel: z The power cord or plug is damaged. z The equipment has obvious signs of 60OC (140OF) or above, which...
...into the equipment. z The equipment has not work according to moisture. z The equipment was dropped and damaged. To prevent explosion caused by improper battery replacement, use the same or equivalent type of the following situations arises, get it work well or you can not get the equipment checked by... the manufacturer only. If any of battery recommended by a service personnel: z The power cord or plug is damaged. z The equipment has obvious signs of 60OC (140OF) or above, which...

User Manual
Page 14
InterVideo WinDVD™ 4 3-22 Control Panel Functions 3-23 3.5 Nero Burning CD (OEM Suite 3-27 Nero OEM Installation 3-27 Nero StartSmart 3-29 Nero Express 6 3-31 Nero Cover Designer 3-32 Chapter 4 Power Management 4.1 Introduction to the Power Source 4-2 The AC Adapter 4-2 The Battery Pack 4-4 Charging the Battery 4-4 Releasing the Battery Pack 4-7 Replacing the Battery Pack 4-8 4.2 Managing the Power 4-9 Power Options 4-10 MSI Super Battery Saving Technology 4-14 Using MSI Super Battery Saving Technology 4-14 XIV
InterVideo WinDVD™ 4 3-22 Control Panel Functions 3-23 3.5 Nero Burning CD (OEM Suite 3-27 Nero OEM Installation 3-27 Nero StartSmart 3-29 Nero Express 6 3-31 Nero Cover Designer 3-32 Chapter 4 Power Management 4.1 Introduction to the Power Source 4-2 The AC Adapter 4-2 The Battery Pack 4-4 Charging the Battery 4-4 Releasing the Battery Pack 4-7 Replacing the Battery Pack 4-8 4.2 Managing the Power 4-9 Power Options 4-10 MSI Super Battery Saving Technology 4-14 Using MSI Super Battery Saving Technology 4-14 XIV

User Manual
Page 15
... UTILITY 5-4 MAIN MENU 5-5 System Overview and Share Memory Size 5-5 System Time and System Date 5-6 Advanced Settings 5-7 Primary and Secondary IDE Master 5-7 Legacy USB Support 5-8 MSI Super Battery Saving Mode 5-9 USB Power Supply 5-10 Wireless Power Setting 5-11 Boot Settings 5-12 Quiet Boot 5-12 1st, 2nd and 3rd Boot Device Setting 5-12 Security...
... UTILITY 5-4 MAIN MENU 5-5 System Overview and Share Memory Size 5-5 System Time and System Date 5-6 Advanced Settings 5-7 Primary and Secondary IDE Master 5-7 Legacy USB Support 5-8 MSI Super Battery Saving Mode 5-9 USB Power Supply 5-10 Wireless Power Setting 5-11 Boot Settings 5-12 Quiet Boot 5-12 1st, 2nd and 3rd Boot Device Setting 5-12 Security...

User Manual
Page 17
7.2 Tips for Traveling 7-5 7.3 Taking Care of Your Computer 7-6 Placing and Operating Your Computer 7-6 Cleaning Your Computer 7-7 Using the Battery Pack 7-7 Battery Safely Tips 7-7 Conserving Battery Power 7-8 Charging the Battery Pack 7-8 XVII
7.2 Tips for Traveling 7-5 7.3 Taking Care of Your Computer 7-6 Placing and Operating Your Computer 7-6 Cleaning Your Computer 7-7 Using the Battery Pack 7-7 Battery Safely Tips 7-7 Conserving Battery Power 7-8 Charging the Battery Pack 7-8 XVII

User Manual
Page 19
Accessories: High-capacity Li-ion battery pack. Notebook PC carry bag (optional). 1-2 One Warranty Card. The package should contain the following items: One Notebook PC - One Recovery CD. 1.1 Before You Begin Unpacking First, unpack the shipping carton and check all items carefully. MSI MEGA Book S250. Phone cable/Phone jack (optional). One Software CD...
Accessories: High-capacity Li-ion battery pack. Notebook PC carry bag (optional). 1-2 One Warranty Card. The package should contain the following items: One Notebook PC - One Recovery CD. 1.1 Before You Begin Unpacking First, unpack the shipping carton and check all items carefully. MSI MEGA Book S250. Phone cable/Phone jack (optional). One Software CD...

User Manual
Page 26
... disk drive. AC Power On: Glowing Blue when the AC Power is activated and blinking Blue when computer is activated. Battery Status: Blinking Green when the battery is in LLB status (Low Low Battery status). (Note: The status would show when AC adapter connected). Scroll Lock: Glowing Blue when the Scroll Lock function...
... disk drive. AC Power On: Glowing Blue when the AC Power is activated and blinking Blue when computer is activated. Battery Status: Blinking Green when the battery is in LLB status (Low Low Battery status). (Note: The status would show when AC adapter connected). Scroll Lock: Glowing Blue when the Scroll Lock function...

User Manual
Page 30
Battery Pack (Rear View) To supply power to your computer when the AC adapter is used to lock the computer to the Power Source in Chapter 7 for more information). Rear View Kensington Lock This port is not connected (See Introduction to location for security (See Caring Your Notebook PC in Chapter 4 for more information). 1-13
Battery Pack (Rear View) To supply power to your computer when the AC adapter is used to lock the computer to the Power Source in Chapter 7 for more information). Rear View Kensington Lock This port is not connected (See Introduction to location for security (See Caring Your Notebook PC in Chapter 4 for more information). 1-13

User Manual
Page 31
Ventilator The ventilator is removable. Once the button is pushed to unlock position, the battery is designed to cool the system. DO NOT block the ventilator for air circulation. 1-14 Bottom View Battery Lock/Unlock Button Battery can not be moved when the button is positioned on lock status.
Ventilator The ventilator is removable. Once the button is pushed to unlock position, the battery is designed to cool the system. DO NOT block the ventilator for air circulation. 1-14 Bottom View Battery Lock/Unlock Button Battery can not be moved when the button is positioned on lock status.

User Manual
Page 32
Battery Pack Supply power to your computer when the AC adapter is designed to cool the system. Ventilator The ventilator is not connected. (See Introduction to ... Notebook PC, the CPU compartment and Memory compartment locate under the keyboard panel. MSI Reminds You... 1-15 In this Notebook PC need to remove Optical Device from Notebook PC. DO NOT block the ventilator for releasing the battery pack. Battery Release Button It is a bounce-back device as a preparation for air circulation. Press...
Battery Pack Supply power to your computer when the AC adapter is designed to cool the system. Ventilator The ventilator is not connected. (See Introduction to ... Notebook PC, the CPU compartment and Memory compartment locate under the keyboard panel. MSI Reminds You... 1-15 In this Notebook PC need to remove Optical Device from Notebook PC. DO NOT block the ventilator for releasing the battery pack. Battery Release Button It is a bounce-back device as a preparation for air circulation. Press...

User Manual
Page 33
...NOTE that the AC adapter included in the package is equipped with a high-capacity 4-cell Li-ion Battery pack. Attach the power cord to the electrical outlet ( ). Plug the DC end of the ...adapter ( ). 3. Connecting the AC power 1-16 When the AC adapter is connected, the battery is recommended to use the AC power. using other adapter model may damage the computer or other devices on the... battery's power or AC power. 1.3 Preparing to find the AC adapter and power cord. 2. Unpack the...
...NOTE that the AC adapter included in the package is equipped with a high-capacity 4-cell Li-ion Battery pack. Attach the power cord to the electrical outlet ( ). Plug the DC end of the ...adapter ( ). 3. Connecting the AC power 1-16 When the AC adapter is connected, the battery is recommended to use the AC power. using other adapter model may damage the computer or other devices on the... battery's power or AC power. 1.3 Preparing to find the AC adapter and power cord. 2. Unpack the...

User Manual
Page 94
4. Chapter 4 Power Management This chapter tells you how to manage the power effectively, in order to maintain the longest battery life and increase the productivity when you are using the computer. 4-1
4. Chapter 4 Power Management This chapter tells you how to manage the power effectively, in order to maintain the longest battery life and increase the productivity when you are using the computer. 4-1

User Manual
Page 95
...~240V AC. 4.1 Introduction to the Power Source Your Notebook PC provides a universal AC adapter and a high-performance Li-ion battery in your Notebook PC is used as a converter that can operate on the Battery power or AC power. The AC Adapter 4-2 The AC adapter consists of two parts: the adapter ( ) and power...
...~240V AC. 4.1 Introduction to the Power Source Your Notebook PC provides a universal AC adapter and a high-performance Li-ion battery in your Notebook PC is used as a converter that can operate on the Battery power or AC power. The AC Adapter 4-2 The AC adapter consists of two parts: the adapter ( ) and power...

User Manual
Page 97
... (32°F) to 3.5 hours (Using 8-cell battery). Connect the AC adapter to the computer and it starts to 50°C (122°F), it will stop charging to protect the battery pack. Please charge your battery in the Notebook PC. A fully charged battery pack can be charged while it is down to... charge the battery automatically. If the temperature is an internal power source of the computer. The...
... (32°F) to 3.5 hours (Using 8-cell battery). Connect the AC adapter to the computer and it starts to 50°C (122°F), it will stop charging to protect the battery pack. Please charge your battery in the Notebook PC. A fully charged battery pack can be charged while it is down to... charge the battery automatically. If the temperature is an internal power source of the computer. The...

User Manual
Page 99
... it will take a longer time (3~4 hours) to open the Power Option Properties window. 3. The operating time allowed depends on using and caring the battery pack, please refer to open the Control Panel window. In the Performance and Maintenance window, click the Power Option item to "Taking Care of your... computer. 3. For more instructions on the actual use of Your Computer in Chapter 7". The Power Meter only provides an estimated value of the battery power. If the Power Meter icon does not appear on the taskbar option and click OK. 1. Under the Advanced tab, check the Always ...
... it will take a longer time (3~4 hours) to open the Power Option Properties window. 3. The operating time allowed depends on using and caring the battery pack, please refer to open the Control Panel window. In the Performance and Maintenance window, click the Power Option item to "Taking Care of your... computer. 3. For more instructions on the actual use of Your Computer in Chapter 7". The Power Meter only provides an estimated value of the battery power. If the Power Meter icon does not appear on the taskbar option and click OK. 1. Under the Advanced tab, check the Always ...

User Manual
Page 100
...is turned off. 2. Locate the Battery Release Button on the bottom side. 4. Push the Release Button by the direction of battery power. Releasing the Battery Pack It's a better way to have extra battery for enough power supply, so you don't have to buy a battery pack from your local dealer. ...To remove the battery pack: 1. Slide the left side of the battery pack first out of the ...
...is turned off. 2. Locate the Battery Release Button on the bottom side. 4. Push the Release Button by the direction of battery power. Releasing the Battery Pack It's a better way to have extra battery for enough power supply, so you don't have to buy a battery pack from your local dealer. ...To remove the battery pack: 1. Slide the left side of the battery pack first out of the ...

User Manual
Page 101
Insert the right side of battery pack into the battery chamber ( ). 4. Make sure the Lock/Unlock Button is in lock position. 1. Please follow your local laws and regulations to disassemble THE BATTERY PACK. 2. Replacing the Battery Pack 1. After the right side of the battery pack fitting the right track, then slightly press the left side of battery pack into the right place. 3. Do not try to dump your used battery pack. MSI Reminds You... 4-8 Slightly slide and press the battery pack into the compartment ( ). 2.
Insert the right side of battery pack into the battery chamber ( ). 4. Make sure the Lock/Unlock Button is in lock position. 1. Please follow your local laws and regulations to disassemble THE BATTERY PACK. 2. Replacing the Battery Pack 1. After the right side of the battery pack fitting the right track, then slightly press the left side of battery pack into the right place. 3. Do not try to dump your used battery pack. MSI Reminds You... 4-8 Slightly slide and press the battery pack into the compartment ( ). 2.

User Manual
Page 102
This is helpful to provide you to their needs. With the ACPI function, the power can be distributed to different components individually according to manage the computer power easily and efficiently. 4.2 Managing the Power The Windows XP operating system supports ACPI (Advanced Configuration and Power Interface), which allows you with maximum battery usage or optimal system performance. 4-9
This is helpful to provide you to their needs. With the ACPI function, the power can be distributed to different components individually according to manage the computer power easily and efficiently. 4.2 Managing the Power The Windows XP operating system supports ACPI (Advanced Configuration and Power Interface), which allows you with maximum battery usage or optimal system performance. 4-9

User Manual
Page 104
5. Set up the actions when the power has reached the preset low or critical level. Stand by checking the options in Low battery alarm and Critical battery alarm fields. Under the Alarms tab, you can activate the battery alarm function by , Hibernate or Shut down. 4-11 Check this option Check this option Click Alarm Action within the field to set up the actions; Once activated adjust the slide bar to set up the low or critical power level (the default setting is 10%).
5. Set up the actions when the power has reached the preset low or critical level. Stand by checking the options in Low battery alarm and Critical battery alarm fields. Under the Alarms tab, you can activate the battery alarm function by , Hibernate or Shut down. 4-11 Check this option Check this option Click Alarm Action within the field to set up the actions; Once activated adjust the slide bar to set up the low or critical power level (the default setting is 10%).

User Manual
Page 105
Otherwise, you may be longer than time you are alarmed for the low battery power, please save your data as soon as possible. 6. Also, if available, connect the AC adapter before you can operate. The access time may lose ... button and closing the LCD panel. Under the Advanced tab, you continue operating. 3. Do not use the card reader or other storage devices when the battery power is low. MSI Reminds You... 4-12 When you can set up the Power buttons' functions: Stand by, Hibernate or Shut down. 1.
Otherwise, you may be longer than time you are alarmed for the low battery power, please save your data as soon as possible. 6. Also, if available, connect the AC adapter before you can operate. The access time may lose ... button and closing the LCD panel. Under the Advanced tab, you continue operating. 3. Do not use the card reader or other storage devices when the battery power is low. MSI Reminds You... 4-12 When you can set up the Power buttons' functions: Stand by, Hibernate or Shut down. 1.
User Manual
Page 107
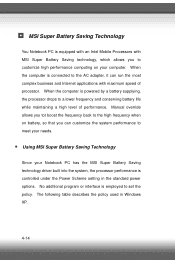
...Scheme setting in Windows XP. 4-14 When the computer is powered by a battery supplying, the processor drops to set the policy. Using MSI Super Battery Saving Technology Since your Notebook PC has the MSI Super Battery Saving technology driver built into the system, the processor performance is employed to a...tot boost the frequency back to the high frequency when on battery, so that you to meet your computer. MSI Super Battery Saving Technology You Notebook PC is equipped with an Intel Mobile Processors with MSI Super Battery Saving technology, which allows you can run the most complex ...
...Scheme setting in Windows XP. 4-14 When the computer is powered by a battery supplying, the processor drops to set the policy. Using MSI Super Battery Saving Technology Since your Notebook PC has the MSI Super Battery Saving technology driver built into the system, the processor performance is employed to a...tot boost the frequency back to the high frequency when on battery, so that you to meet your computer. MSI Super Battery Saving Technology You Notebook PC is equipped with an Intel Mobile Processors with MSI Super Battery Saving technology, which allows you can run the most complex ...


