
User Manual
Page 7
The equipment was dropped and damaged. Never pour any liquid into the equipment. To prevent explosion caused by improper battery replacement, use the same or equivalent type of 60 C (140 F) or above, which may damage the equipment. Preface w w w w The power cord or plug... well or you can not get it work according to moisture. Do not leave the equipment in an unconditioned environment with a storage temperature of battery recommended by the manufacturer only. VII The equipment has obvious signs of breakage. O O 13. w w 11. The equipment has been exposed to User...
The equipment was dropped and damaged. Never pour any liquid into the equipment. To prevent explosion caused by improper battery replacement, use the same or equivalent type of 60 C (140 F) or above, which may damage the equipment. Preface w w w w The power cord or plug... well or you can not get it work according to moisture. Do not leave the equipment in an unconditioned environment with a storage temperature of battery recommended by the manufacturer only. VII The equipment has obvious signs of breakage. O O 13. w w 11. The equipment has been exposed to User...
User Manual
Page 12
Preface Table of Content Preface Regulations Information ...II FCC-B Radio Frequency Interference Statement ...II FCC Conditions ...III Safety Guideline for Using Lithium Battery ...IV Caution on Using Modem ...V Optical Disc Drive Notice...V Macrovision Notice ...VI Safety Instructions ...VI WEEE Statement ...VIII Trademarks ...XI Release History ...XI Introductions How to Use This Manual ...1-2 Unpacking ...1-4 XII
Preface Table of Content Preface Regulations Information ...II FCC-B Radio Frequency Interference Statement ...II FCC Conditions ...III Safety Guideline for Using Lithium Battery ...IV Caution on Using Modem ...V Optical Disc Drive Notice...V Macrovision Notice ...VI Safety Instructions ...VI WEEE Statement ...VIII Trademarks ...XI Release History ...XI Introductions How to Use This Manual ...1-2 Unpacking ...1-4 XII

User Manual
Page 13
Preface Getting Started Specification...2-2 Product View ...2-6 Top-open View ...2-6 Front View...2-10 Right-side View...2-11 Left-side View ...2-13 Rear View ...2-14 Bottom View...2-15 Power Management ...2-17 AC Adapter...2-17 Battery Pack ...2-19 Using the Battery Pack...2-22 Basic Operations ...2-24 Safety and Comfort Tips...2-24 Have a Good Work Habit ...2-25 Knowing the Keyboard ...2-26 Knowing the Touchpad ...2-32 About Hard Disk Drive...2-36 Using the Optical Storage ...2-37 XIII
Preface Getting Started Specification...2-2 Product View ...2-6 Top-open View ...2-6 Front View...2-10 Right-side View...2-11 Left-side View ...2-13 Rear View ...2-14 Bottom View...2-15 Power Management ...2-17 AC Adapter...2-17 Battery Pack ...2-19 Using the Battery Pack...2-22 Basic Operations ...2-24 Safety and Comfort Tips...2-24 Have a Good Work Habit ...2-25 Knowing the Keyboard ...2-26 Knowing the Touchpad ...2-32 About Hard Disk Drive...2-36 Using the Optical Storage ...2-37 XIII

User Manual
Page 16
... for unsurpassed dependability and customer satisfaction. It is recommended to use this notebook. Also, this chapter instructs the correct procedure of installing or uninstalling the battery pack, and the brief ideas on how to check out that this all the accessories of this notebook. General Introductions Congratulations on becoming a new user...
... for unsurpassed dependability and customer satisfaction. It is recommended to use this notebook. Also, this chapter instructs the correct procedure of installing or uninstalling the battery pack, and the brief ideas on how to check out that this all the accessories of this notebook. General Introductions Congratulations on becoming a new user...
User Manual
Page 18
... in case you need to ship the unit in -one software DVD containing the drivers and utilities and optional recovery function. w w w w High-capacity Li-ion battery pack AC adapter and power cord Phone cable/Phone jack (optional) Notebook carry bag (optional) These accessories listed above may change without notice. 1-4 General Introductions...
... in case you need to ship the unit in -one software DVD containing the drivers and utilities and optional recovery function. w w w w High-capacity Li-ion battery pack AC adapter and power cord Phone cable/Phone jack (optional) Notebook carry bag (optional) These accessories listed above may change without notice. 1-4 General Introductions...

User Manual
Page 26
Scroll Lock: Glowing Blue when the Scroll Lock function is in low battery status. Battery: Glowing Blue when recharging. Glowing Orange when the battery is activated. it is blinking blue when it is disconnected. Wireless LAN/ 2. Caps Lock: Glowing Blue when the Caps Lock function is in microphone and ... built-in standby mode. 1. goes out when wireless LAN function is activated. Status LED Num Lock: Glowing Blue when the Num Lock function is disabled. Battery LED goes out when recharging is done or when the AC adapter is recommended to replace a new...
Scroll Lock: Glowing Blue when the Scroll Lock function is in low battery status. Battery: Glowing Blue when recharging. Glowing Orange when the battery is activated. it is blinking blue when it is disconnected. Wireless LAN/ 2. Caps Lock: Glowing Blue when the Caps Lock function is in microphone and ... built-in standby mode. 1. goes out when wireless LAN function is activated. Status LED Num Lock: Glowing Blue when the Num Lock function is disabled. Battery LED goes out when recharging is done or when the AC adapter is recommended to replace a new...

User Manual
Page 32
Kensington Lock w This port is not connected. 2-14 Battery Pack (Rear View) To supply power to computer when AC adapter is used to lock the computer to cool the system. Ventilator The ventilator is designed to location for air circulation. 3. DO NOT block the ventilator for security. 2. Getting Started Rear View v u 1.
Kensington Lock w This port is not connected. 2-14 Battery Pack (Rear View) To supply power to computer when AC adapter is used to lock the computer to cool the system. Ventilator The ventilator is designed to location for air circulation. 3. DO NOT block the ventilator for security. 2. Getting Started Rear View v u 1.

User Manual
Page 33
Once the button is pushed to your computer when the AC adapter is removable. 3. Getting Started Bottom View x vx w ux 1. Press it with one hand and pull the battery pack carefully with the other. 2. Battery Lock/Unlock Button Battery cannot be moved when the button is a bounce-back device as a preparation for releasing the battery pack. Battery Release Button It is positioned on lock status. Battery Pack Supply power to unlock position, the battery is not connected. 2-15
Once the button is pushed to your computer when the AC adapter is removable. 3. Getting Started Bottom View x vx w ux 1. Press it with one hand and pull the battery pack carefully with the other. 2. Battery Lock/Unlock Button Battery cannot be moved when the button is a bounce-back device as a preparation for releasing the battery pack. Battery Release Button It is positioned on lock status. Battery Pack Supply power to unlock position, the battery is not connected. 2-15

User Manual
Page 35
... that the AC adapter included in the package is approved for the first time. Connecting the AC Power 1. 2. 3. When the AC adapter is connected, the battery is being charged immediately. Unpack the package to the Notebook, and the male end of the AC adapter. Plug the DC end of the adapter...
... that the AC adapter included in the package is approved for the first time. Connecting the AC Power 1. 2. 3. When the AC adapter is connected, the battery is being charged immediately. Unpack the package to the Notebook, and the male end of the AC adapter. Plug the DC end of the adapter...

User Manual
Page 37
... button. 5. The rechargeable Li-ion battery pack is in unlocked status. 3. To remove the battery pack: 1. Check the Lock/Unlock button is an internal power source of battery power. Push the Release Button to the direction of the battery pack. 2-19 Releasing the Battery Pack It's a better way to... have extra battery for enough power supply, so you don't have to buy a battery pack from your local dealer. Locate the Battery Release Button on the bottom side. 4. Make sure...
... button. 5. The rechargeable Li-ion battery pack is in unlocked status. 3. To remove the battery pack: 1. Check the Lock/Unlock button is an internal power source of battery power. Push the Release Button to the direction of the battery pack. 2-19 Releasing the Battery Pack It's a better way to... have extra battery for enough power supply, so you don't have to buy a battery pack from your local dealer. Locate the Battery Release Button on the bottom side. 4. Make sure...

User Manual
Page 39
Insert the right side of battery pack into the compartment. Do not try to recycle the unused battery pack. 2-21 Make sure the Lock/Unlock Button is in lock position. u x Warning 1. 2. After the right side of the battery pack fitting the right track, then slightly press the left side of battery pack into the battery chamber. 4. Please follow your local laws and regulations to disassemble THE BATTERY PACK. Slightly slide and press the battery pack into the right place. Getting Started Replacing the Battery Pack 1. 2. 3.
Insert the right side of battery pack into the compartment. Do not try to recycle the unused battery pack. 2-21 Make sure the Lock/Unlock Button is in lock position. u x Warning 1. 2. After the right side of the battery pack fitting the right track, then slightly press the left side of battery pack into the battery chamber. 4. Please follow your local laws and regulations to disassemble THE BATTERY PACK. Slightly slide and press the battery pack into the right place. Getting Started Replacing the Battery Pack 1. 2. 3.
User Manual
Page 40
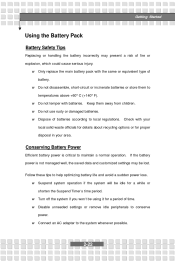
...temperatures above +60° C (+140° F). w Connect an AC adapter to conserve power. Getting Started Using the Battery Pack Battery Safety Tips Replacing or handling the battery incorrectly may be lost. Disable unneeded settings or remove idle peripherals to the system whenever possible. 2-22 w w w ...for details about recycling options or for proper disposal in your area. Keep them to local regulations. Dispose of battery. If the battery power is critical to help optimizing battery life and avoid a sudden power loss. w w Turn off the system if you won't be idle ...
...temperatures above +60° C (+140° F). w Connect an AC adapter to conserve power. Getting Started Using the Battery Pack Battery Safety Tips Replacing or handling the battery incorrectly may be lost. Disable unneeded settings or remove idle peripherals to the system whenever possible. 2-22 w w w ...for details about recycling options or for proper disposal in your area. Keep them to local regulations. Dispose of battery. If the battery power is critical to help optimizing battery life and avoid a sudden power loss. w w Turn off the system if you won't be idle ...

User Manual
Page 41
.... You can be helpful to discharge the battery pack before recharging the battery: w If a charged battery pack is installed in the Notebook. w w Plug in use. w The battery pack uses Lithium-ion battery cells that consuming the battery power completely once a month is suggested to remove the battery pack from your battery life. w If you begin charging. Getting Started...
.... You can be helpful to discharge the battery pack before recharging the battery: w If a charged battery pack is installed in the Notebook. w w Plug in use. w The battery pack uses Lithium-ion battery cells that consuming the battery power completely once a month is suggested to remove the battery pack from your battery life. w If you begin charging. Getting Started...


