
User's Guide
Page 7
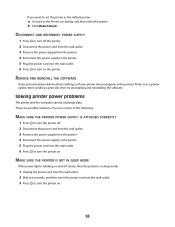
..., a risk of fire or electrical shock results. The safety features of misuse. SAVE THESE INSTRUCTIONS. 7 Do not pinch the power cord between objects such as the power supply cord or telephone, during a lightning storm. Lexmark is designed, tested, and approved to meet strict global safety standards with this product or make any electrical or cabling...
..., a risk of fire or electrical shock results. The safety features of misuse. SAVE THESE INSTRUCTIONS. 7 Do not pinch the power cord between objects such as the power supply cord or telephone, during a lightning storm. Lexmark is designed, tested, and approved to meet strict global safety standards with this product or make any electrical or cabling...

User's Guide
Page 11
Connect the printer to a power source using the power cord. 1 Plug the power cord all the way into the power supply on the printer. 2 Plug the power cord into the paper slot. 7 Paper guides Keep paper straight when feeding. 8 Paper support Load paper. 1 Use the 1 USB port 2 Power supply 2 3 To Connect the printer to a computer using . 2 1 3 If the light is...
Connect the printer to a power source using the power cord. 1 Plug the power cord all the way into the power supply on the printer. 2 Plug the power cord into the paper slot. 7 Paper guides Keep paper straight when feeding. 8 Paper support Load paper. 1 Use the 1 USB port 2 Power supply 2 3 To Connect the printer to a computer using . 2 1 3 If the light is...

User's Guide
Page 49
... may damage the finish of the printer. 4 Wipe only the outside of time. CAUTION-SHOCK HAZARD: To avoid the risk of electric shock, unplug the power cord from the wall outlet and disconnect all cables to your printer. 5 Make sure the paper support and paper exit tray are ready to install them...
... may damage the finish of the printer. 4 Wipe only the outside of time. CAUTION-SHOCK HAZARD: To avoid the risk of electric shock, unplug the power cord from the wall outlet and disconnect all cables to your printer. 5 Make sure the paper support and paper exit tray are ready to install them...
User's Guide
Page 52
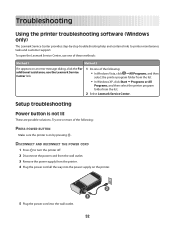
..., and then select the printer program folder from the printer. 4 Plug the power cord all the way into the power supply on the printer. 2 1 5 Plug the power cord into the wall outlet. 52 To open the Lexmark Service Center, use one of these methods: Method 1 Method 2 If it ...on by -step troubleshooting help and contains links to turn the printer off. 2 Disconnect the power cord from the wall outlet. 3 Remove the power supply from the list. 2 Select Lexmark Service Center. Setup troubleshooting Power button is on an error message dialog, click the For additional assistance, use the...
..., and then select the printer program folder from the printer. 4 Plug the power cord all the way into the power supply on the printer. 2 1 5 Plug the power cord into the wall outlet. 52 To open the Lexmark Service Center, use one of these methods: Method 1 Method 2 If it ...on by -step troubleshooting help and contains links to turn the printer off. 2 Disconnect the power cord from the wall outlet. 3 Remove the power supply from the list. 2 Select Lexmark Service Center. Setup troubleshooting Power button is on an error message dialog, click the For additional assistance, use the...
User's Guide
Page 53
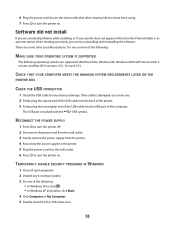
.... 5 Double-click the CD or DVD drive icon. 53 RECONNECT THE POWER SUPPLY 1 Press to turn the printer off. 2 Disconnect the power cord from the wall outlet. 3 Gently remove the power supply from the printer. 4 Reconnect the power supply to the printer. 5 Plug the power cord into the wall outlet. 6 Press to turn the printer on . The...
.... 5 Double-click the CD or DVD drive icon. 53 RECONNECT THE POWER SUPPLY 1 Press to turn the printer off. 2 Disconnect the power cord from the wall outlet. 3 Gently remove the power supply from the printer. 4 Reconnect the power supply to the printer. 5 Plug the power cord into the wall outlet. 6 Press to turn the printer on . The...
User's Guide
Page 54
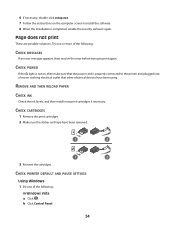
... : In Windows Vista a Click . CHECK CARTRIDGES 1 Remove the print cartridges. 2 Make sure the sticker and tape have been using. CHECK POWER If the light is not on the computer screen to install the software. 8 When the installation is properly connected to print again. REMOVE AND... MESSAGES If an error message appears, then resolve the error before trying to the printer and plugged into a known working electrical outlet that the power cord is completed, enable the security software again. b Click Control Panel. 54 Page does not print These are possible solutions. 6 If necessary, ...
... : In Windows Vista a Click . CHECK CARTRIDGES 1 Remove the print cartridges. 2 Make sure the sticker and tape have been using. CHECK POWER If the light is not on the computer screen to install the software. 8 When the installation is properly connected to print again. REMOVE AND... MESSAGES If an error message appears, then resolve the error before trying to the printer and plugged into a known working electrical outlet that the power cord is completed, enable the security software again. b Click Control Panel. 54 Page does not print These are possible solutions. 6 If necessary, ...
User's Guide
Page 56
...select the printer. b Click Make Default. DISCONNECT AND RECONNECT POWER SUPPLY 1 Press to turn off . 2 Disconnect the power cord from the wall outlet. 3 Remove the power supply from the printer. 4 Reconnect the power supply to the printer. 5 Plug the power cord into the wall outlet. 6 Press to turn the printer... CORRECTLY 1 Press to turn the printer off the printer. 2 Disconnect the power cord from the wall outlet. 3 Remove the power supply from the printer. 4 Reconnect the power supply to the printer. 5 Plug the power cord into the wall outlet. 3 Press to turn the printer on. 56 REMOVE...
...select the printer. b Click Make Default. DISCONNECT AND RECONNECT POWER SUPPLY 1 Press to turn off . 2 Disconnect the power cord from the wall outlet. 3 Remove the power supply from the printer. 4 Reconnect the power supply to the printer. 5 Plug the power cord into the wall outlet. 6 Press to turn the printer... CORRECTLY 1 Press to turn the printer off the printer. 2 Disconnect the power cord from the wall outlet. 3 Remove the power supply from the printer. 4 Reconnect the power supply to the printer. 5 Plug the power cord into the wall outlet. 3 Press to turn the printer on. 56 REMOVE...
User's Guide
Page 78
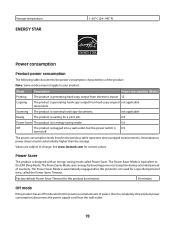
...energy-saving mode. 5.6 Off The product is plugged into a wall outlet, but the power switch is 0.9 turned off mode which still consumes a small amount of time, called Power Saver. See www.lexmark.com for this product (in minutes): 30 minutes Off mode If this product is ...an off . Values are subject to the EPA Sleep Mode. Instantaneous power draws may not apply to completely stop product power consumption, disconnect the power supply cord from hard-copy original not applicable documents. The Power Saver Mode is generating hard-copy output from the wall outlet. ...
...energy-saving mode. 5.6 Off The product is plugged into a wall outlet, but the power switch is 0.9 turned off mode which still consumes a small amount of time, called Power Saver. See www.lexmark.com for this product (in minutes): 30 minutes Off mode If this product is ...an off . Values are subject to the EPA Sleep Mode. Instantaneous power draws may not apply to completely stop product power consumption, disconnect the power supply cord from hard-copy original not applicable documents. The Power Saver Mode is generating hard-copy output from the wall outlet. ...


