

User Guide
Page 1
X46x Series User's Guide February 2009 Machine type(s): 7014, 4569, 4570 Model(s): 431, 636, 63W, n01, n02, g01, g02, n11, n12, g11, g12, hn1, hn2, wh1, wh2 www.lexmark.com
X46x Series User's Guide February 2009 Machine type(s): 7014, 4569, 4570 Model(s): 431, 636, 63W, n01, n02, g01, g02, n11, n12, g11, g12, hn1, hn2, wh1, wh2 www.lexmark.com

User Guide
Page 17
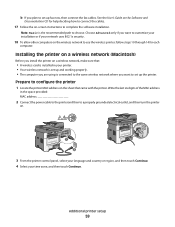
... and solving problems Help using your needs. To get back on track fast. After all, you are you looking for? User's Guide-The User's Guide is available on your suggestions help you 're satisfied. Click to make sure it better. Learning about the printer Thank you... Software and Documentation CD. If you find something we do, and your operating system. For updates, check our Web site at www.lexmark.com/publications/. Initial setup instructions: • Connecting the printer • Installing the printer software Additional setup and instructions for using the...
... and solving problems Help using your needs. To get back on track fast. After all, you are you looking for? User's Guide-The User's Guide is available on your suggestions help you 're satisfied. Click to make sure it better. Learning about the printer Thank you... Software and Documentation CD. If you find something we do, and your operating system. For updates, check our Web site at www.lexmark.com/publications/. Initial setup instructions: • Connecting the printer • Installing the printer software Additional setup and instructions for using the...
User Guide
Page 59
... Advanced only if you are using is the recommended path to set up and working properly. • The computer you want to choose. See the User's Guide on -screen instructions to complete the software installation.
... Advanced only if you are using is the recommended path to set up and working properly. • The computer you want to choose. See the User's Guide on -screen instructions to complete the software installation.
User Guide
Page 135
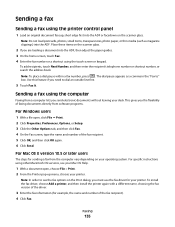
... To place a dial pause within a fax number, press . The dial pause appears as magazine clippings) into the ADF. For Mac OS X version 10.5 or later users The steps for example, the name and number of the fax recipient. 5 Click OK, and then click OK again. 6 Click Send. To add recipients, touch... glass. For specific instructions using the printer control panel 1 Load an original document faceup, short edge first into the ADF, then adjust the paper guides. 3 On the home screen, touch Fax. 4 Enter the fax number or a shortcut using the computer Faxing from software programs. For Windows...
... To place a dial pause within a fax number, press . The dial pause appears as magazine clippings) into the ADF. For Mac OS X version 10.5 or later users The steps for example, the name and number of the fax recipient. 5 Click OK, and then click OK again. 6 Click Send. To add recipients, touch... glass. For specific instructions using the printer control panel 1 Load an original document faceup, short edge first into the ADF, then adjust the paper guides. 3 On the home screen, touch Fax. 4 Enter the fax number or a shortcut using the computer Faxing from software programs. For Windows...
User Guide
Page 268
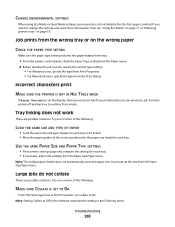
... job to the correct positions for each tray to be linked. • Move the paper guides to print, specify the correct type setting: • For Windows users, specify the type from Print Properties. • For Macintosh users, specify the type from the Paper Size/Type menu. Troubleshooting 268 Tray linking does not work...
... job to the correct positions for each tray to be linked. • Move the paper guides to print, specify the correct type setting: • For Windows users, specify the type from Print Properties. • For Macintosh users, specify the type from the Paper Size/Type menu. Troubleshooting 268 Tray linking does not work...
User Guide
Page 271
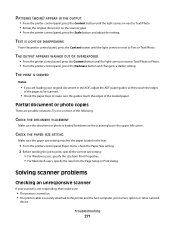
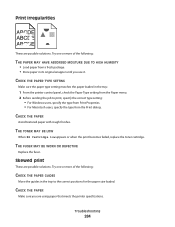
...glass in the upper left corner. Troubleshooting 271 Partial document or photo copies These are loading your scanner is not responding, then make sure the guides touch the edges of the following: CHECK THE DOCUMENT PLACEMENT Make sure the document or photo is securely attached to print, specify the correct ...the size from Print Properties. • For Macintosh users, specify the size from the Page Setup or Print dialog. CHECK THE PAPER SIZE SETTING Make sure the paper size setting matches the paper loaded in the ADF, adjust the ADF paper guides so they touch the edges of the pages to ...
...glass in the upper left corner. Troubleshooting 271 Partial document or photo copies These are loading your scanner is not responding, then make sure the guides touch the edges of the following: CHECK THE DOCUMENT PLACEMENT Make sure the document or photo is securely attached to print, specify the correct ...the size from Print Properties. • For Macintosh users, specify the size from the Page Setup or Print dialog. CHECK THE PAPER SIZE SETTING Make sure the paper size setting matches the paper loaded in the ADF, adjust the ADF paper guides so they touch the edges of the pages to ...

User Guide
Page 282
...positions for the paper size loaded. Gray background ABCDE ABCDE ABCDE Troubleshooting 282 Try one or more of the following: CHECK THE GUIDES Move the width and length guides in the tray: 1 From the printer control panel Paper menu, check the Paper Size setting. 2 Before sending the job to... print, specify the correct size setting: • For Windows users, specify the size from Print Properties. • For Macintosh users, specify the size from ...
...positions for the paper size loaded. Gray background ABCDE ABCDE ABCDE Troubleshooting 282 Try one or more of the following: CHECK THE GUIDES Move the width and length guides in the tray: 1 From the printer control panel Paper menu, check the Paper Size setting. 2 Before sending the job to... print, specify the correct size setting: • For Windows users, specify the size from Print Properties. • For Macintosh users, specify the size from ...
User Guide
Page 283
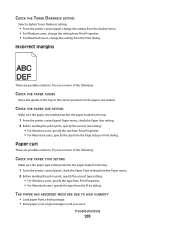
... Print Properties. • For Macintosh users, specify the type from the Print dialog. Incorrect margins These are possible solutions. Troubleshooting 283 Paper curl These are possible solutions. Try one or more of the following : CHECK THE PAPER GUIDES Move the guides in the tray: 1 From the ...printer control panel, check the Paper Type setting from the Paper menu. 2 Before sending the job to print, specify the correct size setting: • For Windows users, specify the size from Print Properties...
... Print Properties. • For Macintosh users, specify the type from the Print dialog. Incorrect margins These are possible solutions. Troubleshooting 283 Paper curl These are possible solutions. Try one or more of the following : CHECK THE PAPER GUIDES Move the guides in the tray: 1 From the ...printer control panel, check the Paper Type setting from the Paper menu. 2 Before sending the job to print, specify the correct size setting: • For Windows users, specify the size from Print Properties...
User Guide
Page 284
Try one or more of the following : CHECK THE PAPER GUIDES Move the guides in the tray: 1 From the printer control panel, check the Paper Type setting from the Paper menu. 2 Before sending the job to the correct positions ... the paper type setting matches the paper loaded in the tray to print, specify the correct type setting: • For Windows users, specify the type from Print Properties. • For Macintosh users, specify the type from a fresh package. • Store paper in its original wrapper until you are possible solutions. THE FUSER...
Try one or more of the following : CHECK THE PAPER GUIDES Move the guides in the tray: 1 From the printer control panel, check the Paper Type setting from the Paper menu. 2 Before sending the job to the correct positions ... the paper type setting matches the paper loaded in the tray to print, specify the correct type setting: • For Windows users, specify the type from Print Properties. • For Macintosh users, specify the type from a fresh package. • Store paper in its original wrapper until you are possible solutions. THE FUSER...

User Guide
Page 304
... present proof of the warranty period. The replacement item assumes the remaining warranty period of the Remarketer or Lexmark. To obtain warranty service, you may be required to present the feature or option with Lexmark user's guides, manuals, instructions or guidance -Unsuitable physical or operating environment Notices 304 Limited warranty service The warranty period...
... present proof of the warranty period. The replacement item assumes the remaining warranty period of the Remarketer or Lexmark. To obtain warranty service, you may be required to present the feature or option with Lexmark user's guides, manuals, instructions or guidance -Unsuitable physical or operating environment Notices 304 Limited warranty service The warranty period...


