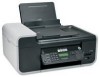
User's Guide
Page 3
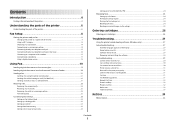
Contents Safety information 9 Introduction 10 Finding information about the printer...10 Setting up the printer 13 Granting access to the software during installation 13 Setting up the printer as a copier only or fax only 13 Understanding the parts of the ...23 Using the printer menus ...26 Saving settings...28 Using the printer software...30 Installing printer software ...30 Installing the optional XPS driver (Windows Vista users only 31 Using the Windows printer software...32 Using the Macintosh printer software...33 Switching between the rear USB port and the Quick Connect laptop port...
Contents Safety information 9 Introduction 10 Finding information about the printer...10 Setting up the printer 13 Granting access to the software during installation 13 Setting up the printer as a copier only or fax only 13 Understanding the parts of the ...23 Using the printer menus ...26 Saving settings...28 Using the printer software...30 Installing printer software ...30 Installing the optional XPS driver (Windows Vista users only 31 Using the Windows printer software...32 Using the Macintosh printer software...33 Switching between the rear USB port and the Quick Connect laptop port...
User's Guide
Page 7
... Resetting to factory settings...119 Troubleshooting 121 Using the printer troubleshooting software (Windows only 121 Setup troubleshooting...121 Incorrect language appears on the display...121 Power button is not lit ...122 Software did not install...122 Page does not print...123 Solving printer ...power problems ...126 Removing and reinstalling the software ...126 Enabling the USB port in Windows ...127 Wireless troubleshooting...128 Wireless troubleshooting checklist ...128 Printing a network setup page ...129 Wireless configuration...
... Resetting to factory settings...119 Troubleshooting 121 Using the printer troubleshooting software (Windows only 121 Setup troubleshooting...121 Incorrect language appears on the display...121 Power button is not lit ...122 Software did not install...122 Page does not print...123 Solving printer ...power problems ...126 Removing and reinstalling the software ...126 Enabling the USB port in Windows ...127 Wireless troubleshooting...128 Wireless troubleshooting checklist ...128 Printing a network setup page ...129 Wireless configuration...

User's Guide
Page 10
...Your printer may not have this Help. The Help installs automatically with these publications. The Help installs automatically with the printer software. Click to make sure that the application that you want to view the main page of the Help. Printed Networking ...Quick Setup sheet Initial setup instructions. Electronic User's Guide Complete instructions for using the printer software on a Macintosh operating system. Windows Help Additional instructions for using the printer software on a Windows operating system. Note: If you have support for using the printer.
...Your printer may not have this Help. The Help installs automatically with these publications. The Help installs automatically with the printer software. Click to make sure that the application that you want to view the main page of the Help. Printed Networking ...Quick Setup sheet Initial setup instructions. Electronic User's Guide Complete instructions for using the printer software on a Macintosh operating system. Windows Help Additional instructions for using the printer software on a Windows operating system. Note: If you have support for using the printer.
User's Guide
Page 30
... Welcome screen to Power Saver mode when the printer is the letter of the following: In Windows Vista a Click . Using Macintosh 1 Close all open software applications. 2 Insert the installation software CD. The Power Saver timeout is the time it takes for the printer to switch to... up the printer. Change the Power Saver timeout to set up the printer 30 Using the printer software Installing printer software Using Windows 1 Close all open software programs. 2 Insert the installation software CD. If the Welcome screen does not appear after a minute, do not want to be efficient...
... Welcome screen to Power Saver mode when the printer is the letter of the following: In Windows Vista a Click . Using Macintosh 1 Close all open software applications. 2 Insert the installation software CD. The Power Saver timeout is the time it takes for the printer to switch to... up the printer. Change the Power Saver timeout to set up the printer 30 Using the printer software Installing printer software Using Windows 1 Close all open software programs. 2 Insert the installation software CD. If the Welcome screen does not appear after a minute, do not want to be efficient...
User's Guide
Page 31
... located in Windows Vista Service Pack 1 or later. • Before installing the XPS driver, you must have administrator privileges on the two additional dialogs that are launched. Setting up the printer 31 Using the World Wide Web 1 Go to the Lexmark Web site at www.lexmark.com. ...an additional driver after you must install the printer on your operating system. 4 Follow the instructions on the installation software CD. Installing the optional XPS driver (Windows Vista users only) The XML Paper Specification (XPS) driver is supported only in the xps folder with the setupxps ...
... located in Windows Vista Service Pack 1 or later. • Before installing the XPS driver, you must have administrator privileges on the two additional dialogs that are launched. Setting up the printer 31 Using the World Wide Web 1 Go to the Lexmark Web site at www.lexmark.com. ...an additional driver after you must install the printer on your operating system. 4 Follow the instructions on the installation software CD. Installing the optional XPS driver (Windows Vista users only) The XML Paper Specification (XPS) driver is supported only in the xps folder with the setupxps ...
User's Guide
Page 32
... capability. Manage, edit, transfer, and print photos and documents. Using the Windows printer software When you do. Use the LexmarkTM Productivity Studio Lexmark Fast Pics Lexmark Toolbar Lexmark Tools for the printer. Scan a document and produce text that you choose not to install the Lexmark Productivity Studio. • Print black or text-only Web pages to...
... capability. Manage, edit, transfer, and print photos and documents. Using the Windows printer software When you do. Use the LexmarkTM Productivity Studio Lexmark Fast Pics Lexmark Toolbar Lexmark Tools for the printer. Scan a document and produce text that you choose not to install the Lexmark Productivity Studio. • Print black or text-only Web pages to...
User's Guide
Page 34
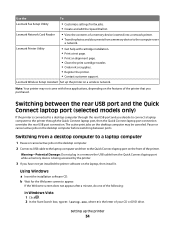
... a USB cable to the laptop computer and then to the Quick Connect laptop port on the laptop, then install it. Using Windows a Insert the installation software CD. Note: Your printer may be canceled. The active print jobs on the desktop computer may not come with cartridge installation. ...Welcome screen to appear. Lexmark Wireless Setup Assistant Set up the printer 34 Lexmark Network Card Reader • View the contents of the printer that you have not yet installed the printer software on the front of your CD or DVD drive. Lexmark Printer Utility • Get...
... a USB cable to the laptop computer and then to the Quick Connect laptop port on the laptop, then install it. Using Windows a Insert the installation software CD. Note: Your printer may be canceled. The active print jobs on the desktop computer may not come with cartridge installation. ...Welcome screen to appear. Lexmark Wireless Setup Assistant Set up the printer 34 Lexmark Network Card Reader • View the contents of the printer that you have not yet installed the printer software on the front of your CD or DVD drive. Lexmark Printer Utility • Get...
User's Guide
Page 35
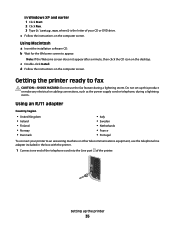
..., use the fax feature during a lightning storm. c Double-click Install. Do not set up the printer 35 Using Macintosh a Insert the installation software CD. Using an RJ11 adapter Country/region • United Kingdom • Ireland • Finland • Norway • Denmark • Italy ...; Sweden • Netherlands • France • Portugal To connect your CD or DVD drive. d Follow the instructions on the desktop. In Windows XP and earlier 1 Click Start. 2 Click Run. 3 Type D:\setup.exe, where D is the letter of the printer. c Follow the instructions on...
..., use the fax feature during a lightning storm. c Double-click Install. Do not set up the printer 35 Using Macintosh a Insert the installation software CD. Using an RJ11 adapter Country/region • United Kingdom • Ireland • Finland • Norway • Denmark • Italy ...; Sweden • Netherlands • France • Portugal To connect your CD or DVD drive. d Follow the instructions on the desktop. In Windows XP and earlier 1 Click Start. 2 Click Run. 3 Type D:\setup.exe, where D is the letter of the printer. c Follow the instructions on...
User's Guide
Page 46
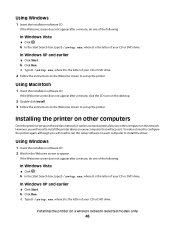
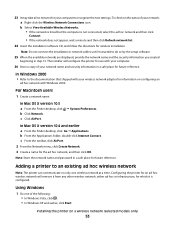
...any other computers Once the printer is the letter of your CD or DVD drive. In Windows XP and earlier a Click Start. However, you will need to install the driver. Using Windows 1 Insert the installation software CD. 2 Wait for the Welcome screen to set up the printer. b Click Run....computer on every computer that will need to run the setup software on the Welcome screen to appear. Using Windows 1 Insert the installation software CD. If the Welcome screen does not appear after a minute, do one of the following : In Windows Vista a Click . If the Welcome screen does not appear...
...any other computers Once the printer is the letter of your CD or DVD drive. In Windows XP and earlier a Click Start. However, you will need to install the driver. Using Windows 1 Insert the installation software CD. 2 Wait for the Welcome screen to set up the printer. b Click Run....computer on every computer that will need to run the setup software on the Welcome screen to appear. Using Windows 1 Insert the installation software CD. If the Welcome screen does not appear after a minute, do one of the following : In Windows Vista a Click . If the Welcome screen does not appear...

User's Guide
Page 48
...the printer. If the printer is not automatically assigned an IP address, the installation software will prompt you may be prompted to connect the printer to the computer again ...instructions provided. 2 If there is an associate/registration button on the computer screen to reinstall the software, and then make the changes that came with the box, or from the box Web page....as the configured network, the security key, or other settings: Using Windows 1 Do one of the following: • In Windows Vista, click . • In Windows XP and earlier, click Start. 2 Click All Programs or Programs,...
...the printer. If the printer is not automatically assigned an IP address, the installation software will prompt you may be prompted to connect the printer to the computer again ...instructions provided. 2 If there is an associate/registration button on the computer screen to reinstall the software, and then make the changes that came with the box, or from the box Web page....as the configured network, the security key, or other settings: Using Windows 1 Do one of the following: • In Windows Vista, click . • In Windows XP and earlier, click Start. 2 Click All Programs or Programs,...
User's Guide
Page 51
...network is to use a wireless access point (wireless router). ASCII characters are letters, numbers, and symbols found on any remaining windows. 8 Insert the installation software CD, and follow the directions for your printer. Installing the printer on only one wireless network at a time. A network...Do not already have an infrastructure network, you should configure the printer for you have a wireless network (but do so by the setup software. 9 When the available networks are A-F, a-f, and 0-9. WEP keys must be: • Exactly 10 or 26 hexadecimal characters. Advanced ...
...network is to use a wireless access point (wireless router). ASCII characters are letters, numbers, and symbols found on any remaining windows. 8 Insert the installation software CD, and follow the directions for your printer. Installing the printer on only one wireless network at a time. A network...Do not already have an infrastructure network, you should configure the printer for you have a wireless network (but do so by the setup software. 9 When the available networks are A-F, a-f, and 0-9. WEP keys must be: • Exactly 10 or 26 hexadecimal characters. Advanced ...
User's Guide
Page 52
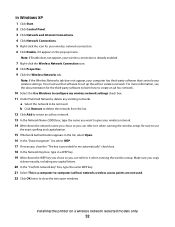
... sure you copy it when running the wireless setup. In Windows XP 1 Click Start. 2 Click Control Panel. 3 Click Network and Internet Connections. 4 Click Network Connections. 5...OK twice to be removed. Note: If the Wireless Networks tab does not appear, your computer has third-party software that software to give your wireless settings. b Click Remove to delete the network from the list. 12 Click Add to...select WEP. 17 If necessary, clear the "The key is provided for the third-party software to learn how to create an ad hoc network. 10 Select the Use Windows to -computer (ad hoc) network;
... sure you copy it when running the wireless setup. In Windows XP 1 Click Start. 2 Click Control Panel. 3 Click Network and Internet Connections. 4 Click Network Connections. 5...OK twice to be removed. Note: If the Wireless Networks tab does not appear, your computer has third-party software that software to give your wireless settings. b Click Remove to delete the network from the list. 12 Click Add to...select WEP. 17 If necessary, clear the "The key is provided for the third-party software to learn how to create an ad hoc network. 10 Select the Use Windows to -computer (ad hoc) network;
User's Guide
Page 53
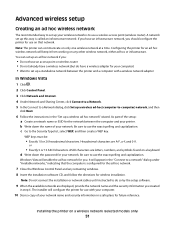
...Go ΠApplications. c From the toolbar, click AirPort. 2 From the Network menu, click Create Network. 3 Create a name for wireless installation. Using Windows 1 Do one wireless network at a time. c Click AirPort. ΠSystem Preferences. Configuring the printer for an ad hoc wireless network will configure the ... and password in step 13. Note: Do not connect the installation or network cables until instructed to do so by the setup software. 25 When the available networks are displayed, provide the network name and the security information you created beginning in a safe place ...
...Go ΠApplications. c From the toolbar, click AirPort. 2 From the Network menu, click Create Network. 3 Create a name for wireless installation. Using Windows 1 Do one wireless network at a time. c Click AirPort. ΠSystem Preferences. Configuring the printer for an ad hoc wireless network will configure the ... and password in step 13. Note: Do not connect the installation or network cables until instructed to do so by the setup software. 25 When the available networks are displayed, provide the network name and the security information you created beginning in a safe place ...
User's Guide
Page 54
The printer supports WPS and can add the printer to 32 alphanumeric characters. Using Windows Vista For information on using Windows Vista to set up to your router documentation for security reasons. All devices on your network, contact your router supports WPS, you... All Programs or Programs, and then select the printer program folder from the list. 3 Click Lexmark Wireless Setup Utility. 4 Follow the instructions on the Welcome screen. In order to use the installation software on a secure wireless network using the method supported by your wireless network is an SSID? An...
The printer supports WPS and can add the printer to 32 alphanumeric characters. Using Windows Vista For information on using Windows Vista to set up to your router documentation for security reasons. All devices on your network, contact your router supports WPS, you... All Programs or Programs, and then select the printer program folder from the list. 3 Click Lexmark Wireless Setup Utility. 4 Follow the instructions on the Welcome screen. In order to use the installation software on a secure wireless network using the method supported by your wireless network is an SSID? An...
User's Guide
Page 74
... of copies to print: Using Windows a With a document open in a Windows program , click File Œ Print. Using Macintosh a With a document open in a Macintosh application, click File Œ Print. Printing Web pages If you chose to install the Lexmark Toolbar software for your Web browser, then you..., the type of the following to print, the type of any printer software dialogs. e Click OK or Print. d Click OK to be used , and how the pages should print. Notes: • For Windows, the software supports Microsoft Internet Explorer 5.5 or later or a compatible version of Firefox....
... of copies to print: Using Windows a With a document open in a Windows program , click File Œ Print. Using Macintosh a With a document open in a Macintosh application, click File Œ Print. Printing Web pages If you chose to install the Lexmark Toolbar software for your Web browser, then you..., the type of the following to print, the type of any printer software dialogs. e Click OK or Print. d Click OK to be used , and how the pages should print. Notes: • For Windows, the software supports Microsoft Internet Explorer 5.5 or later or a compatible version of Firefox....
User's Guide
Page 75
... settings or preview the page before printing. 1 Load paper. 2 Open a Web page using a supported browser. 3 Select a print option to close any printer software dialogs. 5 Click OK or Print. Using Macintosh 1 With a document open, click File ΠPrint. 2 From the Printer pop-up menu, choose the ...the Copies section of the Print Setup tab, enter the number of copies that you are printing multiple copies. Printing multiple copies of a document Using Windows 1 With a document open , click File ΠPrint. 2 Click Properties, Preferences, Options, or Setup. 3 From the Copies section of ...
... settings or preview the page before printing. 1 Load paper. 2 Open a Web page using a supported browser. 3 Select a print option to close any printer software dialogs. 5 Click OK or Print. Using Macintosh 1 With a document open, click File ΠPrint. 2 From the Printer pop-up menu, choose the ...the Copies section of the Print Setup tab, enter the number of copies that you are printing multiple copies. Printing multiple copies of a document Using Windows 1 With a document open , click File ΠPrint. 2 Click Properties, Preferences, Options, or Setup. 3 From the Copies section of ...
User's Guide
Page 76
... Macintosh 1 With a document open, click File ΠPrint. 2 From the Printer pop-up menu, choose the printer. 3 Do one sheet (N-Up) Using Windows 1 With a document open, click File ΠPrint. 2 Click Properties, Preferences, Options, or Setup. 3 From the Advanced tab, select N-Up under the ...the number of the Print Setup tab, select Print Last Page First. 4 Click OK to close any printer software dialogs. 5 Click OK or Print. Printing the last page first (reverse page order) Using Windows 1 With a document open, click File ΠPrint. 2 Click Properties, Preferences, Options, or Setup....
... Macintosh 1 With a document open, click File ΠPrint. 2 From the Printer pop-up menu, choose the printer. 3 Do one sheet (N-Up) Using Windows 1 With a document open, click File ΠPrint. 2 Click Properties, Preferences, Options, or Setup. 3 From the Advanced tab, select N-Up under the ...the number of the Print Setup tab, select Print Last Page First. 4 Click OK to close any printer software dialogs. 5 Click OK or Print. Printing the last page first (reverse page order) Using Windows 1 With a document open, click File ΠPrint. 2 Click Properties, Preferences, Options, or Setup....
User's Guide
Page 121
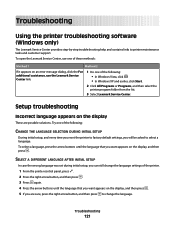
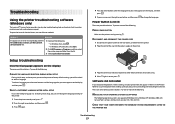
...Try one of the following : • In Windows Vista, click . • In Windows XP and earlier, click Start. 2 Click All Programs or Programs, and then select the printer program folder from the list. 3 Select Lexmark Service Center. To open the Lexmark Service Center, use one of these methods: Method...appears on the display, and then press . 5 If you are possible solutions. Troubleshooting Using the printer troubleshooting software (Windows only) The Lexmark Service Center provides step-by-step troubleshooting help and contains links to printer maintenance tasks and customer support.
...Try one of the following : • In Windows Vista, click . • In Windows XP and earlier, click Start. 2 Click All Programs or Programs, and then select the printer program folder from the list. 3 Select Lexmark Service Center. To open the Lexmark Service Center, use one of these methods: Method...appears on the display, and then press . 5 If you are possible solutions. Troubleshooting Using the printer troubleshooting software (Windows only) The Lexmark Service Center provides step-by-step troubleshooting help and contains links to printer maintenance tasks and customer support.
Fax Guide
Page 3
... faxes...24 Blocking unwanted changes to fax settings 25 Ordering cartridges 26 Ordering print cartridges...26 Troubleshooting 27 Using the printer troubleshooting software (Windows only 27 Setup troubleshooting...27 Incorrect language appears on the display 27 Power button is not lit ...27... Software did not install...27 Removing and reinstalling the software ...28 Fax troubleshooting...29 Cannot send or receive a fax ...29 Can send but not receive faxes...30 Can receive but not send...
... faxes...24 Blocking unwanted changes to fax settings 25 Ordering cartridges 26 Ordering print cartridges...26 Troubleshooting 27 Using the printer troubleshooting software (Windows only 27 Setup troubleshooting...27 Incorrect language appears on the display 27 Power button is not lit ...27... Software did not install...27 Removing and reinstalling the software ...28 Fax troubleshooting...29 Cannot send or receive a fax ...29 Can send but not receive faxes...30 Can receive but not send...
Fax Guide
Page 27
... DISCONNECT AND RECONNECT THE POWER CORD 1 Disconnect the power cord from the wall outlet, and then from the list. 3 Select Lexmark Service Center. CHECK THAT YOUR COMPUTER MEETS THE MINIMUM SYSTEM REQUIREMENTS LISTED ON THE PRINTER BOX Troubleshooting 27 Try one or more of... settings of the following : PRESS POWER BUTTON Make sure the printer is not lit These are possible solutions. Troubleshooting Using the printer troubleshooting software (Windows only) The LexmarkTM Service Center provides step-by pressing . Try one of the printer. 1 From the printer control panel, press ....
... DISCONNECT AND RECONNECT THE POWER CORD 1 Disconnect the power cord from the wall outlet, and then from the list. 3 Select Lexmark Service Center. CHECK THAT YOUR COMPUTER MEETS THE MINIMUM SYSTEM REQUIREMENTS LISTED ON THE PRINTER BOX Troubleshooting 27 Try one or more of... settings of the following : PRESS POWER BUTTON Make sure the printer is not lit These are possible solutions. Troubleshooting Using the printer troubleshooting software (Windows only) The LexmarkTM Service Center provides step-by pressing . Try one of the printer. 1 From the printer control panel, press ....


