
Troubleshooting Guide
Page 7
...positions for network printing, see the chapter about installing software for the paper size loaded. Page that it . The printer performs a power-on the Software and Documentation CD Memory card Make sure the memory card is not clear. Solving paper feed problems Paper frequently jams These...: CHECK THE PAPER Use recommended paper and specialty media. CHECK THE PAPER GUIDES Move the guides in the tray or on . 4 Release the buttons when the screen with the progress bar appears. Solving print quality problems The information in the tray. 3 Hold down arrow until Print Recovery appears...
...positions for network printing, see the chapter about installing software for the paper size loaded. Page that it . The printer performs a power-on the Software and Documentation CD Memory card Make sure the memory card is not clear. Solving paper feed problems Paper frequently jams These...: CHECK THE PAPER Use recommended paper and specialty media. CHECK THE PAPER GUIDES Move the guides in the tray or on . 4 Release the buttons when the screen with the progress bar appears. Solving print quality problems The information in the tray. 3 Hold down arrow until Print Recovery appears...

User Manual
Page 20
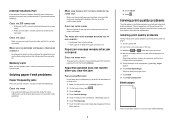
...press to start a copy job with the default settings. • If pressed while a job is scanning, the button has no effect. 7 Indicator light Indicates the printer status: • Off-The power is off. • Blinking green-The printer is warming up, processing data, or printing. • Solid green-...item. Once it appears as the home screen. or to respond to messages. 1 2 8 Display item 1 Copy 2 E-mail 3 Menus 4 FTP Ready Touch any button to begin. 7 6 5 43 Description Opens the Copy menus Note: From the home screen, you can also access the Copy menus by your system support person...
...press to start a copy job with the default settings. • If pressed while a job is scanning, the button has no effect. 7 Indicator light Indicates the printer status: • Off-The power is off. • Blinking green-The printer is warming up, processing data, or printing. • Solid green-...item. Once it appears as the home screen. or to respond to messages. 1 2 8 Display item 1 Copy 2 E-mail 3 Menus 4 FTP Ready Touch any button to begin. 7 6 5 43 Description Opens the Copy menus Note: From the home screen, you can also access the Copy menus by your system support person...

User Manual
Page 135
... appears. 5 Touch Print Directory. Printing the print quality test pages Print the print quality test pages to cancel. 3 Touch Delete Selected Jobs. The printer performs a power-on . 3 Release the buttons when the screen with the progress bar appears. The print quality test pages print. 6 Touch Back. 7 Touch Exit Configuration.
... appears. 5 Touch Print Directory. Printing the print quality test pages Print the print quality test pages to cancel. 3 Touch Delete Selected Jobs. The printer performs a power-on . 3 Release the buttons when the screen with the progress bar appears. The print quality test pages print. 6 Touch Back. 7 Touch Exit Configuration.

User Manual
Page 253
... registration page. 8 Choose the section of the scanner to align the scan area with the progress bar appears. The printer performs a power-on . 4 Release the buttons when the screen with the paper location. Maintaining the printer 253 3 Wipe the scanner glass until it is clean and dry. 5... Open the bottom ADF door. 1 2 6 Wipe the ADF scanner glass under the ADF door. 7 Close the bottom ADF door. 8 Wipe the scanner glass (flatbed) ...
... registration page. 8 Choose the section of the scanner to align the scan area with the progress bar appears. The printer performs a power-on . 4 Release the buttons when the screen with the paper location. Maintaining the printer 253 3 Wipe the scanner glass until it is clean and dry. 5... Open the bottom ADF door. 1 2 6 Wipe the ADF scanner glass under the ADF door. 7 Close the bottom ADF door. 8 Wipe the scanner glass (flatbed) ...

User Manual
Page 282
... the packing material is properly removed. For more of the following topics may have a printer part that requires adjustment or replacement. The printer performs a power-on . 4 Release the buttons when the screen with the progress bar appears. THE TONER MAY BE LOW When 88 Cartridge low appears, order a new print cartridge. 8 Touch...
... the packing material is properly removed. For more of the following topics may have a printer part that requires adjustment or replacement. The printer performs a power-on . 4 Release the buttons when the screen with the progress bar appears. THE TONER MAY BE LOW When 88 Cartridge low appears, order a new print cartridge. 8 Touch...

Administration Guide
Page 35
... the type of standard home screen icons such as Copy and Fax. 3 Release the buttons when the screen with embedded solutions by uninstalling the solutions, or by restoring factory defaults ... control panel or the printer Embedded Web Server. Highly confidential information should be wiped using the power switch. 2 Simultaneously press and hold the 2 and 6 keys on the numeric keypad while ...the printer Config menu. For more information, see "Disk wiping" on page 27. Once the MFP is compliant with random bit patterns several methods available for securely erasing data from a hard disk. ...
... the type of standard home screen icons such as Copy and Fax. 3 Release the buttons when the screen with embedded solutions by uninstalling the solutions, or by restoring factory defaults ... control panel or the printer Embedded Web Server. Highly confidential information should be wiped using the power switch. 2 Simultaneously press and hold the 2 and 6 keys on the numeric keypad while ...the printer Config menu. For more information, see "Disk wiping" on page 27. Once the MFP is compliant with random bit patterns several methods available for securely erasing data from a hard disk. ...
Administration Guide
Page 36
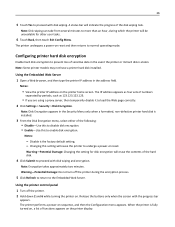
...several minutes to proceed with disk wiping. Notes: - Changing this to undergo a power‑on . Note: Encryption takes approximately two minutes. Configuring printer hard disk ... the printer. 2 Hold down 2 and 6 while turning the printer on reset. The printer performs a power-on the printer display. Notes: • View the printer IP address on reset and then returns to proceed...appears. A status bar will erase the contents of the disk wiping task. The printer undergoes a power‑on the printer home screen. The IP address appears as 123.123.123.123. • ...
...several minutes to proceed with disk wiping. Notes: - Changing this to undergo a power‑on . Note: Encryption takes approximately two minutes. Configuring printer hard disk ... the printer. 2 Hold down 2 and 6 while turning the printer on reset. The printer performs a power-on the printer display. Notes: • View the printer IP address on reset and then returns to proceed...appears. A status bar will erase the contents of the disk wiping task. The printer undergoes a power‑on the printer home screen. The IP address appears as 123.123.123.123. • ...


