X5150 All-In-One Series User's Guide
Page 3
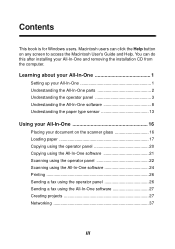
... do this after installing your document on any screen to access the Macintosh User's Guide and Help. Learning about your All-In-One 1 Setting up your All-In-One 1 Understanding the All-In-One parts 2 Understanding the operator panel 3 Understanding the All-In-One software 8 Understanding the... paper type sensor 13 Using your All-In-One 16 Placing your All-In-One and removing the installation CD from the...
... do this after installing your document on any screen to access the Macintosh User's Guide and Help. Learning about your All-In-One 1 Setting up your All-In-One 1 Understanding the All-In-One parts 2 Understanding the operator panel 3 Understanding the All-In-One software 8 Understanding the... paper type sensor 13 Using your All-In-One 16 Placing your All-In-One and removing the installation CD from the...
X5150 All-In-One Series User's Guide
Page 5
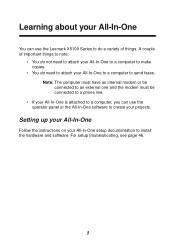
... have an internal modem or be connected to an external one and the modem must be connected to a phone line. • If your All-In-One is attached to a computer, you can use the operator panel or the All-In-One software to install the hardware and software. A couple of important things to note...; You do not need to attach your All-In-One to a computer to make copies. • You do need to attach your All-In-One to a computer to do a variety of things. For setup troubleshooting, see page 46. 1 Learning about your All-In-One You can use the Lexmark X5100 Series to send faxes.
... have an internal modem or be connected to an external one and the modem must be connected to a phone line. • If your All-In-One is attached to a computer, you can use the operator panel or the All-In-One software to install the hardware and software. A couple of important things to note...; You do not need to attach your All-In-One to a computer to make copies. • You do need to attach your All-In-One to a computer to do a variety of things. For setup troubleshooting, see page 46. 1 Learning about your All-In-One You can use the Lexmark X5100 Series to send faxes.

X5150 All-In-One Series User's Guide
Page 43
Store them in an air-tight container or dispose of them. 5 If you are installing new cartridges, remove the foam, stickers, and transparent tape from the bottom of the cartridges. 3 Squeeze the tabs on the cartridges. 39 Warning: Do NOT touch the gold contact area on the cartridge lids, and then lift the lids. 4 Remove the old cartridges.
Store them in an air-tight container or dispose of them. 5 If you are installing new cartridges, remove the foam, stickers, and transparent tape from the bottom of the cartridges. 3 Squeeze the tabs on the cartridges. 39 Warning: Do NOT touch the gold contact area on the cartridge lids, and then lift the lids. 4 Remove the old cartridges.
X5150 All-In-One Series User's Guide
Page 45
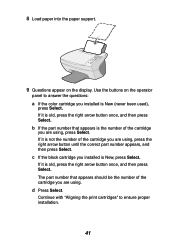
...with "Aligning the print cartridges" to answer the questions: a If the color cartridge you installed is old, press the right arrow button once, and then press Select. c If the black cartridge you installed is old, press the right arrow button once, and then press Select. Use the buttons... on the display. If it is New, press Select. 8 Load paper into the paper support. 9 Questions appear on the operator panel to ensure proper installation. 41
...with "Aligning the print cartridges" to answer the questions: a If the color cartridge you installed is old, press the right arrow button once, and then press Select. c If the black cartridge you installed is old, press the right arrow button once, and then press Select. Use the buttons... on the display. If it is New, press Select. 8 Load paper into the paper support. 9 Questions appear on the operator panel to ensure proper installation. 41
X5150 All-In-One Series User's Guide
Page 46
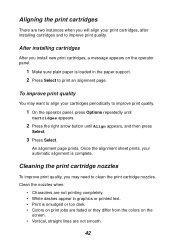
...colors on the operator panel. 1 Make sure plain paper is loaded in graphics or printed text. • Print is complete. After installing cartridges After you may want to align your cartridges periodically to print an alignment page. Cleaning the print cartridge nozzles To improve print quality..., you install new print cartridges, a message appears on the screen. • Vertical, straight lines are not smooth. 42 To improve print quality ...
...colors on the operator panel. 1 Make sure plain paper is loaded in graphics or printed text. • Print is complete. After installing cartridges After you may want to align your cartridges periodically to print an alignment page. Cleaning the print cartridge nozzles To improve print quality..., you install new print cartridges, a message appears on the screen. • Vertical, straight lines are not smooth. 42 To improve print quality ...
X5150 All-In-One Series User's Guide
Page 49
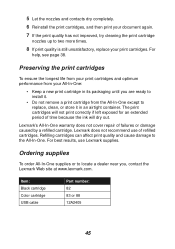
..., or store it in its packaging until you , contact the Lexmark Web site at www.lexmark.com. For best results, use of refilled cartridges. For help, see page 38. Lexmark does not recommend use Lexmark supplies. Lexmark's All-In-One warranty does not cover repair of time because the ink will dry... try cleaning the print cartridge nozzles up to the All-In-One. Ordering supplies To order All-In-One supplies or to locate a dealer near you are ready to install it. • Do not remove a print cartridge from your All-In-One: • Keep a new print cartridge in an airtight container...
..., or store it in its packaging until you , contact the Lexmark Web site at www.lexmark.com. For best results, use of refilled cartridges. For help, see page 38. Lexmark does not recommend use Lexmark supplies. Lexmark's All-In-One warranty does not cover repair of time because the ink will dry... try cleaning the print cartridge nozzles up to the All-In-One. Ordering supplies To order All-In-One supplies or to locate a dealer near you are ready to install it. • Do not remove a print cartridge from your All-In-One: • Keep a new print cartridge in an airtight container...
X5150 All-In-One Series User's Guide
Page 50
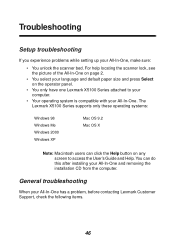
... items. 46 Troubleshooting Setup troubleshooting If you experience problems while setting up your All-In-One and removing the installation CD from the computer. You can click the Help button on the operator panel. • You only have one Lexmark X5100 Series attached to access the User's Guide and Help. General troubleshooting When your...
... items. 46 Troubleshooting Setup troubleshooting If you experience problems while setting up your All-In-One and removing the installation CD from the computer. You can click the Help button on the operator panel. • You only have one Lexmark X5100 Series attached to access the User's Guide and Help. General troubleshooting When your...
X5150 All-In-One Series User's Guide
Page 51
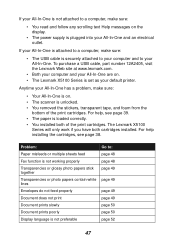
... Document prints poorly Display language is not preferable Go to your All-In-One has a problem, make sure: • The USB cable is loaded correctly. • You installed both cartridges installed. The Lexmark X5100 Series will only work if you have both of the print cartridges.... For help installing the cartridges, see page 39. • The paper is securely attached to your All-In-One and an electrical outlet. For help...
... Document prints poorly Display language is not preferable Go to your All-In-One has a problem, make sure: • The USB cable is loaded correctly. • You installed both cartridges installed. The Lexmark X5100 Series will only work if you have both of the print cartridges.... For help installing the cartridges, see page 39. • The paper is securely attached to your All-In-One and an electrical outlet. For help...
X5150 All-In-One Series User's Guide
Page 52
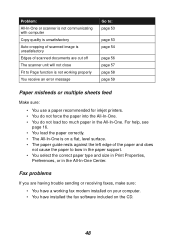
Fax problems If you are having trouble sending or receiving faxes, make sure: • You have a working fax modem installed on your computer. • You have installed the fax software included on a flat, level surface. • The paper guide rests against the left edge of scanned documents are cut off The ... type and size in Print Properties, Preferences, or in the All-In-One. For help, see page 16. • You load the paper correctly. • The All-In-One is on the CD. 48 Problem: All-In-One or scanner is not communicating with computer Copy quality is unsatisfactory Auto-cropping ...
Fax problems If you are having trouble sending or receiving faxes, make sure: • You have a working fax modem installed on your computer. • You have installed the fax software included on a flat, level surface. • The paper guide rests against the left edge of scanned documents are cut off The ... type and size in Print Properties, Preferences, or in the All-In-One. For help, see page 16. • You load the paper correctly. • The All-In-One is on the CD. 48 Problem: All-In-One or scanner is not communicating with computer Copy quality is unsatisfactory Auto-cropping ...

X5150 All-In-One Series User's Guide
Page 53
.... Transparencies or photo papers contain white lines • Clean the nozzles. For help , see page 51. To check All-In-One status: 1 Click Start Settings Printers. 2 Double-click the Lexmark X5100 Series icon, and then click Printer. 3 Make sure no check mark appears next to make sure: • You load the envelopes... dry completely before you start your document is the default fax driver in Print Properties. Note: DSL (digital subscriber line) and cable modems are properly installed. • Use an undamaged USB cable. • Check your All-In...
.... Transparencies or photo papers contain white lines • Clean the nozzles. For help , see page 51. To check All-In-One status: 1 Click Start Settings Printers. 2 Double-click the Lexmark X5100 Series icon, and then click Printer. 3 Make sure no check mark appears next to make sure: • You load the envelopes... dry completely before you start your document is the default fax driver in Print Properties. Note: DSL (digital subscriber line) and cable modems are properly installed. • Use an undamaged USB cable. • Check your All-In...
X5150 All-In-One Series User's Guide
Page 61
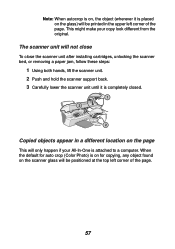
... Note: When autocrop is on, the object (wherever it is attached to a computer. The scanner unit will not close To close the scanner unit after installing cartridges, unlocking the scanner bed, or removing a paper jam, follow these steps: 1 Using both hands, lift the scanner unit. 2 Push and hold the scanner support... if your copy look different from the original. Copied objects appear in the upper left corner of the page. This might make your All-In-One is completely closed.
... Note: When autocrop is on, the object (wherever it is attached to a computer. The scanner unit will not close To close the scanner unit after installing cartridges, unlocking the scanner bed, or removing a paper jam, follow these steps: 1 Using both hands, lift the scanner unit. 2 Push and hold the scanner support... if your copy look different from the original. Copied objects appear in the upper left corner of the page. This might make your All-In-One is completely closed.
X5150 All-In-One Series User's Guide
Page 65
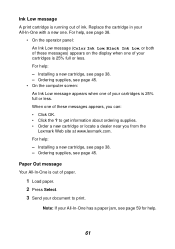
... page 38. - Installing a new cartridge, see page 38. • On the operator panel: An Ink Low message (Color Ink Low, Black Ink Low, or both of these messages) appears on the display when one . For help . 61 When one of these messages appears, you from the Lexmark Web site at www.lexmark.com. For help...
... page 38. - Installing a new cartridge, see page 38. • On the operator panel: An Ink Low message (Color Ink Low, Black Ink Low, or both of these messages) appears on the display when one . For help . 61 When one of these messages appears, you from the Lexmark Web site at www.lexmark.com. For help...

X5150 All-In-One Series User's Guide
Page 66
...the All-In-One back on. For help, see page 45. 62 Cartridge Error messages When you get these messages you to unlock the scanner. 4 Using both hands to lift the scanner unit until the scanner support holds it is completely closed. 7 Press Power to : • Install cartridges, see ...page 38. • Order cartridges, see page 2. 3 Pull the scanner lock toward you might need to turn the All-In-One off. 2 Use both hands, lift the scanner unit. 5 Push and hold the scanner...
...the All-In-One back on. For help, see page 45. 62 Cartridge Error messages When you get these messages you to unlock the scanner. 4 Using both hands to lift the scanner unit until the scanner support holds it is completely closed. 7 Press Power to : • Install cartridges, see ...page 38. • Order cartridges, see page 2. 3 Pull the scanner lock toward you might need to turn the All-In-One off. 2 Use both hands, lift the scanner unit. 5 Push and hold the scanner...
X5150 All-In-One Series User's Guide
Page 67
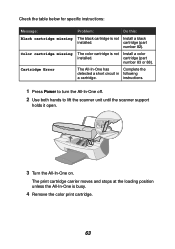
... (part number 82). The print cartridge carrier moves and stops at the loading position unless the All-In-One is not Install a black installed. instructions. 1 Press Power to turn the All-In-One off. 2 Use both hands to lift the scanner unit until the scanner support holds it open. 3 ...Turn the All-In-One on. The All-In-One has Complete the detected a short circuit in following a cartridge. Check the...
... (part number 82). The print cartridge carrier moves and stops at the loading position unless the All-In-One is not Install a black installed. instructions. 1 Press Power to turn the All-In-One off. 2 Use both hands to lift the scanner unit until the scanner support holds it open. 3 ...Turn the All-In-One on. The All-In-One has Complete the detected a short circuit in following a cartridge. Check the...

X5150 All-In-One Series User's Guide
Page 68
... . If the error message does not appear, repeat steps 1-3 and then go to use your document to uninstall, and then reinstall the All-In-One software. 64 5 Lower the scanner unit until it is completely closed . If you may need to print. If the error message appears again, replace...with a new color cartridge. Other error messages 1 Turn the All-In-One off. 2 Wait a few seconds, and then turn the All-In-One back on. 3 Send your All-In-One, you get the error message again, while both cartridges are installed, replace both print cartridges. 8 Lower the scanner unit until it is ...
... . If the error message does not appear, repeat steps 1-3 and then go to use your document to uninstall, and then reinstall the All-In-One software. 64 5 Lower the scanner unit until it is completely closed . If you may need to print. If the error message appears again, replace...with a new color cartridge. Other error messages 1 Turn the All-In-One off. 2 Wait a few seconds, and then turn the All-In-One back on. 3 Send your All-In-One, you get the error message again, while both cartridges are installed, replace both print cartridges. 8 Lower the scanner unit until it is ...

X5150 All-In-One Series User's Guide
Page 69
... All-In-One software. 4 Insert the Lexmark X5100 Series CD. 5 Follow the instructions on the left side of the screen. • Go to http://support.lexmark.com/ for more troubleshooting information: 1 Click Start Programs Lexmark X5100 Series Lexmark X5100 Series Solution Center. 2 Click the Troubleshooting tab on your All-In-One: • Refer to install the software...
... All-In-One software. 4 Insert the Lexmark X5100 Series CD. 5 Follow the instructions on the left side of the screen. • Go to http://support.lexmark.com/ for more troubleshooting information: 1 Click Start Programs Lexmark X5100 Series Lexmark X5100 Series Solution Center. 2 Click the Troubleshooting tab on your All-In-One: • Refer to install the software...
X5150 All-In-One Series User's Guide
Page 70
... use a properly shielded and grounded cable such as Lexmark part number 1329605 for parallel attach or 12A2405 for the indirect connections to the public telecommunications systems in conformity with the instructions, may result in a particular installation. Operation is connected. • Consult your point...requirements of the FCC Rules. The United Kingdom Telecommunications Act 1984 This apparatus is encouraged to try to correct the interference by one or more of the following two conditions: (1) this device may cause undesired operation. This equipment generates, uses and can ...
... use a properly shielded and grounded cable such as Lexmark part number 1329605 for parallel attach or 12A2405 for the indirect connections to the public telecommunications systems in conformity with the instructions, may result in a particular installation. Operation is connected. • Consult your point...requirements of the FCC Rules. The United Kingdom Telecommunications Act 1984 This apparatus is encouraged to try to correct the interference by one or more of the following two conditions: (1) this device may cause undesired operation. This equipment generates, uses and can ...

X5150 All-In-One Series User's Guide
Page 74
Index A aligning print cartridges 42 All-In-One Center 8 All-In-One overview 1 B banner paper 18 loading 27, 28 printing 28 Black Copy 5 black print cartridge part number 38 buttons, operator panel 3 Black Copy 5 Color Copy 5 Copy ... 5 right arrow 5 Select 5 Start Fax 5 Start Scan 5 Stop/Clear 5 C cable, part number USB 45 cards loading 17 Cartridge Error 62 cartridges aligning 42 cleaning 42 installing 38 ordering 45 part numbers 38 removing 39 replacing 38 wiping 44 cleaning print cartridge nozzles using operator panel 43 using the LSC 43 cleaning...
Index A aligning print cartridges 42 All-In-One Center 8 All-In-One overview 1 B banner paper 18 loading 27, 28 printing 28 Black Copy 5 black print cartridge part number 38 buttons, operator panel 3 Black Copy 5 Color Copy 5 Copy ... 5 right arrow 5 Select 5 Start Fax 5 Start Scan 5 Stop/Clear 5 C cable, part number USB 45 cards loading 17 Cartridge Error 62 cartridges aligning 42 cleaning 42 installing 38 ordering 45 part numbers 38 removing 39 replacing 38 wiping 44 cleaning print cartridge nozzles using operator panel 43 using the LSC 43 cleaning...
X5150 All-In-One Series User's Guide
Page 75
...17 Ink Low 61 installing print cartridges 38 iron-on transfers loading 18 L left arrow 5 Lexmark All-In-One Center 8 Lexmark Solution Center tabs Advanced 12 Contact Information 12 How To 12 Maintenance 12 Troubleshooting 12 using 12 Lexmark X5100 Series Photo Editor 10 Lexmark X5100 Series Solution Center ...photo paper loading 17 postcards loading 17 Power 5 Power light 3 preserving print cartridges 45 print cartridges aligning 42 cleaning 42 installing 38 ordering 45 preserving 45 removing 39 replacing 38 wiping 44 print nozzles, wiping 44 Print Properties 9 print quality, troubleshooting 53 ...
...17 Ink Low 61 installing print cartridges 38 iron-on transfers loading 18 L left arrow 5 Lexmark All-In-One Center 8 Lexmark Solution Center tabs Advanced 12 Contact Information 12 How To 12 Maintenance 12 Troubleshooting 12 using 12 Lexmark X5100 Series Photo Editor 10 Lexmark X5100 Series Solution Center ...photo paper loading 17 postcards loading 17 Power 5 Power light 3 preserving print cartridges 45 print cartridges aligning 42 cleaning 42 installing 38 ordering 45 preserving 45 removing 39 replacing 38 wiping 44 print nozzles, wiping 44 Print Properties 9 print quality, troubleshooting 53 ...


