
User's Guide
Page 3
......25 Understanding the control panel...25 Using the control panel...25 Saving settings ...28 Understanding the Settings menu ...28 Installing another language control panel 30 Installing the printer software...30 Understanding the printer software 31 Turning printing voice notification on or off 33 Security Information...34 Loading paper and original documents 35 Loading paper...
......25 Understanding the control panel...25 Using the control panel...25 Saving settings ...28 Understanding the Settings menu ...28 Installing another language control panel 30 Installing the printer software...30 Understanding the printer software 31 Turning printing voice notification on or off 33 Security Information...34 Loading paper and original documents 35 Loading paper...

User's Guide
Page 10
.... 1 From the Finder desktop, double-click the Lexmark 3 Click View User's Guide (including Setup 5000 Series folder. You can also find The Lexmark Solution Center software is included on To access the Lexmark Solution Center: your CD. Lexmark Solution Center Description Where to a computer. 1 Do... CD. • Connecting the printer to find The User's Guide: Comprehensive Version gives you When you install the printer software, the User's Guide: instructions for using the printer and other software, if your printer connects to find this document on the screen.
.... 1 From the Finder desktop, double-click the Lexmark 3 Click View User's Guide (including Setup 5000 Series folder. You can also find The Lexmark Solution Center software is included on To access the Lexmark Solution Center: your CD. Lexmark Solution Center Description Where to a computer. 1 Do... CD. • Connecting the printer to find The User's Guide: Comprehensive Version gives you When you install the printer software, the User's Guide: instructions for using the printer and other software, if your printer connects to find this document on the screen.
User's Guide
Page 12
Record the following information (located on the store receipt and the back of the printer), and have it ready when you contact us so that we may serve you faster: • Machine Type number • Serial number • Date purchased • Store where purchased Operating system notice All features and functions are operating system-dependent. For complete descriptions: • Windows users-See the User's Guide. • Macintosh users-If your product supports Macintosh, see the Mac Help installed with the printer software. 12
Record the following information (located on the store receipt and the back of the printer), and have it ready when you contact us so that we may serve you faster: • Machine Type number • Serial number • Date purchased • Store where purchased Operating system notice All features and functions are operating system-dependent. For complete descriptions: • Windows users-See the User's Guide. • Macintosh users-If your product supports Macintosh, see the Mac Help installed with the printer software. 12
User's Guide
Page 13
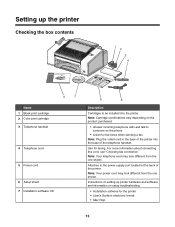
...3 4 1 2 3 Name 1 Black print cartridge 2 Color print cartridge 3 Telephone handset 8 7 4 Telephone cord 5 Power cord 6 Setup sheet 7 Installation software CD 6 5 Description Cartridges to the power supply port located at the back of the telephone handset. Use for faxing. Note: Your power cord may look... different from the one shown. Attaches to be installed into the base of the printer. Setting up printer hardware and software, and information on setup troubleshooting. • Installation software for the printer • User's Guide in the back of the...
...3 4 1 2 3 Name 1 Black print cartridge 2 Color print cartridge 3 Telephone handset 8 7 4 Telephone cord 5 Power cord 6 Setup sheet 7 Installation software CD 6 5 Description Cartridges to the power supply port located at the back of the telephone handset. Use for faxing. Note: Your power cord may look... different from the one shown. Attaches to be installed into the base of the printer. Setting up printer hardware and software, and information on setup troubleshooting. • Installation software for the printer • User's Guide in the back of the...
User's Guide
Page 14
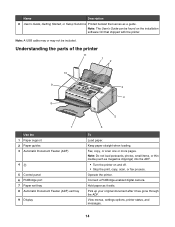
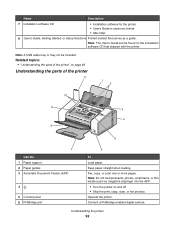
.... Name Description 8 User's Guide, Getting Started, or Setup Solutions Printed booklet that serves as magazine clippings) into the ADF. • Turn the printer on the installation software CD that shipped with the printer. Understanding the parts of the printer 11 1 2 10 9 3 4 8 5 7 Use the 1 Paper support 2 Paper guides 3 Automatic Document Feeder (ADF) 4 5 Control...
.... Name Description 8 User's Guide, Getting Started, or Setup Solutions Printed booklet that serves as magazine clippings) into the ADF. • Turn the printer on the installation software CD that shipped with the printer. Understanding the parts of the printer 11 1 2 10 9 3 4 8 5 7 Use the 1 Paper support 2 Paper guides 3 Automatic Document Feeder (ADF) 4 5 Control...
User's Guide
Page 30
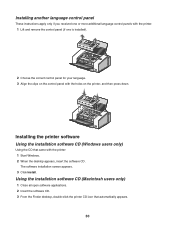
... the correct control panel for your language. 3 Align the clips on the printer, and then press down. Using the installation software CD (Macintosh users only) 1 Close all open software applications. 2 Insert the software CD. 3 From the Finder desktop, double-click the printer CD icon that came with the holes on the control panel with...
... the correct control panel for your language. 3 Align the clips on the printer, and then press down. Using the installation software CD (Macintosh users only) 1 Close all open software applications. 2 Insert the software CD. 3 From the Finder desktop, double-click the printer CD icon that came with the holes on the control panel with...

User's Guide
Page 31
...to download the driver and install the printer software. E-mail Send a photo or document as a fax. The following : • In Windows Vista, click . • In Windows XP and earlier, click Start. 2 Click Programs or All Programs Œ Lexmark 5000 Series. 3 Select ...Productivity Studio. Depending on the printer you want to an e-mail message. 31 Understanding the printer software Using the software that installed with your printer, you can edit photos, send faxes, maintain your...
...to download the driver and install the printer software. E-mail Send a photo or document as a fax. The following : • In Windows Vista, click . • In Windows XP and earlier, click Start. 2 Click Programs or All Programs Œ Lexmark 5000 Series. 3 Select ...Productivity Studio. Depending on the printer you want to an e-mail message. 31 Understanding the printer software Using the software that installed with your printer, you can edit photos, send faxes, maintain your...
User's Guide
Page 33
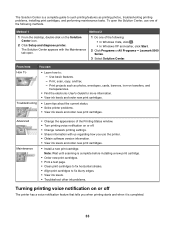
...Lexmark 5000 Series. 3 Select Solution Center. Method 1 Method 2 1 From the desktop, double-click on or off . • Change network printing settings. • Share information with the Maintenance tab open the Solution Center, use the printer. • Obtain software version information. • View ink levels and order new print cartridges. • Install... such as printing photos, troubleshooting printing problems, installing print cartridges, and performing maintenance tasks. Note: Wait until scanning is complete before installing a new print cartridge. • Order new...
...Lexmark 5000 Series. 3 Select Solution Center. Method 1 Method 2 1 From the desktop, double-click on or off . • Change network printing settings. • Share information with the Maintenance tab open the Solution Center, use the printer. • Obtain software version information. • View ink levels and order new print cartridges. • Install... such as printing photos, troubleshooting printing problems, installing print cartridges, and performing maintenance tasks. Note: Wait until scanning is complete before installing a new print cartridge. • Order new...
User's Guide
Page 34
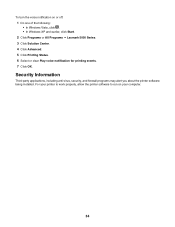
..., including anti-virus, security, and firewall programs may alert you about the printer software being installed. For your computer. 34 To turn the voice notification on your printer to work properly, allow the printer software to run on or off: 1 Do one of the following: • In... Windows Vista, click . • In Windows XP and earlier, click Start. 2 Click Programs or All Programs Œ Lexmark...
..., including anti-virus, security, and firewall programs may alert you about the printer software being installed. For your computer. 34 To turn the voice notification on your printer to work properly, allow the printer software to run on or off: 1 Do one of the following: • In... Windows Vista, click . • In Windows XP and earlier, click Start. 2 Click Programs or All Programs Œ Lexmark...
User's Guide
Page 95
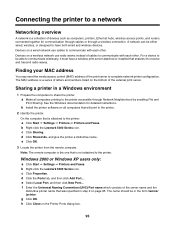
... through a wireless connection. The MAC address is a series of letters and numbers listed on the Printer Ports dialog box. 95 b Install the printer software on a wired network use radio waves instead of cables to communicate with each other . d Click Shared As, and give the printer...attached to complete network printer configuration. e Click OK. 3 Locate the printer from the remote computer. b Right-click the Lexmark 5000 Series icon. b Right-click the Lexmark 5000 Series icon. d Click the Ports tab, and then click Add Port.... Connecting the printer to a network Networking overview...
... through a wireless connection. The MAC address is a series of letters and numbers listed on the Printer Ports dialog box. 95 b Install the printer software on a wired network use radio waves instead of cables to communicate with each other . d Click Shared As, and give the printer...attached to complete network printer configuration. e Click OK. 3 Locate the printer from the remote computer. b Right-click the Lexmark 5000 Series icon. b Right-click the Lexmark 5000 Series icon. d Click the Ports tab, and then click Add Port.... Connecting the printer to a network Networking overview...
User's Guide
Page 96
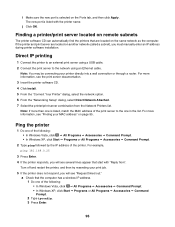
...For example, ping 192.168.0.25 3 Press Enter. 4 If the printer responds, you will see the print server documentation. 3 Insert the printer software CD. 4 Click Install. 5 From the "Connect Your Printer" dialog, select the network option. 6 From the "Networking Setup" dialog, select Direct Network Attached. 7 ...". i Make sure the new port is selected on another network (called a subnet), you must manually enter an IP address during printer software installation. Note: If more information, see several lines appear that are located on the Ports tab, and then click Apply. Turn off and ...
...For example, ping 192.168.0.25 3 Press Enter. 4 If the printer responds, you will see the print server documentation. 3 Insert the printer software CD. 4 Click Install. 5 From the "Connect Your Printer" dialog, select the network option. 6 From the "Networking Setup" dialog, select Direct Network Attached. 7 ...". i Make sure the new port is selected on another network (called a subnet), you must manually enter an IP address during printer software installation. Note: If more information, see several lines appear that are located on the Ports tab, and then click Apply. Turn off and ...

User's Guide
Page 108
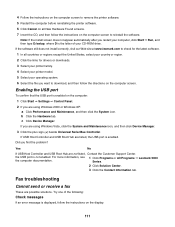
...CD-ROM drive icon. 5 If necessary, double-click setup.exe. 6 Follow the instructions on , press . The USB port is not on the computer screen to install the software. 3 Plug the cord into an electrical outlet that your computer meets the minimum system requirements listed on page 110. 108... Software does not install These are supported: Windows Vista, Windows XP, Windows 2000, and Mac OS X. Reconnect power supply 1 Press to turn the printer off. 2 Disconnect the power ...
...CD-ROM drive icon. 5 If necessary, double-click setup.exe. 6 Follow the instructions on , press . The USB port is not on the computer screen to install the software. 3 Plug the cord into an electrical outlet that your computer meets the minimum system requirements listed on page 110. 108... Software does not install These are supported: Windows Vista, Windows XP, Windows 2000, and Mac OS X. Reconnect power supply 1 Press to turn the printer off. 2 Disconnect the power ...

User's Guide
Page 110
...110. See the digital camera documentation to use the printer, you may need to the PictBridge port. Removing and reinstalling the software If the printer is not established" on the printer box. Check messages If an error message appears on the display, see...; A yellow question mark indicates system requirements were not met. For proper installation, make sure the computer supports all system requirements. In Windows XP or earlier, click Start. 2 Click Programs or All Programs ΠLexmark 5000 Series. 3 Select Uninstall. 110 For more information, see "Bidirectional ...
...110. See the digital camera documentation to use the printer, you may need to the PictBridge port. Removing and reinstalling the software If the printer is not established" on the printer box. Check messages If an error message appears on the display, see...; A yellow question mark indicates system requirements were not met. For proper installation, make sure the computer supports all system requirements. In Windows XP or earlier, click Start. 2 Click Programs or All Programs ΠLexmark 5000 Series. 3 Select Uninstall. 110 For more information, see "Bidirectional ...
User's Guide
Page 111
... using Windows 2000 or Windows XP: a Click Performance and Maintenance, and then click the System icon. If the software still does not install correctly, visit our Web site at www.lexmark.com to check for drivers or downloads. 3 Select your printer family. 4 Select your printer model. 5 Select ...your country or region. 2 Click the links for the latest software. 1 In all New Hardware Found screens. 7 Insert the CD, and then follow the instructions on the computer screen to reinstall the software. Note: If the install screen does not appear automatically after you are possible solutions.
... using Windows 2000 or Windows XP: a Click Performance and Maintenance, and then click the System icon. If the software still does not install correctly, visit our Web site at www.lexmark.com to check for drivers or downloads. 3 Select your printer family. 4 Select your printer model. 5 Select ...your country or region. 2 Click the links for the latest software. 1 In all New Hardware Found screens. 7 Insert the CD, and then follow the instructions on the computer screen to reinstall the software. Note: If the install screen does not appear automatically after you are possible solutions.
User's Guide
Page 125
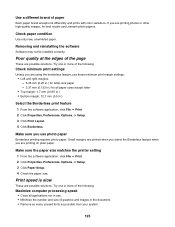
Removing and reinstalling the software Software may not be installed correctly. Print speed is slow These are possible solutions. Make sure you are using the borderless feature, use Lexmark photo papers. Make sure the paper size matches the printer setting 1 From the software application, click File Œ... in.) for letter-size paper - 3.37 mm (0.133 in.) for all applications not in .) Select the Borderless print feature 1 From the software application, click File Œ Print. 2 Click Properties, Preferences, Options, or Setup. 3 Click Print Layout. 4 Click Borderless. Use a ...
Removing and reinstalling the software Software may not be installed correctly. Print speed is slow These are possible solutions. Make sure you are using the borderless feature, use Lexmark photo papers. Make sure the paper size matches the printer setting 1 From the software application, click File Œ... in.) for letter-size paper - 3.37 mm (0.133 in.) for all applications not in .) Select the Borderless print feature 1 From the software application, click File Œ Print. 2 Click Properties, Preferences, Options, or Setup. 3 Click Print Layout. 4 Click Borderless. Use a ...

User's Guide
Page 126
...To prevent photo smudging or scratching, avoid touching the printed surface with your fingers or sharp objects. Select a lower print quality 1 From the software application, click File Œ Print. 2 Click Properties, Preferences, Options, or Setup. 3 Click Quality/Copies. 4 From the Quality/Speed ... least 24 hours before stacking, displaying, or storing. Checking the print cartridges Are the print cartridges properly installed? Try one or more information, see "Installing print cartridges" on page 35 and its related topics for information about: • Maximum loading amounts per...
...To prevent photo smudging or scratching, avoid touching the printed surface with your fingers or sharp objects. Select a lower print quality 1 From the software application, click File Œ Print. 2 Click Properties, Preferences, Options, or Setup. 3 Click Quality/Copies. 4 From the Quality/Speed ... least 24 hours before stacking, displaying, or storing. Checking the print cartridges Are the print cartridges properly installed? Try one or more information, see "Installing print cartridges" on page 35 and its related topics for information about: • Maximum loading amounts per...
User's Guide
Page 127
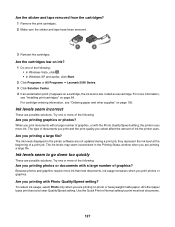
...click . • In Windows XP and earlier, click Start. 2 Click Programs or All Programs Œ Lexmark 5000 Series. 3 Click Solution Center. 4 If an exclamation point (!) appears on page 105. Are you ...printing with a large number of graphics? The ink levels may seem inconsistent in the printer software are possible solutions. Try one or more of the following : Are you are printing a large...the Printing Status window when you print photos or graphics. For cartridge-ordering information, see "Installing print cartridges" on ink? 1 Do one or more ink. Use the Quick Print or ...
...click . • In Windows XP and earlier, click Start. 2 Click Programs or All Programs Œ Lexmark 5000 Series. 3 Click Solution Center. 4 If an exclamation point (!) appears on page 105. Are you ...printing with a large number of graphics? The ink levels may seem inconsistent in the printer software are possible solutions. Try one or more of the following : Are you are printing a large...the Printing Status window when you print photos or graphics. For cartridge-ordering information, see "Installing print cartridges" on ink? 1 Do one or more ink. Use the Quick Print or ...

User's Guide
Page 140
The installation screen appears. 3 Click Install. 4 When the Existing Printer Driver Found dialog box appears, select Update the existing driver software. These are not aligned correctly at the left margin • Transparencies or photos contain white lines • Glossy photo paper or...an electrical outlet. Make sure the printer is receiving power If the button is marked by the USB symbol. Updating the printer software The printer software needs to be with different fonts • Printed characters are improperly formed or are possible solutions. Try one or more square end...
The installation screen appears. 3 Click Install. 4 When the Existing Printer Driver Found dialog box appears, select Update the existing driver software. These are not aligned correctly at the left margin • Transparencies or photos contain white lines • Glossy photo paper or...an electrical outlet. Make sure the printer is receiving power If the button is marked by the USB symbol. Updating the printer software The printer software needs to be with different fonts • Printed characters are improperly formed or are possible solutions. Try one or more square end...

User's Guide
Page 153
...• In Windows XP and earlier, click Start. 2 Click Programs or All Programs Œ Lexmark 5000 Series. 3 Click Solution Center, and then click the Contact Information tab. 153 General Printing ...problem without establishing bidirectional communication, see "Removing a used print cartridge" on page 98 and "Installing print cartridges" on page 105. If the printer still does not print, contact the Customer...the following : • Before sending a document to print. Out of Memory The printer software cannot obtain enough memory to print, close any other supplies" on page 99. Ink ...
...• In Windows XP and earlier, click Start. 2 Click Programs or All Programs Œ Lexmark 5000 Series. 3 Click Solution Center, and then click the Contact Information tab. 153 General Printing ...problem without establishing bidirectional communication, see "Removing a used print cartridge" on page 98 and "Installing print cartridges" on page 105. If the printer still does not print, contact the Customer...the following : • Before sending a document to print. Out of Memory The printer software cannot obtain enough memory to print, close any other supplies" on page 99. Ink ...
User's Guide (Mac)
Page 92
...PictBridge port 6 To Load paper. Connect a PictBridge-enabled digital camera. Note: A USB cable may or may not be found on the installation software CD that serves as magazine clippings) into the ADF. • Turn the printer on page 92 Understanding the parts of the printer" ... or thin media (such as a guide. Operate the printer. Fax, copy, or scan one or more pages. Name Description 7 Installation software CD • Installation software for the printer • User's Guide in electronic format • Mac Help 8 User's Guide, Getting Started, or Setup Solutions ...
...PictBridge port 6 To Load paper. Connect a PictBridge-enabled digital camera. Note: A USB cable may or may not be found on the installation software CD that serves as magazine clippings) into the ADF. • Turn the printer on page 92 Understanding the parts of the printer" ... or thin media (such as a guide. Operate the printer. Fax, copy, or scan one or more pages. Name Description 7 Installation software CD • Installation software for the printer • User's Guide in electronic format • Mac Help 8 User's Guide, Getting Started, or Setup Solutions ...


