
Getting Started
Page 3
... server 17 Configuring the optional internal wireless print server 19 Installing the printer on additional network computers 19 Wireless networking...20 Networking overview...20 Learning about the printer 25 Understanding the parts of the printer 25 Using the control panel buttons and menus 26 Using...the PictBridge menu ...32 Using the Settings menu ...33 Saving settings ...35 Learning about the software 37 Using the printer software...37 Using the Lexmark Imaging Studio...37 Using the Solution Center...38 Using Printing Preferences...40 Opening Printing Preferences ...40 Using the Save ...
... server 17 Configuring the optional internal wireless print server 19 Installing the printer on additional network computers 19 Wireless networking...20 Networking overview...20 Learning about the printer 25 Understanding the parts of the printer 25 Using the control panel buttons and menus 26 Using...the PictBridge menu ...32 Using the Settings menu ...33 Saving settings ...35 Learning about the software 37 Using the printer software...37 Using the Lexmark Imaging Studio...37 Using the Solution Center...38 Using Printing Preferences...40 Opening Printing Preferences ...40 Using the Save ...
Getting Started
Page 4
...page ...50 Wi-Fi indicator is not lit ...51 Network printer does not show up in the printer selection list during installation 51 Check your security keys...52 Wireless Setup Utility cannot communicate with the printer during installation (Windows users only) ...52 Wi-Fi indicator light is ...orange ...53 Wi-Fi indicator light is blinking orange during installation 54 Wireless network printer does not print ...57 Wireless printer is no longer working...58 Photos do...
...page ...50 Wi-Fi indicator is not lit ...51 Network printer does not show up in the printer selection list during installation 51 Check your security keys...52 Wireless Setup Utility cannot communicate with the printer during installation (Windows users only) ...52 Wi-Fi indicator light is ...orange ...53 Wi-Fi indicator light is blinking orange during installation 54 Wireless network printer does not print ...57 Wireless printer is no longer working...58 Photos do...
Getting Started
Page 6
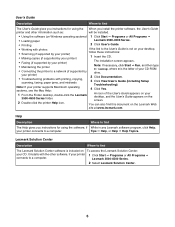
... with photos If the link to the User's Guide is not on the Lexmark Web site at www.lexmark.com. User's Guide Description Where to find The User's Guide gives you install the printer software, the User's Guide printer and other software, if your printer 1 Click Start ΠPrograms or All Programs Πconnects to a computer...
... with photos If the link to the User's Guide is not on the Lexmark Web site at www.lexmark.com. User's Guide Description Where to find The User's Guide gives you install the printer software, the User's Guide printer and other software, if your printer 1 Click Start ΠPrograms or All Programs Πconnects to a computer...
Getting Started
Page 9
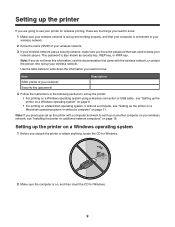
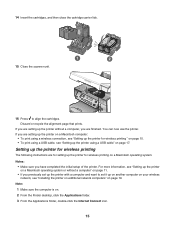
Note: If you do not know this information, see "Installing the printer on additional network computers" on page 19. This password is on... without a computer" on , and then insert the CD for Windows. 9 Setting up the printer on a Windows operating system 1 Before you unpack the printer or attach anything, locate the CD for Windows. 2 Make sure the computer is also known as... security key, WEP key, or WPA key. Setting up the printer If you are going to use your printer for wireless printing, these are the things you need to know. Note: If you previously...
Note: If you do not know this information, see "Installing the printer on additional network computers" on page 19. This password is on... without a computer" on , and then insert the CD for Windows. 9 Setting up the printer on a Windows operating system 1 Before you unpack the printer or attach anything, locate the CD for Windows. 2 Make sure the computer is also known as... security key, WEP key, or WPA key. Setting up the printer If you are going to use your printer for wireless printing, these are the things you need to know. Note: If you previously...
Getting Started
Page 10
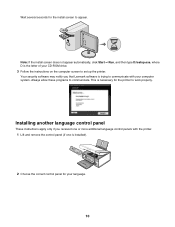
...3 Follow the instructions on the computer screen to communicate. Installing another language control panel These instructions apply only if you that Lexmark software is trying to communicate with the printer. 1 Lift and remove the control panel (if one is the letter of your language. 10 Note: If ...the install screen does not appear automatically, click Start ΠRun, and ...
...3 Follow the instructions on the computer screen to communicate. Installing another language control panel These instructions apply only if you that Lexmark software is trying to communicate with the printer. 1 Lift and remove the control panel (if one is the letter of your language. 10 Note: If ...the install screen does not appear automatically, click Start ΠRun, and ...
Getting Started
Page 15
... on another computer on your wireless network, see "Setting up the printer on a Macintosh operating system or without a computer, you are setting up the printer using a USB cable, see "Setting up the printer without a computer" on page 19. For more information, see "Installing the printer on additional network computers" on page 11. • If you...
... on another computer on your wireless network, see "Setting up the printer on a Macintosh operating system or without a computer, you are setting up the printer using a USB cable, see "Setting up the printer without a computer" on page 19. For more information, see "Installing the printer on additional network computers" on page 11. • If you...
Getting Started
Page 16
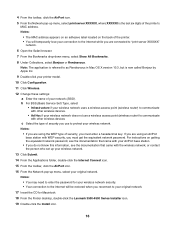
...password. Note: The application is referred to enter the password for Macintosh. 18 From the Finder desktop, double-click the Lexmark 3500-4500 Series Installer icon. 19 Double-click the Install icon. 16 Notes: • You may need to as Rendezvous in Mac OS X version 10.3, but is the ... select print server XXXXXX, where XXXXXX is now called Bonjour by Apple Inc. 9 Double-click your printer model. 10 Click Configuration. 11 Click Wireless. 12 Change these settings: a Enter the name of the printer's MAC address. 4 From the toolbar, click the AirPort icon. 5 From the Network pop-up ...
...password. Note: The application is referred to enter the password for Macintosh. 18 From the Finder desktop, double-click the Lexmark 3500-4500 Series Installer icon. 19 Double-click the Install icon. 16 Notes: • You may need to as Rendezvous in Mac OS X version 10.3, but is the ... select print server XXXXXX, where XXXXXX is now called Bonjour by Apple Inc. 9 Double-click your printer model. 10 Click Configuration. 11 Click Wireless. 12 Change these settings: a Enter the name of the printer's MAC address. 4 From the toolbar, click the AirPort icon. 5 From the Network pop-up ...
Getting Started
Page 17
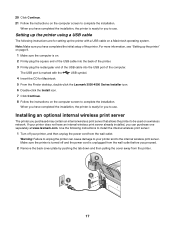
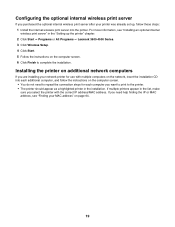
... unplugged from the wall outlet before you purchased may contain an internal wireless print server that allows the printer to use . Installing an optional internal wireless print server The printer you proceed. 2 Remove the back cover plate by pushing the tab down and then pulling the cover ...to the internal wireless print server. 20 Click Continue. 21 Follow the instructions on the computer screen to unplug the printer can purchase one separately at www.lexmark.com. Setting up the printer" on page 9. 1 Make sure the computer is marked with a USB cable on . 2 Firmly plug the ...
... unplugged from the wall outlet before you purchased may contain an internal wireless print server that allows the printer to use . Installing an optional internal wireless print server The printer you proceed. 2 Remove the back cover plate by pushing the tab down and then pulling the cover ...to the internal wireless print server. 20 Click Continue. 21 Follow the instructions on the computer screen to unplug the printer can purchase one separately at www.lexmark.com. Setting up the printer" on page 9. 1 Make sure the computer is marked with a USB cable on . 2 Firmly plug the ...

Getting Started
Page 18
...the internal wireless print server to work on your wireless network. • If you purchased the optional internal wireless print server and printer at the same time, see "Setting up . 6 Attach the adhesive label with the MAC address to the back of the... the internal wireless print server. Touch something metal such as the printer frame before you purchased the optional internal wireless print server separately and have already installed the printer: a Click Start Œ Programs or All Programs Œ Lexmark 3500-4500 Series. b Click Wireless Setup. Warning: Wireless print servers...
...the internal wireless print server to work on your wireless network. • If you purchased the optional internal wireless print server and printer at the same time, see "Setting up . 6 Attach the adhesive label with the MAC address to the back of the... the internal wireless print server. Touch something metal such as the printer frame before you purchased the optional internal wireless print server separately and have already installed the printer: a Click Start Œ Programs or All Programs Œ Lexmark 3500-4500 Series. b Click Wireless Setup. Warning: Wireless print servers...
Getting Started
Page 19
... do not need help finding the IP or MAC address, see "Installing an optional internal wireless print server" in the installation. For more information, see "Finding your printer was already set up the printer" chapter. 2 Click Start ΠPrograms or All Programs ΠLexmark 3500-4500 Series. 3 Click Wireless Setup. 4 Click Start. 5 Follow the instructions...
... do not need help finding the IP or MAC address, see "Installing an optional internal wireless print server" in the installation. For more information, see "Finding your printer was already set up the printer" chapter. 2 Click Start ΠPrograms or All Programs ΠLexmark 3500-4500 Series. 3 Click Wireless Setup. 4 Click Start. 5 Follow the instructions...
Getting Started
Page 20
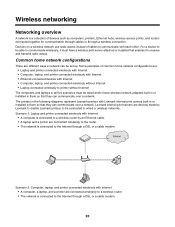
... home network configurations There are connected wirelessly to the router. • The network is connected to communicate with Lexmark internal print servers built in or installed in the following diagrams represent Lexmark printers with each other. The printers in them so that they can communicate over a network. Wireless networking Networking overview A network is a collection of...
... home network configurations There are connected wirelessly to the router. • The network is connected to communicate with Lexmark internal print servers built in or installed in the following diagrams represent Lexmark printers with each other. The printers in them so that they can communicate over a network. Wireless networking Networking overview A network is a collection of...
Getting Started
Page 22
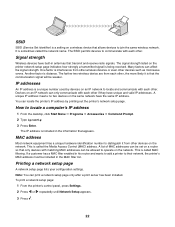
...Printing a network setup page A network setup page lists your configuration settings. Signal strength Wireless devices have the same IP address. One factor is interference from other wireless devices or even other devices on the network. IP addresses An IP address is a unique...strongly a transmitted signal is distance. Many factors can print a network setup page only after a print server has been installed. To print a network setup page: 1 From the printer's control panel, press Settings. 2 Press or repeatedly until Network Setup appears. 3 Press . 22 How to communicate ...
...Printing a network setup page A network setup page lists your configuration settings. Signal strength Wireless devices have the same IP address. One factor is interference from other wireless devices or even other devices on the network. IP addresses An IP address is a unique...strongly a transmitted signal is distance. Many factors can print a network setup page only after a print server has been installed. To print a network setup page: 1 From the printer's control panel, press Settings. 2 Press or repeatedly until Network Setup appears. 3 Press . 22 How to communicate ...
Getting Started
Page 23
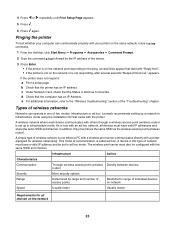
... to the ping, several seconds "Request timed out." If the printer does not respond: a Print a setup page. e For additional information, refer to ad hoc mode. Lexmark recommends setting up in infrastructure mode using the installation CD that the Status is not responding, after several lines appear... network or is listed as the wireless access point (wireless router). A device in one where a PC with a wireless print server communicates directly with the same SSID and channel. d Check that the printer has an IP address. A simple type of network must have a valid IP address...
... to the ping, several seconds "Request timed out." If the printer does not respond: a Print a setup page. e For additional information, refer to ad hoc mode. Lexmark recommends setting up in infrastructure mode using the installation CD that the Status is not responding, after several lines appear... network or is listed as the wireless access point (wireless router). A device in one where a PC with a wireless print server communicates directly with the same SSID and channel. d Check that the printer has an IP address. A simple type of network must have a valid IP address...
Getting Started
Page 25
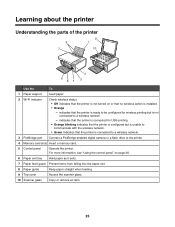
...scanner glass. 10 Scanner glass Copy or remove an item. 25 indicates that the printer is ready to be configured for USB printing • Orange blinking indicates that the printer is configured but is installed. • Orange - For more information, see "Using the control panel" on... or that the printer is connected to a wireless network. 3 PictBridge port Connect a PictBridge-enabled digital...
...scanner glass. 10 Scanner glass Copy or remove an item. 25 indicates that the printer is ready to be configured for USB printing • Orange blinking indicates that the printer is configured but is installed. • Orange - For more information, see "Using the control panel" on... or that the printer is connected to a wireless network. 3 PictBridge port Connect a PictBridge-enabled digital...
Getting Started
Page 26
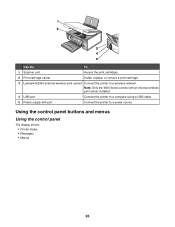
Using the control panel buttons and menus Using the control panel The display shows: • Printer status • Messages • Menus 26 Use the To 1 Scanner unit Access the print cartridges. 2 Print cartridge carrier Install, replace, or remove a print cartridge. 3 Lexmark N2050 (internal wireless print server) Connect the printer to a power source. Note: Only the 4500 Series comes with an internal wireless print server installed. 4 USB port Connect the printer to a computer using a USB cable. 5 Power supply with port Connect the printer to a wireless network.
Using the control panel buttons and menus Using the control panel The display shows: • Printer status • Messages • Menus 26 Use the To 1 Scanner unit Access the print cartridges. 2 Print cartridge carrier Install, replace, or remove a print cartridge. 3 Lexmark N2050 (internal wireless print server) Connect the printer to a power source. Note: Only the 4500 Series comes with an internal wireless print server installed. 4 USB port Connect the printer to a computer using a USB cable. 5 Power supply with port Connect the printer to a wireless network.
Getting Started
Page 39
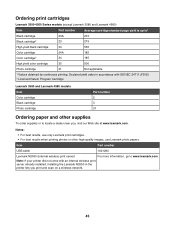
... print cartridges. 39 Method 2 1 Click Start Œ Programs or All Programs Œ Lexmark 3500-4500 Series. 2 Select Solution Center. Print, scan, copy, and fax. - Use basic features. - For example, while printing, the status of the printer is complete before installing a new print cartridge. • View shopping options for more information. • View ink...; View ink levels and order new print cartridges. • Learn how to : - The Solution Center appears with the Maintenance tab open the Solution Center, use one of the printer. To open .
... print cartridges. 39 Method 2 1 Click Start Œ Programs or All Programs Œ Lexmark 3500-4500 Series. 2 Select Solution Center. Print, scan, copy, and fax. - Use basic features. - For example, while printing, the status of the printer is complete before installing a new print cartridge. • View shopping options for more information. • View ink...; View ink levels and order new print cartridges. • Learn how to : - The Solution Center appears with the Maintenance tab open the Solution Center, use one of the printer. To open .
Getting Started
Page 43
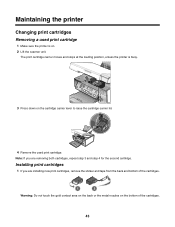
... the cartridge carrier lever to raise the cartridge carrier lid. 4 Remove the used print cartridge 1 Make sure the printer is busy. 3 Press down on . 2 Lift the scanner unit. Installing print cartridges 1 If you are installing new print cartridges, remove the sticker and tape from the back and bottom of the cartridges. 1 2 Warning: Do...
... the cartridge carrier lever to raise the cartridge carrier lid. 4 Remove the used print cartridge 1 Make sure the printer is busy. 3 Press down on . 2 Lift the scanner unit. Installing print cartridges 1 If you are installing new print cartridges, remove the sticker and tape from the back and bottom of the cartridges. 1 2 Warning: Do...
Getting Started
Page 45
... network. 45 Declared yield value in accordance with an internal wireless print server already installed, installing the Lexmark N2050 in the printer lets you , visit our Web site at www.lexmark.com. Notes: • For best results, use Lexmark photo papers. Note: If your printer did not come with ISO/IEC 24711 (FDIS). 2 Licensed Return Program Cartridge...
... network. 45 Declared yield value in accordance with an internal wireless print server already installed, installing the Lexmark N2050 in the printer lets you , visit our Web site at www.lexmark.com. Notes: • For best results, use Lexmark photo papers. Note: If your printer did not come with ISO/IEC 24711 (FDIS). 2 Licensed Return Program Cartridge...
Getting Started
Page 47
Troubleshooting For more of the following : Press power button Make sure the printer is on the display These are possible solutions. Try one of the following : Change the language selection during initial setup After you want appears on the display, see the Mac Help. Select a different language...on page 47 • "Power button is not lit These are possible solutions. Power button is not lit" on page 47 • "Software does not install" on page 48 • "Page does not print" on page 49 • "Cannot print from digital camera using PictBridge" on page 50 Incorrect language...
Troubleshooting For more of the following : Press power button Make sure the printer is on the display These are possible solutions. Try one of the following : Change the language selection during initial setup After you want appears on the display, see the Mac Help. Select a different language...on page 47 • "Power button is not lit These are possible solutions. Power button is not lit" on page 47 • "Software does not install" on page 48 • "Page does not print" on page 49 • "Cannot print from digital camera using PictBridge" on page 50 Incorrect language...
Getting Started
Page 48
The USB port is not on, press . Try one or more of the following operating systems are possible solutions. Reconnect the power supply 1 Press to turn the printer on. 48 Software does not install These are supported: • Windows 2000 with the USB symbol. Check your operating system The ...later • Windows XP • Windows Vista • Mac OS X Check your system requirements Check that other electrical devices have been using the printer on a wireless network: 1 Check the USB cable for any obvious damage. 2 Firmly plug the square end of the USB cable into the back...
The USB port is not on, press . Try one or more of the following operating systems are possible solutions. Reconnect the power supply 1 Press to turn the printer on. 48 Software does not install These are supported: • Windows 2000 with the USB symbol. Check your operating system The ...later • Windows XP • Windows Vista • Mac OS X Check your system requirements Check that other electrical devices have been using the printer on a wireless network: 1 Check the USB cable for any obvious damage. 2 Firmly plug the square end of the USB cable into the back...


