User's Guide
Page 4
... Accessing the printer driver Help 41 Canceling a print job 41 Using the operator panel 41 Using the printer driver 41 Chapter 5: Copying 42 Using the scanning bed 42 Using the ADF 44 Customizing settings 45 Darkness 45 Content 45 Number 46 Scale ...46 Advanced 47 Customizing default settings 48 Setting the...
... Accessing the printer driver Help 41 Canceling a print job 41 Using the operator panel 41 Using the printer driver 41 Chapter 5: Copying 42 Using the scanning bed 42 Using the ADF 44 Customizing settings 45 Darkness 45 Content 45 Number 46 Scale ...46 Advanced 47 Customizing default settings 48 Setting the...
User's Guide
Page 5
... 51 Using the ADF 52 Sending a fax manually 52 Using the scanning bed 52 Using the ADF 53 Receiving a fax automatically 53 Receiving a fax manually 53 Customizing settings 54 Using special features 56 Phonebook 56 Broadcast 58 ... 8: Reports 61 Chapter 9: Maintenance 62 Cleaning the machine 62 Cleaning the outside of the machine 62 Cleaning the inside of the machine 63 Cleaning the scan unit 64 Maintaining the toner cartridge 64 Redistributing toner 65 Ordering toner cartridges 65 Replacing the toner cartridge 66 Cleaning the photoconductor drum 68 Chapter...
... 51 Using the ADF 52 Sending a fax manually 52 Using the scanning bed 52 Using the ADF 53 Receiving a fax automatically 53 Receiving a fax manually 53 Customizing settings 54 Using special features 56 Phonebook 56 Broadcast 58 ... 8: Reports 61 Chapter 9: Maintenance 62 Cleaning the machine 62 Cleaning the outside of the machine 62 Cleaning the inside of the machine 63 Cleaning the scan unit 64 Maintaining the toner cartridge 64 Redistributing toner 65 Ordering toner cartridges 65 Replacing the toner cartridge 66 Cleaning the photoconductor drum 68 Chapter...

User's Guide
Page 6
Manual bypass area (BYPASS JAM 78 Clearing display messages 79 Solving problems 79 Paper feeding problems 80 Printing and copying problems 81 Scanning problems 84 Faxing problems 84 Print quality problems 86 Calling for service 89 Notices 90 Safety information 90 Conventions 90 Laser notices 91 Electronic emission notices 91 Telecommunications notices 94 Contents 6
Manual bypass area (BYPASS JAM 78 Clearing display messages 79 Solving problems 79 Paper feeding problems 80 Printing and copying problems 81 Scanning problems 84 Faxing problems 84 Print quality problems 86 Calling for service 89 Notices 90 Safety information 90 Conventions 90 Laser notices 91 Electronic emission notices 91 Telecommunications notices 94 Contents 6

User's Guide
Page 7
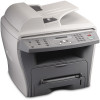
You can use it . Allow adequate space for ventilation. space to copy, fax, print, and scan. space for air circulation and opening covers and trays. Do not set the machine close to set it to remove the paper tray. Right 100 ..., stable surface on which to the edge of heat, cold, and humidity. Clearance space Front 482.6 mm (19 in.) - space for ventilation. Getting started The Lexmark X215™ MFP is a multifunction printer.
You can use it . Allow adequate space for ventilation. space to copy, fax, print, and scan. space for air circulation and opening covers and trays. Do not set the machine close to set it to remove the paper tray. Right 100 ..., stable surface on which to the edge of heat, cold, and humidity. Clearance space Front 482.6 mm (19 in.) - space for ventilation. Getting started The Lexmark X215™ MFP is a multifunction printer.

User's Guide
Page 8
Understanding the parts Front view Document guide Automatic document feeder (ADF) Document input tray Operator panel Front output tray Front cover Paper tray Manual bypass Rear view ADF release knob Scanning bed Document output tray Document cover Paper output extension Telephone line connector Rear cover Power switch AC power cord connector USB connector Parallel connector Understanding the parts 8
Understanding the parts Front view Document guide Automatic document feeder (ADF) Document input tray Operator panel Front output tray Front cover Paper tray Manual bypass Rear view ADF release knob Scanning bed Document output tray Document cover Paper output extension Telephone line connector Rear cover Power switch AC power cord connector USB connector Parallel connector Understanding the parts 8

User's Guide
Page 19
The CD contains the following: • Drivers for printing, scanning (TWAIN), and USB support • User's Guide • Adobe Acrobat Reader Installing the drivers 1 Close all unnecessary programs. 2 Launch the Drivers and Documentation CD. 3 ...the language that you receive the message that the radio button labeled Yes, I want to use in the installation window. c Click Continue Anyway if any Lexmark X215 new hardware screens appear, click Next or Continue until finished. g If any messages about certification appear. Your product has been thoroughly tested and is selected...
The CD contains the following: • Drivers for printing, scanning (TWAIN), and USB support • User's Guide • Adobe Acrobat Reader Installing the drivers 1 Close all unnecessary programs. 2 Launch the Drivers and Documentation CD. 3 ...the language that you receive the message that the radio button labeled Yes, I want to use in the installation window. c Click Continue Anyway if any Lexmark X215 new hardware screens appear, click Next or Continue until finished. g If any messages about certification appear. Your product has been thoroughly tested and is selected...

User's Guide
Page 20
... to remove. • To remove the scan driver, select TWAIN Driver Uninstall. • To remove the printer driver, select Printer Driver Uninstall. Note: Before removing, close all of its components, are upgrading the software or if your computer after removing the drivers. 1 Click Start Programs Lexmark X215. 2 You can remove the software using...
... to remove. • To remove the scan driver, select TWAIN Driver Uninstall. • To remove the printer driver, select Printer Driver Uninstall. Note: Before removing, close all of its components, are upgrading the software or if your computer after removing the drivers. 1 Click Start Programs Lexmark X215. 2 You can remove the software using...

User's Guide
Page 42
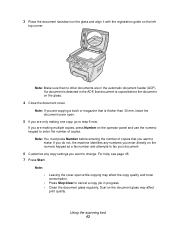
Copying 42 If you are copying a page from a book or magazine, lift the cover until its hinges are caught by the stopper. 5 Copying Using the scanning bed 1 Make sure paper is in the tray. Note: If you need to load paper, see "Loading the paper tray" on page 24. 2 Open the document cover.
Copying 42 If you are copying a page from a book or magazine, lift the cover until its hinges are caught by the stopper. 5 Copying Using the scanning bed 1 Make sure paper is in the tray. Note: If you need to load paper, see "Loading the paper tray" on page 24. 2 Open the document cover.
User's Guide
Page 43
...). For help, see page 45. 7 Press Start. If a document is detected in the ADF, that is copied before entering the number of copies. Using the scanning bed 43 ABC Note: Make sure that you are in progress. • Clean the document glass regularly. Note: • Leaving the cover open . 5 If you...
...). For help, see page 45. 7 Press Start. If a document is detected in the ADF, that is copied before entering the number of copies. Using the scanning bed 43 ABC Note: Make sure that you are in progress. • Clean the document glass regularly. Note: • Leaving the cover open . 5 If you...

User's Guide
Page 44
If you use the scanning bed. Carbon-paper or carbon-backed paper - Coated paper - For help , see page 42. 1 Load the document (up to 30 documents (20 lb, 75 g/m2) ...
If you use the scanning bed. Carbon-paper or carbon-backed paper - Coated paper - For help , see page 42. 1 Load the document (up to 30 documents (20 lb, 75 g/m2) ...

User's Guide
Page 46
... setting appears on the bottom line of the display, and then press Select. 3 Enter the size you can reduce or enlarge the size of the scanning bed, or change the darkness setting. Number To select the number of copies from the edges of a copied image from 25% to a pre-defined copy...
... setting appears on the bottom line of the display, and then press Select. 3 Enter the size you can reduce or enlarge the size of the scanning bed, or change the darkness setting. Number To select the number of copies from the edges of a copied image from 25% to a pre-defined copy...

User's Guide
Page 49
... 1 Place your original document on the scanning bed facedown, with the top left corner of the page aligned with the arrow on the corner of the document glass. 2 Press Start. 3 Place the ... loading documents into the ADF. If you do not, the reverse side of the document copy could print upside down. 2 Reload your document on the scanning bed, with the top left corner of the page aligned with the arrow on the corner of the document glass. 4 Load the previously copied output...
... 1 Place your original document on the scanning bed facedown, with the top left corner of the page aligned with the arrow on the corner of the document glass. 2 Press Start. 3 Place the ... loading documents into the ADF. If you do not, the reverse side of the document copy could print upside down. 2 Reload your document on the scanning bed, with the top left corner of the page aligned with the arrow on the corner of the document glass. 4 Load the previously copied output...

User's Guide
Page 50
6 Scanning Scanning a document or image Scanning with this machine requires the use of TWAIN-compliant software, such as PaperPort or Photoshop. 3 Refer to use the scanning function, select your machine as your TWAIN source in the program you want to the user documentation for your program for instructions on the document glass or in the ADF. 2 Open a program, such as Scansoft PaperPort or Adobe Photoshop. To scan a document or image: 1 Place the document or image on acquiring an image and other information. Scanning 50 The first time you use .
6 Scanning Scanning a document or image Scanning with this machine requires the use of TWAIN-compliant software, such as PaperPort or Photoshop. 3 Refer to use the scanning function, select your machine as your TWAIN source in the program you want to the user documentation for your program for instructions on the document glass or in the ADF. 2 Open a program, such as Scansoft PaperPort or Adobe Photoshop. To scan a document or image: 1 Place the document or image on acquiring an image and other information. Scanning 50 The first time you use .
User's Guide
Page 51
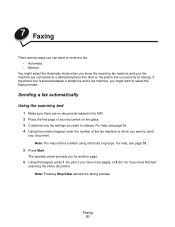
.... 2 Place the first page of your document on the glass. 3 Customize any fax settings you have finished scanning the entire document. Note: You may enter a number using shortcuts or groups. Sending a fax automatically Using the scanning bed 1 Make sure there are connected to select the Manual mode. For help , see page 54...
.... 2 Place the first page of your document on the glass. 3 Customize any fax settings you have finished scanning the entire document. Note: You may enter a number using shortcuts or groups. Sending a fax automatically Using the scanning bed 1 Make sure there are connected to select the Manual mode. For help , see page 54...

User's Guide
Page 52
... you want to send your document. The operator panel prompts you for another page. 7 Using the keypad, press 1 (for yes) if you have finished scanning the entire document. Note: You may be times when the fax recipient mistakenly answers the telephone rather than connecting the fax machine. If this happens..., inform the recipient you are no ) if you should hear a high-pitched fax signal. Using the scanning bed 1 Make sure there are attempting to send a fax, ask them to hang up the telephone, and then resend the fax. When you connect ...
... you want to send your document. The operator panel prompts you for another page. 7 Using the keypad, press 1 (for yes) if you have finished scanning the entire document. Note: You may be times when the fax recipient mistakenly answers the telephone rather than connecting the fax machine. If this happens..., inform the recipient you are no ) if you should hear a high-pitched fax signal. Using the scanning bed 1 Make sure there are attempting to send a fax, ask them to hang up the telephone, and then resend the fax. When you connect ...
User's Guide
Page 58
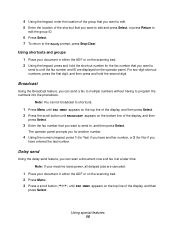
Broadcast Using the Broadcast feature, you can scan a document now and fax it at a later time. The operator panel prompts you for another number. 4 Using the numeric keypad, press 1 (for Yes) if you ... then press Select. Using shortcuts and groups 1 Place your document in either the ADF or on the scanning bed. 2 Press Menu. 3 Press a scroll button ( or ) until the fax number and ID are displayed on the scanning bed. 2 Using the keypad, press and hold the second digit. Delay send Using the delay send...
Broadcast Using the Broadcast feature, you can scan a document now and fax it at a later time. The operator panel prompts you for another number. 4 Using the numeric keypad, press 1 (for Yes) if you ... then press Select. Using shortcuts and groups 1 Place your document in either the ADF or on the scanning bed. 2 Press Menu. 3 Press a scroll button ( or ) until the fax number and ID are displayed on the scanning bed. 2 Using the keypad, press and hold the second digit. Delay send Using the delay send...
User's Guide
Page 59
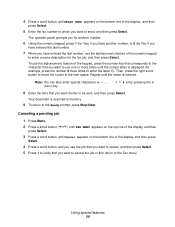
... the time that you want to cancel the job or 2 to return to the Fax menu. Using special features 59 Repeat until the name is scanned to memory. 9 To return to the next space. Canceling a pending job 1 Press Menu. 2 Press a scroll button ( or ) until FAX MENU appears on the top line...
... the time that you want to cancel the job or 2 to return to the Fax menu. Using special features 59 Repeat until the name is scanned to memory. 9 To return to the next space. Canceling a pending job 1 Press Menu. 2 Press a scroll button ( or ) until FAX MENU appears on the top line...

User's Guide
Page 64
For help, see pages 65 and 68. Cleaning the scan unit Keeping the scan unit clean helps ensure the best possible copies. To clean the scan unit: 1 Slightly dampen a soft, lint-free cloth or paper towel with water. 2 Open the document cover. 3 Wipe the surfaces of the document glass and ADF ...until it is clean and dry. 5 Close the document cover. You should clean the scan unit as needed. Maintaining the toner cartridge 64 If you are clean and dry. 4 Wipe the underside of the white document cover and white sheet...
For help, see pages 65 and 68. Cleaning the scan unit Keeping the scan unit clean helps ensure the best possible copies. To clean the scan unit: 1 Slightly dampen a soft, lint-free cloth or paper towel with water. 2 Open the document cover. 3 Wipe the surfaces of the document glass and ADF ...until it is clean and dry. 5 Close the document cover. You should clean the scan unit as needed. Maintaining the toner cartridge 64 If you are clean and dry. 4 Wipe the underside of the white document cover and white sheet...

User's Guide
Page 79
.... See page 24. Paper jam in the paper tray. Toner is powered on. Unplug the power cord and plug it back in the LSU (laser scanning unit). A problem in . This temporarily reestablishes printing. If the problem persists after all suggested solutions. If the problem persists, call for memory. Load paper. Paper...
.... See page 24. Paper jam in the paper tray. Toner is powered on. Unplug the power cord and plug it back in the LSU (laser scanning unit). A problem in . This temporarily reestablishes printing. If the problem persists after all suggested solutions. If the problem persists, call for memory. Load paper. Paper...

User's Guide
Page 81
... page orientation in your default printer in Windows. See be set incorrectly. 1 Click Start Settings Printers. 2 Right-click the Lexmark X215 printer icon. 3 Click Properties. 4 From the Details tab, click Spool Settings. 5 Select the spool setting you want. ...scanning is working properly and print a job. • Try a new printer cable. See page 21. See page 11. Disconnect the printer cable, and then reconnect it. If using the printer. Clear the paper jam. Configuration incorrect. Paper jam. Print job is not connected properly. Select Lexmark X215...
... page orientation in your default printer in Windows. See be set incorrectly. 1 Click Start Settings Printers. 2 Right-click the Lexmark X215 printer icon. 3 Click Properties. 4 From the Details tab, click Spool Settings. 5 Select the spool setting you want. ...scanning is working properly and print a job. • Try a new printer cable. See page 21. See page 11. Disconnect the printer cable, and then reconnect it. If using the printer. Clear the paper jam. Configuration incorrect. Paper jam. Print job is not connected properly. Select Lexmark X215...


