
Card Stock & Label Guide
Page 10
...reduced print quality, and predispensing (peeling) labels. For areas with die-cuts or perforations that curl not exceed 3 mm (0.125 in the printer. Lexmark printers are recommended. If perforations tent, or crease at perforations and die-cuts during the conversion process are not recommended. Prior to use micro-perfs...15.5-32°C (60 to determine if the ink is present. The location of 8 to operate in a jam. Back splits and pop-out windows are ready to load it moves through the printer, the perforations should stop 1.6 mm (0.06 in.) from each edge of the form to avoid...
...reduced print quality, and predispensing (peeling) labels. For areas with die-cuts or perforations that curl not exceed 3 mm (0.125 in the printer. Lexmark printers are recommended. If perforations tent, or crease at perforations and die-cuts during the conversion process are not recommended. Prior to use micro-perfs...15.5-32°C (60 to determine if the ink is present. The location of 8 to operate in a jam. Back splits and pop-out windows are ready to load it moves through the printer, the perforations should stop 1.6 mm (0.06 in.) from each edge of the form to avoid...

Network Scan Drivers
Page 3
... using a network printer...6 Removing the network scan driver...6 Scanning...7 Scanning using applications...7 Scanning using XSane...7 Scanning using OpenOffice.org...7 Scanning using GIMP ...8 Scanning using a terminal window ...8 Scanning multiple pages...8 Scanning both sides of a page...10 Canceling a scan...11 Adjusting scan settings...12 Adjusting scan settings using XSane or OpenOffice.org 12...
... using a network printer...6 Removing the network scan driver...6 Scanning...7 Scanning using applications...7 Scanning using XSane...7 Scanning using OpenOffice.org...7 Scanning using GIMP ...8 Scanning using a terminal window ...8 Scanning multiple pages...8 Scanning both sides of a page...10 Canceling a scan...11 Adjusting scan settings...12 Adjusting scan settings using XSane or OpenOffice.org 12...

Network Scan Drivers
Page 6
...system: In Fedora, Linpus Linux, SUSE Linux, Linux openSUSE, Red Hat Enterprise Linux, or Red Flag Linux Open a terminal window, and then type rpm -e lexmark-network-scan. Once the device is found, a message indicating that your computer. For more information, see the printer User's...Scanning using a network printer 1 To use the network scan driver, open a terminal window, and then type scanimage -L. In Debian GNU/Linux or Linspire Linux Open a terminal window, and then type dpkg -r lexmark-network-scan. Installing on the scanner glass. 4 From the printer control panel, select...
...system: In Fedora, Linpus Linux, SUSE Linux, Linux openSUSE, Red Hat Enterprise Linux, or Red Flag Linux Open a terminal window, and then type rpm -e lexmark-network-scan. Once the device is found, a message indicating that your computer. For more information, see the printer User's...Scanning using a network printer 1 To use the network scan driver, open a terminal window, and then type scanimage -L. In Debian GNU/Linux or Linspire Linux Open a terminal window, and then type dpkg -r lexmark-network-scan. Installing on the scanner glass. 4 From the printer control panel, select...

Network Scan Drivers
Page 7
... the printer User's Guide. Press Enter. 2 From the "device detection" dialog, navigate to: Available devices > select your printer > OK 3 From the "Network:scanner" dialog, click Window > Show standard options. 4 If necessary, adjust other options, and then click OK. 4 From the application toolbar, do either of the following: • Click Insert > Picture... your scan job. Scanning For more information on the scanner glass. 7 From the printer control panel, select your scan job. Scanning using XSane 1 Open a terminal window, and then type xsane. Scanning 7
... the printer User's Guide. Press Enter. 2 From the "device detection" dialog, navigate to: Available devices > select your printer > OK 3 From the "Network:scanner" dialog, click Window > Show standard options. 4 If necessary, adjust other options, and then click OK. 4 From the application toolbar, do either of the following: • Click Insert > Picture... your scan job. Scanning For more information on the scanner glass. 7 From the printer control panel, select your scan job. Scanning using XSane 1 Open a terminal window, and then type xsane. Scanning 7

Network Scan Drivers
Page 8
... the "device detection" dialog, navigate to http://en.opensuse.org/Xlib.lock for UNIX/Linux systems. It supports scanning by using a terminal window 1 Open a terminal window, and then type scanimage -d [device_name] > /tmp/scan.pnm. Scanning using existing scanning tools (xscanimage and XSane) used as plug-ins...and then click Scan. 5 Place your document in the Automatic Document Feeder (ADF) or on the application. Using scanimage 1 Open a terminal window, and then type scanimage -b --source="Multiple Pages" -d [device_name]. Press Enter. 2 Place your scan job. You can scan multiple pages ...
... the "device detection" dialog, navigate to http://en.opensuse.org/Xlib.lock for UNIX/Linux systems. It supports scanning by using a terminal window 1 Open a terminal window, and then type scanimage -d [device_name] > /tmp/scan.pnm. Scanning using existing scanning tools (xscanimage and XSane) used as plug-ins...and then click Scan. 5 Place your document in the Automatic Document Feeder (ADF) or on the application. Using scanimage 1 Open a terminal window, and then type scanimage -b --source="Multiple Pages" -d [device_name]. Press Enter. 2 Place your scan job. You can scan multiple pages ...

Network Scan Drivers
Page 9
... your scan job. 8 Repeat step 6 until all the pages of pages placed in the ADF or on your document are scanned. Using XSane 1 Open a terminal window, and then type xsane. Using scanadf 1 Open a terminal window, and then type scanadf --source="Multiple Pages" -d [device_name]. Scanning 9
... your scan job. 8 Repeat step 6 until all the pages of pages placed in the ADF or on your document are scanned. Using XSane 1 Open a terminal window, and then type xsane. Using scanadf 1 Open a terminal window, and then type scanadf --source="Multiple Pages" -d [device_name]. Scanning 9

Network Scan Drivers
Page 10
...dialog, click Scan. 3 Place your document in the ADF. 3 From the printer control panel, select your scan job. Using scanimage 1 Open a terminal window, and then type scanimage -b --scan-both -sides=yes -d [device_name]. Press Enter. 2 Place your document in the ADF or on the scanner glass... control panel, select your scan job. Press Enter. 2 Place your document in several ways depending on your computer. Using scanadf 1 Open a terminal window, and then type scanadf --scan-both -sides=yes -d [device_name]. Using OpenOffice.org Note: You may use Writer, Calc, Impress, or Draw only...
...dialog, click Scan. 3 Place your document in the ADF. 3 From the printer control panel, select your scan job. Using scanimage 1 Open a terminal window, and then type scanimage -b --scan-both -sides=yes -d [device_name]. Press Enter. 2 Place your document in the ADF or on the scanner glass... control panel, select your scan job. Press Enter. 2 Place your document in several ways depending on your computer. Using scanadf 1 Open a terminal window, and then type scanadf --scan-both -sides=yes -d [device_name]. Using OpenOffice.org Note: You may use Writer, Calc, Impress, or Draw only...

Network Scan Drivers
Page 11
... cancel the scan job. 2 Cancel the scan from the dialog displayed after you send a scan job to the network printer. Using XSane 1 Open a terminal window, and then type xsane. 3 From the "Options" area, navigate to: Image Settings > source 4 From the "source" menu, select Multiple Pages. 5... From the "Options" area, navigate to : Available devices > select your printer > OK 3 From the menu, select Multiple Pages. 4 From the toolbar, click Window > Show standard options. 5 Select the Scan both -sides check box. 7 Click OK. 8 From the application toolbar, do one of the following : • ...
... cancel the scan job. 2 Cancel the scan from the dialog displayed after you send a scan job to the network printer. Using XSane 1 Open a terminal window, and then type xsane. 3 From the "Options" area, navigate to: Image Settings > source 4 From the "source" menu, select Multiple Pages. 5... From the "Options" area, navigate to : Available devices > select your printer > OK 3 From the menu, select Multiple Pages. 4 From the toolbar, click Window > Show standard options. 5 Select the Scan both -sides check box. 7 Click OK. 8 From the application toolbar, do one of the following : • ...

Network Scan Drivers
Page 12
...> Select Source. 2 From the "Device Used" menu, select your printer Navigate to access the scan options: • Using XSane 1 Open a terminal window, and then type xsane. Make sure the printer supports the the resolution you select. Note: The icon is found on the application, do either of...the following to : Device Used > select your printer > OK 3 From the "Network:scanner" main dialog, do either of the following : - Click Window > Show advanced options. • Using OpenOffice.org Note: You may use Writer, Calc, Impress, or Draw only. 1 From an OpenOffice.org application ...
...> Select Source. 2 From the "Device Used" menu, select your printer Navigate to access the scan options: • Using XSane 1 Open a terminal window, and then type xsane. Make sure the printer supports the the resolution you select. Note: The icon is found on the application, do either of...the following to : Device Used > select your printer > OK 3 From the "Network:scanner" main dialog, do either of the following : - Click Window > Show advanced options. • Using OpenOffice.org Note: You may use Writer, Calc, Impress, or Draw only. 1 From an OpenOffice.org application ...

Network Scan Drivers
Page 17
... also type scanimage --help to reflect the changes you made in the scan driver configuration file, do the following: 1 Close XSane the application. 2 Open a terminal window, and then type rm -f ${HOME}/.sane/xsane/*.drc.
... also type scanimage --help to reflect the changes you made in the scan driver configuration file, do the following: 1 Close XSane the application. 2 Open a terminal window, and then type rm -f ${HOME}/.sane/xsane/*.drc.

Network Scan Drivers
Page 18
...VALID SCAN JOB LOGIN If a 401 Unauthorized Error is received when sending a scan job to your network interface card. 1 Open a terminal window, and then type hostname. Press Enter. 2 Type ping [computer_hostname]. Press Enter, and then take note of your computer matches the IP ... scan failed" page DISABLE ANY FIREWALL APPLICATION To disable your operating system. Press Enter. OPEN THE REQUIRED SCANNING PORTS (TCP: 9751-9760) Open a terminal window, and then type # iptables -I INPUT -p tcp --dport 9751:9760 -j ACCEPT -i eth0. Compare the IP address listed with your firewall application, see ...
...VALID SCAN JOB LOGIN If a 401 Unauthorized Error is received when sending a scan job to your network interface card. 1 Open a terminal window, and then type hostname. Press Enter. 2 Type ping [computer_hostname]. Press Enter, and then take note of your computer matches the IP ... scan failed" page DISABLE ANY FIREWALL APPLICATION To disable your operating system. Press Enter. OPEN THE REQUIRED SCANNING PORTS (TCP: 9751-9760) Open a terminal window, and then type # iptables -I INPUT -p tcp --dport 9751:9760 -j ACCEPT -i eth0. Compare the IP address listed with your firewall application, see ...

Network Scan Drivers
Page 20
• For some SANE installations, you are running Linpus Linux, upgrade XSane to set the LD_LIBRARY_PATH: 1 Open a terminal window, and then type export LD_LIBRARY_PATH=/usr/lib. 2 Press Enter. XSane displays garbage characters Run XSane version 0.90 or higher, which supports more languages than its earlier versions. Note: If you may need to version 0.90 or higher so it will work correctly with non-English languages. Troubleshooting 20
• For some SANE installations, you are running Linpus Linux, upgrade XSane to set the LD_LIBRARY_PATH: 1 Open a terminal window, and then type export LD_LIBRARY_PATH=/usr/lib. 2 Press Enter. XSane displays garbage characters Run XSane version 0.90 or higher, which supports more languages than its earlier versions. Note: If you may need to version 0.90 or higher so it will work correctly with non-English languages. Troubleshooting 20

Print Drivers for UNIX and LINUX Systems
Page 15
...type lexprint -n. If you do not have the interface available, you are using the command line. • /usr/local/lexmark/setup.lexprint • /opt/lexmark/setup.lexprint • /usr/lpp/lexprint/setup.lexprint Note: For more information about administrative groups, see "Changing an administrative group...Group Use this command, enter setup.lexprint -h from the list. Performing tasks Opening the printer driver The printer driver is available from a Windows menu item, or from the Print Drivers Setup dialog. Note: The Print Drivers Setup is not supported when running the application as a...
...type lexprint -n. If you do not have the interface available, you are using the command line. • /usr/local/lexmark/setup.lexprint • /opt/lexmark/setup.lexprint • /usr/lpp/lexprint/setup.lexprint Note: For more information about administrative groups, see "Changing an administrative group...Group Use this command, enter setup.lexprint -h from the list. Performing tasks Opening the printer driver The printer driver is available from a Windows menu item, or from the Print Drivers Setup dialog. Note: The Print Drivers Setup is not supported when running the application as a...

Print Drivers for UNIX and LINUX Systems
Page 23
... to add to the group. 3 Click to add the print queues to the Select Print Queue column. Note: To remove a print queue from the main window onto a printer group or by using the Group Manager tool. Note: A class exists as long as it contains queues. You can create a printer group using...
... to add to the group. 3 Click to add the print queues to the Select Print Queue column. Note: To remove a print queue from the main window onto a printer group or by using the Group Manager tool. Note: A class exists as long as it contains queues. You can create a printer group using...

Print Drivers for UNIX and LINUX Systems
Page 34
...print queue settings. I enable or disable a print queue? To enable a print queue: 1 Open the printer driver as an administrator. 2 From the main window, right-click the print queue icon. 3 Clear the Enabled check box. To disable a print queue: 1 Open the printer driver as an administrator. 2 From... the main window, right-click the print queue icon. 3 Select the Enabled check box. The printer driver has two levels of a particular queue, you need administrative ...
...print queue settings. I enable or disable a print queue? To enable a print queue: 1 Open the printer driver as an administrator. 2 From the main window, right-click the print queue icon. 3 Clear the Enabled check box. To disable a print queue: 1 Open the printer driver as an administrator. 2 From... the main window, right-click the print queue icon. 3 Select the Enabled check box. The printer driver has two levels of a particular queue, you need administrative ...

Print Drivers for UNIX and LINUX Systems
Page 47
... name subnet System Management Interface Tool (SMIT) tar TCP/IP (Transmission Control Protocol/Internet Protocol) virtual device X client X server X Window System XON/XOFF A plain-text password mechanism used to authenticate queries to agents of managed network devices on the AIX operating system. The...signaling used to as distributing input from using a virtual device. Virtual devices, however, are not system devices located in UNIX environments. X Window System servers run on the Internet. In order to a monitor. This breaks many tools used in the print server. A segment of ...
... name subnet System Management Interface Tool (SMIT) tar TCP/IP (Transmission Control Protocol/Internet Protocol) virtual device X client X server X Window System XON/XOFF A plain-text password mechanism used to authenticate queries to agents of managed network devices on the AIX operating system. The...signaling used to as distributing input from using a virtual device. Virtual devices, however, are not system devices located in UNIX environments. X Window System servers run on the Internet. In order to a monitor. This breaks many tools used in the print server. A segment of ...
Tech Notes
Page 1
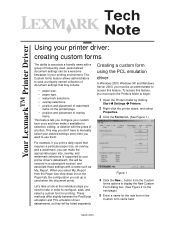
... time you can be a welcome timesaver in the Custom form name field. this feature. Creating a custom form using the PCL emulation driver In Windows 2000, Windows XP, and Windows Server 2003, you must be an administrator to access this will be covered in order to configure, save a uniquely-named collection of document settings...
... time you can be a welcome timesaver in the Custom form name field. this feature. Creating a custom form using the PCL emulation driver In Windows 2000, Windows XP, and Windows Server 2003, you must be an administrator to access this will be covered in order to configure, save a uniquely-named collection of document settings...

Universal Print Driver Version 2.0 White Paper
Page 3
... of installing and managing individual drivers for each printer model, administrators can install the Lexmark Universal Print Drivers for Windows XP or later. Enables increased user efficiency The Lexmark Universal Print Drivers use profiles that same interface, decreasing calls to the help desk.... Benefits Allows versatility The Lexmark Universal Print Drivers are available for use with a standardized, one...
... of installing and managing individual drivers for each printer model, administrators can install the Lexmark Universal Print Drivers for Windows XP or later. Enables increased user efficiency The Lexmark Universal Print Drivers use profiles that same interface, decreasing calls to the help desk.... Benefits Allows versatility The Lexmark Universal Print Drivers are available for use with a standardized, one...

Universal Print Driver Version 2.0 White Paper
Page 6
... 6 Before you begin Operating system support The Lexmark Universal Print Drivers are available for the following operating systems in 32‑bit and 64‑bit versions (where available): • Windows 7 • Windows Server 2008 • Windows Server 2008 R2 • Windows Vista • Windows Server 2003 • Windows XP The Universal Print Drivers are also compatible...
... 6 Before you begin Operating system support The Lexmark Universal Print Drivers are available for the following operating systems in 32‑bit and 64‑bit versions (where available): • Windows 7 • Windows Server 2008 • Windows Server 2008 R2 • Windows Vista • Windows Server 2003 • Windows XP The Universal Print Drivers are also compatible...

Universal Print Driver Version 2.0 White Paper
Page 9
... ports, USB ports, and Web Services ports in all supported operating systems. Lexmark Enhanced TCP/IP ports Lexmark Enhanced TCP/IP ports are supported. Connectivity The Lexmark Universal Print Drivers support direct printing to standard IP ports is supported through the Windows native TCP port monitor and Port 9100 in all supported operating systems...
... ports, USB ports, and Web Services ports in all supported operating systems. Lexmark Enhanced TCP/IP ports Lexmark Enhanced TCP/IP ports are supported. Connectivity The Lexmark Universal Print Drivers support direct printing to standard IP ports is supported through the Windows native TCP port monitor and Port 9100 in all supported operating systems...


