
Setup Guide (1.4 MB)
Page 2
... section in the operating instructions, to a professional service person. • This product is not responsible for selecting print media to avoid the possibility of some parts may not always be addressed to Lexmark International, Inc., Department F95/035-3, 740 West New Circle Road, Lexington, Kentucky 40550, U.S.A. First Edition (June 1999) The following two conditions: (1) this device may not cause...
... section in the operating instructions, to a professional service person. • This product is not responsible for selecting print media to avoid the possibility of some parts may not always be addressed to Lexmark International, Inc., Department F95/035-3, 740 West New Circle Road, Lexington, Kentucky 40550, U.S.A. First Edition (June 1999) The following two conditions: (1) this device may not cause...
Setup Guide (1.4 MB)
Page 3
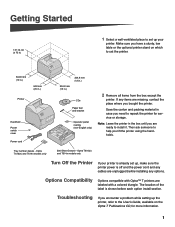
... - Options Compatibility Options compatible with Optra™ T printers are labeled with a colored triangle. Note: Leave the printer in .) CDs Paper bail and bracket Operator panel overlay (non-English only) 2 Remove all items from the box except the printer. Troubleshooting If you encounter a problem while setting up the printer, refer to the User's Guide, available on which to set the printer. 304.8 mm (12 in.) 508 mm (20 in.) Printer Handhold Power switch cover Power...
... - Options Compatibility Options compatible with Optra™ T printers are labeled with a colored triangle. Note: Leave the printer in .) CDs Paper bail and bracket Operator panel overlay (non-English only) 2 Remove all items from the box except the printer. Troubleshooting If you encounter a problem while setting up the printer, refer to the User's Guide, available on which to set the printer. 304.8 mm (12 in.) 508 mm (20 in.) Printer Handhold Power switch cover Power...
Setup Guide (1.4 MB)
Page 4
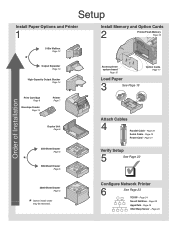
... Install Paper Options and Printer 1 Install Memory and Option Cards 2 Printer/Flash Memory Page 16 5-Bin Mailbox Page 12 * Output Expander Page 10 High-Capacity Output Stacker Page 14 Print Cartridge Page 9 Envelope Feeder Page 14 Printer Page 7 Duplex Unit Page 6 250-Sheet Drawer Page 5 * 500-Sheet Drawer Page 5 Access printer system board Page 15 Load Paper 3 See Page 19 Option Cards Page 17 Attach Cables 4 Parallel Cable - Configure Network Printer 6 See Page 23 TCP/IP - Page 24 Novell NetWare - Page 29 Page 20 Serial Cable - Page 29 OS/2 Warp Server - Page...
... Install Paper Options and Printer 1 Install Memory and Option Cards 2 Printer/Flash Memory Page 16 5-Bin Mailbox Page 12 * Output Expander Page 10 High-Capacity Output Stacker Page 14 Print Cartridge Page 9 Envelope Feeder Page 14 Printer Page 7 Duplex Unit Page 6 250-Sheet Drawer Page 5 * 500-Sheet Drawer Page 5 Access printer system board Page 15 Load Paper 3 See Page 19 Option Cards Page 17 Attach Cables 4 Parallel Cable - Configure Network Printer 6 See Page 23 TCP/IP - Page 24 Novell NetWare - Page 29 Page 20 Serial Cable - Page 29 OS/2 Warp Server - Page...
Setup Guide (1.4 MB)
Page 6
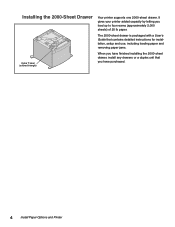
Installing the 2000-Sheet Drawer Optra T label (colored triangle) Your printer supports one 2000-sheet drawer. The 2000-sheet drawer is packaged with a User's Guide that contains detailed instructions for installation, setup and use, including loading paper and removing paper jams. When you have finished installing the 2000-sheet drawer, install any drawers or a duplex unit that you load up to four reams (approximately 2,000 sheets) of 20 lb paper. It gives your printer added capacity by letting you have purchased. 4 Install Paper Options and Printer
Installing the 2000-Sheet Drawer Optra T label (colored triangle) Your printer supports one 2000-sheet drawer. The 2000-sheet drawer is packaged with a User's Guide that contains detailed instructions for installation, setup and use, including loading paper and removing paper jams. When you have finished installing the 2000-sheet drawer, install any drawers or a duplex unit that you load up to four reams (approximately 2,000 sheets) of 20 lb paper. It gives your printer added capacity by letting you have purchased. 4 Install Paper Options and Printer
Setup Guide (1.4 MB)
Page 11
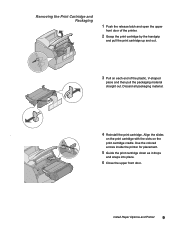
... front door of the printer. 2 Grasp the print cartridge by the handgrip and pull the print cartridge up and out. 3 Pull on the print cartridge cradle. Use the colored arrows inside the printer for placement. 5 Guide the print cartridge down as it drops and snaps into place. 6 Close the upper front door. Discard all packaging material. . 4 Reinstall the print cartridge. Install Paper Options and Printer 9 Align the slides on the print cartridge with...
... front door of the printer. 2 Grasp the print cartridge by the handgrip and pull the print cartridge up and out. 3 Pull on the print cartridge cradle. Use the colored arrows inside the printer for placement. 5 Guide the print cartridge down as it drops and snaps into place. 6 Close the upper front door. Discard all packaging material. . 4 Reinstall the print cartridge. Install Paper Options and Printer 9 Align the slides on the print cartridge with...
Setup Guide (1.4 MB)
Page 12
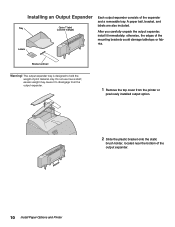
... the output expander. 1 Remove the top cover from the printer or previously installed output option. 2 Slide the plastic bracket onto the static brush holder, located near the bottom of print material only. excess weight may cause it to hold the weight of the output expander. 10 Install Paper Options and Printer Bracket and bail Warning! otherwise, the edges of the expander and a removable tray. Installing an Output Expander Tray Optra T label (colored triangle) Labels Each output...
... the output expander. 1 Remove the top cover from the printer or previously installed output option. 2 Slide the plastic bracket onto the static brush holder, located near the bottom of print material only. excess weight may cause it to hold the weight of the output expander. 10 Install Paper Options and Printer Bracket and bail Warning! otherwise, the edges of the expander and a removable tray. Installing an Output Expander Tray Optra T label (colored triangle) Labels Each output...
Setup Guide (1.4 MB)
Page 13
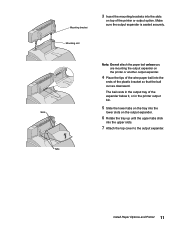
... it, or in the printer output bin. 5 Slide the lower tabs on the tray into the lower slots on the output expander. 6 Rotate the tray up until the upper tabs click into the ends of the plastic bracket so that the bail curves downward. Make sure the output expander is seated securely. Install Paper Options and Printer 11 Slots Tabs Note: Do...
... it, or in the printer output bin. 5 Slide the lower tabs on the tray into the lower slots on the output expander. 6 Rotate the tray up until the upper tabs click into the ends of the plastic bracket so that the bail curves downward. Make sure the output expander is seated securely. Install Paper Options and Printer 11 Slots Tabs Note: Do...

Setup Guide (1.4 MB)
Page 16
... lower front door of the printer. 2 Lift open the envelope feeder connector door. 3 Align the tabs on both sides of your printer behind the lower front door. Optra T label (colored triangle) Installing the Envelope Feeder Optra T label (colored triangle) The envelope feeder attaches to the User's Guide, available on the Optra T Publications CD, for information on using it is packaged with the slots on the envelope feeder with installation instructions. The high-capacity output stacker is installed properly. 14 Install Paper Options and Printer
... lower front door of the printer. 2 Lift open the envelope feeder connector door. 3 Align the tabs on both sides of your printer behind the lower front door. Optra T label (colored triangle) Installing the Envelope Feeder Optra T label (colored triangle) The envelope feeder attaches to the User's Guide, available on the Optra T Publications CD, for information on using it is packaged with the slots on the envelope feeder with installation instructions. The high-capacity output stacker is installed properly. 14 Install Paper Options and Printer

Setup Guide (1.4 MB)
Page 18
... the shield and side door. 16 Install Memory and Optional Cards Insert the memory option straight into the connector with the connection points pointing toward the system board as shown. 4 Push the memory card firmly into the connector until the top three screws fit into place. Tab Installing Printer Memory or Flash Memory Memory connector 1 Memory connector 2 Memory connector 3 T616(n) and T614(n) models only 1 Follow the steps under "Accessing the Printer System Board...
... the shield and side door. 16 Install Memory and Optional Cards Insert the memory option straight into the connector with the connection points pointing toward the system board as shown. 4 Push the memory card firmly into the connector until the top three screws fit into place. Tab Installing Printer Memory or Flash Memory Memory connector 1 Memory connector 2 Memory connector 3 T616(n) and T614(n) models only 1 Follow the steps under "Accessing the Printer System Board...
Setup Guide (1.4 MB)
Page 19
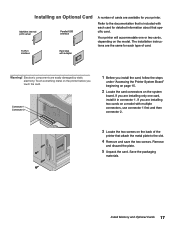
... printer before you install the card, follow the steps under "Accessing the Printer System Board" beginning on page 15. 2 Locate the card connectors on the model. Your printer will accommodate one card, install it in connector 1. Electronic components are easily damaged by static electricity. If you are installing only one or two cards, depending on the system board. Installing an Optional Card MarkNet internal print server Parallel/USB interface Tri-Port interface Hard disk with adapter A number...
... printer before you install the card, follow the steps under "Accessing the Printer System Board" beginning on page 15. 2 Locate the card connectors on the model. Your printer will accommodate one card, install it in connector 1. Electronic components are easily damaged by static electricity. If you are installing only one or two cards, depending on the system board. Installing an Optional Card MarkNet internal print server Parallel/USB interface Tri-Port interface Hard disk with adapter A number...
Setup Guide (1.4 MB)
Page 24
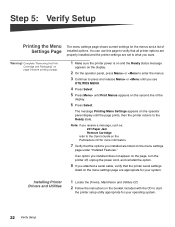
... page prints, then the printer returns to the User's Guide on the Publications CD for more information. 7 Verify that the options you receive a message, such as: 201 Paper Jam Remove Cartridge refer to the Ready state. Step 5: Verify Setup Printing the Menu Settings Page The menu settings page shows current settings for the menus and a list of the display. 6 Press Select. You can use this page to verify that the printer serial settings listed on the second line of installed options. Installing Printer Drivers...
... page prints, then the printer returns to the User's Guide on the Publications CD for more information. 7 Verify that the options you receive a message, such as: 201 Paper Jam Remove Cartridge refer to the Ready state. Step 5: Verify Setup Printing the Menu Settings Page The menu settings page shows current settings for the menus and a list of the display. 6 Press Select. You can use this page to verify that the printer serial settings listed on the second line of installed options. Installing Printer Drivers...
Setup Guide (1.4 MB)
Page 25
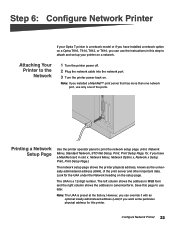
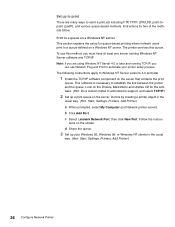
... the network cable into the network port. 3 Turn the printer power back on. Configure Network Printer 23 The left column shows the address in MSB form and the right column shows the address in canonical form. The UAA is preset at the factory. However, you can use the instructions in this step to use only one of the print server and other important data. Attaching Your Printer to print the network setup page. (Hint: Network Menu, Standard Network...
... the network cable into the network port. 3 Turn the printer power back on. Configure Network Printer 23 The left column shows the address in MSB form and the right column shows the address in canonical form. The UAA is preset at the factory. However, you can use the instructions in this step to use only one of the print server and other important data. Attaching Your Printer to print the network setup page. (Hint: Network Menu, Standard Network...
Setup Guide (1.4 MB)
Page 26
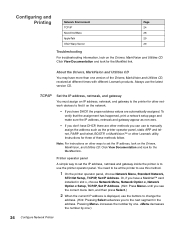
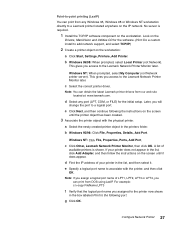
.... Instructions for three of the Drivers, MarkVision and Utilities CD, received at the printer to use the buttons to set the IP address, look for the MarkNet link. Printer operator panel A simple way to change the address. (Hint: Pressing Select advances you don't have more than one . Configuring and Printing Network Environment TCP/IP Novell NetWare AppleTalk OS/2 Warp Server Page 24 28 29 29 Troubleshooting For troubleshooting...
.... Instructions for three of the Drivers, MarkVision and Utilities CD, received at the printer to use the buttons to set the IP address, look for the MarkNet link. Printer operator panel A simple way to change the address. (Hint: Pressing Select advances you don't have more than one . Configuring and Printing Network Environment TCP/IP Novell NetWare AppleTalk OS/2 Warp Server Page 24 28 29 29 Troubleshooting For troubleshooting...
Setup Guide (1.4 MB)
Page 27
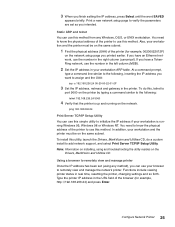
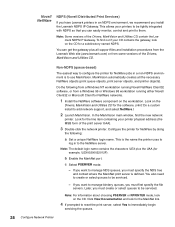
... include viewing printer status in the printer. Print a new network setup page to verify the parameters are set (using and troubleshooting the utility resides on the network. To do this utility, launch the Drivers, MarkVision and Utilities CD, do a custom install to remotely view and manage the network printer. To install this , telnet to port 9000 on the network setup page you can use this method. At a command prompt, type a command line similar to the...
... include viewing printer status in the printer. Print a new network setup page to verify the parameters are set (using and troubleshooting the utility resides on the network. To do this utility, launch the Drivers, MarkVision and Utilities CD, do a custom install to remotely view and manage the network printer. To install this , telnet to port 9000 on the network setup page you can use this method. At a command prompt, type a command line similar to the...
Setup Guide (1.4 MB)
Page 28
... (not Network printer server). Look on the Drivers, MarkVision and Utilities CD for two of the methods follow. The printer services this method, you can use this queue. This software is necessary to add network support, and select TCP/IP.) 2 Set up a print queue on the screen. b Click Add Port. c Select Lexmark Network Port, then click New Port. tions on the server. To use Network Plug and Print to Windows NT Server versions 4.0 and later. 1 Install the...
... (not Network printer server). Look on the Drivers, MarkVision and Utilities CD for two of the methods follow. The printer services this method, you can use this queue. This software is necessary to add network support, and select TCP/IP.) 2 Set up a print queue on the screen. b Click Add Port. c Select Lexmark Network Port, then click New Port. tions on the server. To use Network Plug and Print to Windows NT Server versions 4.0 and later. 1 Install the...
Setup Guide (1.4 MB)
Page 29
... using LexIP. Note: You can obtain the latest Lexmark printer drivers from our web site located at: www.lexmark.com. b Windows 95/98: When prompted, select Local Printer (not Network). c Select the correct printer driver. Point-to-point printing (LexIP) You can print from any port (LPT, COM, or FILE) for the software. (Hint: Do a custom install to add network support, and select TCP/IP.) 2 Create a printer object on the workstation: a Click Start, Settings, Printers, Add Printer...
... using LexIP. Note: You can obtain the latest Lexmark printer drivers from our web site located at: www.lexmark.com. b Windows 95/98: When prompted, select Local Printer (not Network). c Select the correct printer driver. Point-to-point printing (LexIP) You can print from any port (LPT, COM, or FILE) for the software. (Hint: Do a custom install to add network support, and select TCP/IP.) 2 Create a printer object on the workstation: a Click Start, Settings, Printers, Add Printer...
Setup Guide (1.4 MB)
Page 30
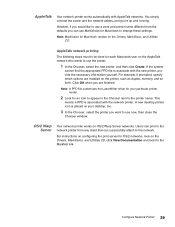
.... This is the name the printer uses to log in a non-NDPS environment is defined. b Enable the MarkNet port. MarkVision automatically creates all support files and installation procedures from the Lexmark Web site (www.lexmark.com) or from a Windows 95 or Windows 98 workstation running Novell NetWare Client32 software, or from some versions of the print server UAA). 3 Double-click the network printer. If you want to manage...
.... This is the name the printer uses to log in a non-NDPS environment is defined. b Enable the MarkNet port. MarkVision automatically creates all support files and installation procedures from the Lexmark Web site (www.lexmark.com) or from a Windows 95 or Windows 98 workstation running Novell NetWare Client32 software, or from some versions of the print server UAA). 3 Double-click the network printer. If you want to manage...
Setup Guide (1.4 MB)
Page 31
... appropriate PPD file to change these settings. You simply connect the power and the network cables, and you are installed on the AppleTalk network who wants to the printer name. Note: MarkVision for Macintosh to associate with AppleTalk networks. This means a PPD is placed on OS/2 Warp Server networks. For instructions on configuring the print server for OS/2 networks, look for each Macintosh user on the printer, such as duplex, memory, and...
... appropriate PPD file to change these settings. You simply connect the power and the network cables, and you are installed on the AppleTalk network who wants to the printer name. Note: MarkVision for Macintosh to associate with AppleTalk networks. This means a PPD is placed on OS/2 Warp Server networks. For instructions on configuring the print server for OS/2 networks, look for each Macintosh user on the printer, such as duplex, memory, and...

Setup Guide (1.4 MB)
Page 33
... to , a product in warranty service, or damaged beyond repair. Optra T Laser Printers This Statement of , or damage to the Remarketer or the designated location. The replacement may be a new or repaired item. For products no longer covered by a Lexmark warranty, technical support may be free of the warranty period. Warranty Service The warranty period is used parts, which it was designed. Warranty service is provided for loss...
... to , a product in warranty service, or damaged beyond repair. Optra T Laser Printers This Statement of , or damage to the Remarketer or the designated location. The replacement may be a new or repaired item. For products no longer covered by a Lexmark warranty, technical support may be free of the warranty period. Warranty Service The warranty period is used parts, which it was designed. Warranty service is provided for loss...
Setup Guide (1.4 MB)
Page 34
... to the greater of this section. Extent of Warranty We do not warrant uninterrupted or error-free operation of remedies are not cumulative. For any claim concerning performance or nonperformance of its duty cycle &#...may also have installed a maintenance kit as specified (if applicable) • use of printing media outside of Lexmark specifications • use of other than Lexmark supplies (such as toner cartridges, inkjet cartridges, and ribbons) • use of other than Lexmark or a Lexmark authorized servicer • operation of a product beyond the limit of Lexmark or a ...
... to the greater of this section. Extent of Warranty We do not warrant uninterrupted or error-free operation of remedies are not cumulative. For any claim concerning performance or nonperformance of its duty cycle &#...may also have installed a maintenance kit as specified (if applicable) • use of printing media outside of Lexmark specifications • use of other than Lexmark supplies (such as toner cartridges, inkjet cartridges, and ribbons) • use of other than Lexmark or a Lexmark authorized servicer • operation of a product beyond the limit of Lexmark or a ...


