Setup Guide (1.4 MB)
Page 24
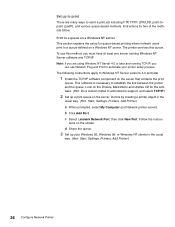
Installing Printer Drivers and Utilities 1 Locate the Drivers, MarkVision and Utilities CD. 2 Follow the instructions in the booklet ... Warning! Complete "Removing the Print Cartridge and Packaging" on page 9 before printing a page. 1 Make sure the printer power is on and the Ready status message appears on the display. 2 On the operator panel, press Menu> or ...or until the page prints, then the printer returns to start the printer setup utility appropriate for your operating system. 22 Verify Setup If an option you installed does not...
Installing Printer Drivers and Utilities 1 Locate the Drivers, MarkVision and Utilities CD. 2 Follow the instructions in the booklet ... Warning! Complete "Removing the Print Cartridge and Packaging" on page 9 before printing a page. 1 Make sure the printer power is on and the Ready status message appears on the display. 2 On the operator panel, press Menu> or ...or until the page prints, then the printer returns to start the printer setup utility appropriate for your operating system. 22 Verify Setup If an option you installed does not...
Setup Guide (1.4 MB)
Page 26
... Documentation and look on other Lexmark utility. TCP/IP Set the IP address, netmask, and gateway You must assign an IP address, netmask, and gateway to the printer for three of the Drivers, MarkVision and Utilities CD, received at the printer to manually assign the address ...the number by one version of these methods follow. Note: For instructions on the Drivers, MarkVision and Utilities CD. You need to be at different times with different Lexmark products. About the Drivers, MarkVision and Utilities CD You may have DHCP, there are automatically assigned. Instructions for...
... Documentation and look on other Lexmark utility. TCP/IP Set the IP address, netmask, and gateway You must assign an IP address, netmask, and gateway to the printer for three of the Drivers, MarkVision and Utilities CD, received at the printer to manually assign the address ...the number by one version of these methods follow. Note: For instructions on the Drivers, MarkVision and Utilities CD. You need to be at different times with different Lexmark products. About the Drivers, MarkVision and Utilities CD You may have DHCP, there are automatically assigned. Instructions for...
Setup Guide (1.4 MB)
Page 27
...running Windows 95, Windows 98 or Windows NT. At a command prompt, type a command line similar to use the number in real time, resetting the printer, changing settings and so forth. Print a new network setup page to add network support, and select Print Server TCP/IP Setup Utility. To do ...a custom install to verify the parameters are set (using and troubleshooting the utility resides on the Drivers, MarkVision and Utilities CD. You need to initialize the IP address if your workstation ARP table. If you can use this method. If ...
...running Windows 95, Windows 98 or Windows NT. At a command prompt, type a command line similar to use the number in real time, resetting the printer, changing settings and so forth. Print a new network setup page to add network support, and select Print Server TCP/IP Setup Utility. To do ...a custom install to verify the parameters are set (using and troubleshooting the utility resides on the Drivers, MarkVision and Utilities CD. You need to initialize the IP address if your workstation ARP table. If you can use this method. If ...
Setup Guide (1.4 MB)
Page 28
... on a Windows NT server This section explains the setup for two of the methods follow. c Select Lexmark Network Port, then click New Port. Follow the instruc- d Share the queue. 3 Set up a print queue... on a Windows NT server. Look on the Drivers, MarkVision and Utilities CD for the software. (Hint: Do a custom install to a queue defined on ...-based printing where network users print to add network support, and select TCP/IP.) 2 Set up your printer setup process. Print to a queue on the screen. To use Network Plug and Print to Windows NT ...
... on a Windows NT server This section explains the setup for two of the methods follow. c Select Lexmark Network Port, then click New Port. Follow the instruc- d Share the queue. 3 Set up a print queue... on a Windows NT server. Look on the Drivers, MarkVision and Utilities CD for the software. (Hint: Do a custom install to a queue defined on ...-based printing where network users print to add network support, and select TCP/IP.) 2 Set up your printer setup process. Print to a queue on the screen. To use Network Plug and Print to Windows NT ...
Setup Guide (1.4 MB)
Page 29
.... Later, you access to a logical port. No server is shown. Note: You can obtain the latest Lexmark printer drivers from our web site located at: www.lexmark.com. This gives you will change the port to the Lexmark Network Printer Monitor later. Windows NT: Click File, Properties, Ports, Add Port. Point-to-point printing (LexIP) You...
.... Later, you access to a logical port. No server is shown. Note: You can obtain the latest Lexmark printer drivers from our web site located at: www.lexmark.com. This gives you will change the port to the Lexmark Network Printer Monitor later. Windows NT: Click File, Properties, Ports, Add Port. Point-to-point printing (LexIP) You...
Setup Guide (1.4 MB)
Page 30
Novell NetWare NDPS (Novell Distributed Print Services) If you have Lexmark printers in to immediately begin servicing the queues. 28 Configure Network Printer Look on the Drivers, MarkVision and Utilities CD for NetWare networks. 1 Install the NetWare software component on the workstation. If you want to manage bindery queues, you can get ...
Novell NetWare NDPS (Novell Distributed Print Services) If you have Lexmark printers in to immediately begin servicing the queues. 28 Configure Network Printer Look on the Drivers, MarkVision and Utilities CD for NetWare networks. 1 Install the NetWare software component on the workstation. If you want to manage bindery queues, you can get ...
Setup Guide (1.4 MB)
Page 31
... PPD file to change these settings. A new desktop printer icon is associated with the network printer. Note: MarkVision for each Macintosh user on the Drivers, MarkVision, and Utilities CD. This means a PPD is placed on the Drivers, MarkVision, and Utilities CD, click View Documentation and ... A PPD file customizes the LaserWriter driver for your desktop, too. 3 In the Chooser, select the printer you can successfully attach to use the printer. 1 In the Chooser, select the new printer, and then click Create. Users can print to the network printer from any client that can use a...
... PPD file to change these settings. A new desktop printer icon is associated with the network printer. Note: MarkVision for each Macintosh user on the Drivers, MarkVision, and Utilities CD. This means a PPD is placed on the Drivers, MarkVision, and Utilities CD, click View Documentation and ... A PPD file customizes the LaserWriter driver for your desktop, too. 3 In the Chooser, select the printer you can successfully attach to use the printer. 1 In the Chooser, select the new printer, and then click Create. Users can print to the network printer from any client that can use a...

