User's Guide
Page 8
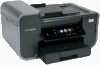
...old printer instead of throwing it here Setup documentation The setup documentation came with fewer cartridges. • Clean the printhead. Follow the instructions to www.lexmark.com/recycle. Finding information about the printer Publications What are mostly text. • Use High Yield cartridges. ...These features clean the printhead nozzles to print more pages with the printer and is also available on the Lexmark Web site at http://support.lexmark.com. Initial setup instructions: • Connecting the printer • Installing ...
...old printer instead of throwing it here Setup documentation The setup documentation came with fewer cartridges. • Clean the printhead. Follow the instructions to www.lexmark.com/recycle. Finding information about the printer Publications What are mostly text. • Use High Yield cartridges. ...These features clean the printhead nozzles to print more pages with the printer and is also available on the Lexmark Web site at http://support.lexmark.com. Initial setup instructions: • Connecting the printer • Installing ...

User's Guide
Page 11
... A4-size documents. 4 1 2 3 < < LINE EXT 5 6 7 9 8 Use the 1 Scanner unit 2 Ink cartridge access 3 Ethernet port 4 USB port 5 LINE Port To • Access the ink cartridges and printhead. • Remove paper jams. Install, replace, or remove ink cartridges. LINE 6 EXT Port EXT Connect additional devices (telephone or answering machine) to a computer, a local network...
... A4-size documents. 4 1 2 3 < < LINE EXT 5 6 7 9 8 Use the 1 Scanner unit 2 Ink cartridge access 3 Ethernet port 4 USB port 5 LINE Port To • Access the ink cartridges and printhead. • Remove paper jams. Install, replace, or remove ink cartridges. LINE 6 EXT Port EXT Connect additional devices (telephone or answering machine) to a computer, a local network...

User's Guide
Page 12
Note: The carrier moves to the printhead access area when no printhead is installed in the printer. About your printer 12 Use the 8 Duplex unit 9 Printhead access To • Print on both sides of a sheet of paper. • Remove paper jams. Install the printhead.
Note: The carrier moves to the printhead access area when no printhead is installed in the printer. About your printer 12 Use the 8 Duplex unit 9 Printhead access To • Print on both sides of a sheet of paper. • Remove paper jams. Install the printhead.

User's Guide
Page 14
... the new ink cartridges immediately after removing the old ones or the ink remaining in the printhead nozzles may dry out. 1 Turn on your printer. 2 Open the printer. Ordering and replacing supplies 14 Note: The printhead moves to install the black cartridge. You must install new cartridges immediately after removing the protective...
... the new ink cartridges immediately after removing the old ones or the ink remaining in the printhead nozzles may dry out. 1 Turn on your printer. 2 Open the printer. Ordering and replacing supplies 14 Note: The printhead moves to install the black cartridge. You must install new cartridges immediately after removing the protective...
User's Guide
Page 24
...• Print a test page. • Print an alignment page. • Clean the printhead nozzles. • Order ink or supplies. • Register the printer. • Contact technical support. Lexmark Printer Utility (referred to as Wireless Setup Assistant) Note: Your printer may not come with these...tab, click Customer Support. 4 From the Web site, select your printer and download the driver. 7 Install additional or optional software. Lexmark Wireless Setup Assistant Set up the printer on the features of a memory device inserted into a network printer. • Transfer photos and...
...• Print a test page. • Print an alignment page. • Clean the printhead nozzles. • Order ink or supplies. • Register the printer. • Contact technical support. Lexmark Printer Utility (referred to as Wireless Setup Assistant) Note: Your printer may not come with these...tab, click Customer Support. 4 From the Web site, select your printer and download the driver. 7 Install additional or optional software. Lexmark Wireless Setup Assistant Set up the printer on the features of a memory device inserted into a network printer. • Transfer photos and...
User's Guide
Page 132
... may need to Align Printer: > More Options > Align Printer. Using the printer control panel 1 Load plain paper. 2 From the home screen, navigate to align the printhead. It will temporarily power on your printer image appear jagged or wavy, then you can perform, your printer from the Maintenance tab. An alignment page... Printer Utility from the list. 3 Check the ink levels from the printer drop-down list. 5 From the Maintenance tab, click Check ink levels. Aligning the printhead If the characters or lines on if it is plugged into an electrical outlet.
... may need to Align Printer: > More Options > Align Printer. Using the printer control panel 1 Load plain paper. 2 From the home screen, navigate to align the printhead. It will temporarily power on your printer image appear jagged or wavy, then you can perform, your printer from the Maintenance tab. An alignment page... Printer Utility from the list. 3 Check the ink levels from the printer drop-down list. 5 From the Maintenance tab, click Check ink levels. Aligning the printhead If the characters or lines on if it is plugged into an electrical outlet.
User's Guide
Page 133
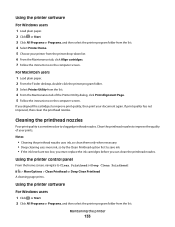
...them only when necessary. • Deep cleaning uses more ink, so try the Clean Printhead option first to clogged printhead nozzles. If print quality has not improved, then clean the printhead nozzles. Using the printer software For Windows users 1 Click or Start. 2 Click All...Follow the instructions on the computer screen. Using the printer control panel From the home screen, navigate to Clean Printhead or Deep Clean Printhead: > More Options > Clean Printhead or Deep Clean Printhead A cleaning page prints. Using the printer software For Windows users 1 Load plain paper. 2 Click or ...
...them only when necessary. • Deep cleaning uses more ink, so try the Clean Printhead option first to clogged printhead nozzles. If print quality has not improved, then clean the printhead nozzles. Using the printer software For Windows users 1 Click or Start. 2 Click All...Follow the instructions on the computer screen. Using the printer control panel From the home screen, navigate to Clean Printhead or Deep Clean Printhead: > More Options > Clean Printhead or Deep Clean Printhead A cleaning page prints. Using the printer software For Windows users 1 Load plain paper. 2 Click or ...
User's Guide
Page 136
.... 4 From the Support tab, select Service Center. If Troubleshooting does not solve your problem Visit our Web site at http://support.lexmark.com to find the following: • Knowledgebase articles with the latest information and troubleshooting for your printer • Live online technical support...errors. • Check for telephone technical support Setup troubleshooting • "Incorrect language appears on the display" on page 137 • "Printhead errors" on page 137 • "Software did not install" on page 138 Troubleshooting 136 Using the Service Center to solve printer problems...
.... 4 From the Support tab, select Service Center. If Troubleshooting does not solve your problem Visit our Web site at http://support.lexmark.com to find the following: • Knowledgebase articles with the latest information and troubleshooting for your printer • Live online technical support...errors. • Check for telephone technical support Setup troubleshooting • "Incorrect language appears on the display" on page 137 • "Printhead errors" on page 137 • "Software did not install" on page 138 Troubleshooting 136 Using the Service Center to solve printer problems...
User's Guide
Page 137
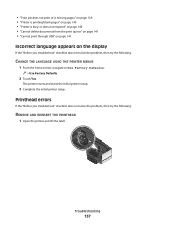
The printer resets and starts the initial printer setup. 3 Complete the initial printer setup. Printhead errors If the "Before you troubleshoot" checklist does not solve the problem, then try the following : CHANGE THE LANGUAGE USING THE PRINTER MENUS 1 From the ... Incorrect language appears on the display If the "Before you troubleshoot" checklist does not solve the problem, then try the following : REMOVE AND REINSERT THE PRINTHEAD 1 Open the printer and lift the latch. 2 Troubleshooting 137
The printer resets and starts the initial printer setup. 3 Complete the initial printer setup. Printhead errors If the "Before you troubleshoot" checklist does not solve the problem, then try the following : CHANGE THE LANGUAGE USING THE PRINTER MENUS 1 From the ... Incorrect language appears on the display If the "Before you troubleshoot" checklist does not solve the problem, then try the following : REMOVE AND REINSERT THE PRINTHEAD 1 Open the printer and lift the latch. 2 Troubleshooting 137
User's Guide
Page 138
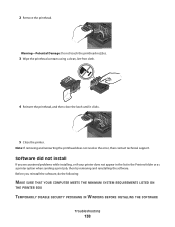
...or as a printer option when sending a print job, then try removing and reinstalling the software. Note: If removing and reinserting the printhead does not resolve the error, then contact technical support. Software did not install If you reinstall the software, do the following: MAKE ... DISABLE SECURITY PROGRAMS IN WINDOWS BEFORE INSTALLING THE SOFTWARE Troubleshooting 138 Warning-Potential Damage: Do not touch the printhead nozzles. 3 Wipe the printhead contacts using a clean, lint-free cloth. 4 Reinsert the printhead, and then close the latch until it clicks. 5 Close the printer. 2 Remove the...
...or as a printer option when sending a print job, then try removing and reinstalling the software. Note: If removing and reinserting the printhead does not resolve the error, then contact technical support. Software did not install If you reinstall the software, do the following: MAKE ... DISABLE SECURITY PROGRAMS IN WINDOWS BEFORE INSTALLING THE SOFTWARE Troubleshooting 138 Warning-Potential Damage: Do not touch the printhead nozzles. 3 Wipe the printhead contacts using a clean, lint-free cloth. 4 Reinsert the printhead, and then close the latch until it clicks. 5 Close the printer. 2 Remove the...
User's Guide
Page 139
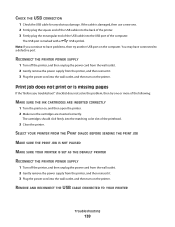
... the USB cable into the back of the printer. 3 Firmly plug the rectangular end of the USB cable into the matching color slot of the printhead. 3 Close the printer. SELECT YOUR PRINTER FROM THE PRINT DIALOG BEFORE SENDING THE PRINT JOB MAKE SURE THE PRINT JOB IS NOT PAUSED MAKE SURE...
... the USB cable into the back of the printer. 3 Firmly plug the rectangular end of the USB cable into the matching color slot of the printhead. 3 Close the printer. SELECT YOUR PRINTER FROM THE PRINT DIALOG BEFORE SENDING THE PRINT JOB MAKE SURE THE PRINT JOB IS NOT PAUSED MAKE SURE...
User's Guide
Page 140
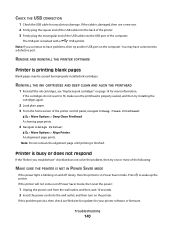
...then try installing the cartridges again. 2 Load plain paper. 3 From the home screen of the printer control panel, navigate to Deep Clean Printhead: > More Options > Deep Clean Printhead A cleaning page prints. 4 Navigate to wake up the 1 Unplug the power cord from the wall outlet, and then wait 10 seconds. ...computer. The USB port is damaged, then use a new one or more information. REINSTALL THE INK CARTRIDGES AND DEEP CLEAN AND ALIGN THE PRINTHEAD 1 Reinstall the ink cartridges, see "Replacing ink cartridges" on and off slowly, then the printer is busy or does not respond If the...
...then try installing the cartridges again. 2 Load plain paper. 3 From the home screen of the printer control panel, navigate to Deep Clean Printhead: > More Options > Deep Clean Printhead A cleaning page prints. 4 Navigate to wake up the 1 Unplug the power cord from the wall outlet, and then wait 10 seconds. ...computer. The USB port is damaged, then use a new one or more information. REINSTALL THE INK CARTRIDGES AND DEEP CLEAN AND ALIGN THE PRINTHEAD 1 Reinstall the ink cartridges, see "Replacing ink cartridges" on and off slowly, then the printer is busy or does not respond If the...
User's Guide
Page 146
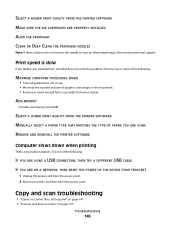
... These are possible solutions. SELECT A HIGHER PRINT QUALITY FROM THE PRINTER SOFTWARE MAKE SURE THE INK CARTRIDGES ARE PROPERLY INSTALLED ALIGN THE PRINTHEAD CLEAN OR DEEP CLEAN THE PRINTHEAD NOZZLES Note: If these solutions do not remove the streaks or lines on page 147 Troubleshooting 146 Print speed is slow If the...
... These are possible solutions. SELECT A HIGHER PRINT QUALITY FROM THE PRINTER SOFTWARE MAKE SURE THE INK CARTRIDGES ARE PROPERLY INSTALLED ALIGN THE PRINTHEAD CLEAN OR DEEP CLEAN THE PRINTHEAD NOZZLES Note: If these solutions do not remove the streaks or lines on page 147 Troubleshooting 146 Print speed is slow If the...

User's Guide
Page 192
...cannot scan to computer over a network 148 cannot send e-mail 149 cannot send faxes 150 cartridges, ink ordering 13 using genuine Lexmark 13 changing Power Saver timeout 19 changing printing mode 55 changing wireless settings after installation (Mac) 106 changing wireless settings after ...troubleshoot 136 fax troubleshooting 150 memory card troubleshooting 155 choosing a splitter, faxing 95 cleaning exterior of the printer 134 cleaning printhead nozzles 133 cleaning the printer control panel 135 Club Internet 104 coated paper loading 32 collating copies 61 Communication not available message...
...cannot scan to computer over a network 148 cannot send e-mail 149 cannot send faxes 150 cartridges, ink ordering 13 using genuine Lexmark 13 changing Power Saver timeout 19 changing printing mode 55 changing wireless settings after installation (Mac) 106 changing wireless settings after ...troubleshoot 136 fax troubleshooting 150 memory card troubleshooting 155 choosing a splitter, faxing 95 cleaning exterior of the printer 134 cleaning printhead nozzles 133 cleaning the printer control panel 135 Club Internet 104 coated paper loading 32 collating copies 61 Communication not available message...
User's Guide
Page 196
...problems, basic solutions 136 printer software installing 26 uninstalling 25 printer solutions 129 printer, setting as default 54 printhead aligning 132 printhead access location 10 printhead error 137 printhead nozzles cleaning 133 printing collate 38 custom-size paper 42 documents 37 documents from memory card or flash ... 8 R received history report 99 receiving faxes Auto Answer setting 93, 94 automatically 93 manually 94 tips 93, 94 recycling 7 Lexmark products 15 WEEE statement 178 redial attempts setting 89 redial time setting 89 reducing an image 60 repeating an image 61 replacing ink ...
...problems, basic solutions 136 printer software installing 26 uninstalling 25 printer solutions 129 printer, setting as default 54 printhead aligning 132 printhead access location 10 printhead error 137 printhead nozzles cleaning 133 printing collate 38 custom-size paper 42 documents 37 documents from memory card or flash ... 8 R received history report 99 receiving faxes Auto Answer setting 93, 94 automatically 93 manually 94 tips 93, 94 recycling 7 Lexmark products 15 WEEE statement 178 redial attempts setting 89 redial time setting 89 reducing an image 60 repeating an image 61 replacing ink ...
User's Guide
Page 197
... print through USB 141 incorrect language appears on display 137 page does not print 139 printer does not respond 140 printer printing blank pages 140 printhead error 137 software did not install 138 shared printing 115 sharing printer in Windows 114 SmartSolutions 129 adding printer 130 customizing 130 SMTP server configuring...
... print through USB 141 incorrect language appears on display 137 page does not print 139 printer does not respond 140 printer printing blank pages 140 printhead error 137 software did not install 138 shared printing 115 sharing printer in Windows 114 SmartSolutions 129 adding printer 130 customizing 130 SMTP server configuring...
User's Guide
Page 198
... print through USB 141 incorrect language appears on display 137 page does not print 139 printer does not respond 140 printer printing blank pages 140 printhead error 137 software did not install 138 troubleshooting, wireless cannot print over wireless network 160 changing wireless settings after installation (Mac) 106 changing wireless settings...
... print through USB 141 incorrect language appears on display 137 page does not print 139 printer does not respond 140 printer printing blank pages 140 printhead error 137 software did not install 138 troubleshooting, wireless cannot print over wireless network 160 changing wireless settings after installation (Mac) 106 changing wireless settings...
Quick Reference
Page 4
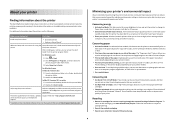
...other resources. Conserving paper • Activate Eco-Mode. Inks in High-Yield cartridges allow you can be able to www.lexmark.com/recycle. These features clean the printhead nozzles to print more than normal and are continually improving our printers to a computer program, application, or flash drive ...the environment and are ideal for printing in a minimum-power standby mode after the printer is left idle for using the "Clean Printhead" and "Deep Clean Printhead" features. The Power Saver feature puts the printer in Windows and Mac OS X 10.6 or later. • Print more ...
...other resources. Conserving paper • Activate Eco-Mode. Inks in High-Yield cartridges allow you can be able to www.lexmark.com/recycle. These features clean the printhead nozzles to print more than normal and are continually improving our printers to a computer program, application, or flash drive ...the environment and are ideal for printing in a minimum-power standby mode after the printer is left idle for using the "Clean Printhead" and "Deep Clean Printhead" features. The Power Saver feature puts the printer in Windows and Mac OS X 10.6 or later. • Print more ...

Quick Reference
Page 6
...The icons are displayed when they are selectable on both sides of a sheet of paper. • Remove paper jams. Use the 9 Printhead access To Install the printhead. If an icon is not displayed, then the function is on and off the printer. Note: When the printer is not available. ...EXT 5 6 7 9 8 Use the 1 Scanner unit 2 Ink cartridge access 3 Ethernet port 4 USB port 5 LINE Port To • Access the ink cartridges and printhead. • Remove paper jams. Install, replace, or remove ink cartridges. to a higher one menu level to switch for the printer, and if this port if...
...The icons are displayed when they are selectable on both sides of a sheet of paper. • Remove paper jams. Use the 9 Printhead access To Install the printhead. If an icon is not displayed, then the function is on and off the printer. Note: When the printer is not available. ...EXT 5 6 7 9 8 Use the 1 Scanner unit 2 Ink cartridge access 3 Ethernet port 4 USB port 5 LINE Port To • Access the ink cartridges and printhead. • Remove paper jams. Install, replace, or remove ink cartridges. to a higher one menu level to switch for the printer, and if this port if...
Quick Reference
Page 10
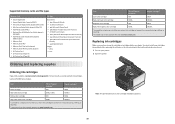
...new cartridges immediately after removing the old ones or the ink remaining in the printhead nozzles may dry out. 1 Turn on the Lexmark Web site at www.lexmark.com. Note: The printhead moves to Lexmark for remanufacturing, refilling, or recycling. 2 Available only on your printer. ... this cartridge to the cartridge installation position. 10 After use, return this cartridge to Lexmark for remanufacturing, refilling, or recycling. 2 Available only on the Lexmark Web site at www.lexmark.com/pageyields. Supported memory cards and file types Memory Card • Secure Digital (SD...
...new cartridges immediately after removing the old ones or the ink remaining in the printhead nozzles may dry out. 1 Turn on the Lexmark Web site at www.lexmark.com. Note: The printhead moves to Lexmark for remanufacturing, refilling, or recycling. 2 Available only on your printer. ... this cartridge to the cartridge installation position. 10 After use, return this cartridge to Lexmark for remanufacturing, refilling, or recycling. 2 Available only on the Lexmark Web site at www.lexmark.com/pageyields. Supported memory cards and file types Memory Card • Secure Digital (SD...


