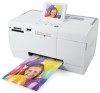
Setup Solutions
Page 3
...approved to a professional service person. Lexmark Web site at www.lexmark.com. 3 Lexmark is not responsible for setting up this product or the manufacturer's authorized replacement power supply and power supply cord. Refer service or repairs, other replacement parts. Finding information about the printer" on page 3 • "...on page 12 Safety information Use only the power supply and power supply cord provided with the use of some parts may not always be obvious. The safety features of other than those described in the printer box or on the hardware and software. ...
...approved to a professional service person. Lexmark Web site at www.lexmark.com. 3 Lexmark is not responsible for setting up this product or the manufacturer's authorized replacement power supply and power supply cord. Refer service or repairs, other replacement parts. Finding information about the printer" on page 3 • "...on page 12 Safety information Use only the power supply and power supply cord provided with the use of some parts may not always be obvious. The safety features of other than those described in the printer box or on the hardware and software. ...
Setup Solutions
Page 10
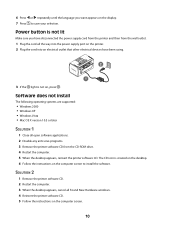
... 2000 • Windows XP • Windows Vista • Mac OS X version 10.3 or later SOLUTION 1 1 Close all the way into the power supply port on the printer. 2 Plug the cord into an electrical outlet that other electrical devices have been using. 3 If the light is not lit Make sure you want... appears on the display. 7 Press to install the software. 6 Press or repeatedly until the language you have disconnected the power supply cord from the printer and then from the wall outlet. 1 Plug the cord all open software applications. 2 Disable any anti-virus programs. 3 Remove the...
... 2000 • Windows XP • Windows Vista • Mac OS X version 10.3 or later SOLUTION 1 1 Close all the way into the power supply port on the printer. 2 Plug the cord into an electrical outlet that other electrical devices have been using. 3 If the light is not lit Make sure you want... appears on the display. 7 Press to install the software. 6 Press or repeatedly until the language you have disconnected the power supply cord from the printer and then from the wall outlet. 1 Plug the cord all open software applications. 2 Disable any anti-virus programs. 3 Remove the...
Setup Solutions
Page 11
... of the User's Guide on the CD. SOLUTION 3 Remove and then load paper. SOLUTION 5 If the printer is marked with the USB symbol. SOLUTION 6 1 Press to turn the printer off. 2 Disconnect the power supply cord from the wall outlet. 3 Disconnect the other end of the User's Guide on page 10. For ...4 Check the ink level, and install a new print cartridge if necessary. For more information, see "Installing the print cartridge" in the "Maintaining the printer" chapter of the power supply cord from any other device, such as a USB hub or switch box. 2 Directly connect the cable to the...
... of the User's Guide on the CD. SOLUTION 3 Remove and then load paper. SOLUTION 5 If the printer is marked with the USB symbol. SOLUTION 6 1 Press to turn the printer off. 2 Disconnect the power supply cord from the wall outlet. 3 Disconnect the other end of the User's Guide on page 10. For ...4 Check the ink level, and install a new print cartridge if necessary. For more information, see "Installing the print cartridge" in the "Maintaining the printer" chapter of the power supply cord from any other device, such as a USB hub or switch box. 2 Directly connect the cable to the...
Setup Solutions
Page 12
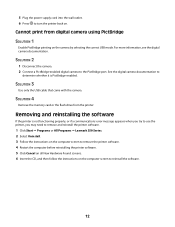
... error message appears when you try to use the printer, you may need to remove and reinstall the printer software. 1 Click Start ΠPrograms or All Programs ΠLexmark 350 Series. 2 Select Uninstall. 3 Follow the instructions... on the computer screen to remove the printer software. 4 Restart the computer before reinstalling the printer software. 5 Click Cancel on all New Hardware Found screens. 6 Insert the CD, and then follow the instructions on the camera by selecting the correct USB mode. 5 Plug the power supply...
... error message appears when you try to use the printer, you may need to remove and reinstall the printer software. 1 Click Start ΠPrograms or All Programs ΠLexmark 350 Series. 2 Select Uninstall. 3 Follow the instructions... on the computer screen to remove the printer software. 4 Restart the computer before reinstalling the printer software. 5 Click Cancel on all New Hardware Found screens. 6 Insert the CD, and then follow the instructions on the camera by selecting the correct USB mode. 5 Plug the power supply...
Getting Started
Page 9
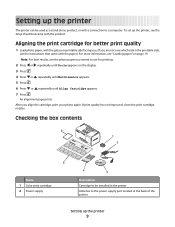
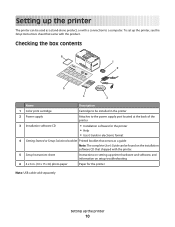
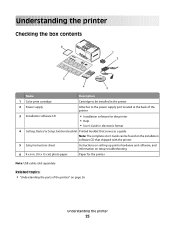
...For more information, see the Setup sheet that came with a connection to a computer. To set up the printer 9 Checking the box contents Name 1 Color print cartridge 2 Power supply Description Cartridge to be used as a stand-alone product, or with the product. If print quality has ... facing you. (If you align the cartridge, print your photo again. Setting up the printer The printer can be installed in the printer Attaches to the power supply port located at the back of the printer Setting up the printer, see "Loading paper" on the display. 3 Press . 4 Press or repeatedly until ...
...For more information, see the Setup sheet that came with a connection to a computer. To set up the printer 9 Checking the box contents Name 1 Color print cartridge 2 Power supply Description Cartridge to be used as a stand-alone product, or with the product. If print quality has ... facing you. (If you align the cartridge, print your photo again. Setting up the printer The printer can be installed in the printer Attaches to the power supply port located at the back of the printer Setting up the printer, see "Loading paper" on the display. 3 Press . 4 Press or repeatedly until ...
Getting Started
Page 12
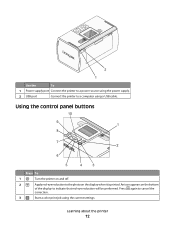
Using the control panel buttons Press To 1 Turn the printer on and off. 2 Apply red-eye reduction to the photo on the bottom of the display to indicate that red-eye reduction will be performed. Learning about the printer 12 An icon appears on the display when it is printed. Use the To 1 Power supply port Connect the printer to a power source using the power supply. 2 USB port Connect the printer to a computer using the current settings. Press again to cancel the correction. 3 Start a color print job using a USB cable.
Using the control panel buttons Press To 1 Turn the printer on and off. 2 Apply red-eye reduction to the photo on the bottom of the display to indicate that red-eye reduction will be performed. Learning about the printer 12 An icon appears on the display when it is printed. Use the To 1 Power supply port Connect the printer to a power source using the power supply. 2 USB port Connect the printer to a computer using the current settings. Press again to cancel the correction. 3 Start a color print job using a USB cable.
Getting Started
Page 37
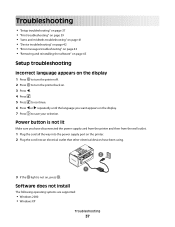
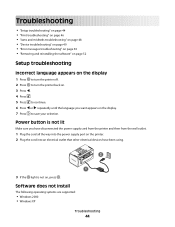
... appears on the display 1 Press to turn the printer off. 2 Press to turn the printer back on. 3 Press . 4 Press . 5 Press to continue. 6 Press or repeatedly until the language you have disconnected the power supply cord from the printer and then from the wall outlet. 1 Plug the... cord all the way into the power supply port on the printer. 2 Plug the cord into an electrical outlet that other electrical devices have been using....
... appears on the display 1 Press to turn the printer off. 2 Press to turn the printer back on. 3 Press . 4 Press . 5 Press to continue. 6 Press or repeatedly until the language you have disconnected the power supply cord from the printer and then from the wall outlet. 1 Plug the... cord all the way into the power supply port on the printer. 2 Plug the cord into an electrical outlet that other electrical devices have been using....
Getting Started
Page 40
... switch box. 2 Directly connect the cable to turn the printer off. 2 Disconnect the power supply cord from the wall outlet. 3 Disconnect the other device, such as possible from the printer. 4 Reconnect the power supply cord to the printer. 5 Plug the power supply cord into the wall outlet. 6 Press to the printer and the computer. SOLUTION 2 Try minimizing the number and...
... switch box. 2 Directly connect the cable to turn the printer off. 2 Disconnect the power supply cord from the wall outlet. 3 Disconnect the other device, such as possible from the printer. 4 Reconnect the power supply cord to the printer. 5 Plug the power supply cord into the wall outlet. 6 Press to the printer and the computer. SOLUTION 2 Try minimizing the number and...
Getting Started
Page 44
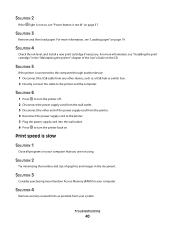
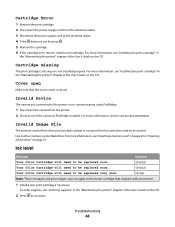
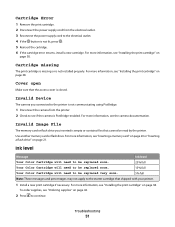
...on the CD. Invalid Image File The memory card or flash drive you connected to the printer is not communicating using PictBridge. 1 Disconnect the camera from the electrical outlet. 3 Reconnect the power supply cord to the electrical outlet. 4 If the button is closed. Use another memory card or... flash drive. Troubleshooting 44 Cartridge Error 1 Remove the print cartridge. 2 Disconnect the power supply cord from the printer. 2 Check to see if the camera is empty or contains files that cannot be replaced very soon. 5% full Note: These messages...
...on the CD. Invalid Image File The memory card or flash drive you connected to the printer is not communicating using PictBridge. 1 Disconnect the camera from the electrical outlet. 3 Reconnect the power supply cord to the electrical outlet. 4 If the button is closed. Use another memory card or... flash drive. Troubleshooting 44 Cartridge Error 1 Remove the print cartridge. 2 Disconnect the power supply cord from the printer. 2 Check to see if the camera is empty or contains files that cannot be replaced very soon. 5% full Note: These messages...
Getting Started
Page 52
...panel 11 display 11 handle 11 light 11 memory card slots 11 paper exit tray 11 paper guide 11 paper support 11 PictBridge port 11 power supply port 12 USB port 12 passport photos, printing 13 photo does not print 39 Photo Edit Mode menu 16 photos adding frames 32 adjusting ... is not lit 37 power supply port 12 print cartridge aligning 9 Print Photos menu 14 Print Properties opening 18 print quality, improving 39 print speed is slow 40 print troubleshooting improving print quality 39 partial photo prints 41 print speed is slow 40 printer software reinstalling 45 removing 45 using 18 printing a ...
...panel 11 display 11 handle 11 light 11 memory card slots 11 paper exit tray 11 paper guide 11 paper support 11 PictBridge port 11 power supply port 12 USB port 12 passport photos, printing 13 photo does not print 39 Photo Edit Mode menu 16 photos adding frames 32 adjusting ... is not lit 37 power supply port 12 print cartridge aligning 9 Print Photos menu 14 Print Properties opening 18 print quality, improving 39 print speed is slow 40 print troubleshooting improving print quality 39 partial photo prints 41 print speed is slow 40 printer software reinstalling 45 removing 45 using 18 printing a ...
User's Guide
Page 10
... print cartridge Cartridge to be used as a guide Note: The complete User's Guide can be installed in the printer 2 Power supply Attaches to the power supply port located at the back of the printer 3 Installation software CD • Installation software for the printer • Help • User's Guide in . (10 x 15 cm) photo paper Paper for the...
... print cartridge Cartridge to be used as a guide Note: The complete User's Guide can be installed in the printer 2 Power supply Attaches to the power supply port located at the back of the printer 3 Installation software CD • Installation software for the printer • Help • User's Guide in . (10 x 15 cm) photo paper Paper for the...

User's Guide
Page 12
Use the To 1 Power supply port Connect the printer to a power source using the power supply. 2 USB port Connect the printer to a computer using the current settings. Using the control panel buttons Press To 1 Turn the printer on the display when it is printed. Learning about the printer 12 Press again to cancel the correction. 3 Start a color print job using a USB cable. An icon appears on the bottom of the display to the photo on and off. 2 Apply red-eye reduction to indicate that red-eye reduction will be performed.
Use the To 1 Power supply port Connect the printer to a power source using the power supply. 2 USB port Connect the printer to a computer using the current settings. Using the control panel buttons Press To 1 Turn the printer on the display when it is printed. Learning about the printer 12 Press again to cancel the correction. 3 Start a color print job using a USB cable. An icon appears on the bottom of the display to the photo on and off. 2 Apply red-eye reduction to indicate that red-eye reduction will be performed.
User's Guide
Page 44
... the display. 7 Press to continue. 6 Press or repeatedly until the language you have disconnected the power supply cord from the printer and then from the wall outlet. 1 Plug the cord all the way into the power supply port on the printer. 2 Plug the cord into an electrical outlet that other electrical devices have been using. 3 If... troubleshooting" on page 50 • "Removing and reinstalling the software" on page 52 Setup troubleshooting Incorrect language appears on the display 1 Press to turn the printer off. 2 Press to turn the...
... the display. 7 Press to continue. 6 Press or repeatedly until the language you have disconnected the power supply cord from the printer and then from the wall outlet. 1 Plug the cord all the way into the power supply port on the printer. 2 Plug the cord into an electrical outlet that other electrical devices have been using. 3 If... troubleshooting" on page 50 • "Removing and reinstalling the software" on page 52 Setup troubleshooting Incorrect language appears on the display 1 Press to turn the printer off. 2 Press to turn the...
User's Guide
Page 47
... from the wall outlet. 3 Disconnect the other device, such as possible from the printer. 4 Reconnect the power supply cord to the printer. 5 Plug the power supply cord into the wall outlet. 6 Press to turn the printer back on page 38. Troubleshooting 47 For more information, see "Installing the print cartridge" on . SOLUTION 2 Try minimizing the number and...
... from the wall outlet. 3 Disconnect the other device, such as possible from the printer. 4 Reconnect the power supply cord to the printer. 5 Plug the power supply cord into the wall outlet. 6 Press to turn the printer back on page 38. Troubleshooting 47 For more information, see "Installing the print cartridge" on . SOLUTION 2 Try minimizing the number and...
User's Guide
Page 51
... flash drive you connected to the printer is not communicating using PictBridge. 1 Disconnect the camera from the electrical outlet. 3 Reconnect the power supply cord to see if the camera is PictBridge-enabled. To order supplies, see "Ordering supplies" on page 38. Invalid Device ...The camera you inserted is empty or contains files that shipped with your printer. 1 Install a new print cartridge if necessary. Cartridge Error 1 Remove the print cartridge. 2 Disconnect the power supply cord from the printer. 2 Check to the electrical outlet. 4 If the button is not lit,...
... flash drive you connected to the printer is not communicating using PictBridge. 1 Disconnect the camera from the electrical outlet. 3 Reconnect the power supply cord to see if the camera is PictBridge-enabled. To order supplies, see "Ordering supplies" on page 38. Invalid Device ...The camera you inserted is empty or contains files that shipped with your printer. 1 Install a new print cartridge if necessary. Cartridge Error 1 Remove the print cartridge. 2 Disconnect the power supply cord from the printer. 2 Check to the electrical outlet. 4 If the button is not lit,...
User's Guide
Page 61
...card slots 11 paper exit tray 11 paper guide 11 paper support 11 PictBridge port 11 power supply port 12 USB port 12 passport photos, printing 13 photo does not print 46 Photo ... 47 print troubleshooting improving print quality 46 partial photo prints 48 print speed is slow 47 printer software reinstalling 52 removing 52 using 18 printing a photo or selected photos 25 all photos ... photos with automatic enhancement 32 photos with frames 33 test page 42 publications, finding 7 R recycling Lexmark products 43 WEEE statement 55 red-eye, removing 16 removing print cartridge 38 rotating photos 16 S ...
...card slots 11 paper exit tray 11 paper guide 11 paper support 11 PictBridge port 11 power supply port 12 USB port 12 passport photos, printing 13 photo does not print 46 Photo ... 47 print troubleshooting improving print quality 46 partial photo prints 48 print speed is slow 47 printer software reinstalling 52 removing 52 using 18 printing a photo or selected photos 25 all photos ... photos with automatic enhancement 32 photos with frames 33 test page 42 publications, finding 7 R recycling Lexmark products 43 WEEE statement 55 red-eye, removing 16 removing print cartridge 38 rotating photos 16 S ...
User's Guide
Page 25
...contents Name Description 1 Color print cartridge Cartridge to be installed in the printer 2 Power supply Attaches to the power supply port located at the back of the printer 3 Installation software CD • Installation software for the printer • Help • User's Guide in electronic format 4 Getting ... guide Note: The complete User's Guide can be found on the installation software CD that shipped with the printer. 5 Setup Instructions sheet Instructions on setting up printer hardware and software, and information on setup troubleshooting 6 4 x 6 in. (10 x 15 cm) photo paper...
...contents Name Description 1 Color print cartridge Cartridge to be installed in the printer 2 Power supply Attaches to the power supply port located at the back of the printer 3 Installation software CD • Installation software for the printer • Help • User's Guide in electronic format 4 Getting ... guide Note: The complete User's Guide can be found on the installation software CD that shipped with the printer. 5 Setup Instructions sheet Instructions on setting up printer hardware and software, and information on setup troubleshooting 6 4 x 6 in. (10 x 15 cm) photo paper...

User's Guide
Page 27
Related topics: • "Checking the box contents" on page 25 Understanding the printer 27 Use the To 1 Power supply port Connect the printer to a power source using the power supply. 2 USB port Connect the printer to a computer using a USB cable.
Related topics: • "Checking the box contents" on page 25 Understanding the printer 27 Use the To 1 Power supply port Connect the printer to a power source using the power supply. 2 USB port Connect the printer to a computer using a USB cable.

User's Guide
Page 42
...appears on . Maintaining the printer 42 Note: For best results, use the photo paper you aligned the cartridge to use for loose connections. - If you intend to improve print quality, print your photo to print again. • Did you connect the power supply cord to a known working ...the light is the printable side, see "Loading paper" on page 43 Checking the cable connections Verify the following : 1 Attach the power supply firmly to the power supply port at the back of the printer. 2 Attach the power supply firmly to a known working electrical outlet? - An alignment page prints.
...appears on . Maintaining the printer 42 Note: For best results, use the photo paper you aligned the cartridge to use for loose connections. - If you intend to improve print quality, print your photo to print again. • Did you connect the power supply cord to a known working ...the light is the printable side, see "Loading paper" on page 43 Checking the cable connections Verify the following : 1 Attach the power supply firmly to the power supply port at the back of the printer. 2 Attach the power supply firmly to a known working electrical outlet? - An alignment page prints.
User's Guide
Page 54
...on page 57. SOLUTION 3 Remove and then reload paper. SOLUTION 5 If the printer is connected to the computer through another device: 1 Disconnect the USB cable from any other end of the power supply cord from the wall outlet. 3 Disconnect the other device, such as a USB ..."Error messages" on page 5. SOLUTION 6 1 Press to turn the printer off. 2 Disconnect the power supply cord from the printer. 4 Reconnect the power supply cord to the printer. 5 Plug the power supply cord into the wall outlet. 6 Press to the printer and the computer. SOLUTION 2 Make sure the paper size being used ...
...on page 57. SOLUTION 3 Remove and then reload paper. SOLUTION 5 If the printer is connected to the computer through another device: 1 Disconnect the USB cable from any other end of the power supply cord from the wall outlet. 3 Disconnect the other device, such as a USB ..."Error messages" on page 5. SOLUTION 6 1 Press to turn the printer off. 2 Disconnect the power supply cord from the printer. 4 Reconnect the power supply cord to the printer. 5 Plug the power supply cord into the wall outlet. 6 Press to the printer and the computer. SOLUTION 2 Make sure the paper size being used ...


