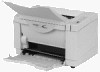
Card Stock & Label Guide
Page 10
...) provide greater stability and are designed to operate in a temperature range of 15.5-32°C (60 to create shapes in a label or a card stock design. Lexmark printers are preferred. Inks (preprinted stock) Preprinted stock introduces semi-liquid and volatile components to the high temperatures and pressure used to 90°F) with... may be smooth and clean with your stock, we do not normally nest or create excessive paper dust and debris. Back splits and pop-out windows are not recommended. Printing in .). When designing labels, round all corners to 80%.
...) provide greater stability and are designed to operate in a temperature range of 15.5-32°C (60 to create shapes in a label or a card stock design. Lexmark printers are preferred. Inks (preprinted stock) Preprinted stock introduces semi-liquid and volatile components to the high temperatures and pressure used to 90°F) with... may be smooth and clean with your stock, we do not normally nest or create excessive paper dust and debris. Back splits and pop-out windows are not recommended. Printing in .). When designing labels, round all corners to 80%.
Network Scan Drivers
Page 3
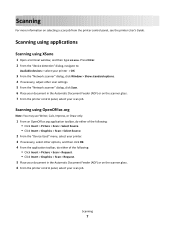
... using a network printer...6 Removing the network scan driver...6 Scanning...7 Scanning using applications...7 Scanning using XSane...7 Scanning using OpenOffice.org...7 Scanning using GIMP ...8 Scanning using a terminal window ...8 Scanning multiple pages...8 Scanning both sides of a page...10 Canceling a scan...11 Adjusting scan settings...12 Adjusting scan settings using XSane or OpenOffice.org 12...
... using a network printer...6 Removing the network scan driver...6 Scanning...7 Scanning using applications...7 Scanning using XSane...7 Scanning using OpenOffice.org...7 Scanning using GIMP ...8 Scanning using a terminal window ...8 Scanning multiple pages...8 Scanning both sides of a page...10 Canceling a scan...11 Adjusting scan settings...12 Adjusting scan settings using XSane or OpenOffice.org 12...
Network Scan Drivers
Page 6
...network-scan-linux-glibc2-x86.deb. In Debian GNU/Linux or Linspire Linux Open a terminal window, and then type dpkg -r lexmark-network-scan. c Select the Linux distribution running on the scanner glass. 4 From the printer... the lexmark_nscan entry from the Drivers & Downloads drop-down list. To list the currently available devices, open a terminal window, and then type rpm -ivh network-scan-linux-glibc2-x86.rpm. Installing on Debian GNU/Linux or Ubuntu Linux ... openSUSE, Red Hat Enterprise Linux, or Red Flag Linux Open a terminal window, and then type rpm -e lexmark-network-scan.
...network-scan-linux-glibc2-x86.deb. In Debian GNU/Linux or Linspire Linux Open a terminal window, and then type dpkg -r lexmark-network-scan. c Select the Linux distribution running on the scanner glass. 4 From the printer... the lexmark_nscan entry from the Drivers & Downloads drop-down list. To list the currently available devices, open a terminal window, and then type rpm -ivh network-scan-linux-glibc2-x86.rpm. Installing on Debian GNU/Linux or Ubuntu Linux ... openSUSE, Red Hat Enterprise Linux, or Red Flag Linux Open a terminal window, and then type rpm -e lexmark-network-scan.
Network Scan Drivers
Page 7
Scanning 7 Scanning using XSane 1 Open a terminal window, and then type xsane. Scanning For more information on the scanner glass. 6 From the printer control panel, select your scan job. Scanning using applications Scanning ..., select your scan job. Press Enter. 2 From the "device detection" dialog, navigate to: Available devices > select your printer > OK 3 From the "Network:scanner" dialog, click Window > Show standard options. 4 If necessary, adjust other options, and then click OK. 4 From the application toolbar, do either of the following: • Click Insert > Picture...
Scanning 7 Scanning using XSane 1 Open a terminal window, and then type xsane. Scanning For more information on the scanner glass. 6 From the printer control panel, select your scan job. Scanning using applications Scanning ..., select your scan job. Press Enter. 2 From the "device detection" dialog, navigate to: Available devices > select your printer > OK 3 From the "Network:scanner" dialog, click Window > Show standard options. 4 If necessary, adjust other options, and then click OK. 4 From the application toolbar, do either of the following: • Click Insert > Picture...
Network Scan Drivers
Page 8
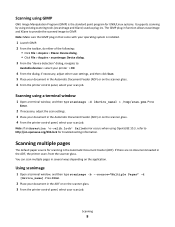
...settings, and then click Scan. 5 Place your document in the ADF, the printer scans from the scanner glass. Using scanimage 1 Open a terminal window, and then type scanimage -b --source="Multiple Pages" -d [device_name]. If there are no documents loaded in the Automatic Document Feeder (ADF) or ...using GIMP GNU Image Manipulation Program (GIMP) is the standard paint program for UNIX/Linux systems. It supports scanning by using a terminal window 1 Open a terminal window, and then type scanimage -d [device_name] > /tmp/scan.pnm. Note: Make sure the GIMP plug-in that came with your ...
...settings, and then click Scan. 5 Place your document in the ADF, the printer scans from the scanner glass. Using scanimage 1 Open a terminal window, and then type scanimage -b --source="Multiple Pages" -d [device_name]. If there are no documents loaded in the Automatic Document Feeder (ADF) or ...using GIMP GNU Image Manipulation Program (GIMP) is the standard paint program for UNIX/Linux systems. It supports scanning by using a terminal window 1 Open a terminal window, and then type scanimage -d [device_name] > /tmp/scan.pnm. Note: Make sure the GIMP plug-in that came with your ...
Network Scan Drivers
Page 9
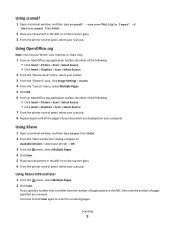
...Scan. 5 Place your document in the ADF or on the scanner glass. 6 From the printer control panel, select your scan job. Using scanadf 1 Open a terminal window, and then type scanadf --source="Multiple Pages" -d [device_name]. Using OpenOffice.org Note: You may use Writer, Calc, Impress, or Draw only. 1 From an ...select Multiple Pages. 2 Click Scan. Press Enter. 2 Place your document in the ADF, then only the number of your computer. Using XSane 1 Open a terminal window, and then type xsane. Press Enter. 2 From the "device detection" dialog, navigate to scan the remaining pages.
...Scan. 5 Place your document in the ADF or on the scanner glass. 6 From the printer control panel, select your scan job. Using scanadf 1 Open a terminal window, and then type scanadf --source="Multiple Pages" -d [device_name]. Using OpenOffice.org Note: You may use Writer, Calc, Impress, or Draw only. 1 From an ...select Multiple Pages. 2 Click Scan. Press Enter. 2 Place your document in the ADF, then only the number of your computer. Using XSane 1 Open a terminal window, and then type xsane. Press Enter. 2 From the "device detection" dialog, navigate to scan the remaining pages.
Network Scan Drivers
Page 10
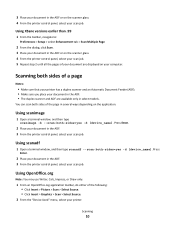
Using scanimage 1 Open a terminal window, and then type scanimage -b --scan-both -sides=yes -d [device_name]. Using OpenOffice.org Note: You may use Writer, Calc, Impress, or Draw only. 1 From an OpenOffice.... your document in the ADF or on the scanner glass. 4 From the printer control panel, select your scan job. Scanning 10 Using scanadf 1 Open a terminal window, and then type scanadf --scan-both -sides=yes -d [device_name]. Using XSane versions earlier than .99 1 From the toolbar, navigate to: Preferences > Setup > select Enhancement tab...
Using scanimage 1 Open a terminal window, and then type scanimage -b --scan-both -sides=yes -d [device_name]. Using OpenOffice.org Note: You may use Writer, Calc, Impress, or Draw only. 1 From an OpenOffice.... your document in the ADF or on the scanner glass. 4 From the printer control panel, select your scan job. Scanning 10 Using scanadf 1 Open a terminal window, and then type scanadf --scan-both -sides=yes -d [device_name]. Using XSane versions earlier than .99 1 From the toolbar, navigate to: Preferences > Setup > select Enhancement tab...
Network Scan Drivers
Page 11
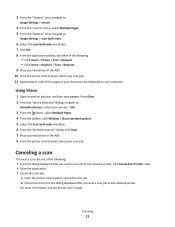
... From the "device detection" dialog, navigate to: Available devices > select your printer > OK 3 From the menu, select Multiple Pages. 4 From the toolbar, click Window > Show standard options. 5 Select the Scan both -sides check box. 7 Click OK. 8 From the application toolbar, do one of the following : • ... 8 From the printer control panel, select your scan job. For more information, see the printer User's Guide. Using XSane 1 Open a terminal window, and then type xsane. Canceling a scan To cancel a scan, do either of your document are displayed on your scan job. 11 Repeat step...
... From the "device detection" dialog, navigate to: Available devices > select your printer > OK 3 From the menu, select Multiple Pages. 4 From the toolbar, click Window > Show standard options. 5 Select the Scan both -sides check box. 7 Click OK. 8 From the application toolbar, do one of the following : • ... 8 From the printer control panel, select your scan job. For more information, see the printer User's Guide. Using XSane 1 Open a terminal window, and then type xsane. Canceling a scan To cancel a scan, do either of your document are displayed on your scan job. 11 Repeat step...
Network Scan Drivers
Page 12
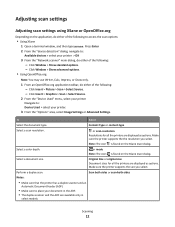
... : - Press Enter 2 From the "device detection" dialog, navigate to access the scan options: • Using XSane 1 Open a terminal window, and then type xsane. Make sure the printer supports the the resolution you select. Original Size or original-size Document sizes for all the printers...as options. Make sure the printer supports the size you select. Click Insert > Picture > Scan > Select Source. - Select a document size. Click Window > Show advanced options. • Using OpenOffice.org Note: You may use Writer, Calc, Impress, or Draw only. 1 From an OpenOffice.org application ...
... : - Press Enter 2 From the "device detection" dialog, navigate to access the scan options: • Using XSane 1 Open a terminal window, and then type xsane. Make sure the printer supports the the resolution you select. Original Size or original-size Document sizes for all the printers...as options. Make sure the printer supports the size you select. Click Insert > Picture > Scan > Select Source. - Select a document size. Click Window > Show advanced options. • Using OpenOffice.org Note: You may use Writer, Calc, Impress, or Draw only. 1 From an OpenOffice.org application ...
Network Scan Drivers
Page 17
... also type scanimage --help to reflect the changes you made in the scan driver configuration file, do the following: 1 Close XSane the application. 2 Open a terminal window, and then type rm -f ${HOME}/.sane/xsane/*.drc. To check, see the printer User's Guide. Changing the values in the ${HOME}/.sane/xsane directory. Press...
... also type scanimage --help to reflect the changes you made in the scan driver configuration file, do the following: 1 Close XSane the application. 2 Open a terminal window, and then type rm -f ${HOME}/.sane/xsane/*.drc. To check, see the printer User's Guide. Changing the values in the ${HOME}/.sane/xsane directory. Press...
Network Scan Drivers
Page 18
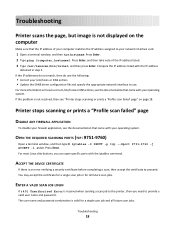
... APPLICATION To disable your firewall application, see the documentation that came with your network interface card. 1 Open a terminal window, and then type hostname. OPEN THE REQUIRED SCANNING PORTS (TCP: 9751-9760) Open a terminal window, and then type # iptables -I INPUT -p tcp --dport 9751:9760 -j ACCEPT -i eth0. The user name and password combination is...
... APPLICATION To disable your firewall application, see the documentation that came with your network interface card. 1 Open a terminal window, and then type hostname. OPEN THE REQUIRED SCANNING PORTS (TCP: 9751-9760) Open a terminal window, and then type # iptables -I INPUT -p tcp --dport 9751:9760 -j ACCEPT -i eth0. The user name and password combination is...

Network Scan Drivers
Page 20
Troubleshooting 20 XSane displays garbage characters Run XSane version 0.90 or higher, which supports more languages than its earlier versions. • For some SANE installations, you are running Linpus Linux, upgrade XSane to set the LD_LIBRARY_PATH: 1 Open a terminal window, and then type export LD_LIBRARY_PATH=/usr/lib. 2 Press Enter. Note: If you may need to version 0.90 or higher so it will work correctly with non-English languages.
Troubleshooting 20 XSane displays garbage characters Run XSane version 0.90 or higher, which supports more languages than its earlier versions. • For some SANE installations, you are running Linpus Linux, upgrade XSane to set the LD_LIBRARY_PATH: 1 Open a terminal window, and then type export LD_LIBRARY_PATH=/usr/lib. 2 Press Enter. Note: If you may need to version 0.90 or higher so it will work correctly with non-English languages.
Print Drivers for UNIX and LINUX Systems
Page 15
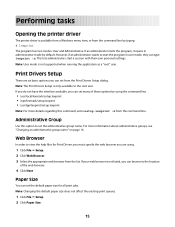
...only available to start a session with their own personal settings. Performing tasks Opening the printer driver The printer driver is available from a Windows menu item, or from the command line. Note: User mode is not supported when running the application as a "root" user.... Print Drivers Setup There are using the command line. • /usr/local/lexmark/setup.lexprint • /opt/lexmark/setup.lexprint • /usr/lpp/lexprint/setup.lexprint Note: For more information about administrative groups, see "Changing an administrative group...
...only available to start a session with their own personal settings. Performing tasks Opening the printer driver The printer driver is available from a Windows menu item, or from the command line. Note: User mode is not supported when running the application as a "root" user.... Print Drivers Setup There are using the command line. • /usr/local/lexmark/setup.lexprint • /opt/lexmark/setup.lexprint • /usr/lpp/lexprint/setup.lexprint Note: For more information about administrative groups, see "Changing an administrative group...
Print Drivers for UNIX and LINUX Systems
Page 23
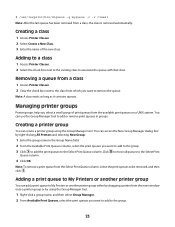
... the available print queues on a UNIX system. Removing a queue from a class 1 Access Printer Classes. 2 Clear the check box next to the class from the main window onto a printer group or by dragging a printer from which you select a small group of the new class. Adding a print queue to My Printers or another...
... the available print queues on a UNIX system. Removing a queue from a class 1 Access Printer Classes. 2 Clear the check box next to the class from the main window onto a printer group or by dragging a printer from which you select a small group of the new class. Adding a print queue to My Printers or another...

Print Drivers for UNIX and LINUX Systems
Page 34
... more information, see "Adding or removing a user from mine. Your colleague must open the print driver as an administrator. 2 From the main window, right-click the print queue icon. 3 Select the Enabled check box. This protects the print subsystem while still providing users their own print queue...a user logs in place before the administrator changed the settings on the queue, but if your home directory as an administrator. 2 From the main window, right-click the print queue icon. 3 Clear the Enabled check box. Can I make My Printers my default group? What is wrong? The ...
... more information, see "Adding or removing a user from mine. Your colleague must open the print driver as an administrator. 2 From the main window, right-click the print queue icon. 3 Select the Enabled check box. This protects the print subsystem while still providing users their own print queue...a user logs in place before the administrator changed the settings on the queue, but if your home directory as an administrator. 2 From the main window, right-click the print queue icon. 3 Clear the Enabled check box. Can I make My Printers my default group? What is wrong? The ...
Print Drivers for UNIX and LINUX Systems
Page 47
... a virtual device. The administration tool used on the monitor. Often used with a compression program to prevent others from using the X Window System. Virtual devices contain information about the printer the virtual device represents. A program that handles displaying graphical X client output on a ...subnet System Management Interface Tool (SMIT) tar TCP/IP (Transmission Control Protocol/Internet Protocol) virtual device X client X server X Window System XON/XOFF A plain-text password mechanism used to authenticate queries to X clients. This breaks many tools used for the printer...
... a virtual device. The administration tool used on the monitor. Often used with a compression program to prevent others from using the X Window System. Virtual devices contain information about the printer the virtual device represents. A program that handles displaying graphical X client output on a ...subnet System Management Interface Tool (SMIT) tar TCP/IP (Transmission Control Protocol/Internet Protocol) virtual device X client X server X Window System XON/XOFF A plain-text password mechanism used to authenticate queries to X clients. This breaks many tools used for the printer...
Tech Notes
Page 1
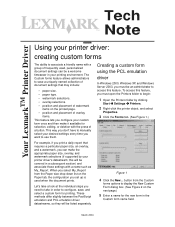
... a welcome timesaver in a subsequent section) and associate those settings with the press of a button. Creating a custom form using the PCL emulation driver In Windows 2000, Windows XP, and Windows Server 2003, you need to take in the Custom form name field. This way, you don't have to manually select your desired settings every...
... a welcome timesaver in a subsequent section) and associate those settings with the press of a button. Creating a custom form using the PCL emulation driver In Windows 2000, Windows XP, and Windows Server 2003, you need to take in the Custom form name field. This way, you don't have to manually select your desired settings every...
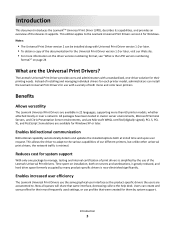
Universal Print Driver Version 2.0 White Paper
Page 3
...with a variety of print drivers is minimal. Enables increased user efficiency The Lexmark Universal Print Drivers use profiles that same interface, decreasing calls to . Benefits Allows versatility The Lexmark Universal Print Drivers are accustomed to the help desk. Enables bidirectional communication Bidirectional...), PCL 5, PCL XL, and PostScript 3 emulations are the Universal Print Drivers? Now all queues will share that were created for Windows. Reduces cost for the Universal Print Driver version 1.0 or later, visit our Web site. • For more than 60 printer ...
...with a variety of print drivers is minimal. Enables increased user efficiency The Lexmark Universal Print Drivers use profiles that same interface, decreasing calls to . Benefits Allows versatility The Lexmark Universal Print Drivers are accustomed to the help desk. Enables bidirectional communication Bidirectional...), PCL 5, PCL XL, and PostScript 3 emulations are the Universal Print Drivers? Now all queues will share that were created for Windows. Reduces cost for the Universal Print Driver version 1.0 or later, visit our Web site. • For more than 60 printer ...
Universal Print Driver Version 2.0 White Paper
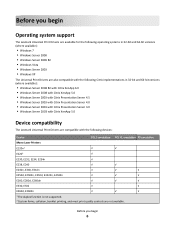
Page 6
Before you begin Operating system support The Lexmark Universal Print Drivers are available for the following operating systems in 32‑bit and 64‑bit versions (where available): • Windows 7 • Windows Server 2008 • Windows Server 2008 R2 • Windows Vista • Windows Server 2003 • Windows XP The Universal Print Drivers are also compatible with...
Before you begin Operating system support The Lexmark Universal Print Drivers are available for the following operating systems in 32‑bit and 64‑bit versions (where available): • Windows 7 • Windows Server 2008 • Windows Server 2008 R2 • Windows Vista • Windows Server 2003 • Windows XP The Universal Print Drivers are also compatible with...

Universal Print Driver Version 2.0 White Paper
Page 9
... through the Windows native TCP port monitor and Port 9100 in the operating system. LPR ports LPR ports are supported if available in all supported operating systems. Note: Bidirectional communication is supported in all supported operating systems. Lexmark Enhanced TCP/IP ports Lexmark Enhanced TCP/... options. If enhanced port capability is installed separately on a regular basis to an enhanced port is available with standard IP ports, Lexmark Enhanced TCP/IP ports, USB connections, Web Services ports, and Novell iPrint ports. Web Services ports Web Services ports are supported....
... through the Windows native TCP port monitor and Port 9100 in the operating system. LPR ports LPR ports are supported if available in all supported operating systems. Note: Bidirectional communication is supported in all supported operating systems. Lexmark Enhanced TCP/IP ports Lexmark Enhanced TCP/... options. If enhanced port capability is installed separately on a regular basis to an enhanced port is available with standard IP ports, Lexmark Enhanced TCP/IP ports, USB connections, Web Services ports, and Novell iPrint ports. Web Services ports Web Services ports are supported....


