Printer Languages and Interfaces Technical Reference
Page 72
... Intervention Required Replace PC Kit 40038 Intervention Required - 40038 Replace PC Kit To Continue Intervention Required Replace Toner Cartridge 40038 Intervention Required - 40038 Replace Toner Cartridge To Continue Intervention Required - 40038 84 All Photo Devs Exhausted Intervention Required - 84 Black Photo Dev ...PerfectFinish Empty FALSE [87] Replace Oil Coating FALSE Roll Replace PC Kit FALSE Replace PC Kit To Continue Replace Toner Cartridge Replace Toner To Continue FALSE FALSE FALSE All Photo Devs Exhausted [84] Black Photo Dev Exhausted [84] FALSE FALSE Black ...
... Intervention Required Replace PC Kit 40038 Intervention Required - 40038 Replace PC Kit To Continue Intervention Required Replace Toner Cartridge 40038 Intervention Required - 40038 Replace Toner Cartridge To Continue Intervention Required - 40038 84 All Photo Devs Exhausted Intervention Required - 84 Black Photo Dev ...PerfectFinish Empty FALSE [87] Replace Oil Coating FALSE Roll Replace PC Kit FALSE Replace PC Kit To Continue Replace Toner Cartridge Replace Toner To Continue FALSE FALSE FALSE All Photo Devs Exhausted [84] Black Photo Dev Exhausted [84] FALSE FALSE Black ...
Printer Languages and Interfaces Technical Reference
Page 79
... 40407 40407 40408 40408 40409 Intervention Required Toner Cartridge Missing Intervention Required Defective Cartridge Intervention Required Missing or Defective Cartridge Intervention Required Toner Cartridge Missing 40409 40409 40409 40410 Intervention Required Toner Cartridge Missing Intervention Required Defective Cartridge Intervention Required Missing or Defective Cartridge Intervention Required Toner Cartridge Missing 40410 40410 40410 40411 Intervention Required Toner Cartridge Missing 40411 Return string Magenta PC Unit...
... 40407 40407 40408 40408 40409 Intervention Required Toner Cartridge Missing Intervention Required Defective Cartridge Intervention Required Missing or Defective Cartridge Intervention Required Toner Cartridge Missing 40409 40409 40409 40410 Intervention Required Toner Cartridge Missing Intervention Required Defective Cartridge Intervention Required Missing or Defective Cartridge Intervention Required Toner Cartridge Missing 40410 40410 40410 40411 Intervention Required Toner Cartridge Missing 40411 Return string Magenta PC Unit...

Printer Languages and Interfaces Technical Reference
Page 80
Printer job language 80 Message Intervention Required Defective Cartridge Intervention Required Missing or Defective Cartridge Intervention Required Toner Cartridge Missing Status code 40411 40411 40412 Intervention Required Toner Cartridge Missing 40412 Intervention Required Defective Cartridge 40412 Intervention Required - Missing or Defective Cartridge 40412 Intervention Required Fuser Missing 40416 Intervention Required Fuser Missing 40416 Intervention Required Fuser Missing 40416 Intervention...
Printer job language 80 Message Intervention Required Defective Cartridge Intervention Required Missing or Defective Cartridge Intervention Required Toner Cartridge Missing Status code 40411 40411 40412 Intervention Required Toner Cartridge Missing 40412 Intervention Required Defective Cartridge 40412 Intervention Required - Missing or Defective Cartridge 40412 Intervention Required Fuser Missing 40416 Intervention Required Fuser Missing 40416 Intervention Required Fuser Missing 40416 Intervention...

Paper and Specialty Media Guide PDF
Page 19
... once through the printer and directly affects feed reliability. Peeled off labels could cause jams. The label or adhesive could void the printer and toner cartridge warranties. • Flex, fan, and align the label edges before loading. • Use only label sheets that have topcoats that remain ... the proper type of three basic parts: the liner, the adhesive, and the face sheet. Partial sheets also contaminate the printer and the cartridge with high‑speed laser printers (50 pages per minute or more information, see "Printer-specific paper support" on page 30. ...
... once through the printer and directly affects feed reliability. Peeled off labels could cause jams. The label or adhesive could void the printer and toner cartridge warranties. • Flex, fan, and align the label edges before loading. • Use only label sheets that have topcoats that remain ... the proper type of three basic parts: the liner, the adhesive, and the face sheet. Partial sheets also contaminate the printer and the cartridge with high‑speed laser printers (50 pages per minute or more information, see "Printer-specific paper support" on page 30. ...
Paper and Specialty Media Guide PDF
Page 24
... problem with these forms. Oil may also migrate from the tray into the printer. The adhesive on page 30. If you replace the toner cartridge. Sheets with a grain long base material, position the form in the tray so the paper portion of paper. 2 Wait approximately fi...Maintenance procedures Note: These procedures apply only to ensure good toner adhesion. Do not feed labels through the printer more information about printing on integrated forms with missing labels could void the printer and cartridge service warranties. Vinyls may be required to the back surface...
... problem with these forms. Oil may also migrate from the tray into the printer. The adhesive on page 30. If you replace the toner cartridge. Sheets with a grain long base material, position the form in the tray so the paper portion of paper. 2 Wait approximately fi...Maintenance procedures Note: These procedures apply only to ensure good toner adhesion. Do not feed labels through the printer more information about printing on integrated forms with missing labels could void the printer and cartridge service warranties. Vinyls may be required to the back surface...

Users Guide PDF
Page 45
... when idle Reboot always* Reboot never Set the printer to a value indicates the factory default setting. Supplies Cartridge Alarm Off* Single Continuous Set the number of automatic reboots that the alarm sounds when the toner cartridge is low. Error Prevention Auto Continue Disabled 5-255 (5*) Let the printer continue processing or printing a job automatically...
... when idle Reboot always* Reboot never Set the printer to a value indicates the factory default setting. Supplies Cartridge Alarm Off* Single Continuous Set the number of automatic reboots that the alarm sounds when the toner cartridge is low. Error Prevention Auto Continue Disabled 5-255 (5*) Let the printer continue processing or printing a job automatically...

Users Guide PDF
Page 114
... and supplies, and may negatively affect actual yield. All life indicators are used. It can also affect warranty coverage. Lexmark MX321 Return Program toner cartridges Item United States and Canada European Economic Area Rest of Asia Pacific Latin America Rest of Europe, Middle East, and Africa Australia and New ...
... and supplies, and may negatively affect actual yield. All life indicators are used. It can also affect warranty coverage. Lexmark MX321 Return Program toner cartridges Item United States and Canada European Economic Area Rest of Asia Pacific Latin America Rest of Europe, Middle East, and Africa Australia and New ...

Users Guide PDF
Page 115
... your Lexmark representative or system administrator. Lexmark MX321 regular toner cartridge High yield regular toner cartridge Item Worldwide 56F0HA0 Lexmark MB2338 Return Program toner cartridge Item Return Program toner cartridge United States, Canada, Australia, and New Zealand B231000 European Economic Area B232000 Rest of Asia Pacific B233000 Latin America B234000 Rest of Europe, Middle East, and Africa B235000 Lexmark MB2338 regular toner cartridge Regular toner cartridge Item...
... your Lexmark representative or system administrator. Lexmark MX321 regular toner cartridge High yield regular toner cartridge Item Worldwide 56F0HA0 Lexmark MB2338 Return Program toner cartridge Item Return Program toner cartridge United States, Canada, Australia, and New Zealand B231000 European Economic Area B232000 Rest of Asia Pacific B233000 Latin America B234000 Rest of Europe, Middle East, and Africa B235000 Lexmark MB2338 regular toner cartridge Regular toner cartridge Item...

Users Guide PDF
Page 116
Replacing parts and supplies Replacing the toner cartridge 1 Open door A. 2 Remove the used toner cartridge. The IP address appears as four sets of numbers separated by periods, such as 123.123.123.123. • If you are using a proxy server, then temporarily disable it to load the web page correctly. 2 Click Settings > Device > Notifications. 3 From the Supplies menu, click Custom Supply Notifications. 4 Select a notification for each supply item. 5 Apply the changes. Maintaining the printer 116 Notes: • View the printer IP address on the printer home screen.
Replacing parts and supplies Replacing the toner cartridge 1 Open door A. 2 Remove the used toner cartridge. The IP address appears as four sets of numbers separated by periods, such as 123.123.123.123. • If you are using a proxy server, then temporarily disable it to load the web page correctly. 2 Click Settings > Device > Notifications. 3 From the Supplies menu, click Custom Supply Notifications. 4 Select a notification for each supply item. 5 Apply the changes. Maintaining the printer 116 Notes: • View the printer IP address on the printer home screen.

Users Guide PDF
Page 117
Note: Use the arrows inside the printer as guides. 5 Close door A. Maintaining the printer 117 3 Unpack the new toner cartridge, and then shake it three times to redistribute the toner. 4 Insert the new toner cartridge.
Note: Use the arrows inside the printer as guides. 5 Close door A. Maintaining the printer 117 3 Unpack the new toner cartridge, and then shake it three times to redistribute the toner. 4 Insert the new toner cartridge.

Users Guide PDF
Page 118
Maintaining the printer 118 Replacing the imaging unit 1 Open door A. 2 Remove the toner cartridge. 3 Remove the used imaging unit.
Maintaining the printer 118 Replacing the imaging unit 1 Open door A. 2 Remove the toner cartridge. 3 Remove the used imaging unit.

Users Guide PDF
Page 119
Note: Use the arrows inside the printer as guides. 6 Insert the toner cartridge. Extended exposure to direct light for more than 10 minutes. Note: Use the arrows inside the printer as guides. Doing so may cause print quality problems. Warning-Potential Damage: Do not touch the photoconductor drum. Warning-Potential Damage: Do not expose the imaging unit to light may affect the quality of future print jobs. 5 Insert the new imaging unit. Maintaining the printer 119 4 Unpack the new imaging unit, and then shake it three times to redistribute the toner.
Note: Use the arrows inside the printer as guides. 6 Insert the toner cartridge. Extended exposure to direct light for more than 10 minutes. Note: Use the arrows inside the printer as guides. Doing so may cause print quality problems. Warning-Potential Damage: Do not touch the photoconductor drum. Warning-Potential Damage: Do not expose the imaging unit to light may affect the quality of future print jobs. 5 Insert the new imaging unit. Maintaining the printer 119 4 Unpack the new imaging unit, and then shake it three times to redistribute the toner.

Users Guide PDF
Page 135
Clearing jams 135 3 Remove the toner cartridge. 4 Remove the imaging unit. Doing so may cause print quality problems. Warning-Potential Damage: Do not touch the photoconductor drum. Extended exposure to direct light for more than 10 minutes. Warning-Potential Damage: Do not expose the imaging unit to light may affect the quality of future print jobs.
Clearing jams 135 3 Remove the toner cartridge. 4 Remove the imaging unit. Doing so may cause print quality problems. Warning-Potential Damage: Do not touch the photoconductor drum. Extended exposure to direct light for more than 10 minutes. Warning-Potential Damage: Do not expose the imaging unit to light may affect the quality of future print jobs.

Users Guide PDF
Page 138
To reduce the risk of the printer might be hot. CAUTION-HOT SURFACE: The inside the printer as guides. 8 Close door A. 9 Insert the tray. Note: Make sure that all paper fragments are removed. Note: Use the arrows inside of injury from a hot component, allow the surface to cool before touching it. 2 Remove the jammed paper. Paper jam in the rear door 1 Open the rear door. Clearing jams 138 7 Insert the toner cartridge.
To reduce the risk of the printer might be hot. CAUTION-HOT SURFACE: The inside the printer as guides. 8 Close door A. 9 Insert the tray. Note: Make sure that all paper fragments are removed. Note: Use the arrows inside of injury from a hot component, allow the surface to cool before touching it. 2 Remove the jammed paper. Paper jam in the rear door 1 Open the rear door. Clearing jams 138 7 Insert the toner cartridge.

Users Guide PDF
Page 147
...: Use of third-party supplies or parts may affect the performance, reliability, or life of the printer and toner cartridge, print the print quality test pages. Non‑Lexmark supply The printer has detected a non‑Lexmark supply or part installed in the message after 42 indicates the region of the printer. • The...
...: Use of third-party supplies or parts may affect the performance, reliability, or life of the printer and toner cartridge, print the print quality test pages. Non‑Lexmark supply The printer has detected a non‑Lexmark supply or part installed in the message after 42 indicates the region of the printer. • The...
Users Guide PDF
Page 151
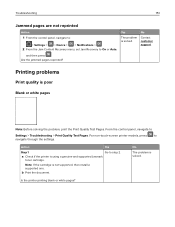
... > > Device > > Notifications > 2 From the Jam Content Recovery menu, set Jam Recovery to On or Auto, Yes The problem is using a genuine and supported Lexmark toner cartridge. No Contact customer support. Action Yes Step 1 Go to navigate through the settings. b Print the document. No The problem is poor Blank or white pages... is solved. Are the jammed pages reprinted? and then press . From the control panel, navigate to Settings > Troubleshooting > Print Quality Test Pages. Note: If the cartridge is not supported, then install a supported one.
... > > Device > > Notifications > 2 From the Jam Content Recovery menu, set Jam Recovery to On or Auto, Yes The problem is using a genuine and supported Lexmark toner cartridge. No Contact customer support. Action Yes Step 1 Go to navigate through the settings. b Print the document. No The problem is poor Blank or white pages... is solved. Are the jammed pages reprinted? and then press . From the control panel, navigate to Settings > Troubleshooting > Print Quality Test Pages. Note: If the cartridge is not supported, then install a supported one.

Users Guide PDF
Page 152
.... 2 Check the imaging unit for more than 10 minutes. Extended exposure to redistribute the toner. 4 Insert the imaging unit, and then insert the toner cartridge. b Print the document. support. The problem is left on the imaging unit. 1 Remove the toner cartridge, and then remove the imaging unit. Step 3 Contact customer Check the status of place... the photoconductor drum under the imaging unit. Is the printer printing blank or white pages? No The problem is not bent or out of the toner cartridge, and replace if necessary.
.... 2 Check the imaging unit for more than 10 minutes. Extended exposure to redistribute the toner. 4 Insert the imaging unit, and then insert the toner cartridge. b Print the document. support. The problem is left on the imaging unit. 1 Remove the toner cartridge, and then remove the imaging unit. Step 3 Contact customer Check the status of place... the photoconductor drum under the imaging unit. Is the printer printing blank or white pages? No The problem is not bent or out of the toner cartridge, and replace if necessary.

Users Guide PDF
Page 153
...to step 6. No The problem is solved. Go to step 2. Step 6 a Load paper from the Printing Preferences or Print dialog. b Reduce toner darkness. The problem is solved. Troubleshooting 153 Action Yes Step 1 Go to step 5. a Depending on textured or rough paper? a Check if... the printer, wait for about 10 seconds, and then turn on the printer control panel. Note: If the cartridge is using a genuine and supported Lexmark toner cartridge. Store paper in its original wrapper until you printing on your operating system, specify the paper type from a fresh...
...to step 6. No The problem is solved. Go to step 2. Step 6 a Load paper from the Printing Preferences or Print dialog. b Reduce toner darkness. The problem is solved. Troubleshooting 153 Action Yes Step 1 Go to step 5. a Depending on textured or rough paper? a Check if... the printer, wait for about 10 seconds, and then turn on the printer control panel. Note: If the cartridge is using a genuine and supported Lexmark toner cartridge. Store paper in its original wrapper until you printing on your operating system, specify the paper type from a fresh...

Users Guide PDF
Page 154
... problem is not supported, then install a supported one. Step 8 a Replace the imaging unit. b Print the document. a Check if the printer is using a genuine and supported Lexmark toner cartridge. Action Yes Step 1 Go to light may affect the quality of future print jobs. b Print the document. Warning-Potential Damage: Do not expose the imaging...
... problem is not supported, then install a supported one. Step 8 a Replace the imaging unit. b Print the document. a Check if the printer is using a genuine and supported Lexmark toner cartridge. Action Yes Step 1 Go to light may affect the quality of future print jobs. b Print the document. Warning-Potential Damage: Do not expose the imaging...

Users Guide PDF
Page 155
From the control panel, navigate to use it. No The problem is using a genuine and supported Lexmark toner cartridge. b Print the document. Is the paper folded or wrinkled? a Check if the printer is solved. Step 2 a Load paper from a fresh package.... a supported one. Note: Paper absorbs moisture due to step 3. Go to high humidity. From the control panel, navigate to step 2. Note: If the cartridge is solved. Action Yes Step 1 Go to Settings > Troubleshooting > Print Quality Test Pages. b Print the document. Is the paper folded or wrinkled? Are...
From the control panel, navigate to use it. No The problem is using a genuine and supported Lexmark toner cartridge. b Print the document. Is the paper folded or wrinkled? a Check if the printer is solved. Step 2 a Load paper from a fresh package.... a supported one. Note: Paper absorbs moisture due to step 3. Go to high humidity. From the control panel, navigate to step 2. Note: If the cartridge is solved. Action Yes Step 1 Go to Settings > Troubleshooting > Print Quality Test Pages. b Print the document. Is the paper folded or wrinkled? Are...


