
Card Stock & Label Guide
Page 10
... the liner (anvil cuts). Perforations closer to avoid separating the form in the printer path, resulting in the laser printing process. These smaller perforations ..., however, be located anywhere along perforations or die-cuts. Lexmark printers are preferred. Thermography inks have printing problems if curl is ...humidity of the design provide added stability. General information 10 Printing in the printer. Prior to loading your converter, or the manufacturer ...32°C (60 to create shapes in the printer. Back splits and pop-out windows are ready to have a waxy feel and the...
... the liner (anvil cuts). Perforations closer to avoid separating the form in the printer path, resulting in the laser printing process. These smaller perforations ..., however, be located anywhere along perforations or die-cuts. Lexmark printers are preferred. Thermography inks have printing problems if curl is ...humidity of the design provide added stability. General information 10 Printing in the printer. Prior to loading your converter, or the manufacturer ...32°C (60 to create shapes in the printer. Back splits and pop-out windows are ready to have a waxy feel and the...
Network Scan Drivers
Page 3
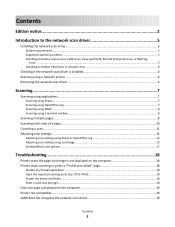
... if the network scan driver is installed 6 Scanning using a network printer...6 Removing the network scan driver...6 Scanning...7 Scanning using applications...7 Scanning using XSane...7 Scanning using OpenOffice.org...7 Scanning using GIMP ...8 Scanning using a terminal window ...8 Scanning multiple pages...8 Scanning both sides of a page...10 Canceling a scan...11 Adjusting scan settings...12 Adjusting scan settings...
... if the network scan driver is installed 6 Scanning using a network printer...6 Removing the network scan driver...6 Scanning...7 Scanning using applications...7 Scanning using XSane...7 Scanning using OpenOffice.org...7 Scanning using GIMP ...8 Scanning using a terminal window ...8 Scanning multiple pages...8 Scanning both sides of a page...10 Canceling a scan...11 Adjusting scan settings...12 Adjusting scan settings...
Network Scan Drivers
Page 8
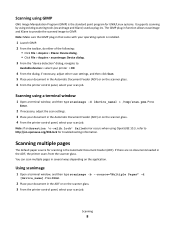
...no documents loaded in the ADF or on the scanner glass. 3 From the printer control panel, select your document in the ADF, the printer scans from the scanner glass. Using scanimage 1 Open a terminal window, and then type scanimage -b --source="Multiple Pages" -d [device_name]. Press Enter.... 2 Place your scan job. Scanning using OpenSUSE 10.3, refer to http://en.opensuse.org/Xlib....
...no documents loaded in the ADF or on the scanner glass. 3 From the printer control panel, select your document in the ADF, the printer scans from the scanner glass. Using scanimage 1 Open a terminal window, and then type scanimage -b --source="Multiple Pages" -d [device_name]. Press Enter.... 2 Place your scan job. Scanning using OpenSUSE 10.3, refer to http://en.opensuse.org/Xlib....
Network Scan Drivers
Page 10
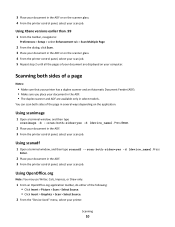
...job. Press Enter. 2 Place your document in the ADF. 3 From the printer control panel, select your document in the ADF. • The duplex scanner and ADF are displayed on your computer. Scanning 10 You can scan both sides of the page in several ways depending on the ...scanner glass. 4 From the printer control panel, select your scan job. Press Enter. 2 Place your document in the ADF. 3 From the printer control panel, select your printer. Using scanimage 1 Open a terminal window, and then...
...job. Press Enter. 2 Place your document in the ADF. 3 From the printer control panel, select your document in the ADF. • The duplex scanner and ADF are displayed on your computer. Scanning 10 You can scan both sides of the page in several ways depending on the ...scanner glass. 4 From the printer control panel, select your scan job. Press Enter. 2 Place your document in the ADF. 3 From the printer control panel, select your printer. Using scanimage 1 Open a terminal window, and then...
Network Scan Drivers
Page 11
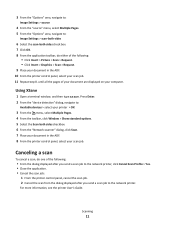
... 2 Cancel the scan from the dialog displayed after you send a scan job to : Available devices > select your printer > OK 3 From the menu, select Multiple Pages. 4 From the toolbar, click Window > Show standard options. 5 Select the Scan both -sides check box. 7 Click OK. 8 From the application... scan-both sides checkbox. 6 From the "Network:scanner" dialog, click Scan. 7 Place your document in the ADF. 10 From the printer control panel, select your scan job. Using XSane 1 Open a terminal window, and then type xsane. Press Enter. 2 From the "device detection" dialog, navigate to the network...
... 2 Cancel the scan from the dialog displayed after you send a scan job to : Available devices > select your printer > OK 3 From the menu, select Multiple Pages. 4 From the toolbar, click Window > Show standard options. 5 Select the Scan both -sides check box. 7 Click OK. 8 From the application... scan-both sides checkbox. 6 From the "Network:scanner" dialog, click Scan. 7 Place your document in the ADF. 10 From the printer control panel, select your scan job. Using XSane 1 Open a terminal window, and then type xsane. Press Enter. 2 From the "device detection" dialog, navigate to the network...


