
Setup Guide
Page 4
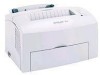
Step 4: Install the tray 2 option 15 Step 5: Attach cables 17 Local printing 17 Network printing 19 Attaching a power cord 20 Step 6: Load paper 21 Loading tray 1 21 Loading the manual feed 24 Loading the optional tray 2 27 Step 7: Verify printer setup 30 Step 8: Understanding the operator panel lights 31 Step 9: Install printer drivers 38 Local printing 38 Network printing 39 Statement of limited warranty 44 Index 47 iv Table of contents
Step 4: Install the tray 2 option 15 Step 5: Attach cables 17 Local printing 17 Network printing 19 Attaching a power cord 20 Step 6: Load paper 21 Loading tray 1 21 Loading the manual feed 24 Loading the optional tray 2 27 Step 7: Verify printer setup 30 Step 8: Understanding the operator panel lights 31 Step 9: Install printer drivers 38 Local printing 38 Network printing 39 Statement of limited warranty 44 Index 47 iv Table of contents

Setup Guide
Page 6
... Paper support Top output bin Tray 1 Paper support Manual feed Paper guide Front output door Optional tray 2 Operator panel lights Use this feature: Tray 1 Paper support Manual feed Paper guides Operator panel lights Top output bin Front output door Optional tray 2 When you want to: Load up to 150 sheets of paper... stock. Check the status of paper/other media. Support media in tray 1 and the manual feed. Load a single sheet of your paper capacity. Increase your printer.
... Paper support Top output bin Tray 1 Paper support Manual feed Paper guide Front output door Optional tray 2 Operator panel lights Use this feature: Tray 1 Paper support Manual feed Paper guides Operator panel lights Top output bin Front output door Optional tray 2 When you want to: Load up to 150 sheets of paper... stock. Check the status of paper/other media. Support media in tray 1 and the manual feed. Load a single sheet of your paper capacity. Increase your printer.

Setup Guide
Page 8
... The operator panel has 6 lights and 1 button. Other sources of the front cover before setting up the printer, installing supplies and options, loading media, launching the drivers CD to change the paper source, paper size and other printer functions. Depending on the inside of information Lexmark Publications CD The Lexmark Publications CD, which is connected...
... The operator panel has 6 lights and 1 button. Other sources of the front cover before setting up the printer, installing supplies and options, loading media, launching the drivers CD to change the paper source, paper size and other printer functions. Depending on the inside of information Lexmark Publications CD The Lexmark Publications CD, which is connected...

Setup Guide
Page 9
...fonts, and additional documentation. Drivers CD The drivers CD contains all the necessary printer drivers to information about loading paper, clearing jams, and understanding common operator panel light messages. Quick Reference card The Quick Reference card provides easy access to get ...your CD-ROM drive. Viewing the Lexmark Publications CD Insert the Lexmark Publications CD into your printer up and running. You must have ...
...fonts, and additional documentation. Drivers CD The drivers CD contains all the necessary printer drivers to information about loading paper, clearing jams, and understanding common operator panel light messages. Quick Reference card The Quick Reference card provides easy access to get ...your CD-ROM drive. Viewing the Lexmark Publications CD Insert the Lexmark Publications CD into your printer up and running. You must have ...

Setup Guide
Page 30
Attaching a power cord 1 Make sure the printer is turned off , starting with Press Button and ending with the Ready light. 20 Attach cables Each indicator light turns on and off . 2 Plug one end of the power cord into the power cord connector. 3 Plug the other end into a properly grounded outlet. 4 Turn on the printer.
Attaching a power cord 1 Make sure the printer is turned off , starting with Press Button and ending with the Ready light. 20 Attach cables Each indicator light turns on and off . 2 Plug one end of the power cord into the power cord connector. 3 Plug the other end into a properly grounded outlet. 4 Turn on the printer.

Setup Guide
Page 36
... type from your software application. 7 Start your print job. 8 Briefly (approximately one second) push the operator panel button to start printing. 9 When the Load Paper light and the Press Button light come on, place another page.
... type from your software application. 7 Start your print job. 8 Briefly (approximately one second) push the operator panel button to start printing. 9 When the Load Paper light and the Press Button light come on, place another page.

Setup Guide
Page 41
For a complete explanation of all of the light sequences, refer to print, the printer needs intervention, or the printer needs servicing. Understanding the operator panel lights 31 They indicate that the printer is ready to the Understanding the operator panel lights section of the more common light sequences are shown in the next section. Step 8: Understanding the operator panel lights The operator panel lights mean different things, depending on their sequence. Some of the Lexmark Publications CD.
For a complete explanation of all of the light sequences, refer to print, the printer needs intervention, or the printer needs servicing. Understanding the operator panel lights 31 They indicate that the printer is ready to the Understanding the operator panel lights section of the more common light sequences are shown in the next section. Step 8: Understanding the operator panel lights The operator panel lights mean different things, depending on their sequence. Some of the Lexmark Publications CD.

Setup Guide
Page 42
Operator panel terms Light is on Light is off Light is blinking Light is blinking slowly Press Button Press Button • A brief button press (push the button once for no more than 3 seconds) restarts the printer. • A long button press (hold until all the lights come on) resets the printer or selects a setting in the special function menu (see the Publications CD for more information). • A double button press (push and release the button twice quickly) displays additional error codes or cycles through the special function menu settings. 32 Understanding the operator panel lights
Operator panel terms Light is on Light is off Light is blinking Light is blinking slowly Press Button Press Button • A brief button press (push the button once for no more than 3 seconds) restarts the printer. • A long button press (hold until all the lights come on) resets the printer or selects a setting in the special function menu (see the Publications CD for more information). • A double button press (push and release the button twice quickly) displays additional error codes or cycles through the special function menu settings. 32 Understanding the operator panel lights

Setup Guide
Page 43
The printer is ready to receive and process data. Understanding the operator panel lights 33 The printer is busy receiving or processing data.
The printer is ready to receive and process data. Understanding the operator panel lights 33 The printer is busy receiving or processing data.

Setup Guide
Page 44
The printer is waiting until additional data is not installed. If both the Error light and Press Button lights are on, a secondary error has occurred: 1 Press the operator panel button with a double-button press to display the secondary error code. 2 Refer to Understanding the Operator Panel Lights section in the Lexmark Publications CD for information on what it means and what you can do. 34 Understanding the operator panel lights The printer top cover is open or the print cartridge is received.
The printer is waiting until additional data is not installed. If both the Error light and Press Button lights are on, a secondary error has occurred: 1 Press the operator panel button with a double-button press to display the secondary error code. 2 Refer to Understanding the Operator Panel Lights section in the Lexmark Publications CD for information on what it means and what you can do. 34 Understanding the operator panel lights The printer top cover is open or the print cartridge is received.

Setup Guide
Page 45
Understanding the operator panel lights 35 The printer prompts you to load another sheet of media or the media did not feed properly. Tray 1 or tray 2 is out of media in the manual feed.
Understanding the operator panel lights 35 The printer prompts you to load another sheet of media or the media did not feed properly. Tray 1 or tray 2 is out of media in the manual feed.

Setup Guide
Page 46
The printer detects a jam. The printer alerts you the toner is installed.) 36 Understanding the operator panel lights Remove the print cartridge and shake it to print more pages before replacing it. (On the Lexmark E320, the Toner Low light does not come on if the standard 1,500-page print cartridge is getting low.
The printer detects a jam. The printer alerts you the toner is installed.) 36 Understanding the operator panel lights Remove the print cartridge and shake it to print more pages before replacing it. (On the Lexmark E320, the Toner Low light does not come on if the standard 1,500-page print cartridge is getting low.

Setup Guide
Page 47
Understanding the operator panel lights 37 The printer has a service error. If the lights are still blinking, contact your point of purchase. Turn the printer off and back on.
Understanding the operator panel lights 37 The printer has a service error. If the lights are still blinking, contact your point of purchase. Turn the printer off and back on.

Setup Guide
Page 52
... the paper guides are blank. Replace the cartridge. are properly positioned against the edges of the printer. Jobs are missing. The operator panel lights do : Installing a print cartridge Characters appear light or blurred. • The print cartridge may be printing, but nothing prints. Step 10: Troubleshooting...USB cable or Ethernet cable is firmly are not printing and the Error light is under both corner bucklers and lying flat in at the back of the page. The paper sticks together/printer feeds multiple sheets of paper. • Remove the paper from tray ...
... the paper guides are blank. Replace the cartridge. are properly positioned against the edges of the printer. Jobs are missing. The operator panel lights do : Installing a print cartridge Characters appear light or blurred. • The print cartridge may be printing, but nothing prints. Step 10: Troubleshooting...USB cable or Ethernet cable is firmly are not printing and the Error light is under both corner bucklers and lying flat in at the back of the page. The paper sticks together/printer feeds multiple sheets of paper. • Remove the paper from tray ...

Setup Guide
Page 58
...loading 23, 25, 28 letterhead, loading 23, 25, 28 Lexmark Publications CD viii Lexmark Web site x loading card stock 23, 25 envelopes 23, ...letterhead 23, 25, 28 transparencies 23, 25 tray 1 21 tray 2 27 local printing, drivers 38 M Macintosh printer drivers 40 manual feed, loading 24 MarkNet internal print server 19 memory cards, installing 6 menu settings page, printing...cord, connecting 20 print cartridge installing 4 removing 2 replacing see Publications CD printer features vi lights 31 reset 32 unpacking 1 printer drivers Macintosh 40 Windows 39 printing from the correct tray 43 menu settings...
...loading 23, 25, 28 letterhead, loading 23, 25, 28 Lexmark Publications CD viii Lexmark Web site x loading card stock 23, 25 envelopes 23, ...letterhead 23, 25, 28 transparencies 23, 25 tray 1 21 tray 2 27 local printing, drivers 38 M Macintosh printer drivers 40 manual feed, loading 24 MarkNet internal print server 19 memory cards, installing 6 menu settings page, printing...cord, connecting 20 print cartridge installing 4 removing 2 replacing see Publications CD printer features vi lights 31 reset 32 unpacking 1 printer drivers Macintosh 40 Windows 39 printing from the correct tray 43 menu settings...

User's Guide
Page 4
... cartridge 42 Chapter 15: Recycling the print cartridge 44 Chapter 16: Ordering supplies 45 Chapter 17: Clearing jams 46 Chapter 18: Understanding the operator panel lights 51 Chapter 19: Solving print quality problems 72 Resetting user defaults 77 Using the special function menu 77 Restoring factory defaults 78 Using Hex Trace...
... cartridge 42 Chapter 15: Recycling the print cartridge 44 Chapter 16: Ordering supplies 45 Chapter 17: Clearing jams 46 Chapter 18: Understanding the operator panel lights 51 Chapter 19: Solving print quality problems 72 Resetting user defaults 77 Using the special function menu 77 Restoring factory defaults 78 Using Hex Trace...

User's Guide
Page 5
...92 Step 2: Set up to print 93 Troubleshooting 101 Novell NetWare 102 Queue-based printing 102 Set up the printer using the Network Printer Utility 102 Choosing NPRINTER/RPRINTER or PSERVER 103 NPRINTER vs. PSERVER in IntraNetWare NetWare Directory Services (NDS 103 ...printing 105 AppleTalk ...106 Finding the default AppleTalk name 106 Creating a desktop printer icon 106 Changing the zone 107 Changing the printer name 107 Updating printer hardware 107 Troubleshooting 108 Print server light patterns 109 Normal conditions 109 Error conditions 110 iii PSERVER in NetWare 3.x 104...
...92 Step 2: Set up to print 93 Troubleshooting 101 Novell NetWare 102 Queue-based printing 102 Set up the printer using the Network Printer Utility 102 Choosing NPRINTER/RPRINTER or PSERVER 103 NPRINTER vs. PSERVER in IntraNetWare NetWare Directory Services (NDS 103 ...printing 105 AppleTalk ...106 Finding the default AppleTalk name 106 Creating a desktop printer icon 106 Changing the zone 107 Changing the printer name 107 Updating printer hardware 107 Troubleshooting 108 Print server light patterns 109 Normal conditions 109 Error conditions 110 iii PSERVER in NetWare 3.x 104...
User's Guide
Page 7
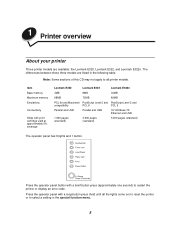
...select a setting in the following table. 1 Printer overview About your printer Three printer models are listed in the special function menu. 5 Press the operator panel with print cartridge yield at approximately 5% coverage Lexmark E320 Lexmark E322 Lexmark E322n 4MB 8MB 16MB 68MB 72MB 80MB PCL ...has 6 lights and 1 button. Note: Some sections of this CD may not apply to all the lights come on) to reset the printer or to restart the printer or display an error code. The differences between these three models are available: the Lexmark E320, Lexmark E322, and Lexmark E322n....
...select a setting in the following table. 1 Printer overview About your printer Three printer models are listed in the special function menu. 5 Press the operator panel with print cartridge yield at approximately 5% coverage Lexmark E320 Lexmark E322 Lexmark E322n 4MB 8MB 16MB 68MB 72MB 80MB PCL ...has 6 lights and 1 button. Note: Some sections of this CD may not apply to all the lights come on) to reset the printer or to restart the printer or display an error code. The differences between these three models are available: the Lexmark E320, Lexmark E322, and Lexmark E322n....

User's Guide
Page 8
.... Load a single sheet of the media in tray 1 and the manual sheet feeder. Adjust the width of paper/other media. Increase your printer. Check the status of other media. Press the operator panel with a double-button press (press and release twice quickly) to display additional error... 1 Paper support Paper support Manual feed Paper guide Front output door Tray 2 Operator panel lights Use this feature: Tray 1 Rear paper support Front paper support Manual feed Paper guides Operator panel lights Top output bin Front output door Optional tray 2 When you want to: Load up to...
.... Load a single sheet of the media in tray 1 and the manual sheet feeder. Adjust the width of paper/other media. Increase your printer. Check the status of other media. Press the operator panel with a double-button press (press and release twice quickly) to display additional error... 1 Paper support Paper support Manual feed Paper guide Front output door Tray 2 Operator panel lights Use this feature: Tray 1 Rear paper support Front paper support Manual feed Paper guides Operator panel lights Top output bin Front output door Optional tray 2 When you want to: Load up to...

User's Guide
Page 9
... 1, manual feed or tray 2 (if installed). detects a jam. When the: Ready/Data light is on Ready/Data light is blinking Toner Low light is on Load Paper light is on Paper Jam light is on Error light is on Press Button light is on The printer: is getting low. is not installed. cover is open or the print...
... 1, manual feed or tray 2 (if installed). detects a jam. When the: Ready/Data light is on Ready/Data light is blinking Toner Low light is on Load Paper light is on Paper Jam light is on Error light is on Press Button light is on The printer: is getting low. is not installed. cover is open or the print...


