
Quick Reference
Page 1
.... 4 Reinstall the print cartridge. 5 Close the printer cover to resume printing. 6 Press Continue to clear the paper path. 1 Open the printer cover. 2 Remove the print cartridge (it completely out of the media. 6 Open the front output door if you are printing on the printer. 6 Resend your print job.... Warning! Load them , fan the sheets on a level surface. Clearing jams The Paper Jam light prompts you . • envelopes in the tray. Fuser Roller If the jam occurs as it . 1 If loading: • letterhead paper, insert letterhead face down with the top of the page entering the ...
.... 4 Reinstall the print cartridge. 5 Close the printer cover to resume printing. 6 Press Continue to clear the paper path. 1 Open the printer cover. 2 Remove the print cartridge (it completely out of the media. 6 Open the front output door if you are printing on the printer. 6 Resend your print job.... Warning! Load them , fan the sheets on a level surface. Clearing jams The Paper Jam light prompts you . • envelopes in the tray. Fuser Roller If the jam occurs as it . 1 If loading: • letterhead paper, insert letterhead face down with the top of the page entering the ...

User's Reference
Page 41
... on the bottom of time. Clearing jams 41 Photoconductor drum 3 Gently pull out the media. Paper handling If the jam occurs in the fuser: 1 Open the printer cover. 2 Remove the print cartridge (it may be hot! 4 If the media is jammed tightly behind the roller, or if you take it out of... the printer for an extended period of the print cartridge may be warm). Fuser Roller CAUTION: Avoid touching the fuser; Note: The photoconductor drum on it...
... on the bottom of time. Clearing jams 41 Photoconductor drum 3 Gently pull out the media. Paper handling If the jam occurs in the fuser: 1 Open the printer cover. 2 Remove the print cartridge (it may be hot! 4 If the media is jammed tightly behind the roller, or if you take it out of... the printer for an extended period of the print cartridge may be warm). Fuser Roller CAUTION: Avoid touching the fuser; Note: The photoconductor drum on it...

User's Reference
Page 42
...to your printer may occur if adhesive labels remain in the fuser. Warning: Serious damage to resume printing. If the jam occurs as the paper exits the optional 250-sheet tray into the printer: 1 Open the printer cover. 2 Remove the print cartridge (the cartridge may occur if the top output...the media is unable to the backing sheet after clearing the jam. 2 Before resuming label printing, load paper in or on the fuser. See Calling for service. The paper removes any remaining adhesive in tray 1. 3 Press the Continue button and print 10 or more menu settings pages. If a jam occurs...
...to your printer may occur if adhesive labels remain in the fuser. Warning: Serious damage to resume printing. If the jam occurs as the paper exits the optional 250-sheet tray into the printer: 1 Open the printer cover. 2 Remove the print cartridge (the cartridge may occur if the top output...the media is unable to the backing sheet after clearing the jam. 2 Before resuming label printing, load paper in or on the fuser. See Calling for service. The paper removes any remaining adhesive in tray 1. 3 Press the Continue button and print 10 or more menu settings pages. If a jam occurs...

User's Reference
Page 77
... cartridge back to distribute the toner evenly. 4 Insert the print cartridge. 1 Align the colored arrows on the bottom of the print cartridge and remove the foam protective liner. Replacing the print cartridge 77 Maintenance Installing the new print cartridge 1 Take the new print cartridge out of the bag.... 2 Pull off the plastic piece attached to the ends of the print cartridge. 3 Shake the cartridge to Lexmark. it between the print cartridge grooves. Note: If you recycle the old print cartridge, wrap the used cartridge with the corresponding arrows in ...
... cartridge back to distribute the toner evenly. 4 Insert the print cartridge. 1 Align the colored arrows on the bottom of the print cartridge and remove the foam protective liner. Replacing the print cartridge 77 Maintenance Installing the new print cartridge 1 Take the new print cartridge out of the bag.... 2 Pull off the plastic piece attached to the ends of the print cartridge. 3 Shake the cartridge to Lexmark. it between the print cartridge grooves. Note: If you recycle the old print cartridge, wrap the used cartridge with the corresponding arrows in ...
Service Manual
Page 5
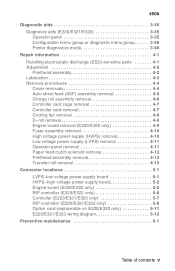
... 4-3 Removal procedures 4-4 Cover removals 4-4 Auto sheet feed (ASF) assembly removal 4-5 Charge roll assembly removal 4-6 Controller card cage removal 4-7 Controller card removal 4-7 Cooling fan removal 4-8 D-roll removal 4-9 Engine board removal (E320/E322 only 4-9 Fuser assembly removal 4-10 High voltage power supply (HVPS) removal 4-10 Low voltage power supply (LVPS) removal 4-11 Operator panel removal 4-11 Paper feed clutch solenoid removal 4-12 Printhead assembly removal 4-13 Transfer roll removal...
... 4-3 Removal procedures 4-4 Cover removals 4-4 Auto sheet feed (ASF) assembly removal 4-5 Charge roll assembly removal 4-6 Controller card cage removal 4-7 Controller card removal 4-7 Cooling fan removal 4-8 D-roll removal 4-9 Engine board removal (E320/E322 only 4-9 Fuser assembly removal 4-10 High voltage power supply (HVPS) removal 4-10 Low voltage power supply (LVPS) removal 4-11 Operator panel removal 4-11 Paper feed clutch solenoid removal 4-12 Printhead assembly removal 4-13 Transfer roll removal...

Service Manual
Page 73
...following these codes. 4500-E220/E321/E323 Service error secondary...98x) Note: There are many tertiary codes following pages show these secondary codes. Ready/Data Toner Low Load/Remove Paper Paper Jam Error Press Continue Service Condition ✳ ❍ ❍ ❍ ❍ ❍...✳ ❍ ❍ ❍ ❍ ✳ Transfer roll error (91x) ✳ ❍ ❍ ❍ ✳ ❍ Fuser / toner sensor error (92x) ✳ ❍ ❍ ❍ ✳ ✳ Printhead / transport motor / RIP to engine error (93x...
...following these codes. 4500-E220/E321/E323 Service error secondary...98x) Note: There are many tertiary codes following pages show these secondary codes. Ready/Data Toner Low Load/Remove Paper Paper Jam Error Press Continue Service Condition ✳ ❍ ❍ ❍ ❍ ❍...✳ ❍ ❍ ❍ ❍ ✳ Transfer roll error (91x) ✳ ❍ ❍ ❍ ✳ ❍ Fuser / toner sensor error (92x) ✳ ❍ ❍ ❍ ✳ ✳ Printhead / transport motor / RIP to engine error (93x...

Service Manual
Page 82
Primary Code Secondary Code Tertiary Codes Ready/Data Toner Low Load/ Remove Paper Paper Jam Error Ready/Data Toner Low Load/ Remove Paper Paper Jam Error Ready/Data Toner Low Load/ Remove Paper Paper Jam Error Press Continue Press Continue Press Continue (940) 2-52 Service Manual It may indicate the wrong LVPS has been installed. 4500-E220/E321/E323 RIP to engine communication failure (controller card) Indicates a failure in the zero crossing signal which is used for fuser control.
Primary Code Secondary Code Tertiary Codes Ready/Data Toner Low Load/ Remove Paper Paper Jam Error Ready/Data Toner Low Load/ Remove Paper Paper Jam Error Ready/Data Toner Low Load/ Remove Paper Paper Jam Error Press Continue Press Continue Press Continue (940) 2-52 Service Manual It may indicate the wrong LVPS has been installed. 4500-E220/E321/E323 RIP to engine communication failure (controller card) Indicates a failure in the zero crossing signal which is used for fuser control.
Service Manual
Page 104
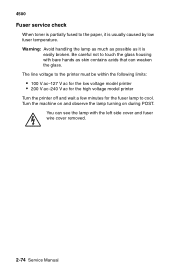
Be careful not to touch the glass housing with the left side cover and fuser wire cover removed. 2-74 Service Manual 4500 Fuser service check When toner is partially fused to cool. Warning: Avoid handling the lamp as much as possible as skin contains acids that can see ... printer • 200 V ac-240 V ac for the high voltage model printer Turn the printer off and wait a few minutes for the fuser lamp to the paper, it is usually caused by low fuser temperature. You can weaken the glass. Turn the machine on and observe the lamp turning on during POST.
Be careful not to touch the glass housing with the left side cover and fuser wire cover removed. 2-74 Service Manual 4500 Fuser service check When toner is partially fused to cool. Warning: Avoid handling the lamp as much as possible as skin contains acids that can see ... printer • 200 V ac-240 V ac for the high voltage model printer Turn the printer off and wait a few minutes for the fuser lamp to the paper, it is usually caused by low fuser temperature. You can weaken the glass. Turn the machine on and observe the lamp turning on during POST.

Service Manual
Page 119
...as necessary. Variation in the left and right backup roller springs and backup roller to ensure adequate even pressure is applied to the fuser hot roll. Check the springs in image density horizontally across page FRU Toner cartridge (not a FRU) Transfer bearing Transfer roll Action ... a new one. Partial blank image/white spots (no periodic pattern) 4500 FRU Toner cartridge (not a FRU) Fuser backup roll bearings (and springs) Paper (not a FRU) Action Remove the toner cartridge and gently shake the assembly to the PC drum. Check left and right transfer roll bearings. Inspect...
...as necessary. Variation in the left and right backup roller springs and backup roller to ensure adequate even pressure is applied to the fuser hot roll. Check the springs in image density horizontally across page FRU Toner cartridge (not a FRU) Transfer bearing Transfer roll Action ... a new one. Partial blank image/white spots (no periodic pattern) 4500 FRU Toner cartridge (not a FRU) Fuser backup roll bearings (and springs) Paper (not a FRU) Action Remove the toner cartridge and gently shake the assembly to the PC drum. Check left and right transfer roll bearings. Inspect...

Service Manual
Page 123
...select the correct paper type in your driver, you can download the correct Lexmark setup utility from side to side to remove any toner that may have accumulated. Paper designed for more information. • Check fuser temperature. If the setting is not on if the standard 1,500 page... print cartridge is installed. • Remove the print cartridge and gently shake it from the Lexmark Web site at www.lexmark.com. • The Toner Low light does ...
...select the correct paper type in your driver, you can download the correct Lexmark setup utility from side to side to remove any toner that may have accumulated. Paper designed for more information. • Check fuser temperature. If the setting is not on if the standard 1,500 page... print cartridge is installed. • Remove the print cartridge and gently shake it from the Lexmark Web site at www.lexmark.com. • The Toner Low light does ...

Service Manual
Page 184
.... 7. See "Left side cover" on page 4-4 for more information. 2. Remove fuser top cover. 9. See "Front cover" on page 4-5 for more information. 4. Remove the left and right charge roll assembly brackets. Remove charge roll assembly. 4-6 Service Manual Remove the top cover. Remove the toner cartridge. 6. Remove the front cover. Remove two cooling fan screws. 5. Note: When reinstalling charge roll...
.... 7. See "Left side cover" on page 4-4 for more information. 2. Remove fuser top cover. 9. See "Front cover" on page 4-5 for more information. 4. Remove the left and right charge roll assembly brackets. Remove charge roll assembly. 4-6 Service Manual Remove the top cover. Remove the toner cartridge. 6. Remove the front cover. Remove two cooling fan screws. 5. Note: When reinstalling charge roll...

Service Manual
Page 188
...supply (HVPS) removal 1.Unplug the printer. 2.Open the front cover. Remove the four HVPS board screws. 6. Remove the four bottom cover screws. 4. Reattach bottom cover and set printer upright. 6. Remove the two fuser mounting screws. 8. See "Left side cover" on the controller card (E220/E321/E323). ...Disconnect connector from engine card (E320/E322) or J14 and J22 on page 4-5 for more information. 5. See "Front cover" on each end of fuser assembly and lift out. Extract cables. 5. Remove charge roll assembly. Release the tabs...
...supply (HVPS) removal 1.Unplug the printer. 2.Open the front cover. Remove the four HVPS board screws. 6. Remove the four bottom cover screws. 4. Reattach bottom cover and set printer upright. 6. Remove the two fuser mounting screws. 8. See "Left side cover" on the controller card (E220/E321/E323). ...Disconnect connector from engine card (E320/E322) or J14 and J22 on page 4-5 for more information. 5. See "Front cover" on each end of fuser assembly and lift out. Extract cables. 5. Remove charge roll assembly. Release the tabs...
Service Manual
Page 237
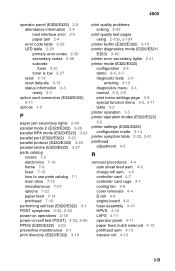
...19 print quality problems solving 2-92 print quality test pages using 2-103, 2-104 printer buffer (E320/E322) 3-19 printer diagnostics mode (E220/E321/ E323) 3-40 printer error secondary lights 2-41 printer mode (E320/E322) configuration 3-5 demo 3-4, 3-7 diagnostic tests 3-9 entering 3-10...3-14 printer symptom table 2-33, 2-61 printhead adjustment 4-2 R removal procedures 4-4 auto sheet feed asm. 4-5 charge roll asm. 4-6 controller card 4-7 controller card cage 4-7 cooling fan 4-8 cover removals 4-4 D-roll 4-9 engine board 4-9 fuser assembly 4-10 HPVS 4-10 LVPS 4-11 operator panel 4-11 paper...
...19 print quality problems solving 2-92 print quality test pages using 2-103, 2-104 printer buffer (E320/E322) 3-19 printer diagnostics mode (E220/E321/ E323) 3-40 printer error secondary lights 2-41 printer mode (E320/E322) configuration 3-5 demo 3-4, 3-7 diagnostic tests 3-9 entering 3-10...3-14 printer symptom table 2-33, 2-61 printhead adjustment 4-2 R removal procedures 4-4 auto sheet feed asm. 4-5 charge roll asm. 4-6 controller card 4-7 controller card cage 4-7 cooling fan 4-8 cover removals 4-4 D-roll 4-9 engine board 4-9 fuser assembly 4-10 HPVS 4-10 LVPS 4-11 operator panel 4-11 paper...


