
User Guide
Page 2
...64257;gurations...12 Understanding the basic functions of the scanner 13 Using the ADF and scanner glass...14 Understanding the printer control panel 15 Using the printer control panel...15 Understanding the home screen...15 Understanding the colors of the Sleep button and indicator lights 17 Using... up and using the home screen applications 19 Finding the IP address of the computer...19 Finding the IP address of the printer...19 Accessing the Embedded Web Server...19 Customizing the home screen...20 Understanding the different applications 20 Activating the home screen applications......
...64257;gurations...12 Understanding the basic functions of the scanner 13 Using the ADF and scanner glass...14 Understanding the printer control panel 15 Using the printer control panel...15 Understanding the home screen...15 Understanding the colors of the Sleep button and indicator lights 17 Using... up and using the home screen applications 19 Finding the IP address of the computer...19 Finding the IP address of the printer...19 Accessing the Embedded Web Server...19 Customizing the home screen...20 Understanding the different applications 20 Activating the home screen applications......

User Guide
Page 3
... information pages...69 Canceling a print job...69 Copying...70 Making copies...70 Copying photos...71 Copying on specialty media...71 Creating a copy shortcut using the printer control panel 72 Customizing copy settings...72 Placing information on copies...77 Canceling a copy job...78 Understanding the copy options...78 E-mailing...82 Setting up...
... information pages...69 Canceling a print job...69 Copying...70 Making copies...70 Copying photos...71 Copying on specialty media...71 Creating a copy shortcut using the printer control panel 72 Customizing copy settings...72 Placing information on copies...77 Canceling a copy job...78 Understanding the copy options...78 E-mailing...82 Setting up...

User Guide
Page 4
...to Network...113 Scanning to an FTP address...113 Scanning to a computer or flash drive...115 Understanding the scan options...117 Understanding printer menus 120 Menus list...120 Supplies menu...121 Paper menu...121 Reports menu...131 Network/Ports...132 Security menu...141 Settings menu...145 Saving ...money and the environment 194 Saving paper and toner...194 Saving energy...194 Recycling...198 Securing the printer 200 Using the security lock feature...200 Statement of Volatility...200 Erasing volatile memory...201 Erasing non‑volatile memory...201
...to Network...113 Scanning to an FTP address...113 Scanning to a computer or flash drive...115 Understanding the scan options...117 Understanding printer menus 120 Menus list...120 Supplies menu...121 Paper menu...121 Reports menu...131 Network/Ports...132 Security menu...141 Settings menu...145 Saving ...money and the environment 194 Saving paper and toner...194 Saving energy...194 Recycling...198 Securing the printer 200 Using the security lock feature...200 Statement of Volatility...200 Erasing volatile memory...201 Erasing non‑volatile memory...201

User Guide
Page 5
... of parts and supplies 206 Estimated number of remaining pages...206 Ordering supplies...207 Replacing supplies...210 Moving the printer...229 Managing the printer 231 Finding advanced networking and administrator information 231 Checking the virtual display...231 Setting up e‑mail alerts...231...;guring supply notifications from the Embedded Web Server 232 Modifying confidential print settings...233 Copying printer settings to other printers 233 Restoring factory default settings...234 Clearing jams 235 Avoiding jams...235 Identifying jam locations...236 Paper jam in ...
... of parts and supplies 206 Estimated number of remaining pages...206 Ordering supplies...207 Replacing supplies...210 Moving the printer...229 Managing the printer 231 Finding advanced networking and administrator information 231 Checking the virtual display...231 Setting up e‑mail alerts...231...;guring supply notifications from the Embedded Web Server 232 Modifying confidential print settings...233 Copying printer settings to other printers 233 Restoring factory default settings...234 Clearing jams 235 Avoiding jams...235 Identifying jam locations...236 Paper jam in ...

User Guide
Page 7
... that all doors and trays are closed. Do not recharge, disassemble, or incinerate a lithium battery. CAUTION-POTENTIAL INJURY: The printer weight is a danger of injury. CAUTION-POTENTIAL INJURY: When moving parts. You must understand the section in hazardous radiation exposure.... CAUTION-POTENTIAL INJURY: The lithium battery in poor printer performance, property damage, or potential fire. Discard used lithium batteries according to lift it safely. Safety information 7 Safety ...
... that all doors and trays are closed. Do not recharge, disassemble, or incinerate a lithium battery. CAUTION-POTENTIAL INJURY: The printer weight is a danger of injury. CAUTION-POTENTIAL INJURY: When moving parts. You must understand the section in hazardous radiation exposure.... CAUTION-POTENTIAL INJURY: The lithium battery in poor printer performance, property damage, or potential fire. Discard used lithium batteries according to lift it safely. Safety information 7 Safety ...

User Guide
Page 8
...objects such as the power cord, fax feature, or telephone, during a lightning storm. For users in flooring. • If the printer does not have any electrical or cabling connections, such as furniture and walls. CAUTION-SHOCK HAZARD: Make sure that there is not responsible for ... HAZARD: To avoid the risk of electrical shock, do not use only the power cord provided with optional trays, then lift the printer off the printer, and then unplug the power cord from the electrical outlet. • Disconnect all external connections (such as Ethernet and telephone system connections...
...objects such as the power cord, fax feature, or telephone, during a lightning storm. For users in flooring. • If the printer does not have any electrical or cabling connections, such as furniture and walls. CAUTION-SHOCK HAZARD: Make sure that there is not responsible for ... HAZARD: To avoid the risk of electrical shock, do not use only the power cord provided with optional trays, then lift the printer off the printer, and then unplug the power cord from the electrical outlet. • Disconnect all external connections (such as Ethernet and telephone system connections...

User Guide
Page 9
Safety information 9 CAUTION-TIPPING HAZARD: Floor-mounted configurations require additional furniture for stability. CAUTION-POTENTIAL INJURY: To reduce the risk of equipment instability, load each tray separately. Keep all other trays closed until needed. You must use either a printer stand or printer base if you may need additional furniture. For more information, see www.lexmark.com/multifunctionprinters. SAVE THESE INSTRUCTIONS. If you purchased a multifunction printer (MFP) that scans, copies, and faxes, then you are using multiple input options.
Safety information 9 CAUTION-TIPPING HAZARD: Floor-mounted configurations require additional furniture for stability. CAUTION-POTENTIAL INJURY: To reduce the risk of equipment instability, load each tray separately. Keep all other trays closed until needed. You must use either a printer stand or printer base if you may need additional furniture. For more information, see www.lexmark.com/multifunctionprinters. SAVE THESE INSTRUCTIONS. If you purchased a multifunction printer (MFP) that scans, copies, and faxes, then you are using multiple input options.

User Guide
Page 10
... accessibility features of your operating system. Lexmark Accessibility Guide-This guide is also available at http://support.lexmark.com. Click to view context‑sensitive information. Notes: • Help is automatically installed with the printer and is available at http://support.lexmark.com. Windows or Mac Help-Open a printer software program or application, and then...
... accessibility features of your operating system. Lexmark Accessibility Guide-This guide is also available at http://support.lexmark.com. Click to view context‑sensitive information. Notes: • Help is automatically installed with the printer and is available at http://support.lexmark.com. Windows or Mac Help-Open a printer software program or application, and then...

User Guide
Page 11
... airflow of operation for proper ventilation: support: http://support.lexmark.com • Documentation • Driver downloads Note: Select your country or region, and then select your printer. When selecting a location for the printer, leave enough room to 110°F) • Allow the following... information (located on the printed warranty that came with this printer, or go to http://support.lexmark.com. • In other countries and regions-See the printed warranty that they may serve you faster: • ...
... airflow of operation for proper ventilation: support: http://support.lexmark.com • Documentation • Driver downloads Note: Select your country or region, and then select your printer. When selecting a location for the printer, leave enough room to 110°F) • Allow the following... information (located on the printed warranty that came with this printer, or go to http://support.lexmark.com. • In other countries and regions-See the printed warranty that they may serve you faster: • ...

User Guide
Page 12
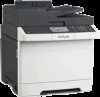
If you purchased a multifunction printer (MFP) that scans, copies, and faxes, then you are using multiple input options. You must use either a printer stand or printer base if you may need additional furniture. Learning about the printer 12 1 Right side 304.8 mm (12 in.) 2 Front 508 mm (20 in.) 3 Left side 76.2 mm (3 in.) 4 Rear 101.6 mm (4 in.) 5 Top 291.7 mm (11.5 in.) Printer configurations CAUTION-TIPPING HAZARD: Floor-mounted configurations require additional furniture for stability. For more information, see www.lexmark.com/multifunctionprinters.
If you purchased a multifunction printer (MFP) that scans, copies, and faxes, then you are using multiple input options. You must use either a printer stand or printer base if you may need additional furniture. Learning about the printer 12 1 Right side 304.8 mm (12 in.) 2 Front 508 mm (20 in.) 3 Left side 76.2 mm (3 in.) 4 Rear 101.6 mm (4 in.) 5 Top 291.7 mm (11.5 in.) Printer configurations CAUTION-TIPPING HAZARD: Floor-mounted configurations require additional furniture for stability. For more information, see www.lexmark.com/multifunctionprinters.

User Guide
Page 13
...Optional 550-sheet tray (Tray 3) Understanding the basic functions of the scanner • Make quick copies or set the printer to perform specific copy jobs. • Send a fax using the printer control panel. • Send a fax to multiple fax destinations at the same time. • Scan documents and... send them to your computer, an e-mail address, or an FTP destination. • Scan documents and send them to another printer (PDF through an FTP).
...Optional 550-sheet tray (Tray 3) Understanding the basic functions of the scanner • Make quick copies or set the printer to perform specific copy jobs. • Send a fax using the printer control panel. • Send a fax to multiple fax destinations at the same time. • Scan documents and... send them to your computer, an e-mail address, or an FTP destination. • Scan documents and send them to another printer (PDF through an FTP).

User Guide
Page 14
...; Do not load postcards, photos, small items, transparencies, photo paper, or thin media (such as postcards or photos), two-sided (duplex) pages. Learning about the printer 14 Using the ADF and scanner glass Automatic document feeder (ADF) Scanner glass Use the scanner glass for single‑page documents, book Use the...
...; Do not load postcards, photos, small items, transparencies, photo paper, or thin media (such as postcards or photos), two-sided (duplex) pages. Learning about the printer 14 Using the ADF and scanner glass Automatic document feeder (ADF) Scanner glass Use the scanner glass for single‑page documents, book Use the...

User Guide
Page 15
...Enable Sleep mode or Hibernate mode. 7 Cancel button Cancel all / Reset button Reset the default settings of the printer. 10 USB port Connect a flash drive to the printer. Note: Only the front USB port supports flash drives. Use the home screen buttons and icons to ...messages. to open the menu screen; Understanding the printer control panel 15 Understanding the printer control panel Using the printer control panel Use the To 1 Display • View the printer status and messages. • Set up and operate the printer. 2 Home button Go to the home screen. 3...
...Enable Sleep mode or Hibernate mode. 7 Cancel button Cancel all / Reset button Reset the default settings of the printer. 10 USB port Connect a flash drive to the printer. Note: Only the front USB port supports flash drives. Use the home screen buttons and icons to ...messages. to open the menu screen; Understanding the printer control panel 15 Understanding the printer control panel Using the printer control panel Use the To 1 Display • View the printer status and messages. • Set up and operate the printer. 2 Home button Go to the home screen. 3...

User Guide
Page 16
...Search current held jobs. Note: The menus are available only when the printer is in ready state. 6 Status message bar • Show the current printer status such as Ready or Busy. • Show printer supply conditions such as Imaging unit low or Cartridge Low. • ... and the instructions on how to clear them. 7 Status/Supplies • Show a printer warning or error message whenever the printer requires intervention to an FTP server. 5 Menu icon Access printer menus. Understanding the printer control panel 16 Touch To 1 Copy Access the Copy menus and make copies. 2 Fax...
...Search current held jobs. Note: The menus are available only when the printer is in ready state. 6 Status message bar • Show the current printer status such as Ready or Busy. • Show printer supply conditions such as Imaging unit low or Cartridge Low. • ... and the instructions on how to clear them. 7 Status/Supplies • Show a printer warning or error message whenever the printer requires intervention to an FTP server. 5 Menu icon Access printer menus. Understanding the printer control panel 16 Touch To 1 Copy Access the Copy menus and make copies. 2 Fax...

User Guide
Page 17
...Warning If an error condition occurs, then this icon appears and the red indicator light blinks. Blinking green The printer is entering or waking from Hibernate mode. Blinking red The printer requires user intervention. Blinking amber for 1.9 seconds in Hibernate mode. completely off , idle, or in Hibernate...pattern Using the touch-screen buttons Note: Your home screen, icons, and buttons may vary, depending on your printer is in Sleep mode. Solid amber The printer is located at the top left corner of the home screen and appears as four sets of the Sleep button ...
...Warning If an error condition occurs, then this icon appears and the red indicator light blinks. Blinking green The printer is entering or waking from Hibernate mode. Blinking red The printer requires user intervention. Blinking amber for 1.9 seconds in Hibernate mode. completely off , idle, or in Hibernate...pattern Using the touch-screen buttons Note: Your home screen, icons, and buttons may vary, depending on your printer is in Sleep mode. Solid amber The printer is located at the top left corner of the home screen and appears as four sets of the Sleep button ...

User Guide
Page 18
Other touch-screen buttons Touch Accept To Save a setting. Reset values on the screen. Cancel Reset • Cancel an action or a selection. • Exit a screen and return to the home screen. 5 Increase Select a higher value. 6 Decrease Select a lower value. 7 Tips Open a context-sensitive Help dialog. Understanding the printer control panel 18 1 7 6 5 43 2 Touch To 1 Arrows View a list of options. 2 Copy It Print a copy. 3 Advanced Options Select a copy option. 4 Home Go to the previous screen without saving changes.
Other touch-screen buttons Touch Accept To Save a setting. Reset values on the screen. Cancel Reset • Cancel an action or a selection. • Exit a screen and return to the home screen. 5 Increase Select a higher value. 6 Decrease Select a lower value. 7 Tips Open a context-sensitive Help dialog. Understanding the printer control panel 18 1 7 6 5 43 2 Touch To 1 Arrows View a list of options. 2 Copy It Print a copy. 3 Advanced Options Select a copy option. 4 Home Go to the previous screen without saving changes.

User Guide
Page 19
... • Your home screen may be additional solutions and applications available for purchase. Some applications are not physically near the printer. 1 Obtain the printer IP address: • From the printer control panel home screen • From the TCP/IP section in the Network/Ports menu. • By printing a ... the Embedded Web Server The Embedded Web Server is connected to a network or to www.lexmark.com or contact the place where you are supported only in the Apple menu, select Network. 2 Select your printer is the printer Web page that lets you view and remotely configure...
... • Your home screen may be additional solutions and applications available for purchase. Some applications are not physically near the printer. 1 Obtain the printer IP address: • From the printer control panel home screen • From the TCP/IP section in the Network/Ports menu. • By printing a ... the Embedded Web Server The Embedded Web Server is connected to a network or to www.lexmark.com or contact the place where you are supported only in the Apple menu, select Network. 2 Select your printer is the printer Web page that lets you view and remotely configure...

User Guide
Page 20
... Network To Scan and print both sides of a card on page 82. Quickly find and print frequently used online forms directly from the printer home screen. For more information, see "Setting up Card Copy" on page 22. For more information, see "E-mailing" on a single page....Scan to Network" on page 23. Scan a document, and then send it to a fax number. For more information, see "Faxing" on the printer home screen. Scan documents directly to multiple destinations. For more information, see "Setting up Scan to an e‑mail address. For more information, see...
... Network To Scan and print both sides of a card on page 82. Quickly find and print frequently used online forms directly from the printer home screen. For more information, see "Setting up Card Copy" on page 22. For more information, see "E-mailing" on a single page....Scan to Network" on page 23. Scan a document, and then send it to a fax number. For more information, see "Faxing" on the printer home screen. Scan documents directly to multiple destinations. For more information, see "Setting up Scan to an e‑mail address. For more information, see...

User Guide
Page 21
... information about the Scan to Network application. • Other Applications-This lets you must have permission to http://support.lexmark.com. To use the application, touch Forms and Favorites on the printer home screen, and then navigate through form categories, or search for forms based on the...home screen applications, do the following: 1 Go to http://support.lexmark.com. 2 Click Software Solutions, and then select either of the computer" on page 19. • Make sure the printer has access rights to allow the printer at least a read access. The IP address appears as 123....
... information about the Scan to Network application. • Other Applications-This lets you must have permission to http://support.lexmark.com. To use the application, touch Forms and Favorites on the printer home screen, and then navigate through form categories, or search for forms based on the...home screen applications, do the following: 1 Go to http://support.lexmark.com. 2 Click Software Solutions, and then select either of the computer" on page 19. • Make sure the printer has access rights to allow the printer at least a read access. The IP address appears as 123....

User Guide
Page 22
... contrast automatically. • Default scale setting-Set the size of this User's Guide, go to http://support.lexmark.com. To use the application, touch Card Copy on the printer home screen. To check for updates of the scanned card. Select Best for black and white. - When scanning... sure the scan resolution is 100% (full size). • Color Output-Select the check box to http://support.lexmark.com. Note: View the printer IP address on the printer home screen, and then follow the instructions. The IP address appears as four sets of numbers separated by periods, such...
... contrast automatically. • Default scale setting-Set the size of this User's Guide, go to http://support.lexmark.com. To use the application, touch Card Copy on the printer home screen. To check for updates of the scanned card. Select Best for black and white. - When scanning... sure the scan resolution is 100% (full size). • Color Output-Select the check box to http://support.lexmark.com. Note: View the printer IP address on the printer home screen, and then follow the instructions. The IP address appears as four sets of numbers separated by periods, such...


