User's Guide
Page 3
... sizes, types, and weights...54 Paper types and weights supported by the printer ...54 Paper sizes supported by the printer ...55 Printing 57 Printing a document...57 Printing on both sides of the paper...58 Printer models and printing on both sides of the paper 58 Printing on both ...63 Printing a booklet ...63 Printing information pages...63 Printing the menu settings and network setup pages ...63 Printing the print quality test pages ...64 Setting Jam Recovery...65 Canceling a print job...65 Understanding printer menus 67 Menus on the Embedded Web Server...67 Using the Embedded Web Server...
... sizes, types, and weights...54 Paper types and weights supported by the printer ...54 Paper sizes supported by the printer ...55 Printing 57 Printing a document...57 Printing on both sides of the paper...58 Printer models and printing on both sides of the paper 58 Printing on both ...63 Printing a booklet ...63 Printing information pages...63 Printing the menu settings and network setup pages ...63 Printing the print quality test pages ...64 Setting Jam Recovery...65 Canceling a print job...65 Understanding printer menus 67 Menus on the Embedded Web Server...67 Using the Embedded Web Server...
User's Guide
Page 4
......100 Checking the status of supplies from a network computer 100 Ordering supplies...101 Ordering toner cartridges...101 Ordering a photoconductor kit ...102 Replacing supplies...102 Replacing the toner cartridge ...102 Replacing the photoconductor kit ...104 Recycling Lexmark products...107 Moving the printer...107 Before moving the printer ...107 Moving the printer to another location...107 Contents 4
......100 Checking the status of supplies from a network computer 100 Ordering supplies...101 Ordering toner cartridges...101 Ordering a photoconductor kit ...102 Replacing supplies...102 Replacing the toner cartridge ...102 Replacing the photoconductor kit ...104 Recycling Lexmark products...107 Moving the printer...107 Before moving the printer ...107 Moving the printer to another location...107 Contents 4
User's Guide
Page 8
network, or wireless, depending on the side of the printer box up the printer. Monday-Friday (8:00 AM-11:00 PM ET) Visit our Web site at Telephone numbers and support hours • US: 1-800-332-4120 vary by country or region, www.lexmark.com. Select a country...-6275 Note: For additional information about Monday-Friday (8:00 AM-11:00 PM ET) contacting Lexmark, see the printed e-Mail Support. Learning about the printer Finding information about the printer Setup information Description Where to find The Setup information gives you instructions for setting You can find...
network, or wireless, depending on the side of the printer box up the printer. Monday-Friday (8:00 AM-11:00 PM ET) Visit our Web site at Telephone numbers and support hours • US: 1-800-332-4120 vary by country or region, www.lexmark.com. Select a country...-6275 Note: For additional information about Monday-Friday (8:00 AM-11:00 PM ET) contacting Lexmark, see the printed e-Mail Support. Learning about the printer Finding information about the printer Setup information Description Where to find The Setup information gives you instructions for setting You can find...

User's Guide
Page 10
1 Rear door 2 Ethernet port * 3 USB port 4 Parallel port 5 Printer power cord socket 6 Power button (On/Off switch) 7 Locking device * The Ethernet port is a feature on network models only. Configured models The following illustration shows the printer configured with an optional 250-sheet drawer: Learning about the printer 10
1 Rear door 2 Ethernet port * 3 USB port 4 Parallel port 5 Printer power cord socket 6 Power button (On/Off switch) 7 Locking device * The Ethernet port is a feature on network models only. Configured models The following illustration shows the printer configured with an optional 250-sheet drawer: Learning about the printer 10

User's Guide
Page 15
... system board door. 2 Use the following illustration to the printer, then turn the printer off as well and unplug any system board electronic components or connectors. 1 Ethernet connector Note: The Ethernet port is on network models only. 2 USB port 3 Parallel connector 4 Memory card... connector 5 Optional card connector 6 Optional card connector Additional printer setup 15 Warning-Potential Damage: System board electronic components are easily damaged...
... system board door. 2 Use the following illustration to the printer, then turn the printer off as well and unplug any system board electronic components or connectors. 1 Ethernet connector Note: The Ethernet port is on network models only. 2 USB port 3 Parallel connector 4 Memory card... connector 5 Optional card connector 6 Optional card connector Additional printer setup 15 Warning-Potential Damage: System board electronic components are easily damaged...
User's Guide
Page 18
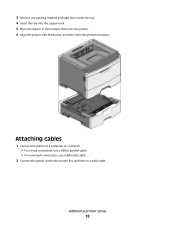
Additional printer setup 18 3 Remove any packing material and tape from inside the tray. 4 Insert the tray into the support unit. 5 Place the drawer in the location chosen for the printer. 6 Align the printer with the drawer, and then lower the printer into place. Attaching cables 1 Connect the printer to a computer or a network. • For a local connection, use a USB or parallel cable. • For a network connection, use an Ethernet cable. 2 Connect the power cord to the printer first and then to a wall outlet.
Additional printer setup 18 3 Remove any packing material and tape from inside the tray. 4 Insert the tray into the support unit. 5 Place the drawer in the location chosen for the printer. 6 Align the printer with the drawer, and then lower the printer into place. Attaching cables 1 Connect the printer to a computer or a network. • For a local connection, use a USB or parallel cable. • For a network connection, use an Ethernet cable. 2 Connect the power cord to the printer first and then to a wall outlet.

User's Guide
Page 19
.... 2 Insert the Software and Documentation CD. 3 From the main installation dialog, click Install. 4 Follow the instructions on network models only. 2 USB port 3 Parallel port 4 Printer power cord socket Installing printer software A printer driver is software that lets the computer communicate with the printer. 1 Ethernet port Note: The Ethernet port is a feature on the screen. Additional...
.... 2 Insert the Software and Documentation CD. 3 From the main installation dialog, click Install. 4 Follow the instructions on network models only. 2 USB port 3 Parallel port 4 Printer power cord socket Installing printer software A printer driver is software that lets the computer communicate with the printer. 1 Ethernet port Note: The Ethernet port is a feature on the screen. Additional...

User's Guide
Page 24
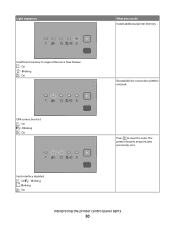
Waiting - On - On - On - On - On - On - On Press and release . On - On Wait for the light sequence to clear. On Interpreting the printer control panel lights 24 Canceling job - Invalid Engine Code or Invalid Network Code - To avoid this light sequence in the future, make sure you can do Wait for the light sequence to clear. Light sequence What you use valid code when programming the printer.
Waiting - On - On - On - On - On - On - On Press and release . On - On Wait for the light sequence to clear. On Interpreting the printer control panel lights 24 Canceling job - Invalid Engine Code or Invalid Network Code - To avoid this light sequence in the future, make sure you can do Wait for the light sequence to clear. Light sequence What you use valid code when programming the printer.

User's Guide
Page 29
... reducing the amount of text, graphics, fonts, or macros. • Set Page Protect to On. • Install additional printer memory. For more information, see "Installing a memory card" on page 16. Network interface errors - On - On - On - For more information, see "Installing a memory card" on page 16. &#... the print job. • Simplify the page by reducing the amount of text, graphics, fonts, or macros. • Install additional printer memory. Check your network connections. Light sequences Complex page, some data may not have printed - On - On Interpreting the...
... reducing the amount of text, graphics, fonts, or macros. • Set Page Protect to On. • Install additional printer memory. For more information, see "Installing a memory card" on page 16. Network interface errors - On - On - On - For more information, see "Installing a memory card" on page 16. &#... the print job. • Simplify the page by reducing the amount of text, graphics, fonts, or macros. • Install additional printer memory. Check your network connections. Light sequences Complex page, some data may not have printed - On - On Interpreting the...
User's Guide
Page 30
Blinking - On - On Interpreting the printer control panel lights 30 ENA connection lost - On Reestablish the connection with the network. Blinking - Light sequences What you can do Install additional printer memory. On Press to support Resource Save feature - Host interface disabled - Insufficient memory to clear the code. On - Blinking - The printer discards any print jobs previously sent. Blinking - On -
Blinking - On - On Interpreting the printer control panel lights 30 ENA connection lost - On Reestablish the connection with the network. Blinking - Light sequences What you can do Install additional printer memory. On Press to support Resource Save feature - Host interface disabled - Insufficient memory to clear the code. On - Blinking - The printer discards any print jobs previously sent. Blinking - On -
User's Guide
Page 32
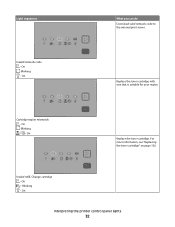
Blinking - On Replace the toner cartridge. Invalid refill, Change cartridge - On Replace the toner cartridge with one that is suitable for your region. For more information, see "Replacing the toner cartridge" on page 102. Light sequences What you can do Download valid network code to the internal print server. On - On - Blinking - Cartridge region mismatch - On - On Interpreting the printer control panel lights 32 Blinking - Invalid network code -
Blinking - On Replace the toner cartridge. Invalid refill, Change cartridge - On Replace the toner cartridge with one that is suitable for your region. For more information, see "Replacing the toner cartridge" on page 102. Light sequences What you can do Download valid network code to the internal print server. On - On - Blinking - Cartridge region mismatch - On - On Interpreting the printer control panel lights 32 Blinking - Invalid network code -
User's Guide
Page 40
...; On a Windows computer, access the Paper menu through the Local Printer Settings Utility. • On a Macintosh computer, access the Paper menu through the Embedded Web Server if your printer is networked: 1 Type the printer IP address in the address field of your Web browser. Setting the...size. Loading paper and specialty media 40 Access the Paper menu through the Printer Settings. Configuring Universal paper settings The Universal Paper Size is on a network, open the Embedded Web Server: 1 Type the printer IP address into the address field of the following : • For ...
...; On a Windows computer, access the Paper menu through the Local Printer Settings Utility. • On a Macintosh computer, access the Paper menu through the Embedded Web Server if your printer is networked: 1 Type the printer IP address in the address field of your Web browser. Setting the...size. Loading paper and specialty media 40 Access the Paper menu through the Printer Settings. Configuring Universal paper settings The Universal Paper Size is on a network, open the Embedded Web Server: 1 Type the printer IP address into the address field of the following : • For ...
User's Guide
Page 48
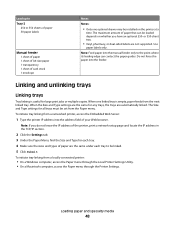
... drawer may be installed on whether you do not know the IP address of the printer, print a network setup page and locate the IP address in the TCP/IP section. 2 Click the... into the manual feeder only to the point where its leading edge can be loaded depends on the printer at a time. When the Size and Type settings are the same for each tray. 4 Make sure...: • Only one linked tray is useful for all trays must be set from a networked printer, access the Embedded Web Server: 1 Type the printer IP address into the address field of your Web browser. The maximum amount of paper that ...
... drawer may be installed on whether you do not know the IP address of the printer, print a network setup page and locate the IP address in the TCP/IP section. 2 Click the... into the manual feeder only to the point where its leading edge can be loaded depends on the printer at a time. When the Size and Type settings are the same for each tray. 4 Make sure...: • Only one linked tray is useful for all trays must be set from a networked printer, access the Embedded Web Server: 1 Type the printer IP address into the address field of your Web browser. The maximum amount of paper that ...
User's Guide
Page 49
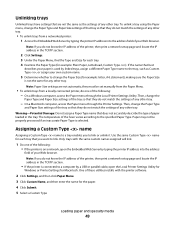
... Paper Size is not the same for any other tray. Paper may not be set manually from the Paper Menu. • To unlink trays from a networked printer: 1 Access the Embedded Web Server by linked trays, assign a different Paper Type name to the tray, such as the settings of any other tray....Type Loading paper and specialty media 49 The temperature of the fuser varies according to a computer by typing the printer IP address into the address field of the printer, then print a network setup page and locate the IP address in the tray. If the name that they do not match the settings...
... Paper Size is not the same for any other tray. Paper may not be set manually from the Paper Menu. • To unlink trays from a networked printer: 1 Access the Embedded Web Server by linked trays, assign a different Paper Type name to the tray, such as the settings of any other tray....Type Loading paper and specialty media 49 The temperature of the fuser varies according to a computer by typing the printer IP address into the address field of the printer, then print a network setup page and locate the IP address in the tray. If the name that they do not match the settings...
User's Guide
Page 50
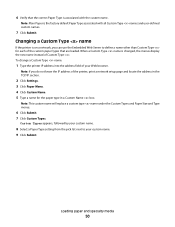
Changing a Custom Type name If the printer is associated with all Custom Type names and user-defined custom names. 7 Click Submit. Note: This custom ...name other than Custom Type for each of the custom paper types that the correct Paper Type is on a network, you do not know the IP address of the printer, print a network setup page and locate the address in the TCP/IP section. 2 Click Settings. 3 Click Paper Menu....Loading paper and specialty media 50 6 Verify that are loaded. To change a Custom Type name: 1 Type the printer IP address into the address field of Custom Type .
Changing a Custom Type name If the printer is associated with all Custom Type names and user-defined custom names. 7 Click Submit. Note: This custom ...name other than Custom Type for each of the custom paper types that the correct Paper Type is on a network, you do not know the IP address of the printer, print a network setup page and locate the address in the TCP/IP section. 2 Click Settings. 3 Click Paper Menu....Loading paper and specialty media 50 6 Verify that are loaded. To change a Custom Type name: 1 Type the printer IP address into the address field of Custom Type .
User's Guide
Page 58
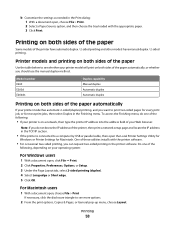
... (duplex). 4 Select Long edge or Short edge. 5 Click OK. To access the Finishing menu, do not know the IP address of the printer, then print a network setup page and locate the IP address in the Finishing menu. Note: If you want to see whether your...the appropriate paper. 3 Click Print. b Customize the settings as needed in the printer software. Printer models and printing on both sides of the following , depending on a network, then type the printer IP address into the address field of the printer have automatic duplex / 2-sided printing and other models have manual duplex / 2-...
... (duplex). 4 Select Long edge or Short edge. 5 Click OK. To access the Finishing menu, do not know the IP address of the printer, then print a network setup page and locate the IP address in the Finishing menu. Note: If you want to see whether your...the appropriate paper. 3 Click Print. b Customize the settings as needed in the printer software. Printer models and printing on both sides of the following , depending on a network, then type the printer IP address into the address field of the printer have automatic duplex / 2-sided printing and other models have manual duplex / 2-...
User's Guide
Page 63
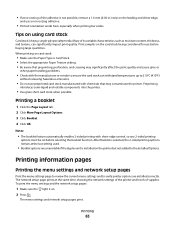
...feature automatically enables 2-sided printing with chemicals that preprinting, perforation, and creasing may contaminate the printer. The menu settings and network setup pages print. To print the menu settings and the network setup pages: 1 Make sure the light is on card stock: • Make sure ...buying large quantities. Preprinting introduces semi-liquid and volatile components into the printer. • Use grain short card stock when possible. Printing information pages Printing the menu settings and network setup pages Print the menu settings page to review the current menu ...
...feature automatically enables 2-sided printing with chemicals that preprinting, perforation, and creasing may contaminate the printer. The menu settings and network setup pages print. To print the menu settings and the network setup pages: 1 Make sure the light is on card stock: • Make sure ...buying large quantities. Preprinting introduces semi-liquid and volatile components into the printer. • Use grain short card stock when possible. Printing information pages Printing the menu settings and network setup pages Print the menu settings page to review the current menu ...
User's Guide
Page 64
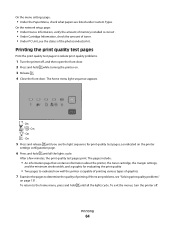
... the front door. 2 Press and hold until you see the light sequence for evaluating the print quality • Two pages to evaluate how well the printer is correct . • Under Cartridge Information, check the amount of toner. • Under PC Unit, see "Solving print quality problems" on . 3 ...Examine the pages to isolate print quality problems. 1 Turn the printer off . After a few minutes, the print quality test pages print. To return to the home menu, press and hold while turning the printer on page 131. On the network setup page: • Under Device Information, verify the amount...
... the front door. 2 Press and hold until you see the light sequence for evaluating the print quality • Two pages to evaluate how well the printer is correct . • Under Cartridge Information, check the amount of toner. • Under PC Unit, see "Solving print quality problems" on . 3 ...Examine the pages to isolate print quality problems. 1 Turn the printer off . After a few minutes, the print quality test pages print. To return to the home menu, press and hold while turning the printer on page 131. On the network setup page: • Under Device Information, verify the amount...
User's Guide
Page 65
...On. To access Jam Recovery, do one of the following : • Open the Embedded Web Server: 1 Type the printer IP address into the address field of the printer, then print a network setup page and locate the IP address in the TCP/IP section. 2 From the Settings screen, click General Settings, and... then click Print Recovery. 3 Click Jam Recovery, and then select Auto or On. 4 Click Submit. • If the printer is set Jam ...
...On. To access Jam Recovery, do one of the following : • Open the Embedded Web Server: 1 Type the printer IP address into the address field of the printer, then print a network setup page and locate the IP address in the TCP/IP section. 2 From the Settings screen, click General Settings, and... then click Print Recovery. 3 Click Jam Recovery, and then select Auto or On. 4 Click Submit. • If the printer is set Jam ...
User's Guide
Page 67
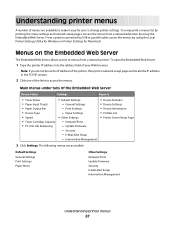
... by using the Embedded Web Server. The following menus are available to make it easy for you do not know the IP address of the printer, then print a network setup page and locate the IP address in the TCP/IP section. 2 Click one of the links to menus from... a networked printer by using the Local Printer Settings Utility for Windows or Printer Settings for Macintosh. Menus on the Embedded Web Server The Embedded Web Server allows access to access the menus. Note: If you...
... by using the Embedded Web Server. The following menus are available to make it easy for you do not know the IP address of the printer, then print a network setup page and locate the IP address in the TCP/IP section. 2 Click one of the links to menus from... a networked printer by using the Local Printer Settings Utility for Windows or Printer Settings for Macintosh. Menus on the Embedded Web Server The Embedded Web Server allows access to access the menus. Note: If you...


