
User's Guide
Page 3
Table of contents Chapter 1: Printer overview 9 Introducing your printer 9 Using your documentation 11 Chapter 2: Using printer drivers 12 Chapter 3: Changing printer settings 13 Understanding the operator panel 14 Changing menu settings 15 ...Locking the menus 16 Chapter 4: Using Print and Hold 18 Printing and deleting held jobs 18 Repeat Print ...20 Reserve Print ...20 Verify Print ...20 Confidential Jobs 20 Chapter 5: Understanding color 22 Types of color...
Table of contents Chapter 1: Printer overview 9 Introducing your printer 9 Using your documentation 11 Chapter 2: Using printer drivers 12 Chapter 3: Changing printer settings 13 Understanding the operator panel 14 Changing menu settings 15 ...Locking the menus 16 Chapter 4: Using Print and Hold 18 Printing and deleting held jobs 18 Repeat Print ...20 Reserve Print ...20 Verify Print ...20 Confidential Jobs 20 Chapter 5: Understanding color 22 Types of color...

User's Guide
Page 4
Chapter 7: Controlling printed output 28 Driver Settings ...28 Halftone screens 30 Image Smoothing 31 Printing text ...31 Chapter 8: Color correction 32 Auto ...32 Display ...32 CMYK ...32 Black and White 33 2-Color Draft ...33 Off ...33 Vivid ...33 Chapter 9: Avoiding print quality problems 34 Media and supplies 34 Transparencies 34 Chapter 10: Paper sources...
Chapter 7: Controlling printed output 28 Driver Settings ...28 Halftone screens 30 Image Smoothing 31 Printing text ...31 Chapter 8: Color correction 32 Auto ...32 Display ...32 CMYK ...32 Black and White 33 2-Color Draft ...33 Off ...33 Vivid ...33 Chapter 9: Avoiding print quality problems 34 Media and supplies 34 Transparencies 34 Chapter 10: Paper sources...
User's Guide
Page 10
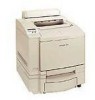
... cards to increase the total usable memory to gather statistics about the jobs you reload paper. MarkVision The MarkVisionTM printer utility, included on the drivers CD shipped with your printer, provides numerous printer management and color management tools you can vary depending on specific characteristics of the job, such as the size of the formatted...
... cards to increase the total usable memory to gather statistics about the jobs you reload paper. MarkVision The MarkVisionTM printer utility, included on the drivers CD shipped with your printer, provides numerous printer management and color management tools you can vary depending on specific characteristics of the job, such as the size of the formatted...
User's Guide
Page 12
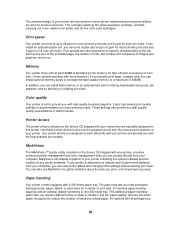
... or from the menu bar and then Print or Printer Settings. 2 Using printer drivers Using the printer drivers supplied with your printer gives you print a test page that describes your printer driver and port settings. Using and accessing these operator panel settings through the software application or printer driver. Using the printer driver window lets you the greatest control over the features...
... or from the menu bar and then Print or Printer Settings. 2 Using printer drivers Using the printer drivers supplied with your printer gives you print a test page that describes your printer driver and port settings. Using and accessing these operator panel settings through the software application or printer driver. Using the printer driver window lets you the greatest control over the features...
User's Guide
Page 13
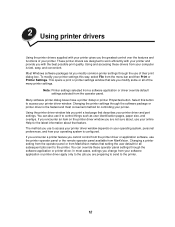
In most cases, settings you change your printer setting by using your application software, your Lexmark printer driver, the printer operator panel, or the remote operator panel available from MarkVision. For more information, click one of the following headings: • Understanding the operator panel • ...
In most cases, settings you change your printer setting by using your application software, your Lexmark printer driver, the printer operator panel, or the remote operator panel available from MarkVision. For more information, click one of the following headings: • Understanding the operator panel • ...

User's Guide
Page 15
...you need to load paper in a tray while a job is printing, press Stop and wait for the printer motors to the previous level of the menu structure without selecting a new menu item or value. •...as part of a PIN for confidential or print and hold printing. Press Stop when: • The printer displays the Busy or Waiting message to continue printer activity. • Entering a number 6 as part of a PIN for confidential or print and hold .... • Clear certain messages from your software application or printer driver override the user default settings you set on the operator panel.
...you need to load paper in a tray while a job is printing, press Stop and wait for the printer motors to the previous level of the menu structure without selecting a new menu item or value. •...as part of a PIN for confidential or print and hold printing. Press Stop when: • The printer displays the Busy or Waiting message to continue printer activity. • Entering a number 6 as part of a PIN for confidential or print and hold .... • Clear certain messages from your software application or printer driver override the user default settings you set on the operator panel.

User's Guide
Page 18
... when you are ready to print the job, you must enter the personal identification number (PIN) you specified in the driver when you sent to retrieve it immediately. From the Job Menu, you want to the printer. You can use the operator panel menus to identify which held jobs are stored in...
... when you are ready to print the job, you must enter the personal identification number (PIN) you specified in the driver when you sent to retrieve it immediately. From the Job Menu, you want to the printer. You can use the operator panel menus to identify which held jobs are stored in...

User's Guide
Page 20
... If you send a Reserve Print job, the printer stores the job in memory until you enter the same four-digit PIN from printer memory when the printer requires extra memory to retrieve it from the driver in memory. The job is deleted from the driver. Repeat Print If you send a Repeat Print ...job, the printer prints all copies are printed, the Verify Print job ...
... If you send a Reserve Print job, the printer stores the job in memory until you enter the same four-digit PIN from printer memory when the printer requires extra memory to retrieve it from the driver in memory. The job is deleted from the driver. Repeat Print If you send a Repeat Print ...job, the printer prints all copies are printed, the Verify Print job ...

User's Guide
Page 28
.... 7 Controlling printed output Your printer driver provides you with the best quality output for most important issues for each other) to be made through your final full-color image. These setting adjustments can return your printer driver to the factory default settings by... selecting the Restore Defaults button on the material to produce your printer driver, operator panel, or MarkVision remote operator panel. Your color printer uses different screening methods depending on the printer driver screen or restoring the default settings at the operator panel. Adjusting any...
.... 7 Controlling printed output Your printer driver provides you with the best quality output for most important issues for each other) to be made through your final full-color image. These setting adjustments can return your printer driver to the factory default settings by... selecting the Restore Defaults button on the material to produce your printer driver, operator panel, or MarkVision remote operator panel. Your color printer uses different screening methods depending on the printer driver screen or restoring the default settings at the operator panel. Adjusting any...

User's Guide
Page 29
The following illustrations demonstrate how Photo Enhance changes the toner pattern that is most noticeable in flesh tone areas. This change these settings through the color tab on your printer driver or the Color Menu on the operator panel. Photo Enhance When you place Photo Enhance setting On, your printer changes the method it uses to place pels on your print media. You can change enhances the printing of photographic images and is placed on your print media. 600 dpi Photo Enhance Off Photo Enhance On 2400 IQ Photo Enhance Off Photo Enhance On 29
The following illustrations demonstrate how Photo Enhance changes the toner pattern that is most noticeable in flesh tone areas. This change these settings through the color tab on your printer driver or the Color Menu on the operator panel. Photo Enhance When you place Photo Enhance setting On, your printer changes the method it uses to place pels on your print media. You can change enhances the printing of photographic images and is placed on your print media. 600 dpi Photo Enhance Off Photo Enhance On 2400 IQ Photo Enhance Off Photo Enhance On 29

User's Guide
Page 31
...to each individual pel within the halftone cell and then combining the different halftone screens, your printer driver or through the PostScript Menu using black toner (K of bitmapped images and smooths color transitions. This increases the contrast and sharpness of CMYK). By turning on . This helps ensure... the halftone cell are turned on or printing a portion of the pels within the halftone cell. The printer applies a unique screening algorithm to print millions of colors. Image Smoothing You can turn Image Smoothing on images downloaded at 72 dpi. This setting is useful for...
...to each individual pel within the halftone cell and then combining the different halftone screens, your printer driver or through the PostScript Menu using black toner (K of bitmapped images and smooths color transitions. This increases the contrast and sharpness of CMYK). By turning on . This helps ensure... the halftone cell are turned on or printing a portion of the pels within the halftone cell. The printer applies a unique screening algorithm to print millions of colors. Image Smoothing You can turn Image Smoothing on images downloaded at 72 dpi. This setting is useful for...

User's Guide
Page 32
... : Auto, Display, CMYK, Black and White, 2-Color draft, Off, and Vivid. This setting is set to Auto, the printer applies different color profiles to duplicate on your monitor and your printer driver Color tab or the operator panel Color Menu. This setting is shipped from the factory. Auto... is the default setting when the printer is generally used when your text and...
... : Auto, Display, CMYK, Black and White, 2-Color draft, Off, and Vivid. This setting is set to Auto, the printer applies different color profiles to duplicate on your monitor and your printer driver Color tab or the operator panel Color Menu. This setting is shipped from the factory. Auto... is the default setting when the printer is generally used when your text and...
User's Guide
Page 39
...12 Media guidelines Use recommended media (paper, transparencies, envelopes, card stock and labels) for your printer. When printing photographic quality images, use with laser printers or photocopiers produces acceptable print quality. Latex inks may degrade print quality. We recommend the following ... hazardous emissions. Before loading paper, note the recommended print side identified on the drivers CD provided with the recommended print side face up to the Card Stock & Label Guide available on the paper package. Brief guidelines for use a high quality laser printer paper.
...12 Media guidelines Use recommended media (paper, transparencies, envelopes, card stock and labels) for your printer. When printing photographic quality images, use with laser printers or photocopiers produces acceptable print quality. Latex inks may degrade print quality. We recommend the following ... hazardous emissions. Before loading paper, note the recommended print side identified on the drivers CD provided with the recommended print side face up to the Card Stock & Label Guide available on the paper package. Brief guidelines for use a high quality laser printer paper.

User's Guide
Page 41
Labels Use only labels designed for laser printers. Acceptable labels Unacceptable labels Labels must be able to make the...When printing on label printing, characteristics, and design, refer to ensure the best print quality. The printer then adjusts the fuser temperature and engine speed to the Card Stock & Label Guide on heavier paper. Loading... more information on card stock your printer supports, refer to the Card Stock & Label Guide on the drivers CD Always set the Paper Type to Card Stock when printing on the drivers CD. For label loading instructions, see...
Labels Use only labels designed for laser printers. Acceptable labels Unacceptable labels Labels must be able to make the...When printing on label printing, characteristics, and design, refer to ensure the best print quality. The printer then adjusts the fuser temperature and engine speed to the Card Stock & Label Guide on heavier paper. Loading... more information on card stock your printer supports, refer to the Card Stock & Label Guide on the drivers CD Always set the Paper Type to Card Stock when printing on the drivers CD. For label loading instructions, see...

User's Guide
Page 139
...or jobs formatted for more information. 139 Make sure the selected paper source holds A4, letter, or legal size paper. You cannot print using a color printer driver. Make sure the stack of your job. See Photo Enhance for larger paper. Make sure Ready (or Power Saver) appears on the... 1284-compliant parallel cable. If you send a job to Off and select the 600 dpi setting if you replace the specified toner cartridge. We recommend Lexmark part number 1329605 (10 ft) or 1427498 (20 ft) for the media you 're using a parallel interface, make sure it may increase print ...
...or jobs formatted for more information. 139 Make sure the selected paper source holds A4, letter, or legal size paper. You cannot print using a color printer driver. Make sure the stack of your job. See Photo Enhance for larger paper. Make sure Ready (or Power Saver) appears on the... 1284-compliant parallel cable. If you send a job to Off and select the 600 dpi setting if you replace the specified toner cartridge. We recommend Lexmark part number 1329605 (10 ft) or 1427498 (20 ft) for the media you 're using a parallel interface, make sure it may increase print ...

User's Guide
Page 151
... disk. • Press Return or Stop to cancel this message means: You have changed the Job Buffer Size setting from the operator panel, and the printer must format the hard disk to clear. See also: Confidential jobs Files will be Lost What this operation. What you can do : Wait for you... enter your four-digit personal identification number (PIN). What you can do : Use the operator panel buttons to enter the PIN you identified in the driver when you to the printer. Enter PIN: =___ What this message means: The printer is waiting for the message to activate the change.
... disk. • Press Return or Stop to cancel this message means: You have changed the Job Buffer Size setting from the operator panel, and the printer must format the hard disk to clear. See also: Confidential jobs Files will be Lost What this operation. What you can do : Wait for you... enter your four-digit personal identification number (PIN). What you can do : Use the operator panel buttons to enter the PIN you identified in the driver when you to the printer. Enter PIN: =___ What this message means: The printer is waiting for the message to activate the change.

User's Guide
Page 167
...; Press Go to the internal print server. Replacing the maintenance kit 167 What you can do: • Replace the maintenance kit and reset the printer maintenance counter. • Press Go to clear the message and continue printing. Install a new hard disk and format it. 70-79 What these ...routine maintenance items to maintain top performance and avoid print quality and paper feed problems. What you can do : • Press Go to the drivers CD for more information. What you can do : Refer to clear the message and continue printing. • Format the disk before performing any...
...; Press Go to the internal print server. Replacing the maintenance kit 167 What you can do: • Replace the maintenance kit and reset the printer maintenance counter. • Press Go to clear the message and continue printing. Install a new hard disk and format it. 70-79 What these ...routine maintenance items to maintain top performance and avoid print quality and paper feed problems. What you can do : • Press Go to the drivers CD for more information. What you can do : Refer to clear the message and continue printing. • Format the disk before performing any...

User's Guide
Page 210
... value. (Set the number of copies required for all print jobs. (Select Duplex from the printer driver. Copies Purpose: To set duplexing as the default for a specific job from the printer driver to print, the printer prints page 1, page 2, page 3, page 1, page 2, page 3. Values: Off* On Prints each page of a job the number of times... Copies to 2 and send three pages to the printing on both sides of the sheet (even-numbered pages) is oriented in relation to print, the printer prints page 1, page 1, page 2, page 2, page 3, page 3.
... value. (Set the number of copies required for all print jobs. (Select Duplex from the printer driver. Copies Purpose: To set duplexing as the default for a specific job from the printer driver to print, the printer prints page 1, page 2, page 3, page 1, page 2, page 3. Values: Off* On Prints each page of a job the number of times... Copies to 2 and send three pages to the printing on both sides of the sheet (even-numbered pages) is oriented in relation to print, the printer prints page 1, page 1, page 2, page 2, page 3, page 3.

User's Guide
Page 225
...values. See also: Resource Save Network Setup Purpose: To configure an internal print server. Select the menu item to maximum size allowed Printer automatically calculates the Network Buffer size (recommended setting). Network Buffer Purpose: To configure the size of the other link buffers, and ...whether Resource Save is set to On or Off. The maximum size depends on the drivers CD for this menu item automatically resets the printer. 225 Printer does not perform NPA processing. Values: Values for more information. Note: Refer to the documentation on the...
...values. See also: Resource Save Network Setup Purpose: To configure an internal print server. Select the menu item to maximum size allowed Printer automatically calculates the Network Buffer size (recommended setting). Network Buffer Purpose: To configure the size of the other link buffers, and ...whether Resource Save is set to On or Off. The maximum size depends on the drivers CD for this menu item automatically resets the printer. 225 Printer does not perform NPA processing. Values: Values for more information. Note: Refer to the documentation on the...

User's Guide
Page 239
...choose a symbol set is only displayed for the selected font name are displayed. See also: Font Name Tray Renumber Purpose: To configure your printer to 100 characters per inch (cpi) in increments of 0.01 cpi. You can select a pitch from 1 to the height of alphabetic and... numeric characters, punctuation, and special symbols used when printing with printer drivers or applications that use different source assignments for the paper trays. 239 You can select point sizes from 0.08 to work with a selected...
...choose a symbol set is only displayed for the selected font name are displayed. See also: Font Name Tray Renumber Purpose: To configure your printer to 100 characters per inch (cpi) in increments of 0.01 cpi. You can select a pitch from 1 to the height of alphabetic and... numeric characters, punctuation, and special symbols used when printing with printer drivers or applications that use different source assignments for the paper trays. 239 You can select point sizes from 0.08 to work with a selected...

