

User's Guide
Page 10
...; Blinking, the printer is on and is busy 8 LCD 1 Menu 2 Select 3 Return 4 Light Go 5 Stop 6 Indicator light The indicator light gives information about understanding the operator panel, changing printer settings, and understanding operator panel menus. Changes made to printer settings from a software application override changes made from your software application or printer driver. 2 Using the operator panel This section contains information about the status of your printer. If you cannot change a setting from your application, use the printer...
...; Blinking, the printer is on and is busy 8 LCD 1 Menu 2 Select 3 Return 4 Light Go 5 Stop 6 Indicator light The indicator light gives information about understanding the operator panel, changing printer settings, and understanding operator panel menus. Changes made to printer settings from a software application override changes made from your software application or printer driver. 2 Using the operator panel This section contains information about the status of your printer. If you cannot change a setting from your application, use the printer...

User's Guide
Page 12
... operator panel. 10 User default settings remain in the menu appears. - A phrase or word to previous menus. The menu names appear. 2 Continue to press and release Menu until you can select menu items and associated values to print your software application can be changed - Using the operator panel to change printer settings From the operator panel, you save new settings or restore the factory defaults. See Using printer menus for one second, clears, displays the...
... operator panel. 10 User default settings remain in the menu appears. - A phrase or word to previous menus. The menu names appear. 2 Continue to press and release Menu until you can select menu items and associated values to print your software application can be changed - Using the operator panel to change printer settings From the operator panel, you save new settings or restore the factory defaults. See Using printer menus for one second, clears, displays the...
User's Guide
Page 24
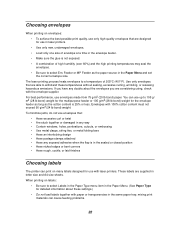
... Labels in the Paper Type menu item in the Paper Menu. (See Paper Type for detailed information about the envelopes you have any exposed adhesive when the flap is in letter size and A4 size sheets. Choosing envelopes When printing on envelopes: • To achieve the best possible print quality, use only high-quality envelopes that are designed for use in laser printers. • Use only new, undamaged envelopes. • Load only one size of envelope at a time in the envelope feeder. • Make...
... Labels in the Paper Type menu item in the Paper Menu. (See Paper Type for detailed information about the envelopes you have any exposed adhesive when the flap is in letter size and A4 size sheets. Choosing envelopes When printing on envelopes: • To achieve the best possible print quality, use only high-quality envelopes that are designed for use in laser printers. • Use only new, undamaged envelopes. • Load only one size of envelope at a time in the envelope feeder. • Make...
User's Guide
Page 69
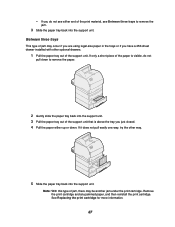
... support unit. 3 Pull the paper tray out of the print material, see either up or down. Remove the print cartridge and any jammed paper, and then reinstall the print cartridge. If only a short piece of the paper is visible, do not see Between three trays to remove the jam. 3 Slide the paper tray back into the support unit. Between three trays This type of jam may occur if you are using legal-size paper in the trays...
... support unit. 3 Pull the paper tray out of the print material, see either up or down. Remove the print cartridge and any jammed paper, and then reinstall the print cartridge. If only a short piece of the paper is visible, do not see Between three trays to remove the jam. 3 Slide the paper tray back into the support unit. Between three trays This type of jam may occur if you are using legal-size paper in the trays...

User's Guide
Page 77
... data bit settings. Make sure PCL SmartSwitch and PS SmartSwitch are set to the USB Make sure you are using . Determine which host interface you are using Windows 98, Windows 2000, Windows Me, or port, but will not print. We recommend Lexmark part number 1329605 (10 ft) or 1427498 (20 ft). Verify that a null modem cable is not stalled. another USB-capable operating system supported by Lexmark. See Print material specifications for your service representative...
... data bit settings. Make sure PCL SmartSwitch and PS SmartSwitch are set to the USB Make sure you are using . Determine which host interface you are using Windows 98, Windows 2000, Windows Me, or port, but will not print. We recommend Lexmark part number 1329605 (10 ft) or 1427498 (20 ft). Verify that a null modem cable is not stalled. another USB-capable operating system supported by Lexmark. See Print material specifications for your service representative...

User's Guide
Page 79
... are printing on an uneven print surface, change the Paper Weight and Paper Texture settings in the Paper Menu. See Print material specifications for more details. • If the problem continues, call your service representative. Problem Print is on the back of the job to run the printer setup cycle and clean the transfer roll. 77 26 Solving print quality problems If the suggested corrective action does not fix the problem, call the Lexmark Customer Support Center...
... are printing on an uneven print surface, change the Paper Weight and Paper Texture settings in the Paper Menu. See Print material specifications for more details. • If the problem continues, call your service representative. Problem Print is on the back of the job to run the printer setup cycle and clean the transfer roll. 77 26 Solving print quality problems If the suggested corrective action does not fix the problem, call the Lexmark Customer Support Center...
User's Guide
Page 87
...Install or Cancel Job Invalid Network Code Invalid Standard Network Code J K L Load Manual Load Tray LocalTalk M Menus Disabled N Network Card Busy Network Network No Jobs Found. Not Ready O P Parallel Performing Self Test Power Saver Print Jobs on Disk. Printing Directory List Printing Font List Printing Job Accounting Stat Printing Menu Settings Prog Engine Code Prog System Code Program Flash Programming Disk Q Queuing and Deleting Jobs Queuing Jobs R Ready Ready Hex Reattach Res Reduced Resetting the Printer Resetting Maint Cnt Value Restoring Factory Defaults S Serial T Toner Low...
...Install or Cancel Job Invalid Network Code Invalid Standard Network Code J K L Load Manual Load Tray LocalTalk M Menus Disabled N Network Card Busy Network Network No Jobs Found. Not Ready O P Parallel Performing Self Test Power Saver Print Jobs on Disk. Printing Directory List Printing Font List Printing Job Accounting Stat Printing Menu Settings Prog Engine Code Prog System Code Program Flash Programming Disk Q Queuing and Deleting Jobs Queuing Jobs R Ready Ready Hex Reattach Res Reduced Resetting the Printer Resetting Maint Cnt Value Restoring Factory Defaults S Serial T Toner Low...
User's Guide
Page 108
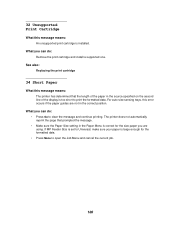
... Menu to print the formatted data. See also: Replacing the print cartridge 34 Short Paper What this error occurs if the paper guides are using. What you are not in the Paper Menu is too short to open the Job Menu and cancel the current job. 106 If MP Feeder Size is set to Universal, make sure your paper is installed. For auto-size sensing trays, this message means: The printer has determined that prompted the message. • Make sure the Paper Size setting in...
... Menu to print the formatted data. See also: Replacing the print cartridge 34 Short Paper What this error occurs if the paper guides are using. What you are not in the Paper Menu is too short to open the Job Menu and cancel the current job. 106 If MP Feeder Size is set to Universal, make sure your paper is installed. For auto-size sensing trays, this message means: The printer has determined that prompted the message. • Make sure the Paper Size setting in...

User's Guide
Page 118
...Custom Types Substitute Size Configure MP Envelope Enhance Paper Texture Paper Weight Paper Loading Universal Setup Parallel Menu PCL SmartSwitch PS SmartSwitch NPA Mode Parallel Buffer Job Buffering Advanced Status Protocol Honor Init Parallel Mode 1 Parallel Mode 2 PCL Emul Menu Font Source Font Name Point Size Pitch Symbol Set Orientation Lines per Page A4 Width Auto CR after LF Auto LF after CR Tray Renumber Setup Menu Printer Language Power Saver Resource Save Download Target Print Timeout Auto Continue Wait Timeout Jam Recovery Page Protect Display Language Alarm Control Toner Alarm Job...
...Custom Types Substitute Size Configure MP Envelope Enhance Paper Texture Paper Weight Paper Loading Universal Setup Parallel Menu PCL SmartSwitch PS SmartSwitch NPA Mode Parallel Buffer Job Buffering Advanced Status Protocol Honor Init Parallel Mode 1 Parallel Mode 2 PCL Emul Menu Font Source Font Name Point Size Pitch Symbol Set Orientation Lines per Page A4 Width Auto CR after LF Auto LF after CR Tray Renumber Setup Menu Printer Language Power Saver Resource Save Download Target Print Timeout Auto Continue Wait Timeout Jam Recovery Page Protect Display Language Alarm Control Toner Alarm Job...

User's Guide
Page 120
... Menu Power Saver PQET Print Buffer Print Directory Print Fonts Print Menus Print Net Setup Print PS Error Print Resolution Print Timeout Printer Language Protocol PS SmartSwitch Parallel Menu Serial Menu Network Menu Infrared Menu LocalTalk Menu USB Menu Q Quality Menu R Reset Printer Resource Save Robust XON RS-422 Polarity RS-232/RS-422 S Separator Sheets Separator Source Serial Buffer Serial Menu Serial Protocol Setup Menu Substitute Size Symbol Set T Toner Darkness Toner Alarm Transmit Delay Tray Renumber U Universal Setup USB Buffer 118 USB Menu Utilities Menu V W Wait Timeout Window...
... Menu Power Saver PQET Print Buffer Print Directory Print Fonts Print Menus Print Net Setup Print PS Error Print Resolution Print Timeout Printer Language Protocol PS SmartSwitch Parallel Menu Serial Menu Network Menu Infrared Menu LocalTalk Menu USB Menu Q Quality Menu R Reset Printer Resource Save Robust XON RS-422 Polarity RS-232/RS-422 S Separator Sheets Separator Source Serial Buffer Serial Menu Serial Protocol Setup Menu Substitute Size Symbol Set T Toner Darkness Toner Alarm Transmit Delay Tray Renumber U Universal Setup USB Buffer 118 USB Menu Utilities Menu V W Wait Timeout Window...
User's Guide
Page 122
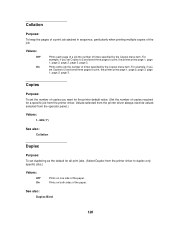
... print, the printer prints page 1, page 1, page 2, page 2, page 3, page 3. Prints on one side of times specified by the Copies menu item. Values selected from the printer driver always override values selected from the printer driver. See also: Duplex Bind 120 Collation Purpose: To keep the pages of a print job stacked in sequence, particularly when printing multiple copies of the paper. For example, if you set the number of copies you set duplexing as the default for all print jobs. (Select Duplex from the printer driver to duplex only specific jobs...
... print, the printer prints page 1, page 1, page 2, page 2, page 3, page 3. Prints on one side of times specified by the Copies menu item. Values selected from the printer driver always override values selected from the printer driver. See also: Duplex Bind 120 Collation Purpose: To keep the pages of a print job stacked in sequence, particularly when printing multiple copies of the paper. For example, if you set the number of copies you set duplexing as the default for all print jobs. (Select Duplex from the printer driver to duplex only specific jobs...
User's Guide
Page 140
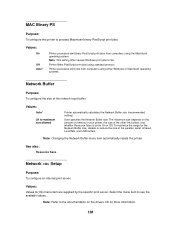
... Save Network Setup Purpose: To configure an internal print server. User specifies the Network Buffer size. Values: Values for the Network Buffer size, disable or reduce the size of the network input buffer. To maximize the range for this menu item are supplied by the specific print server. Note: Changing the Network Buffer menu item automatically resets the printer. Note: Refer to On or Off. Select the menu item to fail. Printer filters PostScript print jobs using either Windows...
... Save Network Setup Purpose: To configure an internal print server. User specifies the Network Buffer size. Values: Values for the Network Buffer size, disable or reduce the size of the network input buffer. To maximize the range for this menu item are supplied by the specific print server. Note: Changing the Network Buffer menu item automatically resets the printer. Note: Refer to On or Off. Select the menu item to fail. Printer filters PostScript print jobs using either Windows...

User's Guide
Page 209
... Blank Pages (Finishing Menu) 119 buffer, infrared 125 buffer, LocalTalk 134 buffer, network 138 buffer, parallel 156 buffer, serial 167 buffer, USB 180 C Cancel Job (Job Menu) 130 card stock, choosing 23 charge roll, replacing 49 clearing paper jams 57 Collation (Finishing Menu) 120 collation, enabling 120 complex page errors 170 Confidential Job (Job Menu) 131 Configure MP (Paper Menu) 141 Copies (Finishing Menu) 120 copies, specifying number 120 Custom Types (Paper Menu) 142 D Data Bits (Serial Menu) 163 Defragment Flash (Utilities Menu) 174 disk (hard disk) 175 Display Language (Setup Menu...
... Blank Pages (Finishing Menu) 119 buffer, infrared 125 buffer, LocalTalk 134 buffer, network 138 buffer, parallel 156 buffer, serial 167 buffer, USB 180 C Cancel Job (Job Menu) 130 card stock, choosing 23 charge roll, replacing 49 clearing paper jams 57 Collation (Finishing Menu) 120 collation, enabling 120 complex page errors 170 Confidential Job (Job Menu) 131 Configure MP (Paper Menu) 141 Copies (Finishing Menu) 120 copies, specifying number 120 Custom Types (Paper Menu) 142 D Data Bits (Serial Menu) 163 Defragment Flash (Utilities Menu) 174 disk (hard disk) 175 Display Language (Setup Menu...

User's Guide
Page 211
... types 20 paper jams 57 200 Paper Jam Remove Cartridge 59 201 Paper Jam Remove Cartridge 59 202 Paper Jam Open Rear Door 60 230 Paper Jam Check Duplex 63 24x Paper Jams Check Tray x 66 250 Paper Jam Check MP Feeder 71 260 Paper Jam Check Env Feeder 71 reprinting pages 170 paper length guide 30 Paper Loading (Paper Menu) 143 Paper Menu 141 Configure MP 141 Custom Types 142 Envelope Enhance 142 Paper Loading 143 Paper Size 144 Paper Source 144 Paper Texture 145 Paper Type 146 Paper Weight 147 Substitute Size 147 Universal Setup 148 Paper Size (Paper Menu) 144 Paper Source (Paper Menu) 144 Paper...
... types 20 paper jams 57 200 Paper Jam Remove Cartridge 59 201 Paper Jam Remove Cartridge 59 202 Paper Jam Open Rear Door 60 230 Paper Jam Check Duplex 63 24x Paper Jams Check Tray x 66 250 Paper Jam Check MP Feeder 71 260 Paper Jam Check Env Feeder 71 reprinting pages 170 paper length guide 30 Paper Loading (Paper Menu) 143 Paper Menu 141 Configure MP 141 Custom Types 142 Envelope Enhance 142 Paper Loading 143 Paper Size 144 Paper Source 144 Paper Texture 145 Paper Type 146 Paper Weight 147 Substitute Size 147 Universal Setup 148 Paper Size (Paper Menu) 144 Paper Source (Paper Menu) 144 Paper...
User's Guide
Page 213
... label fuser cleaner 53 maintenance kit 53 ordering 53 print cartridges 53 storing 55 transfer roll 54 Symbol Set (PCL Emul Menu) 153 symbol sets, definition 197 T test printing, Hex Trace mode 176 test printing, menus page 177 timeout, print 171 timeout, wait 173 toner alarm 172 Toner Alarm (Setup Menu) 172 Toner Darkness (Quality Menu) 161 transfer roll, replacing 50 Transmit Delay (Infrared Menu) 128 tray linking 46 Tray Renumber (PCL Emul Menu) 153 TrueType fonts 191 typeface, description 189 U unacceptable paper types 20 Universal Setup (Paper Menu...
... label fuser cleaner 53 maintenance kit 53 ordering 53 print cartridges 53 storing 55 transfer roll 54 Symbol Set (PCL Emul Menu) 153 symbol sets, definition 197 T test printing, Hex Trace mode 176 test printing, menus page 177 timeout, print 171 timeout, wait 173 toner alarm 172 Toner Alarm (Setup Menu) 172 Toner Darkness (Quality Menu) 161 transfer roll, replacing 50 Transmit Delay (Infrared Menu) 128 tray linking 46 Tray Renumber (PCL Emul Menu) 153 TrueType fonts 191 typeface, description 189 U unacceptable paper types 20 Universal Setup (Paper Menu...
Quick Reference Guide
Page 2
... toner, remove the cartridge by gripping the handles with both hands. Verify that the correct print material is being used. • Check the print cartridge to make sure the ink can withstand temperatures of paper sources and possible paper jam areas. Warning: Do not attempt to access paper jam areas. Operator panel menus Paper Menu Paper Source Paper Size Paper Type Custom Types Universal Setup Substitute Size Configure MP Envelope Enhance Paper Texture Paper Weight Paper Loading Finishing Menu Duplex Duplex Bind Copies Blank Pages Collation Separator Sheets...
... toner, remove the cartridge by gripping the handles with both hands. Verify that the correct print material is being used. • Check the print cartridge to make sure the ink can withstand temperatures of paper sources and possible paper jam areas. Warning: Do not attempt to access paper jam areas. Operator panel menus Paper Menu Paper Source Paper Size Paper Type Custom Types Universal Setup Substitute Size Configure MP Envelope Enhance Paper Texture Paper Weight Paper Loading Finishing Menu Duplex Duplex Bind Copies Blank Pages Collation Separator Sheets...

Setup Guide
Page 4
... option cards 2 Optional firmware card page 13 Printer/flash memory page 12 Install printer drivers 7 See page 25 Access printer system board page 10 Option cards page 14 Network printing - page 18 Local printing - page 19 See page 21 Order of installation 2000-Sheet drawer page 3 * Option install order may be reversed. page 28 page 25 Local printing - Setup Install paper options and printer 1 Printer page 6 Print cartridge page 6 Envelope feeder page 9 Duplex unit page 5 250-Sheet drawer page 4 * 500-Sheet drawer page 4 Load print material 3 See page 17 Attach cables...
... option cards 2 Optional firmware card page 13 Printer/flash memory page 12 Install printer drivers 7 See page 25 Access printer system board page 10 Option cards page 14 Network printing - page 18 Local printing - page 19 See page 21 Order of installation 2000-Sheet drawer page 3 * Option install order may be reversed. page 28 page 25 Local printing - Setup Install paper options and printer 1 Printer page 6 Print cartridge page 6 Envelope feeder page 9 Duplex unit page 5 250-Sheet drawer page 4 * 500-Sheet drawer page 4 Load print material 3 See page 17 Attach cables...

Setup Guide
Page 24
... of memory installed is displayed. 3 Verify that printer options are connected to verify that Status is installed in the printer. 22 The message Printing Menus is correctly listed under "Printer Information." 5 Verify that the paper trays are listed under "Installed Features." Save the network setup page for the sizes and types of paper you loaded in Slot 2, you see Print Net Setup, and then press Select to verify that the options you installed are configured for use with later instructions. Printing a menu settings page Print the menu settings page...
... of memory installed is displayed. 3 Verify that printer options are connected to verify that Status is installed in the printer. 22 The message Printing Menus is correctly listed under "Printer Information." 5 Verify that the paper trays are listed under "Installed Features." Save the network setup page for the sizes and types of paper you loaded in Slot 2, you see Print Net Setup, and then press Select to verify that the options you installed are configured for use with later instructions. Printing a menu settings page Print the menu settings page...
Setup Guide
Page 29
... Your Lexmark T522 printer works with NDPS so you can download these printer driver packages from Lexmark's Web site at www.lexmark.com/networking/ndps.html. Novell Distributed Print Services (NDPS) If you have finished. Note: The Sun Solaris package is located both Novell Distributed Print Services (NDPS) and regular queue-based NetWare environments. You can easily monitor, control, and print to install the PPDs. Additional information about Lexmark support for network printer instal...
... Your Lexmark T522 printer works with NDPS so you can download these printer driver packages from Lexmark's Web site at www.lexmark.com/networking/ndps.html. Novell Distributed Print Services (NDPS) If you have finished. Note: The Sun Solaris package is located both Novell Distributed Print Services (NDPS) and regular queue-based NetWare environments. You can easily monitor, control, and print to install the PPDs. Additional information about Lexmark support for network printer instal...

Setup Guide
Page 30
Windows Supported connections The following printer connections are available on the drivers CD. Printer drivers The following instructions explain how to install the Lexmark T522 PPD and use it with your printer is correctly set up the printer for parallel and USB connections. Click View documentation and look for information about local printer installation on Macintosh computers can be found on the Lexmark Web site at www.lexmark.com/drivers. Updated system and custom drivers are provided for...
Windows Supported connections The following printer connections are available on the drivers CD. Printer drivers The following instructions explain how to install the Lexmark T522 PPD and use it with your printer is correctly set up the printer for parallel and USB connections. Click View documentation and look for information about local printer installation on Macintosh computers can be found on the Lexmark Web site at www.lexmark.com/drivers. Updated system and custom drivers are provided for...

