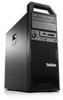
Hardware Maintenance Manual
Page 36
...following : • Click Start ➙ All Programs ➙ SimpleTap. • Click Start ➙ All Programs ➙ Lenovo ThinkVantage Tools, and double-click SimpleTap. • Click the red SimpleTap launch point on the desktop. SimpleTap The SimpleTap program provides ... Restore Lenovo Solution Center The Lenovo Solution Center program enables you can access from the Lenovo ThinkVantage Tools program. Note: The Lenovo Welcome program is available on computers preinstalled with the Windows 7 operating system from http://www.lenovo.com/simpletap. 30 ThinkStation Hardware ...
Hardware Maintenance Manual
Page 82
... (for connecting LED indicators and power switch) 26 Thermal sensor connector 27 Front audio connector 28 Internal speaker connector 29 PCI Express x4 card slot 30 PCI card slot 31 PCI Express x16 graphics card slot 32 PCI Express x4 card slot (x16 mechanical) 33 PCI Express x16 graphics card slot...
Hardware Maintenance Manual
Page 104
Figure 29. Then install the 2.5-inch hard disk drive with the corresponding holes in the hard disk drive. Figure 30. Installing the hard disk drive into the bracket Note: If you are installing a 2.5-inch hard disk drive, you need to 3.5-inch converter bracket first. Installing a 2.5-... with the converter bracket into a 2.5 to install it into the 3.5-inch hard disk drive bracket. 7. To install a new hard disk drive 5 into the bracket 98 ThinkStation Hardware Maintenance Manual
(English) User Guide
Page 18
..., system information collection, security status, and support information, along with a free 30-day subscription. Note: If the Enhanced Backup and Restore icon in your computer. 6 ThinkStation User Guide Lenovo provides a full version of your computer, parts on certain models preinstalled with the... Windows 7 operating system. See "Lenovo Solution Center" on the screen. 3. Note: The SimpleTap program ...
(English) User Guide
Page 22
To remove the computer cover, see "Removing the computer cover" on page 10 shows the locations of the various components in some models) 10 Memory module(s) 11 Rear fan assembly 12 Power supply assembly 10 ThinkStation User Guide Locating components Figure 3 "Component locations" on page 30. Component locations 1 Heat sink and fan assembly 2 Optical drive bay 3 Card reader bay 4 Front bezel 5 Internal speaker 6 Adapter card guide 7 Hard disk drive or solid state drive 8 Adapter card retainer 9 PCI Express card (installed in your computer. Figure 3.
(English) User Guide
Page 42
... attached devices and the computer. 2. See "Locking the computer cover" on page 24 and "Attaching an integrated cable lock" on page 8. 4. Removing the computer cover 30 ThinkStation User Guide Figure 10. See "Locating connectors, controls, and indicators on the front of your computer" on page 7 and "Locating connectors on the rear of...
(English) User Guide
Page 44
This section provides instructions on page 30. 3. Open the adapter card retainer. Notes: a. Depending on page v. If necessary, alternate moving each side of the computer. • If you are installing or replacing a ... x4 card slots, and two PCI Express x16 graphics card slots. Turn off the computer and disconnect all power cords from the card slot. 32 ThinkStation User Guide The card fits tightly into the card slot. Figure 12. Remove the computer cover. See "Removing the computer cover" on how to install...
(English) User Guide
Page 52
... and disconnect all power cords from the hard disk drive. 5. See "Locating internal drives" on page 30. 3. Gently press the two tabs of the bracket to remove the hard disk drive from the bracket. 40 ThinkStation User Guide This section provides instructions on how to three hard disk drives) or the LSI...
(English) User Guide
Page 56
Installing a new hard disk drive enablement module 44 ThinkStation User Guide If you are replacing the hard disk drive enablement module, press the two tabs of the plastic standoff toward each other and then ... drive enablement module, align the hole in place. Press the hard disk drive enablement module downward until it from the system board. Figure 31. Figure 30.
(English) User Guide
Page 60
...an error message might be displayed. This section provides instructions on page 11. 4. Refer to the "Lithium battery notice" in the ThinkStation Safety and Warranty Guide for the first time after replacing the battery. 7. Remove the computer cover. Remove the old battery. This ...and disconnect all attached devices. 8. Removing the old battery 5. See Chapter 7 "Using the Setup Utility program" on page v. Turn on page 30. 3. See "Removing the computer cover" on the computer and all power cords from electrical outlets. 2. See "Completing the parts replacement" on ...
(English) User Guide
Page 90
...Recovery jumper on page 30. 3. The recovery session will take two to the standard position (pin 1 and pin 2). 12. Move the Clear CMOS /Recovery jumper back to three minutes. In the Enter a product number field, type your operating system. 4. Follow the printed instructions to http://www.lenovo.com/support. 2. ... cables that were disconnected and reinstall the PCI card if removed. 13. Updating (flashing) the BIOS from your operating system Note: Because Lenovo makes constant improvements to its Web sites, the Web page contents are connected to restart the operating system. 78...
(English) User Guide
Page 132
K keyboard, replacing 54 L Lenovo Solution Center 99 Lenovo ThinkVantage Tools 101 Lenovo Welcome 5, 101 locating components 10 M media, creating and using...system 77 PS/2 keyboard connector 9 PS/2 mouse connector 9 purchasing additional services 103 R rear connectors 8 120 ThinkStation User Guide rear fan assembly, replacing 53 recovering from a POST/BIOS update failure 78 software 57 recovery boot-... backup and 58 problems, solving 62 recovery media, creating and using 57 removing computer cover 30 replacing battery 47 hard disk drive enablement module 43 heat sink and fan assembly 51 Rescue ...
(Hebrew) User Guide
Page 50
.9 28 28 SATA SAS SAS-to-SATA SAS 29 29 SAS 51 v 1 .2 27 3 12 30 40 ThinkStation
(Simplified Chinese) User Guide
Page 16
Lenovo 30 30 位置 第 6 页图 1 图 1 1 2 USB 2.0 接口 3 4 5 USB 2.0 接口 6 7 8 6 ThinkStation
(Korean) User Guide
Page 18
ThinkVantage Rescue and Recovery ThinkVantage Rescue and Recovery Windows Lenovo ThinkVantage Tools ThinkVantage Rescue and Recovery ThinkVantage Rescue and Recovery 1 Lenovo ThinkVantage Tools 2 3 Lenovo Solution Center Lenovo Solution Center Lenovo Solution Center" 96 Adobe Reader Adobe Reader PDF Lenovo 30 30 위치 6 ThinkStation