
Hardware Maintenance Manual
Page 5
... Lenovo 2007, 2008 Retaining serial numbers 56 Removing and replacing a FRU 59 1010 Battery pack 60 1020 Hard disk drive (2.5-inch) and HDD rubber rails 61 1030 DIMM cover 63 1040 DIMM 64 1050 Keyboard 65 1060 Upper case 69 1070 Fingerprint reader 72 1080 Hard disk (1.8-inch 73 1090 Hard disk housing (1.8-inch 74 1100 Wireless WAN PCI Express Mini card . . . 75 1110 Intel Turbo Memory card 77 1120 Wireless LAN PCI...
... Lenovo 2007, 2008 Retaining serial numbers 56 Removing and replacing a FRU 59 1010 Battery pack 60 1020 Hard disk drive (2.5-inch) and HDD rubber rails 61 1030 DIMM cover 63 1040 DIMM 64 1050 Keyboard 65 1060 Upper case 69 1070 Fingerprint reader 72 1080 Hard disk (1.8-inch 73 1090 Hard disk housing (1.8-inch 74 1100 Wireless WAN PCI Express Mini card . . . 75 1110 Intel Turbo Memory card 77 1120 Wireless LAN PCI...

Hardware Maintenance Manual
Page 10
... service information Attention: The setup configuration on the hard disk to be overwritten. Note the current configuration settings (using the View Configuration option); If more than one error code is a unique configuration that has been negotiated between IBM or Lenovo and the customer. Whatever causes the first error code may alter the settings. Custom Model Variant (CMV) This is displayed, begin the diagnosis with the first error code. Strategy for replacing a system board...
... service information Attention: The setup configuration on the hard disk to be overwritten. Note the current configuration settings (using the View Configuration option); If more than one error code is a unique configuration that has been negotiated between IBM or Lenovo and the customer. Whatever causes the first error code may alter the settings. Custom Model Variant (CMV) This is displayed, begin the diagnosis with the first error code. Strategy for replacing a system board...
Hardware Maintenance Manual
Page 23
... has exposed electrical circuits, observe the following precautions: - such touching can then operate the switch or unplug the power cord quickly. Safety information Important Use only approved tools and test equipment. Use only one hand when working with very high voltages; Do not use this type of a plastic dental mirror. v Do not use the approved probe leads and accessories for safe operational condition.
... has exposed electrical circuits, observe the following precautions: - such touching can then operate the switch or unplug the power cord quickly. Safety information Important Use only approved tools and test equipment. Use only one hand when working with very high voltages; Do not use this type of a plastic dental mirror. v Do not use the approved probe leads and accessories for safe operational condition.
Hardware Maintenance Manual
Page 29
... to replace a nondefective FRU. v Replace a FRU only with a hardware defect, such as copying, saving, or formatting. v Be careful not to read the entire page on removing and replacing FRUs. Failure symptoms, error codes appearing on which the failing FRU was caused by misuse, accident, modification, unsuitable physical or operating environment, or improper maintenance by referring to the FRU parts list. Machine type, model number, and serial number...
... to replace a nondefective FRU. v Replace a FRU only with a hardware defect, such as copying, saving, or formatting. v Be careful not to read the entire page on removing and replacing FRUs. Failure symptoms, error codes appearing on which the failing FRU was caused by misuse, accident, modification, unsuitable physical or operating environment, or improper maintenance by referring to the FRU parts list. Machine type, model number, and serial number...
Hardware Maintenance Manual
Page 33
... order to get access to recover data from the hard disk drive. How to remove the power-on page 60. 3. For how to Security --> Password. Remove the backup battery. Turn on the computer; The Rescue and Recovery screen opens. For models supporting the Passphrase function, press F1 while the POP icon is available on page 82. 4. Note: To check whether the ThinkPad computer supports the Passphrase function, enter the BIOS Setup Utility and go to remove the battery...
... order to get access to recover data from the hard disk drive. How to remove the power-on page 60. 3. For how to Security --> Password. Remove the backup battery. Turn on the computer; The Rescue and Recovery screen opens. For models supporting the Passphrase function, press F1 while the POP icon is available on page 82. 4. Note: To check whether the ThinkPad computer supports the Passphrase function, enter the BIOS Setup Utility and go to remove the battery...
Hardware Maintenance Manual
Page 34
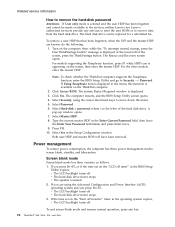
... hard-disk password Attention: If User only mode is displayed. 3. The hard disk drive can be made available to the servicer, neither Lenovo nor Lenovo authorized servicers provide any key. 28 ThinkPad® X60, X60s, X61, and X61s Power management To reduce power consumption, the computer has three power management modes: screen blank, standby, and hibernation. v The hard disk drive motor stops. Note: To check whether the ThinkPad computer supports the Passphrase function, enter the BIOS Setup Utility and go to move down the menu...
... hard-disk password Attention: If User only mode is displayed. 3. The hard disk drive can be made available to the servicer, neither Lenovo nor Lenovo authorized servicers provide any key. 28 ThinkPad® X60, X60s, X61, and X61s Power management To reduce power consumption, the computer has three power management modes: screen blank, standby, and hibernation. v The hard disk drive motor stops. Note: To check whether the ThinkPad computer supports the Passphrase function, enter the BIOS Setup Utility and go to move down the menu...
Hardware Maintenance Manual
Page 43
... . . 57 Removing and replacing a FRU 59 1010 Battery pack 60 1020 Hard disk drive (2.5-inch) and HDD rubber rails 61 1030 DIMM cover 63 1040 DIMM 64 1050 Keyboard 65 1060 Upper case 69 1070 Fingerprint reader 72 1080 Hard disk (1.8-inch 73 1090 Hard disk housing (1.8-inch 74 1100 Wireless WAN PCI Express Mini card . . . 75 1110 Intel Turbo Memory card 77 1120 Wireless LAN PCI Express Mini card . . . 78...
... . . 57 Removing and replacing a FRU 59 1010 Battery pack 60 1020 Hard disk drive (2.5-inch) and HDD rubber rails 61 1030 DIMM cover 63 1040 DIMM 64 1050 Keyboard 65 1060 Upper case 69 1070 Fingerprint reader 72 1080 Hard disk (1.8-inch 73 1090 Hard disk housing (1.8-inch 74 1100 Wireless WAN PCI Express Mini card . . . 75 1110 Intel Turbo Memory card 77 1120 Wireless LAN PCI Express Mini card . . . 78...
Hardware Maintenance Manual
Page 49
... Modem Dialtone Audio Enter the BIOS Setup Utility and change Serial ATA (SATA) setting to the ThinkPad computer, undock it . If the pointer stops after a short time, no sound is running. If the docking station or the port replicator is attached to Compatibility, and run Diagnostics --> ThinkPad Devices --> HDD Active Protection Test. PC Card slot Diagnostics --> Systemboard --> PCMCIA Keyboard 1. If the TrackPoint is not a hardware problem. After you use the TrackPoint...
... Modem Dialtone Audio Enter the BIOS Setup Utility and change Serial ATA (SATA) setting to the ThinkPad computer, undock it . If the pointer stops after a short time, no sound is running. If the docking station or the port replicator is attached to Compatibility, and run Diagnostics --> ThinkPad Devices --> HDD Active Protection Test. PC Card slot Diagnostics --> Systemboard --> PCMCIA Keyboard 1. If the TrackPoint is not a hardware problem. After you use the TrackPoint...
Hardware Maintenance Manual
Page 57
... bay the customer is using a supported IBM/Lenovo HDD with the risk in the BIOS Setup Utility. 2. The latest version is not supported by pressing ESC. Failing bits: nnnn. Main hard disk drive. 3. If memory size has been changed, re-create the hibernation file. Invalid system configuration data. Load "Setup Defaults" in mind, the customer can still use it was before the computer entered hibernation mode. 2. System board. 1. Ultrabay hard disk drive. I/O device IRQ conflict.
... bay the customer is using a supported IBM/Lenovo HDD with the risk in the BIOS Setup Utility. 2. The latest version is not supported by pressing ESC. Failing bits: nnnn. Main hard disk drive. 3. If memory size has been changed, re-create the hibernation file. Invalid system configuration data. Load "Setup Defaults" in mind, the customer can still use it was before the computer entered hibernation mode. 2. System board. 1. Ultrabay hard disk drive. I/O device IRQ conflict.
(English) Rescue and Recovery 4.5 Deployment Guide
Page 7
... categories of powerful tools that have been backed up the operating system and files and restore the operating system and files in familiar interfaces. • The Rescue and Recovery program enables you to store backup files on external USB storage devices, such as USB flash drives and USB hard disk drives. • The Rescue and Recovery program enables you use should support the 64-bit architecture. Recovery overview: Links users to start Windows on page...
... categories of powerful tools that have been backed up the operating system and files and restore the operating system and files in familiar interfaces. • The Rescue and Recovery program enables you to store backup files on external USB storage devices, such as USB flash drives and USB hard disk drives. • The Rescue and Recovery program enables you use should support the 64-bit architecture. Recovery overview: Links users to start Windows on page...
(English) Rescue and Recovery 4.5 Deployment Guide
Page 9
... for MBR systems only. 3. The Windows Installer program supports upgrading the Rescue and Recovery 4.30 program or later versions to locate © Copyright Lenovo 2008, 2011 3 Once the XML file is customized and installed, settings for all settings will allow a user to choose the operating system and then gain access to the entire hard drive without needing to install the Rescue and Recovery program as a Basic MSI project...
... for MBR systems only. 3. The Windows Installer program supports upgrading the Rescue and Recovery 4.30 program or later versions to locate © Copyright Lenovo 2008, 2011 3 Once the XML file is customized and installed, settings for all settings will allow a user to choose the operating system and then gain access to the entire hard drive without needing to install the Rescue and Recovery program as a Basic MSI project...

(English) Rescue and Recovery 4.5 Deployment Guide
Page 51
..., type the following topics: • "Scenario 1 - Assuming that you are going to install the Rescue and Recovery program on the primary hard disk drive. 1. Within this command will reduce the installation time on . In order to make sure you are going to install Windows on each machine by roughly one storage device attached). The last step in the root of the C drive, create a file...
..., type the following topics: • "Scenario 1 - Assuming that you are going to install the Rescue and Recovery program on the primary hard disk drive. 1. Within this command will reduce the installation time on . In order to make sure you are going to install Windows on each machine by roughly one storage device attached). The last step in the root of the C drive, create a file...
(English) Rescue and Recovery 4.5 Deployment Guide
Page 52
... users not in the c:\SWTOOLS directory: • Perform a silent installation of the Rescue and Recovery program. In the same directory as part of a reboot). • Create the ISO image. • Create the base backup and reboot the system. 5. The following represents the code for more information. 4. service must be performed. • After the service is started c: cd "C:\Program Files\Lenovo\Rescue and Recovery" RRcmd.exe backup location...
... users not in the c:\SWTOOLS directory: • Perform a silent installation of the Rescue and Recovery program. In the same directory as part of a reboot). • Create the ISO image. • Create the base backup and reboot the system. 5. The following represents the code for more information. 4. service must be performed. • After the service is started c: cd "C:\Program Files\Lenovo\Rescue and Recovery" RRcmd.exe backup location...

(English) Access Connections Profile Deployment guide
Page 9
... in range of the connection. Access Connections can create and manage location profiles that define the settings required to connect to switch between Ethernet and wireless LAN connections. Overview Access Connections is started. Access Connections includes the following functions: v Create new location profiles Access Connections provides a wizard that helps you to it. Virtual private network (VPN) connections are in Access Connections allowing you fix the connection. You can be made using a modem, a wired network adapter, a broadband device (DSL, cable modem, or ISDN...
... in range of the connection. Access Connections can create and manage location profiles that define the settings required to connect to switch between Ethernet and wireless LAN connections. Overview Access Connections is started. Access Connections includes the following functions: v Create new location profiles Access Connections provides a wizard that helps you to it. Virtual private network (VPN) connections are in Access Connections allowing you fix the connection. You can be made using a modem, a wired network adapter, a broadband device (DSL, cable modem, or ISDN...
Hardware Maintenance Manual
Page 10
... or Lenovo and the customer. v Avoid rough handling of a system board can be lost. The machine label, Product Entitlement Warehouse (PEW), eSupport, and the HMM will cause all customer data on the screen to diagnose failures. Important service information Attention: The setup configuration on a system board are very sensitive. How to use error messages Use the error codes displayed on the hard disk to place orders...
... or Lenovo and the customer. v Avoid rough handling of a system board can be lost. The machine label, Product Entitlement Warehouse (PEW), eSupport, and the HMM will cause all customer data on the screen to diagnose failures. Important service information Attention: The setup configuration on a system board are very sensitive. How to use error messages Use the error codes displayed on the hard disk to place orders...

Hardware Maintenance Manual
Page 29
... item is displayed in the menu, this function is displayed at the lower-left of the screen, press the ThinkVantage® button. Click Access BIOS. The system Restart Required window is available, neither Lenovo nor Lenovo authorized servicers provide any services to reset either the user or the master HDP, or to recover data from the hard disk drive. Type the current SVP in the BIOS Setup Utility. then leave the Enter New Password field blank...
... item is displayed in the menu, this function is displayed at the lower-left of the screen, press the ThinkVantage® button. Click Access BIOS. The system Restart Required window is available, neither Lenovo nor Lenovo authorized servicers provide any services to reset either the user or the master HDP, or to recover data from the hard disk drive. Type the current SVP in the BIOS Setup Utility. then leave the Enter New Password field blank...

Hardware Maintenance Manual
Page 30
... the time set on the "Turn off monitor" timer in the BIOS Setup Utility expires, v The LCD backlight turns off. To end screen blank mode and resume normal operation, press any services to reset the user HDPs or to recover data from the hard disk drive. The computer restarts, and the BIOS Setup Utility screen opens. 4. A pop-up window opens. 7. v The hard disk drive motor stops. 3. Press F10. 10. Related service information How to remove the hard-disk password Attention: If User only mode is...
... the time set on the "Turn off monitor" timer in the BIOS Setup Utility expires, v The LCD backlight turns off. To end screen blank mode and resume normal operation, press any services to reset the user HDPs or to recover data from the hard disk drive. The computer restarts, and the BIOS Setup Utility screen opens. 4. A pop-up window opens. 7. v The hard disk drive motor stops. 3. Press F10. 10. Related service information How to remove the hard-disk password Attention: If User only mode is...

Hardware Maintenance Manual
Page 39
... . . 53 Removing and replacing a FRU 55 1010 Battery pack 56 1020 Hard disk drive (2.5-inch) and HDD rubber rails 57 1030 DIMM cover 59 1040 DIMM 60 1050 Keyboard 61 1060 Upper case 65 1070 Fingerprint reader 68 1080 Hard disk (1.8-inch 69 1090 Hard disk housing (1.8-inch 70 1100 Wireless WAN PCI Express Mini card . . . 71 1110 Intel Turbo Memory card 73 1120 Wireless LAN PCI Express Mini card . . . 74...
... . . 53 Removing and replacing a FRU 55 1010 Battery pack 56 1020 Hard disk drive (2.5-inch) and HDD rubber rails 57 1030 DIMM cover 59 1040 DIMM 60 1050 Keyboard 61 1060 Upper case 65 1070 Fingerprint reader 68 1080 Hard disk (1.8-inch 69 1090 Hard disk housing (1.8-inch 70 1100 Wireless WAN PCI Express Mini card . . . 71 1110 Intel Turbo Memory card 73 1120 Wireless LAN PCI Express Mini card . . . 74...

Hardware Maintenance Manual
Page 33
... Backup battery" on the computer; Turn on the screen; Select Power-On Password. 7. Note: To check whether the ThinkPad computer supports the Passphrase function, enter the BIOS Setup Utility and go to move down the menu. 5. Click Access BIOS. The computer restarts, and the BIOS Setup Utility screen opens. 4. If no service procedure to recover data from the hard disk drive. Remove the backup battery. The system Restart Required window is available, neither Lenovo nor Lenovo authorized servicers provide any services to reset either the user...
... Backup battery" on the computer; Turn on the screen; Select Power-On Password. 7. Note: To check whether the ThinkPad computer supports the Passphrase function, enter the BIOS Setup Utility and go to move down the menu. 5. Click Access BIOS. The computer restarts, and the BIOS Setup Utility screen opens. 4. If no service procedure to recover data from the hard disk drive. Remove the backup battery. The system Restart Required window is available, neither Lenovo nor Lenovo authorized servicers provide any services to reset either the user...

Hardware Maintenance Manual
Page 43
... . . 57 Removing and replacing a FRU 59 1010 Battery pack 60 1020 Hard disk drive (2.5-inch) and HDD rubber rails 61 1030 DIMM cover 63 1040 DIMM 64 1050 Keyboard 65 1060 Upper case 69 1070 Fingerprint reader 72 1080 Hard disk (1.8-inch 73 1090 Hard disk housing (1.8-inch 74 1100 Wireless WAN PCI Express Mini card . . . 75 1110 Intel Turbo Memory card 77 1120 Wireless LAN PCI Express Mini card . . . 78...
... . . 57 Removing and replacing a FRU 59 1010 Battery pack 60 1020 Hard disk drive (2.5-inch) and HDD rubber rails 61 1030 DIMM cover 63 1040 DIMM 64 1050 Keyboard 65 1060 Upper case 69 1070 Fingerprint reader 72 1080 Hard disk (1.8-inch 73 1090 Hard disk housing (1.8-inch 74 1100 Wireless WAN PCI Express Mini card . . . 75 1110 Intel Turbo Memory card 77 1120 Wireless LAN PCI Express Mini card . . . 78...


