(Japanese) Power Manager Deployment Guide
Page 23
...;間 • 2 時間 • 3 時間 • 4 時間 • 5 時間 • Never (なし) Windows Vista および Windows 7 HDD off Timer (AC) (HDD AC)) 値を 0 Monitor off Timer Never Windows Windows XP 3分 • 5分 • 10 分 • 15 分 • 20 分 • 25...
...;間 • 2 時間 • 3 時間 • 4 時間 • 5 時間 • Never (なし) Windows Vista および Windows 7 HDD off Timer (AC) (HDD AC)) 値を 0 Monitor off Timer Never Windows Windows XP 3分 • 5分 • 10 分 • 15 分 • 20 分 • 25...

(Simplified Chinese) Power Manager Deployment Guide
Page 21
... 3 小时 • 4 小时 • 5 对于 Windows Vista 和 Windows 7 0 秒,则"HDD 指定在 Windows Windows XP 3 分钟 • 5 分钟 • 10 分钟 • 15 &#...;时 • 3 小时 • 4 小时 • 5 对于 Windows Vista 和 Windows 7 0 秒,则"HDD 指定在 Windows 对于 Windows XP 1 分钟 • 2 分钟 • 3 分钟 • 5 分...
... 3 小时 • 4 小时 • 5 对于 Windows Vista 和 Windows 7 0 秒,则"HDD 指定在 Windows Windows XP 3 分钟 • 5 分钟 • 10 分钟 • 15 &#...;时 • 3 小时 • 4 小时 • 5 对于 Windows Vista 和 Windows 7 0 秒,则"HDD 指定在 Windows 对于 Windows XP 1 分钟 • 2 分钟 • 3 分钟 • 5 分...

(English) Power Manager Deployment Guide
Page 22
Power Plan (Scheme) Deployments (continued) Policy settings HDD off Timer (AC) HDD off Timer (DC) Description • 4 hours • 5 hours • Never For Windows Vista and Windows 7 client computers, you can specify the value in seconds. For ...; 5 hours • Never For Windows Vista and Windows 7 client computers, you can specify the value in seconds. If you specify the value as 0 second, the HDD off the hard disk drive. Table 2. For Windows XP client computers, possible time periods include: • 3 minutes • 5 minutes • 10 minutes • 15 minutes...
Power Plan (Scheme) Deployments (continued) Policy settings HDD off Timer (AC) HDD off Timer (DC) Description • 4 hours • 5 hours • Never For Windows Vista and Windows 7 client computers, you can specify the value in seconds. For ...; 5 hours • Never For Windows Vista and Windows 7 client computers, you can specify the value in seconds. If you specify the value as 0 second, the HDD off the hard disk drive. Table 2. For Windows XP client computers, possible time periods include: • 3 minutes • 5 minutes • 10 minutes • 15 minutes...
(English) Power Manager Deployment Guide
Page 23
...; 1 hour • 2 hours • 3 hours • 4 hours • 5 hours • Never For Windows Vista and Windows 7 client computers, you specify the value as 0 second, the HDD off Timer will be set to Never. Specifies the period of inactivity before Windows enters the sleep mode. Table 2.
...; 1 hour • 2 hours • 3 hours • 4 hours • 5 hours • Never For Windows Vista and Windows 7 client computers, you specify the value as 0 second, the HDD off Timer will be set to Never. Specifies the period of inactivity before Windows enters the sleep mode. Table 2.
(English) BIOS Setup using Windows Management Instrumentation Deployment Guide
Page 10
...including updating supervisor passwords, power-on passwords, and hard disk drive (HDD) passwords • No dependency on a specific BIOS level Environment &#...8226; Common interface for different products Supported computers BIOS setup through WMI is supported on the following ThinkPad products only: • R400, R500, T400, T500, W500, X200, X200s, X200 Tablet • ...X301 • W700, W700ds, W701 • T400s • X201, X201s, T410, T410s, T510, W510 • T420, T420i, T420s, T420si, T520, T520i, W520, X220, X220i, X220 Tablet, X220i Tablet ...
...including updating supervisor passwords, power-on passwords, and hard disk drive (HDD) passwords • No dependency on a specific BIOS level Environment &#...8226; Common interface for different products Supported computers BIOS setup through WMI is supported on the following ThinkPad products only: • R400, R500, T400, T500, W500, X200, X200s, X200 Tablet • ...X301 • W700, W700ds, W701 • T400s • X201, X201s, T410, T410s, T510, W510 • T420, T420i, T420s, T420si, T520, T520i, W520, X220, X220i, X220 Tablet, X220i Tablet ...
(English) BIOS Setup using Windows Management Instrumentation Deployment Guide
Page 34
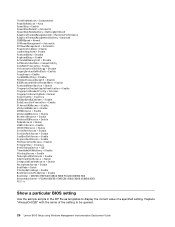
... SmartCardSlotAccess = Enable IntegratedCameraAccess = Enable MicrophoneAccess = Enable BootMode = Quick StartupOptionKeys = Enable BootDeviceListF12Option = Enable BootOrder = USBFDD:ATAPICD0:USBCD:HDD0:PCILAN:USBHDD:HDD NetworkBootOrder = PCILAN:USBFDD:ATAPICD0:USBCD:HDD0:USBHDD:HDD1 PS C:\> Show a particular BIOS setting Use the sample scripts in the ZIP file as templates ...to display the current value of the setting to be queried. 26 Lenovo BIOS Setup using Windows Management Instrumentation Deployment Guide Replace "AlwaysOnUSB" with the name of a specified setting.
... SmartCardSlotAccess = Enable IntegratedCameraAccess = Enable MicrophoneAccess = Enable BootMode = Quick StartupOptionKeys = Enable BootDeviceListF12Option = Enable BootOrder = USBFDD:ATAPICD0:USBCD:HDD0:PCILAN:USBHDD:HDD NetworkBootOrder = PCILAN:USBFDD:ATAPICD0:USBCD:HDD0:USBHDD:HDD1 PS C:\> Show a particular BIOS setting Use the sample scripts in the ZIP file as templates ...to display the current value of the setting to be queried. 26 Lenovo BIOS Setup using Windows Management Instrumentation Deployment Guide Replace "AlwaysOnUSB" with the name of a specified setting.
Hardware Maintenance Manual
Page 3
... guide 3 Handling devices that are sensitive to do first 27 Checkout guide 28 System supporting the Lenovo ThinkVantage Toolbox program and the PC-Doctor for CTO, CMV, and GAV products 25 Chapter 3. ... 36 Checking the backup battery 37 Chapter 4. Removing and replacing a FRU 65 Before servicing ThinkPad T400s, T410s, and T410si 65 1010 Battery pack 66 1020 Serial Ultrabay Slim device or travel bezel .... . 67 1030 Solid state drive (SSD) or hard disk drive (HDD 68 1040 DIMM 69 1050 ...
... guide 3 Handling devices that are sensitive to do first 27 Checkout guide 28 System supporting the Lenovo ThinkVantage Toolbox program and the PC-Doctor for CTO, CMV, and GAV products 25 Chapter 3. ... 36 Checking the backup battery 37 Chapter 4. Removing and replacing a FRU 65 Before servicing ThinkPad T400s, T410s, and T410si 65 1010 Battery pack 66 1020 Serial Ultrabay Slim device or travel bezel .... . 67 1030 Solid state drive (SSD) or hard disk drive (HDD 68 1040 DIMM 69 1050 ...
Hardware Maintenance Manual
Page 38
...drive 1. Place the computer on the computer. Then, run this case, turn on a horizontal surface, and run Diagnostics ➙ ThinkPad Devices ➙ HDD Active Protection Test Note: Do not apply any diskette from the BIOS Setup Utility, do as follows: 1. Interactive Tests ➙ Keyboard..." on the computer. 3. Interactive Tests ➙ Optical Drive Test Memory 1. If the problem does not recur, return the DIMM to the ThinkPad Notebook, detach it. 4. Table 1. While the message, "To interrupt normal startup, press the blue ThinkVangate button," is heard this test. ...
...drive 1. Place the computer on the computer. Then, run this case, turn on a horizontal surface, and run Diagnostics ➙ ThinkPad Devices ➙ HDD Active Protection Test Note: Do not apply any diskette from the BIOS Setup Utility, do as follows: 1. Interactive Tests ➙ Keyboard..." on the computer. 3. Interactive Tests ➙ Optical Drive Test Memory 1. If the problem does not recur, return the DIMM to the ThinkPad Notebook, detach it. 4. Table 1. While the message, "To interrupt normal startup, press the blue ThinkVangate button," is heard this test. ...

Hardware Maintenance Manual
Page 41
...one of the AC adapter for error code descriptions and troubleshooting hints. 2. When the ThinkPad logo is displayed, repeatedly press and release the F12 key. Turn off the computer. 2. When the ThinkPad logo is displayed, repeatedly press and release the F12 key. Restart the computer. 4.... When the Boot Menu window opens, release the F12 key. 5. Connect the ac adapter. 4. Chapter 3. General checkout 35 Attach the USB device to select USB HDD and then press Enter...
...one of the AC adapter for error code descriptions and troubleshooting hints. 2. When the ThinkPad logo is displayed, repeatedly press and release the F12 key. Turn off the computer. 2. When the ThinkPad logo is displayed, repeatedly press and release the F12 key. Restart the computer. 4.... When the Boot Menu window opens, release the F12 key. 5. Connect the ac adapter. 4. Chapter 3. General checkout 35 Attach the USB device to select USB HDD and then press Enter...

Hardware Maintenance Manual
Page 45
...case, you have a Supplemental Recovery Disc, click No. If you must use . This is on which discs to -FRU index" on http://www.lenovo.com/support. When the recovery process is displayed prompting you to restart the computer. Follow the instructions on page 143. © Copyright... click Next. 4. If you do the following information: • "Restoring the factory contents by using Product Recovery discs When the hard disk drive (HDD) or solid state drive (SSD) is replaced because of the recovery process is fully automated and no Product Recovery program is normal. 8. Note: Not...
...case, you have a Supplemental Recovery Disc, click No. If you must use . This is on which discs to -FRU index" on http://www.lenovo.com/support. When the recovery process is displayed prompting you to restart the computer. Follow the instructions on page 143. © Copyright... click Next. 4. If you do the following information: • "Restoring the factory contents by using Product Recovery discs When the hard disk drive (HDD) or solid state drive (SSD) is replaced because of the recovery process is fully automated and no Product Recovery program is normal. 8. Note: Not...
Hardware Maintenance Manual
Page 54
... Setup Utility. Note: For the construction of the DIMM slot, see "1040 DIMM" on a horizontal surface. Run Diagnostics ➙ ThinkPad Device ➙ HDD Active Protection Test. 48 Hardware Maintenance Manual Remove Mini PCI network card. 2. Remove the WAN card that you installed. 2. Remove the...-Power off and remove all partitions. Install DIMM in Slot-1. Undock docking station or port replicator if it . 5. Place the ThinkPad Notebook on page 69. 2000 Hard Drive Active Protection sensor diagnostics failed.Press to continue.Press to Slot-0 or the lower slot....
... Setup Utility. Note: For the construction of the DIMM slot, see "1040 DIMM" on a horizontal surface. Run Diagnostics ➙ ThinkPad Device ➙ HDD Active Protection Test. 48 Hardware Maintenance Manual Remove Mini PCI network card. 2. Remove the WAN card that you installed. 2. Remove the...-Power off and remove all partitions. Install DIMM in Slot-1. Undock docking station or port replicator if it . 5. Place the ThinkPad Notebook on page 69. 2000 Hard Drive Active Protection sensor diagnostics failed.Press to continue.Press to Slot-0 or the lower slot....
Hardware Maintenance Manual
Page 55
..." in the BIOS Setup Utility. 2. DIMM. 2. If in the primary drive bay the customer is using a non-Lenovo hard disk drive (HDD), or an old generation HDD which is not supported by pressing ESC. Inform the following information to continue. Error messages Table 3. Load "Setup Defaults"...still use it by this drive may not function correctly on HDD0 (Main hard disk drive) 1. The latest version is using a supported Lenovo HDD with HDD adapter 2100 Initialization error on this computer. Reseat the hard disk drive. 2. FRU or action, in this system. System board. 1. System...
..." in the BIOS Setup Utility. 2. DIMM. 2. If in the primary drive bay the customer is using a non-Lenovo hard disk drive (HDD), or an old generation HDD which is not supported by pressing ESC. Inform the following information to continue. Error messages Table 3. Load "Setup Defaults"...still use it by this drive may not function correctly on HDD0 (Main hard disk drive) 1. The latest version is using a supported Lenovo HDD with HDD adapter 2100 Initialization error on this computer. Reseat the hard disk drive. 2. FRU or action, in this system. System board. 1. System...

Hardware Maintenance Manual
Page 74
... mode. Improper handling can cause damage and permanent loss of data. • Before removing the drive, have the user make a backup copy of SSD or HDD 1 2 Step 1 Screw (quantity) M2 × 6 mm, bind-head, nylon-coated (1) Color Black Torque 0.181 Nm (1.85 kgfcm) 68 Hardware Maintenance Manual Removal steps of all...
... mode. Improper handling can cause damage and permanent loss of data. • Before removing the drive, have the user make a backup copy of SSD or HDD 1 2 Step 1 Screw (quantity) M2 × 6 mm, bind-head, nylon-coated (1) Color Black Torque 0.181 Nm (1.85 kgfcm) 68 Hardware Maintenance Manual Removal steps of all...

Hardware Maintenance Manual
Page 75
Removing and replacing a FRU 69 3 4 When installing: Make sure that the SSD connector or HDD connector is attached firmly. 1040 DIMM For access, remove these FRUs in order: • "1010 Battery pack" on page 66 Removal steps of DIMM Note: Loosen the screws 1 , but do not remove them. 1 Chapter 8.
Removing and replacing a FRU 69 3 4 When installing: Make sure that the SSD connector or HDD connector is attached firmly. 1040 DIMM For access, remove these FRUs in order: • "1010 Battery pack" on page 66 Removal steps of DIMM Note: Loosen the screws 1 , but do not remove them. 1 Chapter 8.

Hardware Maintenance Manual
Page 85
... reader For access, remove these FRUs in order: • "1010 Battery pack" on page 66 • "1030 Solid state drive (SSD) or hard disk drive (HDD)" on page 68 • "1070 Keyboard" on the adapter. Removal steps of palm rest or palm rest with fingerprint reader 1 2 1 1 1 1 2 1 1 1 Chapter 8. Removing and replacing a FRU...
... reader For access, remove these FRUs in order: • "1010 Battery pack" on page 66 • "1030 Solid state drive (SSD) or hard disk drive (HDD)" on page 68 • "1070 Keyboard" on the adapter. Removal steps of palm rest or palm rest with fingerprint reader 1 2 1 1 1 1 2 1 1 1 Chapter 8. Removing and replacing a FRU...

Hardware Maintenance Manual
Page 86
Step 1 2 Screw (quantity) M2 × 4 mm, bind-head, nylon-coated (8) M2 × 6 mm, bind-head, nylon-coated (2) 3 4 Color Black Black Torque 0.181 Nm (1.85 kgfcm) 0.181 Nm (1.85 kgfcm) 5 5 6 6 6 1110 Bluetooth daughter card (BDC-2) • "1010 Battery pack" on page 66 • "1030 Solid state drive (SSD) or hard disk drive (HDD)" on page 68 • "1070 Keyboard" on page 74 • "1100 Palm rest or palm rest with fingerprint reader" on page 79 Removal steps of BDC-2 1 2 80 Hardware Maintenance Manual
Step 1 2 Screw (quantity) M2 × 4 mm, bind-head, nylon-coated (8) M2 × 6 mm, bind-head, nylon-coated (2) 3 4 Color Black Black Torque 0.181 Nm (1.85 kgfcm) 0.181 Nm (1.85 kgfcm) 5 5 6 6 6 1110 Bluetooth daughter card (BDC-2) • "1010 Battery pack" on page 66 • "1030 Solid state drive (SSD) or hard disk drive (HDD)" on page 68 • "1070 Keyboard" on page 74 • "1100 Palm rest or palm rest with fingerprint reader" on page 79 Removal steps of BDC-2 1 2 80 Hardware Maintenance Manual

Hardware Maintenance Manual
Page 87
..." on page 66 • "1020 Serial Ultrabay Slim device or travel bezel" on page 67 • "1030 Solid state drive (SSD) or hard disk drive (HDD)" on page 68 • "1070 Keyboard" on page 74 • "1100 Palm rest or palm rest with fingerprint reader" on page 79 Removal steps of...
..." on page 66 • "1020 Serial Ultrabay Slim device or travel bezel" on page 67 • "1030 Solid state drive (SSD) or hard disk drive (HDD)" on page 68 • "1070 Keyboard" on page 74 • "1100 Palm rest or palm rest with fingerprint reader" on page 79 Removal steps of...
Hardware Maintenance Manual
Page 89
...: 10 10 9 9 9 10 10 9 10 9 9 Step 10 Screw (quantity) M2 × 3 mm, small-head, nylon-coated (5) Color Silver For ThinkPad T410s and T410si: 10 10 9 9 10 9 10 9 Torque 0.181 Nm (1.85 kgfcm) Step 10 Screw (quantity) M2 × 3 mm, small-head, nylon-coated (4) Color Black 1130 5-..." on page 66 • "1020 Serial Ultrabay Slim device or travel bezel" on page 67 • "1030 Solid state drive (SSD) or hard disk drive (HDD)" on page 68 • "1070 Keyboard" on page 74 • "1100 Palm rest or palm rest with fingerprint reader" on page 79 • "1120 Keyboard...
...: 10 10 9 9 9 10 10 9 10 9 9 Step 10 Screw (quantity) M2 × 3 mm, small-head, nylon-coated (5) Color Silver For ThinkPad T410s and T410si: 10 10 9 9 10 9 10 9 Torque 0.181 Nm (1.85 kgfcm) Step 10 Screw (quantity) M2 × 3 mm, small-head, nylon-coated (4) Color Black 1130 5-..." on page 66 • "1020 Serial Ultrabay Slim device or travel bezel" on page 67 • "1030 Solid state drive (SSD) or hard disk drive (HDD)" on page 68 • "1070 Keyboard" on page 74 • "1100 Palm rest or palm rest with fingerprint reader" on page 79 • "1120 Keyboard...

Hardware Maintenance Manual
Page 90
..." on page 66 • "1020 Serial Ultrabay Slim device or travel bezel" on page 67 • "1030 Solid state drive (SSD) or hard disk drive (HDD)" on page 68 • "1070 Keyboard" on page 74 • "1100 Palm rest or palm rest with fingerprint reader" on page 79 • "1110 Bluetooth...
..." on page 66 • "1020 Serial Ultrabay Slim device or travel bezel" on page 67 • "1030 Solid state drive (SSD) or hard disk drive (HDD)" on page 68 • "1070 Keyboard" on page 74 • "1100 Palm rest or palm rest with fingerprint reader" on page 79 • "1110 Bluetooth...

Hardware Maintenance Manual
Page 91
..." on page 66 • "1020 Serial Ultrabay Slim device or travel bezel" on page 67 • "1030 Solid state drive (SSD) or hard disk drive (HDD)" on page 68 • "1050 PCI Express Mini Card for wireless LAN" on page 71 • "1060 PCI Express Mini Card for wireless WAN" on...
..." on page 66 • "1020 Serial Ultrabay Slim device or travel bezel" on page 67 • "1030 Solid state drive (SSD) or hard disk drive (HDD)" on page 68 • "1050 PCI Express Mini Card for wireless LAN" on page 71 • "1060 PCI Express Mini Card for wireless WAN" on...


