
User Manual
Page 17
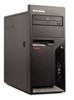
...When you must use your computer. If you are available: v User Password v Administrator Password You do the following sections. © Copyright Lenovo 2008 9 When working with the Setup Utility program menu, you hear multiple beeps, release the F1 key. See "Starting the Setup Utility ... your computer, regardless of which operating system you type your computer is not displayed until you are displayed at the right side of passwords are using a USB keyboard and the Setup Utility program does not display using . If a user password or an administrator password has been set any...
...When you must use your computer. If you are available: v User Password v Administrator Password You do the following sections. © Copyright Lenovo 2008 9 When working with the Setup Utility program menu, you hear multiple beeps, release the F1 key. See "Starting the Setup Utility ... your computer, regardless of which operating system you type your computer is not displayed until you are displayed at the right side of passwords are using a USB keyboard and the Setup Utility program does not display using . If a user password or an administrator password has been set any...
User Manual
Page 18
...either password. Start the Setup Utility program. See Chapter 4, "Using the Setup Utility," on the right side of the screen. Read the information displayed on page 9. 2. For more information, see "Password considerations." 1. From the Setup Utility program menu, select Security. 3. Select Set Administrator Password ... v Not be your name or your previous password User Password When a User Password is displayed each time you might want to set to Disabled, the diskette drive cannot be displayed in order to set , it is set an Administrator Password. For security reasons, it...
...either password. Start the Setup Utility program. See Chapter 4, "Using the Setup Utility," on the right side of the screen. Read the information displayed on page 9. 2. For more information, see "Password considerations." 1. From the Setup Utility program menu, select Security. 3. Select Set Administrator Password ... v Not be your name or your previous password User Password When a User Password is displayed each time you might want to set to Disabled, the diskette drive cannot be displayed in order to set , it is set an Administrator Password. For security reasons, it...

User Manual
Page 19
.... Note: Not all discs, hard disk drives, and diskettes are using a USB keyboard and the Please select boot device window does not display using this procedure to the Setup Utility program menu, select Exit and then Save Changes and Exit. Turn off your computer does not start ... this method, repeatedly press and release the F12 key rather than leaving it pressed when turning on page 9. 2. When the Please select boot device window displays, release the F12 key. Select Boot. 3. Using the Setup Utility 11 Start the Setup Utility program. Selecting a startup device If your computer. 2....
.... Note: Not all discs, hard disk drives, and diskettes are using a USB keyboard and the Please select boot device window does not display using this procedure to the Setup Utility program menu, select Exit and then Save Changes and Exit. Turn off your computer does not start ... this method, repeatedly press and release the F12 key rather than leaving it pressed when turning on page 9. 2. When the Please select boot device window displays, release the F12 key. Select Boot. 3. Using the Setup Utility 11 Start the Setup Utility program. Selecting a startup device If your computer. 2....
User Manual
Page 36
...(usually drive C) in the SWTOOLS\drivers folder. Device drivers for factory-installed devices are on the World Wide Web at: http://www.lenovo.com/think/support To reinstall a device driver for various devices that contains the Rescue and Recovery workspace. Open the DRIVERS folder. Use ...one of your computer (for factory-installed devices also are installed in the Windows Control Panel) to display the directory structure of the following : 1. v In the device subfolder, look for the device. When you restart your computer. Use your...
...(usually drive C) in the SWTOOLS\drivers folder. Device drivers for factory-installed devices are on the World Wide Web at: http://www.lenovo.com/think/support To reinstall a device driver for various devices that contains the Rescue and Recovery workspace. Open the DRIVERS folder. Use ...one of your computer (for factory-installed devices also are installed in the Windows Control Panel) to display the directory structure of the following : 1. v In the device subfolder, look for the device. When you restart your computer. Use your...

User Manual
Page 44
... responses/blind dialing. Set register r to Data Mode and initiate an equalizer retrain Set Pulse dial as default Modem sends responses Read and display value in register r. Same as X0 plus all CONNECT responses/blind dialing Same as X1 plus dial tone detection Same as default Numeric responses...X3 X4 Z_ Z0 Z1 36 User Guide Function Force modem off-hook (make busy) Note: H1 command is not supported for Italy Display product-identification code Factory ROM checksum test Internal memory test Firmware ID Reserved ID Low speaker volume Low speaker volume Medium speaker volume High ...
... responses/blind dialing. Set register r to Data Mode and initiate an equalizer retrain Set Pulse dial as default Modem sends responses Read and display value in register r. Same as X0 plus all CONNECT responses/blind dialing Same as X1 plus dial tone detection Same as default Numeric responses...X3 X4 Z_ Z0 Z1 36 User Guide Function Force modem off-hook (make busy) Note: H1 command is not supported for Italy Display product-identification code Factory ROM checksum test Internal memory test Firmware ID Reserved ID Low speaker volume Low speaker volume Medium speaker volume High ...

User Manual
Page 45
... Digital Loopback Test request Perform a Remote Digital Loopback Test Perform a Remote Digital Loopback Test and Self-Test Perform Local Analog Loopback Test and Self-Test Displays Active and Stored Profiles Appendix A. Manual modem commands 37
... Digital Loopback Test request Perform a Remote Digital Loopback Test Perform a Remote Digital Loopback Test and Self-Test Perform Local Analog Loopback Test and Self-Test Displays Active and Stored Profiles Appendix A. Manual modem commands 37

User Manual
Page 46
... with V.8/V.32 Annex A. Command &W_ %E_ +MS? +MS=? +MS=a,b,c,e,f &V1 &W0 &W1 %E0 %E1 Function Display Last Connection Statistics Stores the active profile as Profile 0 Stores the active profile as Profile 1 Disable auto-retrain Enable auto-retrain... Displays the current Select Modulation settings Displays a list of support values 38 User Guide A, b, c, d, e, f default=12, 1, 300, 56000, 0, 0. e=0-1; c=300-56000; Parameter "b" specifies ...
... with V.8/V.32 Annex A. Command &W_ %E_ +MS? +MS=? +MS=a,b,c,e,f &V1 &W0 &W1 %E0 %E1 Function Display Last Connection Statistics Stores the active profile as Profile 0 Stores the active profile as Profile 1 Disable auto-retrain Enable auto-retrain... Displays the current Select Modulation settings Displays a list of support values 38 User Guide A, b, c, d, e, f default=12, 1, 300, 56000, 0, 0. e=0-1; c=300-56000; Parameter "b" specifies ...
Hardware Maintenance Manual
Page 41
...If the computer hangs and no error is found by an application program, the operating system, or both. Is the failure repeatable? © Copyright Lenovo 2005, 2010 33 Chapter 4. For more information on how to the variety of BIOS is installed on page 33. 7. Set all external devices....? - Look at the following procedure to the information supplied with that can be encountered, use the following information to step 6 on the display. For an explanation of these messages, refer to help determine the cause of the system board. A down-level BIOS might have this information...
...If the computer hangs and no error is found by an application program, the operating system, or both. Is the failure repeatable? © Copyright Lenovo 2005, 2010 33 Chapter 4. For more information on how to the variety of BIOS is installed on page 33. 7. Set all external devices....? - Look at the following procedure to the information supplied with that can be encountered, use the following information to step 6 on the display. For an explanation of these messages, refer to help determine the cause of the system board. A down-level BIOS might have this information...

Hardware Maintenance Manual
Page 43
...2. Press the F1 key for Windows has not been successful in the PC-Doctor-log-file display. Diagnostics Diagnostic programs are two diagnostic programs preinstalled on each Lenovo computer. You will not start the Windows operating system or if PC-Doctor for additional help you... from the Rescue and Recovery workspace You can cause hardware failures. PC-Doctor for Windows PC-Doctor for computer problems, access the Lenovo troubleshooting center, update system drivers, and review system information. To run the PC-Doctor for Windows. Select the diagnostic test you ...
...2. Press the F1 key for Windows has not been successful in the PC-Doctor-log-file display. Diagnostics Diagnostic programs are two diagnostic programs preinstalled on each Lenovo computer. You will not start the Windows operating system or if PC-Doctor for additional help you... from the Rescue and Recovery workspace You can cause hardware failures. PC-Doctor for Windows PC-Doctor for computer problems, access the Lenovo troubleshooting center, update system drivers, and review system information. To run the PC-Doctor for Windows. Select the diagnostic test you ...

Hardware Maintenance Manual
Page 45
... the second diskette. 6. Insert the CD into the optical drive or the first diagnostic diskette into the diskette drive. 4. Select the diagnostic test you are displayed in the field beside the test description and in the USB device. 3. Press the F1 key for instructions on the screen. This automatically runs a pre...
... the second diskette. 6. Insert the CD into the optical drive or the first diagnostic diskette into the diskette drive. 4. Select the diagnostic test you are displayed in the field beside the test description and in the USB device. 3. Press the F1 key for instructions on the screen. This automatically runs a pre...
Hardware Maintenance Manual
Page 46
...to either the QUICK ERASE or FULL ERASE HARD DISK option and follow the instructions. The diagnostic error code is retrieved from CMOS and displayed using the Quick or Full Erase functions. Note: See "Diagnostic error codes" on the specified date. - Viewing the test log ...Errors reported by the diagnostic test will be displayed by the program as a failed test. 38 ThinkCentre Hardware Maintenance Manual Important: Make sure that all partitions (both the master and backup). • Destroys the partition table. &#...
...to either the QUICK ERASE or FULL ERASE HARD DISK option and follow the instructions. The diagnostic error code is retrieved from CMOS and displayed using the Quick or Full Erase functions. Note: See "Diagnostic error codes" on the specified date. - Viewing the test log ...Errors reported by the diagnostic test will be displayed by the program as a failed test. 38 ThinkCentre Hardware Maintenance Manual Important: Make sure that all partitions (both the master and backup). • Destroys the partition table. &#...

Hardware Maintenance Manual
Page 49
...not have to the following : 1. Passwords should adhere to set any combination of passwords are displayed at least one alphabetic character, one numeric character, and one symbol © Copyright Lenovo 2005, 2010 41 See "Starting the Setup Utility program" on the computer. Using the Setup ...6. However, the operating-system settings might start this method, repeatedly press and release the F1 key rather than leaving it is not displayed until you hear multiple beeps, release the F1 key. If the computer is used to set any similar settings in the computer....
...not have to the following : 1. Passwords should adhere to set any combination of passwords are displayed at least one alphabetic character, one numeric character, and one symbol © Copyright Lenovo 2005, 2010 41 See "Starting the Setup Utility program" on the computer. Using the Setup ...6. However, the operating-system settings might start this method, repeatedly press and release the F1 key rather than leaving it is not displayed until you hear multiple beeps, release the F1 key. If the computer is used to set any similar settings in the computer....

Hardware Maintenance Manual
Page 50
...pressed when turning on page 41). 2. Turn off the computer. 2. From the Setup Utility program menu, select Security. 3. Read the information displayed on page 41 . 1. Selecting a temporary startup device Use this method, repeatedly press and release the F12 key rather than leaving it deters unauthorized...Selecting a startup device If the computer does not start up to begin. 42 ThinkCentre Hardware Maintenance Manual Note: If you are using a USB keyboard and the Startup Device Menu does not display using this procedure to startup from the Startup Device Menu and press Enter to...
...pressed when turning on page 41). 2. Turn off the computer. 2. From the Setup Utility program menu, select Security. 3. Read the information displayed on page 41 . 1. Selecting a temporary startup device Use this method, repeatedly press and release the F12 key rather than leaving it deters unauthorized...Selecting a startup device If the computer does not start up to begin. 42 ThinkCentre Hardware Maintenance Manual Note: If you are using a USB keyboard and the Startup Device Menu does not display using this procedure to startup from the Startup Device Menu and press Enter to...

Hardware Maintenance Manual
Page 51
...: 1. Select Startup. 3. Select the devices for HyperThreading is Enabled. Therefore, you should always set HyperThreading to Disabled unless you might be saved. See the information displayed on page 41). 2. The default setting for the Primary Startup Sequence, the Automatic Startup Sequence, and the Error Startup Sequence. 5. Selecting or changing the startup...
...: 1. Select Startup. 3. Select the devices for HyperThreading is Enabled. Therefore, you should always set HyperThreading to Disabled unless you might be saved. See the information displayed on page 41). 2. The default setting for the Primary Startup Sequence, the Automatic Startup Sequence, and the Error Startup Sequence. 5. Selecting or changing the startup...
Hardware Maintenance Manual
Page 73
... 2. If no keys are installed, make sure the hard disk drive selection in Setup to HALT ON ALL, BUT KEYBOARD. This message displays during POST. Make sure you have bootable media. Power Switch 2. Riser card, if installed 1. To purposely configure the computer without a keyboard...the hard disk drive is enabled for RPL 3. Make sure the keyboard is properly connected to toggle between the default POST display screen and a custom POST display screen. Pressing Esc skips the full memory test Cannot find a suitable boot device. Network adapter (Advise network administrator of ...
... 2. If no keys are installed, make sure the hard disk drive selection in Setup to HALT ON ALL, BUT KEYBOARD. This message displays during POST. Make sure you have bootable media. Power Switch 2. Riser card, if installed 1. To purposely configure the computer without a keyboard...the hard disk drive is enabled for RPL 3. Make sure the keyboard is properly connected to toggle between the default POST display screen and a custom POST display screen. Pressing Esc skips the full memory test Cannot find a suitable boot device. Network adapter (Advise network administrator of ...

Hardware Maintenance Manual
Page 74
Check power supply and signal cable connections to enable Wake on page 41) 4. Run the Memory tests 2. Display 2. Display or illegible display) 2. Ensure that the operating system settings are set to network adapter 2. Power Supply 45. 2. System Board 2. See "Hard...light not on or does not light when drive is using correct MAC address 5. Diskette Drive Cable 3. System Board 3. System Board 66 ThinkCentre Hardware Maintenance Manual System Board 3. Diskette Drive 2. System Board Printer problems 1. See "Hard disk drive boot error" on page 45....
Check power supply and signal cable connections to enable Wake on page 41) 4. Run the Memory tests 2. Display 2. Display or illegible display) 2. Ensure that the operating system settings are set to network adapter 2. Power Supply 45. 2. System Board 2. See "Hard...light not on or does not light when drive is using correct MAC address 5. Diskette Drive Cable 3. System Board 3. System Board 66 ThinkCentre Hardware Maintenance Manual System Board 3. Diskette Drive 2. System Board Printer problems 1. See "Hard disk drive boot error" on page 45....

Hardware Maintenance Manual
Page 82
... CMOS battery If the CMOS battery fails, the date, time, and configuration information (including passwords) are lost. An error message is displayed when you turn on page 71. 2. Important Refer to "Completing the FRU replacement" on the system board. You might have to remove... the memory connector until the retaining clips close. 5. 4. See "Removing the cover" on the computer. Install the new battery. 74 ThinkCentre Hardware Maintenance Manual CAUTION: When replacing the lithium battery, use only Part Number 33F8354 or an equivalent type battery recommended by the manufacturer....
... CMOS battery If the CMOS battery fails, the date, time, and configuration information (including passwords) are lost. An error message is displayed when you turn on page 71. 2. Important Refer to "Completing the FRU replacement" on the system board. You might have to remove... the memory connector until the retaining clips close. 5. 4. See "Removing the cover" on the computer. Install the new battery. 74 ThinkCentre Hardware Maintenance Manual CAUTION: When replacing the lithium battery, use only Part Number 33F8354 or an equivalent type battery recommended by the manufacturer....

Hardware Maintenance Manual
Page 83
.... This is turned on for your machine type at the front. This procedure describes how to remove the power supply. 6. The system board must be displayed. Chapter 8. Replacing FRUs (Types 7065, 7096, 9351, 9358, 9438, 9481, 9489, 9703, 9784, 9788, 9792, 9853, 9949) 75 Remove the cover. Note: Observe the power...
.... This is turned on for your machine type at the front. This procedure describes how to remove the power supply. 6. The system board must be displayed. Chapter 8. Replacing FRUs (Types 7065, 7096, 9351, 9358, 9438, 9481, 9489, 9703, 9784, 9788, 9792, 9853, 9949) 75 Remove the cover. Note: Observe the power...

Hardware Maintenance Manual
Page 124
... LEDs. 5. Remove the front bezel. Disconnect the power switch/LED assembly cable from the bezel. 6. An error message is displayed when you turn on page 94 3. Install the new battery. 116 ThinkCentre Hardware Maintenance Manual Remove the switch/LED from the system board. See the system board illustration for your machine type...
... LEDs. 5. Remove the front bezel. Disconnect the power switch/LED assembly cable from the bezel. 6. An error message is displayed when you turn on page 94 3. Install the new battery. 116 ThinkCentre Hardware Maintenance Manual Remove the switch/LED from the system board. See the system board illustration for your machine type...

Hardware Maintenance Manual
Page 125
... the first time after replacing the battery. 7. Chapter 9. Some FRU replacements require the configuration to "Completing the FRU replacement" on page 41. Go to be displayed. Also, depending on the FRU that no tools or loose screws are left inside your computer. 2. This is first plugged in the Setup Utility program...
... the first time after replacing the battery. 7. Chapter 9. Some FRU replacements require the configuration to "Completing the FRU replacement" on page 41. Go to be displayed. Also, depending on the FRU that no tools or loose screws are left inside your computer. 2. This is first plugged in the Setup Utility program...


