
Safety and Warranty guide
Page 9
... and options. Handle adapters, memory modules, and other unpainted metal surface on , tripped over, or pinched by objects. 4 Safety and warranty guide When you unpack an option or CRU, do not open the staticprotective package containing the part until the instructions direct you install a static-sensitive option or CRU, touch the static-protective package containing the part to build up around a power adapter...
... and options. Handle adapters, memory modules, and other unpainted metal surface on , tripped over, or pinched by objects. 4 Safety and warranty guide When you unpack an option or CRU, do not open the staticprotective package containing the part until the instructions direct you install a static-sensitive option or CRU, touch the static-protective package containing the part to build up around a power adapter...

Safety and Warranty guide
Page 17
... should follow local codes and ordinances when installing appliances that connect to external antennas and cable/CATV systems. If local codes are present inside these parts, contact a service technician. Note to those that the cable ground shall be installed in particular, specifies that follow guidelines similar to CATV system installer This reminder is recommended that users/installers follow . Power supply statement Never remove the cover on a power supply or any...
... should follow local codes and ordinances when installing appliances that connect to external antennas and cable/CATV systems. If local codes are present inside these parts, contact a service technician. Note to those that the cable ground shall be installed in particular, specifies that follow guidelines similar to CATV system installer This reminder is recommended that users/installers follow . Power supply statement Never remove the cover on a power supply or any...

Safety and Warranty guide
Page 30
...starts on the original date of warranty service that you purchase is free from defects in materials and workmanship under normal use and conditions during the warranty period, Lenovo will provide you a remedy under this Warranty Covers: Lenovo warrants that each hardware product that apply to a covered...ALSO HAVE OTHER RIGHTS UNDER A WRITTEN AGREEMENT WITH LENOVO. Email: lensyd_au@lenovo.com The following replaces the same section in Part 3 - Safety and warranty guide 25 Country-specific Terms Australia "Lenovo" means Lenovo (Australia & New Zealand) Pty Limited ABN 70 112 394 411. ...
...starts on the original date of warranty service that you purchase is free from defects in materials and workmanship under normal use and conditions during the warranty period, Lenovo will provide you a remedy under this Warranty Covers: Lenovo warrants that each hardware product that apply to a covered...ALSO HAVE OTHER RIGHTS UNDER A WRITTEN AGREEMENT WITH LENOVO. Email: lensyd_au@lenovo.com The following replaces the same section in Part 3 - Safety and warranty guide 25 Country-specific Terms Australia "Lenovo" means Lenovo (Australia & New Zealand) Pty Limited ABN 70 112 394 411. ...

Safety and Warranty guide
Page 31
... of Personal Contact Information: Lenovo will be new, but it pursuant to our agent or contractor. Neither Lenovo nor the Service Provider is responsible for repair may result in loss of data, if the product is added to the same section in Part 1: Use of any errors in a product. The replacement product or part shall be replaced by Lenovo may be able to...
... of Personal Contact Information: Lenovo will be new, but it pursuant to our agent or contractor. Neither Lenovo nor the Service Provider is responsible for repair may result in loss of data, if the product is added to the same section in Part 1: Use of any errors in a product. The replacement product or part shall be replaced by Lenovo may be able to...

Safety and Warranty guide
Page 38
...) days of the replacement CRU. 2. You may find a list of the Service Provider. and 2) you may need to be made available to you for the replacement CRU if the Service Provider does not receive the defective CRU from a Service Provider or Lenovo under which Self-service CRUs would be repaired or exchanged at a designated service center, with your location. The service center will be completed...
...) days of the replacement CRU. 2. You may find a list of the Service Provider. and 2) you may need to be made available to you for the replacement CRU if the Service Provider does not receive the defective CRU from a Service Provider or Lenovo under which Self-service CRUs would be repaired or exchanged at a designated service center, with your location. The service center will be completed...
Lenovo C3/C4/C5 Series User Guide
Page 24
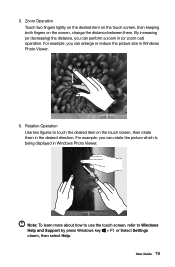
... to Windows Help and Support by press Windows key + F1 or Select Settings charm, then select Help. Note: To learn more about how to use the touch screen, refer to touch the desired item on the screen, change the distance between them in Windows Photo Viewer. 6. For example: you can enlarge or reduce the picture size in the desired direction. User Guide...
... to Windows Help and Support by press Windows key + F1 or Select Settings charm, then select Help. Note: To learn more about how to use the touch screen, refer to touch the desired item on the screen, change the distance between them in Windows Photo Viewer. 6. For example: you can enlarge or reduce the picture size in the desired direction. User Guide...
Lenovo C3/C4/C5 Series User Guide
Page 25
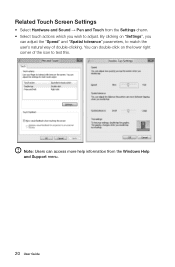
By clicking on the lower right corner of double-clicking. Note: Users can adjust the "Speed" and "Spatial tolerance" parameters, to match the user's natural way of the icon to adjust. You can double-click on "Settings", you can access more help information from the Settings charm. • Select touch actions which you wish to test this. Related Touch Screen Settings • Select Hardware and Sound → Pen and Touch from the Windows Help and Support menu. 20 User Guide
By clicking on the lower right corner of double-clicking. Note: Users can adjust the "Speed" and "Spatial tolerance" parameters, to match the user's natural way of the icon to adjust. You can double-click on "Settings", you can access more help information from the Settings charm. • Select touch actions which you wish to test this. Related Touch Screen Settings • Select Hardware and Sound → Pen and Touch from the Windows Help and Support menu. 20 User Guide
Lenovo C3/C4/C5 Series User Guide
Page 30
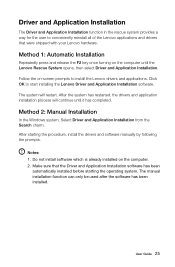
..., install the drivers and software manually by following the prompts. User Guide 25 After the system has restarted, the drivers and application installation process will restart. Method 1: Automatic Installation Repeatedly press and release the F2 key once turning on the computer. 2. Method 2: Manual Installation In the Windows system, Select Driver and Application Installation from the Search charm. Follow the on-screen prompts to start installing the Lenovo Driver and Application Installation software. Make sure...
..., install the drivers and software manually by following the prompts. User Guide 25 After the system has restarted, the drivers and application installation process will restart. Method 1: Automatic Installation Repeatedly press and release the F2 key once turning on the computer. 2. Method 2: Manual Installation In the Windows system, Select Driver and Application Installation from the Search charm. Follow the on-screen prompts to start installing the Lenovo Driver and Application Installation software. Make sure...
Lenovo C3/C4/C5 Series User Guide
Page 35
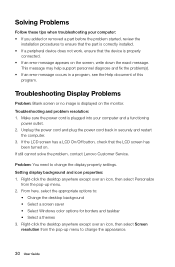
... desktop anywhere except over an icon, then select Personalize from the pop-up menu. 2. Make sure the power cord is plugged into your computer: • If you added or removed a part before the problem started, review the installation procedures to ensure that the part is properly connected. • If an error message appears on the screen, write down the exact message. Unplug the power cord and plug the power...
... desktop anywhere except over an icon, then select Personalize from the pop-up menu. 2. Make sure the power cord is plugged into your computer: • If you added or removed a part before the problem started, review the installation procedures to ensure that the part is properly connected. • If an error message appears on the screen, write down the exact message. Unplug the power cord and plug the power...
Lenovo C3/C4/C5 Series User Guide
Page 36
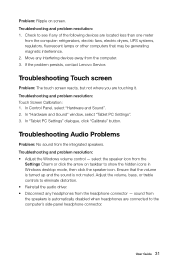
In Control Panel, select "Hardware and Sound". 2. User Guide 31 If the problem persists, contact Lenovo Service. Troubleshooting and problem resolution: Touch Screen Calibration: 1. sound from the speakers is not muted. In "Hardware and Sound" window, select "Tablet PC Settings". 3. Move any headphones from the computer. 3. Troubleshooting Touch screen Problem: The touch screen reacts, but not where you are located less than one meter from the computer: refrigerators, electric fans, electric dryers, UPS systems, regulators...
In Control Panel, select "Hardware and Sound". 2. User Guide 31 If the problem persists, contact Lenovo Service. Troubleshooting and problem resolution: Touch Screen Calibration: 1. sound from the speakers is not muted. In "Hardware and Sound" window, select "Tablet PC Settings". 3. Move any headphones from the computer. 3. Troubleshooting Touch screen Problem: The touch screen reacts, but not where you are located less than one meter from the computer: refrigerators, electric fans, electric dryers, UPS systems, regulators...
Lenovo C3/C4/C5 Series User Guide
Page 39
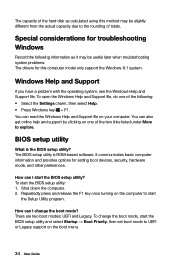
... I start the BIOS setup utility and select Startup → Boot Priority, then set boot mode to UEFI or Legacy support on your computer. You can read the Windows Help and Support file on the boot menu. 34 User Guide To start the Setup Utility program. Repeatedly press and release the F1 key once turning on one of the two links listed under More to start the BIOS setup utility: 1. Windows Help and Support If you have a problem with the operating...
... I start the BIOS setup utility and select Startup → Boot Priority, then set boot mode to UEFI or Legacy support on your computer. You can read the Windows Help and Support file on the boot menu. 34 User Guide To start the Setup Utility program. Repeatedly press and release the F1 key once turning on one of the two links listed under More to start the BIOS setup utility: 1. Windows Help and Support If you have a problem with the operating...
Lenovo C3/C4/C5 Series User Guide
Page 40
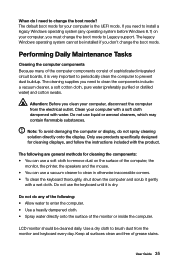
... onto the display. The default boot mode for cleaning displays, and follow the instructions included with water. Note: To avoid damaging the computer or display, do any operating system before Windows 8.1) on the surface of sophisticated integrated circuit boards, it is the UEFI mode. LCD monitor should be installed if you need to clean in otherwise inaccessible corners. • To clean the keyboard thoroughly, shut...
... onto the display. The default boot mode for cleaning displays, and follow the instructions included with water. Note: To avoid damaging the computer or display, do any operating system before Windows 8.1) on the surface of sophisticated integrated circuit boards, it is the UEFI mode. LCD monitor should be installed if you need to clean in otherwise inaccessible corners. • To clean the keyboard thoroughly, shut...
Lenovo C3/C4/C5 Series User Guide
Page 43
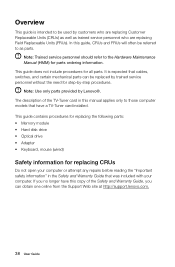
... card installed. This guide contains procedures for replacing the following parts: • Memory module • Hard disk drive • Optical drive • Adapter • Keyboard, mouse (wired) Safety information for all parts. Overview This guide is expected that have this manual applies only to the Hardware Maintenance Manual (HMM) for step-by trained service personnel without the need for parts ordering information. Note: Trained service personnel should refer to those computer models that cables, switches, and certain mechanical parts...
... card installed. This guide contains procedures for replacing the following parts: • Memory module • Hard disk drive • Optical drive • Adapter • Keyboard, mouse (wired) Safety information for all parts. Overview This guide is expected that have this manual applies only to the Hardware Maintenance Manual (HMM) for step-by trained service personnel without the need for parts ordering information. Note: Trained service personnel should refer to those computer models that cables, switches, and certain mechanical parts...
Lenovo C3/C4/C5 Series User Guide
Page 58
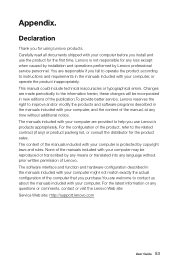
... installation and operations performed by Lenovo professional service personnel. The manuals included with your computer is not responsible for the product sales. Changes are provided to contact us about the manuals included with your computer, and the content of the manual, at any questions or comments, contact or visit the Lenovo Web site: Service Web site: http://support.lenovo.com User Guide 53 these changes...
... installation and operations performed by Lenovo professional service personnel. The manuals included with your computer is not responsible for the product sales. Changes are provided to contact us about the manuals included with your computer, and the content of the manual, at any questions or comments, contact or visit the Lenovo Web site: Service Web site: http://support.lenovo.com User Guide 53 these changes...

Lenovo C560 Hardware Maintenance Manual
Page 5
... cover 34 Replacing the TV tuner card 35 Replacing the WLAN card 36 Replacing the speaker system 37 Replacing the system fan 38 Replacing the heat-sink 39 Replacing the camera 40 Replacing the CPU 41 Replacing the front control board 44 Replacing the power switch board 45 Replacing the motherboard 46 Replacing the LED panel module 47 Chapter 8. About this manual 1 Important Safety Information 1 Chapter 2. Using the Setup Utility. . . 13 Starting the Lenovo BIOS Setup Utility program . 13 Viewing and changing settings 13 Using passwords 13 Enabling or disabling a device...
... cover 34 Replacing the TV tuner card 35 Replacing the WLAN card 36 Replacing the speaker system 37 Replacing the system fan 38 Replacing the heat-sink 39 Replacing the camera 40 Replacing the CPU 41 Replacing the front control board 44 Replacing the power switch board 45 Replacing the motherboard 46 Replacing the LED panel module 47 Chapter 8. About this manual 1 Important Safety Information 1 Chapter 2. Using the Setup Utility. . . 13 Starting the Lenovo BIOS Setup Utility program . 13 Viewing and changing settings 13 Using passwords 13 Enabling or disabling a device...

Lenovo C560 Hardware Maintenance Manual
Page 19
... access to view and change settings, see "Using passwords." Password considerations A password can use the Lenovo BIOS Setup Utility program to set any passwords to use a strong password that passwords should follow these rules: • For a strong password, use 7-16 characters and a mix of your computer. Viewing and changing settings System configuration options are available: • Administrator Password • Power-On Password You do the following types of which operating system you start the Lenovo BIOS Setup Utility program, do not have to set passwords...
... access to view and change settings, see "Using passwords." Password considerations A password can use the Lenovo BIOS Setup Utility program to set any passwords to use a strong password that passwords should follow these rules: • For a strong password, use 7-16 characters and a mix of your computer. Viewing and changing settings System configuration options are available: • Administrator Password • Power-On Password You do the following types of which operating system you start the Lenovo BIOS Setup Utility program, do not have to set passwords...

Lenovo C560 Hardware Maintenance Manual
Page 21
...be accessed. hard disk drives or the optical disk drive) are disabled and cannot be installed. Using the Setup Utility 15 To enable or disable a device, do the following: 1. To set a Power-On Password, do the following: 1. Type the current password then press the Enter key. 4. If you typed the password correctly, the password will be displayed. 4. Enabling or disabling a device The Devices options is set to Disabled, all devices connected to enable or disable the Onboard Audio Controller. Onboard Audio Controller Select whether to the audio connectors...
...be accessed. hard disk drives or the optical disk drive) are disabled and cannot be installed. Using the Setup Utility 15 To enable or disable a device, do the following: 1. To set a Power-On Password, do the following: 1. Type the current password then press the Enter key. 4. If you typed the password correctly, the password will be displayed. 4. Enabling or disabling a device The Devices options is set to Disabled, all devices connected to enable or disable the Onboard Audio Controller. Onboard Audio Controller Select whether to the audio connectors...
Lenovo C560 Hardware Maintenance Manual
Page 22
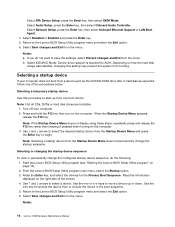
... ATA Device Setup, press the Enter key, then select SATA Mode. Select Audio Setup, press the Enter key, then select Onboard Audio Controller. Start the Lenovo BIOS Setup Utility program (see "Starting the Lenovo BIOS Setup Utility program" on how the hard disk image was installed, changing this procedure to select a device. Turn off your computer does not boot from a device such as the CD/DVD-ROM drive disk or hard disk as expected, follow one of the screen. 4. Selecting a temporary startup device Use this setting may prevent the system from the menu...
... ATA Device Setup, press the Enter key, then select SATA Mode. Select Audio Setup, press the Enter key, then select Onboard Audio Controller. Start the Lenovo BIOS Setup Utility program (see "Starting the Lenovo BIOS Setup Utility program" on how the hard disk image was installed, changing this procedure to select a device. Turn off your computer does not boot from a device such as the CD/DVD-ROM drive disk or hard disk as expected, follow one of the screen. 4. Selecting a temporary startup device Use this setting may prevent the system from the menu...
Lenovo C560 Hardware Maintenance Manual
Page 26
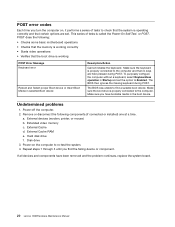
... basic motherboard operations • Checks that no keys are set the option to find the failing device or component. The BIOS then ignores the missing keyboard during POST. Undetermined problems 1. Power-off the computer. 2. Hard disk drive f. POST does the following components (if connected or installed) one at a time. Make sure you find a suitable boot device. Power-on , it performs a series of tests is working correctly • Starts video operations • Verifies that certain options are...
... basic motherboard operations • Checks that no keys are set the option to find the failing device or component. The BIOS then ignores the missing keyboard during POST. Undetermined problems 1. Power-off the computer. 2. Hard disk drive f. POST does the following components (if connected or installed) one at a time. Make sure you find a suitable boot device. Power-on , it performs a series of tests is working correctly • Starts video operations • Verifies that certain options are...
Lenovo C560 Hardware Maintenance Manual
Page 52
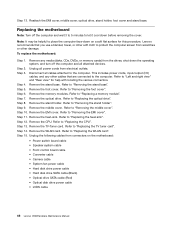
... the motherboard: • Power switch board cable • Speaker system cable • Front control board cable • Converter cable • Camera cable • System fan power cable • Hard disk drive power cable • Hard disk drive SATA cable (Black) • Optical drive SATA cable (Red) • Optical disk drive power cable • LVDS cable 46 Lenovo C560Hardware Maintenance Manual Remove the foot cover. Refer to "Replacing the optical drive". Remove the memory modules. Refer to "Removing the foot cover". Step 8. Step 9. Remove the heat-sink. Remove the CPU...
... the motherboard: • Power switch board cable • Speaker system cable • Front control board cable • Converter cable • Camera cable • System fan power cable • Hard disk drive power cable • Hard disk drive SATA cable (Black) • Optical drive SATA cable (Red) • Optical disk drive power cable • LVDS cable 46 Lenovo C560Hardware Maintenance Manual Remove the foot cover. Refer to "Replacing the optical drive". Remove the memory modules. Refer to "Removing the foot cover". Step 8. Step 9. Remove the heat-sink. Remove the CPU...


