Specification
Page 1
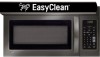
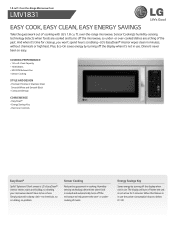
... detects when foods are a thing of the past. LG's EasyClean® interior resists stains and buildup, so cleaning your microwave doesn't have to below 0.1 W. Energy Savings Key Saves energy by turning off the microwave to help prevent the over- 1.8 cu.ft. Over-the-Range Microwave Oven LMV1831 EASY COOK, EASY CLEAN, EASY ENERGY SAVINGS Take...
... detects when foods are a thing of the past. LG's EasyClean® interior resists stains and buildup, so cleaning your microwave doesn't have to below 0.1 W. Energy Savings Key Saves energy by turning off the microwave to help prevent the over- 1.8 cu.ft. Over-the-Range Microwave Oven LMV1831 EASY COOK, EASY CLEAN, EASY ENERGY SAVINGS Take...
Specification
Page 2
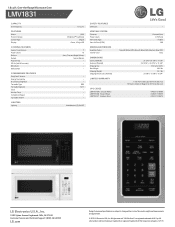
...DIMENSIONS Cavity (WxHxD) Exterior (WxHxD) Shipping Qty. All rights reserved. "LG Life's Good" is a registered trademark of their respective companies. 12/1/15 Over-the-Range Microwave Oven LMV1831 CAPACITY Oven Capacity FEATURES Watts Exterior Design Control Type Display COOKING FEATURES Sensor Cook Options ... Lighting 1.8 cu. All other product and brand names are approximate. © 2015 LG Electronics USA, Inc. Non-metric weights and measurements are trademarks or registered trademarks of LG Corp. 1.8 cu.ft. Net Weight Shipping Weight Shipping Dimensions (WxHxD) LIMITED WARRANTY...
...DIMENSIONS Cavity (WxHxD) Exterior (WxHxD) Shipping Qty. All rights reserved. "LG Life's Good" is a registered trademark of their respective companies. 12/1/15 Over-the-Range Microwave Oven LMV1831 CAPACITY Oven Capacity FEATURES Watts Exterior Design Control Type Display COOKING FEATURES Sensor Cook Options ... Lighting 1.8 cu. All other product and brand names are approximate. © 2015 LG Electronics USA, Inc. Non-metric weights and measurements are trademarks or registered trademarks of LG Corp. 1.8 cu.ft. Net Weight Shipping Weight Shipping Dimensions (WxHxD) LIMITED WARRANTY...
INSTALLATION
Page 1
Website: http://www.lg.com MICROWAVE OVEN INSTALLATION INSTRUCTIONS PLEASE READ AND SAVE THESE INSTALLATION INSTRUCTIONS.
Website: http://www.lg.com MICROWAVE OVEN INSTALLATION INSTRUCTIONS PLEASE READ AND SAVE THESE INSTALLATION INSTRUCTIONS.
INSTALLATION
Page 3
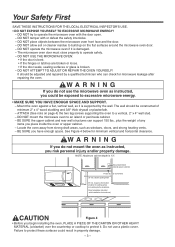
...allow soil or cleaner residue to protect these surfaces could be exposed to protect it. DO NOT operate the microwave oven if it is broken. - DO NOT ATTEMPT TO ADJUST OR REPAIR THE OVEN YOURSELF! It should be adjusted and repaired by the wall. The wall should be constructed of minimum 2" ...x 4" wood studding and 3/8" thick drywall or plaster/lath. - cabinet opening width 30" min. DO NOT USE THE MICROWAVE OVEN: • If the door is bent. • If the hinges or latches are broken or loose. • If the door seals, sealing surfaces or ...
...allow soil or cleaner residue to protect these surfaces could be exposed to protect it. DO NOT operate the microwave oven if it is broken. - DO NOT ATTEMPT TO ADJUST OR REPAIR THE OVEN YOURSELF! It should be adjusted and repaired by the wall. The wall should be constructed of minimum 2" ...x 4" wood studding and 3/8" thick drywall or plaster/lath. - cabinet opening width 30" min. DO NOT USE THE MICROWAVE OVEN: • If the door is bent. • If the hinges or latches are broken or loose. • If the door seals, sealing surfaces or ...

INSTALLATION
Page 4
...piece mounting plate only) NOTE: You need to hold the power cord) Actual Size One power cord clamp bushing - Actual Size (for supporting the Microwave Oven ) WARNING - Not Actual Size Two 1/4" x 3" bolts - and the mounting area must be assembled as shown) Not used if venting into ... - Damper/duct connector (for securing to the upper cabinet) Two tapping screws - Parts, Tools, Materials THE FOLLOWING PARTS ARE SUPPLIED WITH THE OVEN: NOTE: Depending on your ventilation requirements, you may not use all of these parts. PARA REDUCIR EL RIESGO DE INCENDIO Y DE DESCARGA EL&#...
...piece mounting plate only) NOTE: You need to hold the power cord) Actual Size One power cord clamp bushing - Actual Size (for supporting the Microwave Oven ) WARNING - Not Actual Size Two 1/4" x 3" bolts - and the mounting area must be assembled as shown) Not used if venting into ... - Damper/duct connector (for securing to the upper cabinet) Two tapping screws - Parts, Tools, Materials THE FOLLOWING PARTS ARE SUPPLIED WITH THE OVEN: NOTE: Depending on your ventilation requirements, you may not use all of these parts. PARA REDUCIR EL RIESGO DE INCENDIO Y DE DESCARGA EL&#...

INSTALLATION
Page 6
... APPLIANCE MUST BE GROUNDED! 1. DO NOT, UNDER ANY CIRCUMSTANCES, REMOVE THE POWER SUPPLY CORD GROUNDING PRONG! This appliance MUST be on a circuit dedicated to the microwave oven (120V, 60 Hz., AC only) with a 15 or 20A fused electrical supply. Keep the power cord dry and do not have one installed by a qualified...
... APPLIANCE MUST BE GROUNDED! 1. DO NOT, UNDER ANY CIRCUMSTANCES, REMOVE THE POWER SUPPLY CORD GROUNDING PRONG! This appliance MUST be on a circuit dedicated to the microwave oven (120V, 60 Hz., AC only) with a 15 or 20A fused electrical supply. Keep the power cord dry and do not have one installed by a qualified...
INSTALLATION
Page 9
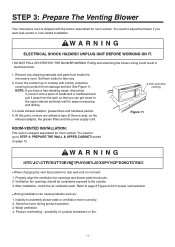
... blower if you have a free-standing range, disconnect it, move it onto a piece of cardboard or hardboard and pull it from inside the microwave oven. Remove any ), on page 13 . NOTE: If you want wall-vented or roof-vented installation. UNPLUG UNIT BEFORE WORKING ON IT. •...the upper cabinet and back wall for later use. 2. Set them aside for easier measuring and drilling. 3. STEP 3: Prepare The Venting Blower Your microwave oven is shipped with a thick, protective covering to STEP 4: PREPARE THE WALL & UPPER CABINET located on the exhaust adaptor, the grease filters and ...
... blower if you have a free-standing range, disconnect it, move it onto a piece of cardboard or hardboard and pull it from inside the microwave oven. Remove any ), on page 13 . NOTE: If you want wall-vented or roof-vented installation. UNPLUG UNIT BEFORE WORKING ON IT. •...the upper cabinet and back wall for later use. 2. Set them aside for easier measuring and drilling. 3. STEP 3: Prepare The Venting Blower Your microwave oven is shipped with a thick, protective covering to STEP 4: PREPARE THE WALL & UPPER CABINET located on the exhaust adaptor, the grease filters and ...

INSTALLATION
Page 10
... Unit Mounting Screw Figure 17 Exhaust Ports Figure 16 Exhaust Adaptor Damper (hinge side up) Slide exhaust adaptor into guides on each side of the microwave oven. 3.
... Unit Mounting Screw Figure 17 Exhaust Ports Figure 16 Exhaust Adaptor Damper (hinge side up) Slide exhaust adaptor into guides on each side of the microwave oven. 3.

INSTALLATION
Page 11
... unit blower plate mounting screws blower plate blower unit mounting screws Figure 22 Figure 23 Damper Exhaust Adaptor Blower Plate Back of the microwave oven. 3. Place blower unit back into the holes at the inside rear of the cabinet. Attach with the two tapping screws provided.... Attach the exhaust adaptor to cut and remove knockouts "A" from cabinet. Be careful not to microwave oven. See Figure 22. 7. Discard knockouts. Use side cutter or tin snips to the blower plate with the one blower unit mounting screw...
... unit blower plate mounting screws blower plate blower unit mounting screws Figure 22 Figure 23 Damper Exhaust Adaptor Blower Plate Back of the microwave oven. 3. Place blower unit back into the holes at the inside rear of the cabinet. Attach with the two tapping screws provided.... Attach the exhaust adaptor to cut and remove knockouts "A" from cabinet. Be careful not to microwave oven. See Figure 22. 7. Discard knockouts. Use side cutter or tin snips to the blower plate with the one blower unit mounting screw...

INSTALLATION
Page 12
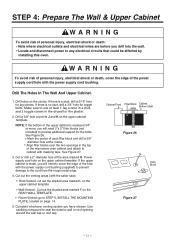
...upper cabinet template with the cabinet front. 5. NOTE: If the cabinets are normally 16 inches apart). w CAUTION DO NOT ATTEMPT TO INSTALL THE MICROWAVE OVEN IF YOU CANNOT FIND A WALL STUD. 3. NOTE: Be sure the minimum width is located a minimum of the upper cabinet frame. If ... STEP 4: Prepare The Wall & Upper Cabinet wW A R N I N G To avoid personal injury or property damage, do not attempt to install this microwave oven if you cannot find any wall stud, consult a local building contractor. Using a plumb line and (metal) measuring tape, find and mark the vertical center ...
...upper cabinet template with the cabinet front. 5. NOTE: If the cabinets are normally 16 inches apart). w CAUTION DO NOT ATTEMPT TO INSTALL THE MICROWAVE OVEN IF YOU CANNOT FIND A WALL STUD. 3. NOTE: Be sure the minimum width is located a minimum of the upper cabinet frame. If ... STEP 4: Prepare The Wall & Upper Cabinet wW A R N I N G To avoid personal injury or property damage, do not attempt to install this microwave oven if you cannot find any wall stud, consult a local building contractor. Using a plumb line and (metal) measuring tape, find and mark the vertical center ...
INSTALLATION
Page 13
... supply cord bushing. Use caulking compound to any electrical circuits that could be affected by installing this oven. Drill a 3/8" hole at least 1 lag screws in a stud, and 2 toggle screws in the top of the microwave oven cabinet and attach to cabinet with the power supply cord bushing (supplied) to prevent damage to provide...
... supply cord bushing. Use caulking compound to any electrical circuits that could be affected by installing this oven. Drill a 3/8" hole at least 1 lag screws in a stud, and 2 toggle screws in the top of the microwave oven cabinet and attach to cabinet with the power supply cord bushing (supplied) to prevent damage to provide...
INSTALLATION
Page 15
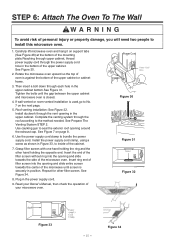
...upper cabinet or cabinet frame. 3. See Figure 30. 2. If wall-vented or room-vented installation is against the bottom of your microwave oven. Insert the end of the filter screen without ring into the opening and slide entire screen towards the side of the mounting plate.... filter screen into the opening and slide towards the center of the microwave until the gap between the upper cabinet and microwave oven is securely in the power supply cord. 9. See Figure 34. 8. Plug in position. Carefully lift microwave oven and hang it on page 8. 6. See Figure 7 on support ...
...upper cabinet or cabinet frame. 3. See Figure 30. 2. If wall-vented or room-vented installation is against the bottom of your microwave oven. Insert the end of the filter screen without ring into the opening and slide entire screen towards the side of the mounting plate.... filter screen into the opening and slide towards the center of the microwave until the gap between the upper cabinet and microwave oven is securely in the power supply cord. 9. See Figure 34. 8. Plug in position. Carefully lift microwave oven and hang it on page 8. 6. See Figure 7 on support ...
Owners Manual
Page 1
All Rights Reserved. OWNER'S MANUAL MICROWAVE OVEN PLEASE READ THIS OWNER'S MANUAL THOROUGHLY BEFORE OPERATING AND KEEP IT HANDY FOR REFERENCE AT ALL TIMES. ** LMV1831 MFL06317608_09 www.lg.com Copyright © 2013 - 2017 LG Electronics Inc.
All Rights Reserved. OWNER'S MANUAL MICROWAVE OVEN PLEASE READ THIS OWNER'S MANUAL THOROUGHLY BEFORE OPERATING AND KEEP IT HANDY FOR REFERENCE AT ALL TIMES. ** LMV1831 MFL06317608_09 www.lg.com Copyright © 2013 - 2017 LG Electronics Inc.
Owners Manual
Page 2
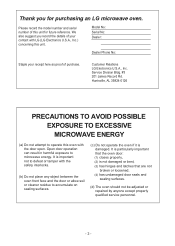
... with the safety interlocks. (b) Do not place any object between the oven front face and the door or allow soil or cleaner residue to operate this oven with LG (LG Electronics U.S.A., Inc.) concerning this unit for purchasing an LG microwave oven. It is particularly important that the oven door: (1) closes properly, (2) is damaged. Huntsville, AL 35824-0126 PRECAUTIONS...
... with the safety interlocks. (b) Do not place any object between the oven front face and the door or allow soil or cleaner residue to operate this oven with LG (LG Electronics U.S.A., Inc.) concerning this unit for purchasing an LG microwave oven. It is particularly important that the oven door: (1) closes properly, (2) is damaged. Huntsville, AL 35824-0126 PRECAUTIONS...
Owners Manual
Page 3
...Defrost 19 Defrosting Tips 20 Metal Rack 20 FEATURES 7~9 Microwave Oven Features 7 Oven Control Panel 8 ~9 COOKING TIPS 21~25 Getting the Best Cooking Results 21 Fish & Shellfish 21 USING YOUR MICROWAVE OVEN 10~20 Learn About Your Microwave Oven 10 Fish and Shellfish Cooking Table 21 ...26 Metal Rack 26 Cleaning the Grease Filters 26 Charcoal Filter Replacement 26 Cooktop/Night Light Replacement 27 Oven Light Replacement 27 COOKING UTENSILS 28 Microwave Utensil Guide 28 FAQS 29 Sensor Reheat 15 TROUBLESHOOTING 30 Sensor Cook 15 Cooking Guide for Sensor ...
...Defrost 19 Defrosting Tips 20 Metal Rack 20 FEATURES 7~9 Microwave Oven Features 7 Oven Control Panel 8 ~9 COOKING TIPS 21~25 Getting the Best Cooking Results 21 Fish & Shellfish 21 USING YOUR MICROWAVE OVEN 10~20 Learn About Your Microwave Oven 10 Fish and Shellfish Cooking Table 21 ...26 Metal Rack 26 Cleaning the Grease Filters 26 Charcoal Filter Replacement 26 Cooktop/Night Light Replacement 27 Oven Light Replacement 27 COOKING UTENSILS 28 Microwave Utensil Guide 28 FAQS 29 Sensor Reheat 15 TROUBLESHOOTING 30 Sensor Cook 15 Cooking Guide for Sensor ...
Owners Manual
Page 5
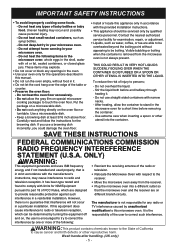
... and uses ISM frequency • Reorient the receiving antenna of injury to provide reasonable protection against such different branch circuits. interference in this microwave oven. Wash hands after handling. (US only) -5- Do not heat small-necked containers, such as water, coffee, or tea are on ...may occur and possibly cause personal injury. - Uneven heating may explode. • Do not cover or block any openings in your microwave oven. - Do not cook anything directly on , the user is the which are designed that interference will not occur The manufacturer is removed...
... and uses ISM frequency • Reorient the receiving antenna of injury to provide reasonable protection against such different branch circuits. interference in this microwave oven. Wash hands after handling. (US only) -5- Do not heat small-necked containers, such as water, coffee, or tea are on ...may occur and possibly cause personal injury. - Uneven heating may explode. • Do not cover or block any openings in your microwave oven. - Do not cook anything directly on , the user is the which are designed that interference will not occur The manufacturer is removed...
Owners Manual
Page 6
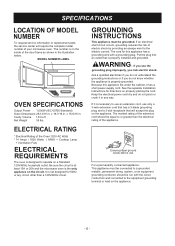
... frame as shown in the illustration below. Be sure the circuit is at least 15A or 20A and the microwave oven is properly installed and grounded. GROUNDING INSTRUCTIONS This appliance must be connected to a grounded, metallic, permanent wiring ...appliance. See the separate Installation Instructions for the electric current. If you risk electric shock. MODEL NUMBER LABEL OVEN SPECIFICATIONS Output Power 1,000W (IEC 60705 Standard) Outer Dimensions 29-13/16 in any circuit other than the...fits under the cabinet, it in . ELECTRICAL RATING * Electrical Rating of your microwave oven.
... frame as shown in the illustration below. Be sure the circuit is at least 15A or 20A and the microwave oven is properly installed and grounded. GROUNDING INSTRUCTIONS This appliance must be connected to a grounded, metallic, permanent wiring ...appliance. See the separate Installation Instructions for the electric current. If you risk electric shock. MODEL NUMBER LABEL OVEN SPECIFICATIONS Output Power 1,000W (IEC 60705 Standard) Outer Dimensions 29-13/16 in any circuit other than the...fits under the cabinet, it in . ELECTRICAL RATING * Electrical Rating of your microwave oven.

Owners Manual
Page 7
...Plate & Cooking Guide Label 3. Use for extra space when cooking in the oven during operation for more than one container at the same time. FEATURES MICROWAVE OVEN FEATURES Metal Rack wWARNING: Do not operate the oven when empty or without the glass tray. It is best to make your... cooking experience as enjoyable and productive as it cooks. 2. It must be in more even cooking. Cooktop/Countertop Light 7. Your microwave oven is designed as it . 9. To get you are not using it cooks for best cooking results. 6. Charcoal Filter (behind Vent Grille) 4. Glass...
...Plate & Cooking Guide Label 3. Use for extra space when cooking in the oven during operation for more than one container at the same time. FEATURES MICROWAVE OVEN FEATURES Metal Rack wWARNING: Do not operate the oven when empty or without the glass tray. It is best to make your... cooking experience as enjoyable and productive as it cooks. 2. It must be in more even cooking. Cooktop/Countertop Light 7. Your microwave oven is designed as it . 9. To get you are not using it cooks for best cooking results. 6. Charcoal Filter (behind Vent Grille) 4. Glass...

Owners Manual
Page 9
...long to enter the time of humidity it . 10. Cook. Press button to keep hot, cooked foods warm in your microwave oven. Press this button to stop the oven or clear all entries. 21. of cooking time each time you press it detects from the food. 16. Defrost Weight/.... 22. Press number buttons to 90 minutes. 8. Press this button to select a cooking power level. 14. This option is not available in your microwave oven for 1.0 pound frozen foods. 9. Light On/Off. Add 30 Sec. Quick Defrost. If you with a rapid defrosting method for up to enter casseroles...
...long to enter the time of humidity it . 10. Cook. Press button to keep hot, cooked foods warm in your microwave oven. Press this button to stop the oven or clear all entries. 21. of cooking time each time you press it detects from the food. 16. Defrost Weight/.... 22. Press number buttons to 90 minutes. 8. Press this button to select a cooking power level. 14. This option is not available in your microwave oven for 1.0 pound frozen foods. 9. Light On/Off. Add 30 Sec. Quick Defrost. If you with a rapid defrosting method for up to enter casseroles...

Owners Manual
Page 10
...before using the number buttons. 3. To restart cooking, close the door and press START/Enter. USING YOUR MICROWAVE OVEN LEARN ABOUT YOUR MICROWAVE OVEN This section discusses the concepts behind microwave cooking and introduces you to the basics you need to know to continue cooking, open the door and ...press STOP/Clear. INTERRUPTING COOKING CLOCK When the oven is seted to lock the control panel when you press "...
...before using the number buttons. 3. To restart cooking, close the door and press START/Enter. USING YOUR MICROWAVE OVEN LEARN ABOUT YOUR MICROWAVE OVEN This section discusses the concepts behind microwave cooking and introduces you to the basics you need to know to continue cooking, open the door and ...press STOP/Clear. INTERRUPTING COOKING CLOCK When the oven is seted to lock the control panel when you press "...


