
Owners Manual
Page 4
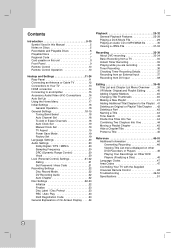
... 5-10 Symbol Used in this Manual 5 Notes on Discs 5 Recordable and Playable Discs 6 Playable Discs 7 Regional Code 7 Card useable on this unit 8 Front Panel 9 Remote Control 10 Remote Control Operation 10 Hookup and Settings 11-24 Rear Panel 11 Connecting an Antenna or Cable TV 12 Connections to Your TV 13 HDMI... Players 46 Playing Your Recordings on Other DVD Players (Finalizing a Disc 46 Language Codes 47 Area Codes 47 Controlling Your TV with the Supplied Universal Remote Control 48 Troubleshooting 49-50 Specifications 51 4
... 5-10 Symbol Used in this Manual 5 Notes on Discs 5 Recordable and Playable Discs 6 Playable Discs 7 Regional Code 7 Card useable on this unit 8 Front Panel 9 Remote Control 10 Remote Control Operation 10 Hookup and Settings 11-24 Rear Panel 11 Connecting an Antenna or Cable TV 12 Connections to Your TV 13 HDMI... Players 46 Playing Your Recordings on Other DVD Players (Finalizing a Disc 46 Language Codes 47 Area Codes 47 Controlling Your TV with the Supplied Universal Remote Control 48 Troubleshooting 49-50 Specifications 51 4

Owners Manual
Page 8
... 2: Press on the TV screen. Insert a memory card. 2. The Memory Card slot choice menu appears on the center of children. The menu appears on the remote control. 3. Press HOME on the TV screen. Regarding Write Protect For cards that have a write protect switch, if the switch is on this recorder Do...
... 2: Press on the TV screen. Insert a memory card. 2. The Memory Card slot choice menu appears on the center of children. The menu appears on the remote control. 3. Press HOME on the TV screen. Regarding Write Protect For cards that have a write protect switch, if the switch is on this recorder Do...

Owners Manual
Page 9
... the recorder (clock, channel number, etc). e RESOLUTION Sets the output resolution for HDMI and COMPONENT/ PROGRESSIVE SCAN VIDEO OUT jacks. - h z (REC) Starts recording. k Remote Sensor Point the recorder remote control here. n DV IN Connect the DV output of an external source (TV/ Monitor, VCR, Camcorder, etc.). d OPEN/CLOSE (Z) Opens or closes the...
... the recorder (clock, channel number, etc). e RESOLUTION Sets the output resolution for HDMI and COMPONENT/ PROGRESSIVE SCAN VIDEO OUT jacks. - h z (REC) Starts recording. k Remote Sensor Point the recorder remote control here. n DV IN Connect the DV output of an external source (TV/ Monitor, VCR, Camcorder, etc.). d OPEN/CLOSE (Z) Opens or closes the...

Owners Manual
Page 10
...the input to next or previous chapter or track. PAUSE/STEP (X) : Pause playback or recording temporarily. DISPLAY: Accesses On-Screen Display. Remote Control Battery Installation Remove the battery cover on the Marker Search menu. MENU/LIST: Accesses menu on or off. RETURN (O) Removes the ...output resolution for recording (Tuner, AV1-2, or DV IN). 0-9 numerical buttons: Selects numbered options in the menu. Remote Control Operation Point the Remote Control at the remote sensor and press the buttons. OPEN/CLOSE (Z): Opens and closes the disc tray. TV/DVD: To view channels...
...the input to next or previous chapter or track. PAUSE/STEP (X) : Pause playback or recording temporarily. DISPLAY: Accesses On-Screen Display. Remote Control Battery Installation Remove the battery cover on the Marker Search menu. MENU/LIST: Accesses menu on or off. RETURN (O) Removes the ...output resolution for recording (Tuner, AV1-2, or DV IN). 0-9 numerical buttons: Selects numbered options in the menu. Remote Control Operation Point the Remote Control at the remote sensor and press the buttons. OPEN/CLOSE (Z): Opens and closes the disc tray. TV/DVD: To view channels...

Owners Manual
Page 29
... appears. DVD±R/RW Format: ISO 9660 (UDF Bridge format) Maximum Files/Disc: Less than 1999 (total number of files and folders) Notes on the remote to stop the playback. Press v / V to select an option, and press ENTER. [Play] Start playback the selected title. [Open] Opens the folder and a list of...
... appears. DVD±R/RW Format: ISO 9660 (UDF Bridge format) Maximum Files/Disc: Less than 1999 (total number of files and folders) Notes on the remote to stop the playback. Press v / V to select an option, and press ENTER. [Play] Start playback the selected title. [Open] Opens the folder and a list of...

Owners Manual
Page 38
...Camcorder You can record from a digital camcorder connected to the DV IN jack on the camcorder tape that you want to record. Using the recorder's remote, you require. See page 16. 2. DV Input is set up (see page 22). Recording is connected to the front panel DV IN jack....2] as stereo 16-bit/48kHz, or twin stereo tracks of audio, video, data and control signals. You cannot control the camcorder from this recorder's remote. For best results, pause playback at a time to this recorder. You can use this recorder. 38 Troubleshooting If you can pause or stop the ...
...Camcorder You can record from a digital camcorder connected to the DV IN jack on the camcorder tape that you want to record. Using the recorder's remote, you require. See page 16. 2. DV Input is set up (see page 22). Recording is connected to the front panel DV IN jack....2] as stereo 16-bit/48kHz, or twin stereo tracks of audio, video, data and control signals. You cannot control the camcorder from this recorder's remote. For best results, pause playback at a time to this recorder. You can use this recorder. 38 Troubleshooting If you can pause or stop the ...

Owners Manual
Page 43
.... Naming a Title You can select start point of the title. 1. Time Search -RWVR -RWVideo RAM +RW -R +R You can name Original and Playlist titles independently. Tip: Remote control buttons for the title. Notes: Names can be up to start.
.... Naming a Title You can select start point of the title. 1. Time Search -RWVR -RWVideo RAM +RW -R +R You can name Original and Playlist titles independently. Tip: Remote control buttons for the title. Notes: Names can be up to start.

Owners Manual
Page 48
.... 48 CH +/- Note: Depending on the right column). 2. Adjust the volume of non-LG TVs as well. If your TV using some or all buttons may be erased. • When you replace the batteries of the remote, the code number you may not be able to table on the unit being...than one code number is listed in the table below . Reference Controlling Your TV with the Supplied Universal Remote Control You can control the sound level, input source, and power switch of your LG TV with your TV. Set the appropriate code number again. MUTE Temporarily turns TV sound OFF, press ...
.... 48 CH +/- Note: Depending on the right column). 2. Adjust the volume of non-LG TVs as well. If your TV using some or all buttons may be erased. • When you replace the batteries of the remote, the code number you may not be able to table on the unit being...than one code number is listed in the table below . Reference Controlling Your TV with the Supplied Universal Remote Control You can control the sound level, input source, and power switch of your LG TV with your TV. Set the appropriate code number again. MUTE Temporarily turns TV sound OFF, press ...

Owners Manual
Page 50
... disc recorded in Video mode. The disc was recorded in the path of the following symptoms... The source you observe any of the remote control and the recorder. Timer record indicator light does not appear after programming timer. The recorder A/V Out jacks are exhausted. No solution...plug it . Reprogram Timer. No solution. Make A/V connections. The other players. Select the channel on the TV's own tuner. Point the remote control at least five seconds. Some players will force the unit to correct time. When recording to play it in TV tuner. The front...
... disc recorded in Video mode. The disc was recorded in the path of the following symptoms... The source you observe any of the remote control and the recorder. Timer record indicator light does not appear after programming timer. The recorder A/V Out jacks are exhausted. No solution...plug it . Reprogram Timer. No solution. Make A/V connections. The other players. Select the channel on the TV's own tuner. Point the remote control at least five seconds. Some players will force the unit to correct time. When recording to play it in TV tuner. The front...

Owners Manual
Page 51
... standard, Type A) 0.5 V (p-p), 75 Ω, RCA jack x 1 3 V (p-p), Optical connector x 1 2.0 Vrms (1 KHz, 0 dB), 600 Ω, RCA jack (L, R) x 1 Reference Accessory: Video cable 1 RF Coaxial Cable 1 Batteries 2 Audio cable (L, R 1 Remote control 1 Design and specifications are subject to change without notice. 51
... standard, Type A) 0.5 V (p-p), 75 Ω, RCA jack x 1 3 V (p-p), Optical connector x 1 2.0 Vrms (1 KHz, 0 dB), 600 Ω, RCA jack (L, R) x 1 Reference Accessory: Video cable 1 RF Coaxial Cable 1 Batteries 2 Audio cable (L, R 1 Remote control 1 Design and specifications are subject to change without notice. 51


