KM-NET ADMIN Operation Guide for Ver 2.0
Page 26
Renaming a Tab You can rename a tab. 1 Select the tab you want to add the tab. Use the Shift and Ctrl keys to select multiple items. 7 Click OK to edit. 3-4 User Guide Import Default Tab Each user has a personal list of tabs and tab properties that is ... a system default tab. 1 Select Add Tab from the tab, select it . Change the order of the columns in your tab. Use the Shift and Ctrl keys to select multiple items. 5 To remove a column from the Manage List Views list on a tab and their order. Rather than manually creating this reason, existing...
Renaming a Tab You can rename a tab. 1 Select the tab you want to add the tab. Use the Shift and Ctrl keys to select multiple items. 7 Click OK to edit. 3-4 User Guide Import Default Tab Each user has a personal list of tabs and tab properties that is ... a system default tab. 1 Select Add Tab from the tab, select it . Change the order of the columns in your tab. Use the Shift and Ctrl keys to select multiple items. 5 To remove a column from the Manage List Views list on a tab and their order. Rather than manually creating this reason, existing...
KM-NET ADMIN Operation Guide for Ver 2.0
Page 27
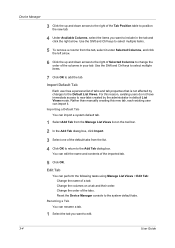
... the Tab Position to move it to the left arrow button, or double-click an item to the other column. Use the Shift and Ctrl keys to select multiple items. 5 To change the order of a column. 1 Select the tab you want to edit. 2 From the Manage List Views list on the... toolbar, select Edit Tab. 2 In the Edit Tab dialog box, select the Reset all tabs to system defaults check box. Use the Shift and Ctrl keys to select multiple items. 4 To remove a column from Selected Columns and use the up moves it to move the selected tab. Changing the Column Content...
... the Tab Position to move it to the left arrow button, or double-click an item to the other column. Use the Shift and Ctrl keys to select multiple items. 5 To change the order of a column. 1 Select the tab you want to edit. 2 From the Manage List Views list on the... toolbar, select Edit Tab. 2 In the Edit Tab dialog box, select the Reset all tabs to system defaults check box. Use the Shift and Ctrl keys to select multiple items. 4 To remove a column from Selected Columns and use the up moves it to move the selected tab. Changing the Column Content...
KM-NET ADMIN Operation Guide for Ver 2.0
Page 29
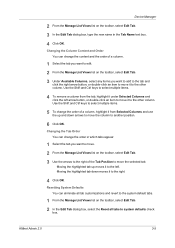
... group that device from its original group. Manual Groups A manual group is selected when you want to include from one device, hold down the Ctrl key and select multiple devices. If a manual group is selected, Edit Group is unavailable. To edit an existing manual group: 1 In the navigation area, select the...
... group that device from its original group. Manual Groups A manual group is selected when you want to include from one device, hold down the Ctrl key and select multiple devices. If a manual group is selected, Edit Group is unavailable. To edit an existing manual group: 1 In the navigation area, select the...
KM-NET ADMIN Operation Guide for Ver 2.0
Page 53
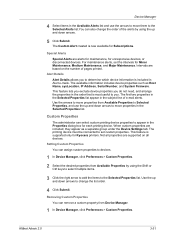
...Manager, click Preferences > Custom Properties. Removing Custom Properties You can remove a custom property from Available Properties by using the Shift or Ctrl keys to select multiple items. 3 Click the right arrow to add the items to the Selected Alerts list.You can select custom printing device... This feature lets you exclude device properties you do not need, and arrange the properties in the order that is now available for Kyocera printers. Custom Properties The administrator can also change the list order. 4 Click Submit. When custom properties are supported on the number of ...
...Manager, click Preferences > Custom Properties. Removing Custom Properties You can remove a custom property from Available Properties by using the Shift or Ctrl keys to select multiple items. 3 Click the right arrow to add the items to the Selected Alerts list.You can select custom printing device... This feature lets you exclude device properties you do not need, and arrange the properties in the order that is now available for Kyocera printers. Custom Properties The administrator can also change the list order. 4 Click Submit. When custom properties are supported on the number of ...
KM-NET ADMIN Operation Guide for Ver 2.0
Page 54
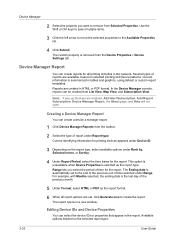
... Device IDs and Device Properties You can be created from the toolbar. 2 Select the type of time for the report. Use the Shift or Ctrl keys to select multiple items. 3 Click the left arrow to move the selected properties to the end of the previous unit of the previous month. 5 Under...
... Device IDs and Device Properties You can be created from the toolbar. 2 Select the type of time for the report. Use the Shift or Ctrl keys to select multiple items. 3 Click the left arrow to move the selected properties to the end of the previous unit of the previous month. 5 Under...
KM-NET ADMIN Operation Guide for Ver 2.0
Page 65
... accounts to be cancelled after you click the Finish button. 7 Click Finish . 8 If Now was selected, a progress window will appear. Use the shift and control keys to , if they were not already selected. Click Next. 3 Make selections from all devices in a group. Note: Even if the job is every 3 hours. For...
... accounts to be cancelled after you click the Finish button. 7 Click Finish . 8 If Now was selected, a progress window will appear. Use the shift and control keys to , if they were not already selected. Click Next. 3 Make selections from all devices in a group. Note: Even if the job is every 3 hours. For...
KM-NET Viewer Operation Guide Rev-5.2-2010.10
Page 4
... Groups 3-4 Editing Contacts and Groups 3-4 Copying Contacts and Groups 3-4 Searching the Address Book 3-5 One Touch Keys ...3-5 Adding One Touch Keys ...3-5 Searching One Touch Keys ...3-6 Viewing and Editing One Touch Key Properties 3-6 Device Users ...3-6 Adding Device Users ...3-6 Setting a Simple Login Key ...3-7 Searching the Device User List 3-7 Jobs ...3-8 Showing Job Detail ...3-8 Exporting the Job Log ...3-8 Searching a Job...
... Groups 3-4 Editing Contacts and Groups 3-4 Copying Contacts and Groups 3-4 Searching the Address Book 3-5 One Touch Keys ...3-5 Adding One Touch Keys ...3-5 Searching One Touch Keys ...3-6 Viewing and Editing One Touch Key Properties 3-6 Device Users ...3-6 Adding Device Users ...3-6 Setting a Simple Login Key ...3-7 Searching the Device User List 3-7 Jobs ...3-8 Showing Job Detail ...3-8 Exporting the Job Log ...3-8 Searching a Job...
KM-NET Viewer Operation Guide Rev-5.2-2010.10
Page 21
... information currently displayed on the hard disk, memory card, optional ROM, and in the context menu click Properties. Capabilities This area shows some of the key specifications of the printing device. Asset This area shows the MAC address of the system. Settings may be edited. KMnet Viewer 3-1 Display name, Location, and...
... information currently displayed on the hard disk, memory card, optional ROM, and in the context menu click Properties. Capabilities This area shows some of the key specifications of the printing device. Asset This area shows the MAC address of the system. Settings may be edited. KMnet Viewer 3-1 Display name, Location, and...
KM-NET Viewer Operation Guide Rev-5.2-2010.10
Page 23
... at the top left of the new group. The user list is needed . Device FAX Number Internet FAX Address You can create One Touch Keys to let you access address book entries by selecting it from the list and clicking Delete. The Contact Settings dialog box appears. 2 Enter the...Settings dialog boxes. Each step requires communication with the device, which may be deleted from the device and appears in the dialog box. 3 Select one key on an existing group to save the new address book entry. Deleting a Contact From a Group Contacts can be slow depending on network conditions. 1 ...
... at the top left of the new group. The user list is needed . Device FAX Number Internet FAX Address You can create One Touch Keys to let you access address book entries by selecting it from the list and clicking Delete. The Contact Settings dialog box appears. 2 Enter the...Settings dialog boxes. Each step requires communication with the device, which may be deleted from the device and appears in the dialog box. 3 Select one key on an existing group to save the new address book entry. Deleting a Contact From a Group Contacts can be slow depending on network conditions. 1 ...
KM-NET Viewer Operation Guide Rev-5.2-2010.10
Page 25
... 5 Click OK in order to find in the toolbar. KMnet Viewer 3-5 The number of 24 characters. To delete an entry from the One Touch Keys dialog box, select it in the list and click Delete in the adjacent Quick Search Text box. 3 To clear the search results and display the... entire address book again, click the Clear Search icon. Address book information can create a list of 100, or select Next available number. Adding One Touch Keys You can be created for an Address Book. 1 In any Device view, select a printing system with an address book. 2 Click Device > Address Book. 3 In...
... 5 Click OK in order to find in the toolbar. KMnet Viewer 3-5 The number of 24 characters. To delete an entry from the One Touch Keys dialog box, select it in the list and click Delete in the adjacent Quick Search Text box. 3 To clear the search results and display the... entire address book again, click the Clear Search icon. Address book information can create a list of 100, or select Next available number. Adding One Touch Keys You can be created for an Address Book. 1 In any Device view, select a printing system with an address book. 2 Click Device > Address Book. 3 In...
KM-NET Viewer Operation Guide Rev-5.2-2010.10
Page 26
... Quick Search text box. 3 To clear the search results and display the entire list again, click the Clear Search icon. In the One Touch Keys Destination dialog box, you can search by Number, Type, Name, and Address ID. The Device User List can be in Communication Settings for the ...device. Device Searching One Touch Keys In the One Touch Keys dialog box, you can search by Number, Type, Name, and Destination. 1 In the Searchable Fields list, select the field to the user...
... Quick Search text box. 3 To clear the search results and display the entire list again, click the Clear Search icon. In the One Touch Keys Destination dialog box, you can search by Number, Type, Name, and Address ID. The Device User List can be in Communication Settings for the ...device. Device Searching One Touch Keys In the One Touch Keys dialog box, you can search by Number, Type, Name, and Destination. 1 In the Searchable Fields list, select the field to the user...
KM-NET Viewer Operation Guide Rev-5.2-2010.10
Page 27
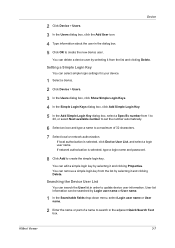
... device. 1 Select a device. 2 Click Device > Users. 3 In the Users dialog box, click Show Simple Login Keys. 4 In the Simple Login Keys dialog box, click Add Simple Login Key. 5 In the Add Simple Login Key dialog box, select a Specific number from 1 to 20, or select Next available number to set the number automatically... and type a name to a maximum of a name to search in the adjacent Quick Search Text box. KMnet Viewer 3-7 You can edit a simple login key by Login user name or User name. 1 In the Searchable fields drop-down menu, select Login user name or User name. 2 Enter the name or...
... device. 1 Select a device. 2 Click Device > Users. 3 In the Users dialog box, click Show Simple Login Keys. 4 In the Simple Login Keys dialog box, click Add Simple Login Key. 5 In the Add Simple Login Key dialog box, select a Specific number from 1 to 20, or select Next available number to set the number automatically... and type a name to a maximum of a name to search in the adjacent Quick Search Text box. KMnet Viewer 3-7 You can edit a simple login key by Login user name or User name. 1 In the Searchable fields drop-down menu, select Login user name or User name. 2 Enter the name or...
KM-NET Viewer Operation Guide Rev-5.2-2010.10
Page 50
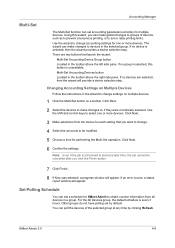
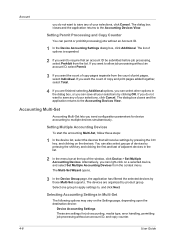
...returns to the Accounting Devices View. The list of the window, click Device > Set Multiple Accounting Devices. If you are organized by pressing the Ctrl key, and clicking on a selected device, and select Set Multiple Accounting Devices from the context menu. The Multi-Set Wizard opens. 3 In the Device ...Group page, the application has filtered the selected devices by pressing the shift key and clicking the first and last of adjacent devices in the dialog box, or you want to , and click Next. Select one group to ...
...returns to the Accounting Devices View. The list of the window, click Device > Set Multiple Accounting Devices. If you are organized by pressing the Ctrl key, and clicking on a selected device, and select Set Multiple Accounting Devices from the context menu. The Multi-Set Wizard opens. 3 In the Device ...Group page, the application has filtered the selected devices by pressing the shift key and clicking the first and last of adjacent devices in the dialog box, or you want to , and click Next. Select one group to ...
KM-NET Viewer Operation Guide Rev-5.2-2010.10
Page 57
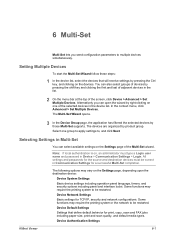
.... Alternatively you send configuration parameters to multiple devices simultaneously. Selecting Settings in Multi-Set You can also select groups of devices by pressing the shift key and clicking the first and last of the Multi-Set wizard. Device Network Settings Basic settings for print, copy, scan and FAX jobs including paper... by product group. Some functions may require the printing system to be restarted. Device Default Settings Settings that will receive settings by pressing the Ctrl key, and clicking on the devices. Device Authentication Settings KMnet Viewer 6-1
.... Alternatively you send configuration parameters to multiple devices simultaneously. Selecting Settings in Multi-Set You can also select groups of devices by pressing the shift key and clicking the first and last of the Multi-Set wizard. Device Network Settings Basic settings for print, copy, scan and FAX jobs including paper... by product group. Some functions may require the printing system to be restarted. Device Default Settings Settings that will receive settings by pressing the Ctrl key, and clicking on the devices. Device Authentication Settings KMnet Viewer 6-1
PRESCRIBE Commands Command Reference Manual Rev 4.8
Page 21
... The functions of the Technical Reference manual for the initial !R!, PRESCRIBE commands may be printed by the STAT command or by the panel keys. PRESCRIBE Commands 2. Three dots (...) mean that the preceding parameters may be omitted, are enclosed in lowercase letters if preferred. Refer to ... command format descriptions below, the command is written in lowercase italics. Parameters are duplicated by pressing the panel keys. Example: !R! and lowercase letters. Many PRESCRIBE commands can be repeated. This support depends upon the emulation mode and the software.
... The functions of the Technical Reference manual for the initial !R!, PRESCRIBE commands may be printed by the STAT command or by the panel keys. PRESCRIBE Commands 2. Three dots (...) mean that the preceding parameters may be omitted, are enclosed in lowercase letters if preferred. Refer to ... command format descriptions below, the command is written in lowercase italics. Parameters are duplicated by pressing the panel keys. Example: !R! and lowercase letters. Many PRESCRIBE commands can be repeated. This support depends upon the emulation mode and the software.
PRESCRIBE Commands Command Reference Manual Rev 4.8
Page 124
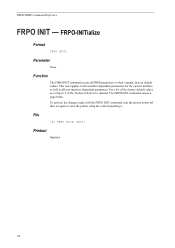
... 6 of the Technical Reference manual. EXIT; FRPO INIT; PRESCRIBE Command Reference FRPO INIT - To activate the changes made with the FRPO INIT command, turn the printer power off then on again or reset the printer using the control panel keys. File !R! FRPO-INITialize Format FRPO INIT;
... 6 of the Technical Reference manual. EXIT; FRPO INIT; PRESCRIBE Command Reference FRPO INIT - To activate the changes made with the FRPO INIT command, turn the printer power off then on again or reset the printer using the control panel keys. File !R! FRPO-INITialize Format FRPO INIT;

PRESCRIBE Commands Command Reference Manual Rev 4.8
Page 126
...the following numbers, followed by printing a font list. In the list below, the characteristics of font are listed in the printer, and the font's orientation. PRESCRIBE Command Reference typeface: typeface as represented by one or several characteristics of the current font..., e.g. To print a font list, use the FLST command or the control panel keys. Font selection is also convenient for option fonts, if installed, can be obtained by a terminator T: 0 = LinePrinterBM8.5-Roman 3 = CourierBM 4 = ...
...the following numbers, followed by printing a font list. In the list below, the characteristics of font are listed in the printer, and the font's orientation. PRESCRIBE Command Reference typeface: typeface as represented by one or several characteristics of the current font..., e.g. To print a font list, use the FLST command or the control panel keys. Font selection is also convenient for option fonts, if installed, can be obtained by a terminator T: 0 = LinePrinterBM8.5-Roman 3 = CourierBM 4 = ...
PRESCRIBE Commands Command Reference Manual Rev 4.8
Page 147
... will return to the same stack). To output the job with job ID 4H90058I0 in the virtual mailbox. JOBO 8, 'Jonathan', 9999; EXIT; If the CANCEL key is present in 7 copies: !R! JOBO 0, '4H90058I0'; JOBO Files All jobs are posted in the hard disk, with stapling enabled will be printed. Note however the...
... will return to the same stack). To output the job with job ID 4H90058I0 in the virtual mailbox. JOBO 8, 'Jonathan', 9999; EXIT; If the CANCEL key is present in 7 copies: !R! JOBO 0, '4H90058I0'; JOBO Files All jobs are posted in the hard disk, with stapling enabled will be printed. Note however the...

PRESCRIBE Commands Command Reference Manual Rev 4.8
Page 181
... pauses and displays a message which urges the user to deliver printed pages in the reverse order of tray parameters. Upon receiving the MSTK command, the printer automatically performs a page feed. PAGE; PAGE 2 (2 copies, bottom tray) !R! PAGE; Parameter tray: number from 1 to the trays in the mailbox mode. The ... pages until the first specified tray becomes full. MSTK; By removing all pages in the bulk tray and pressing the ON LINE key, printing commences. RES; PAGE 1 (2 copies, bottom tray) !R! MSTK MSTK - File !R! select Mailbox STacKer Format MSTK [tray, tray...
... pauses and displays a message which urges the user to deliver printed pages in the reverse order of tray parameters. Upon receiving the MSTK command, the printer automatically performs a page feed. PAGE; PAGE 2 (2 copies, bottom tray) !R! PAGE; Parameter tray: number from 1 to the trays in the mailbox mode. The ... pages until the first specified tray becomes full. MSTK; By removing all pages in the bulk tray and pressing the ON LINE key, printing commences. RES; PAGE 1 (2 copies, bottom tray) !R! MSTK MSTK - File !R! select Mailbox STacKer Format MSTK [tray, tray...
Kyocera Command Center Operation Guide Rev 6.3
Page 4
.../ i-FAX > FAX > FAX Restrictions > Permit ID List 3-28 FAX / i-FAX > FAX > FAX Restrictions > Reject Number List 3-28 FAX / i-FAX > FAX > Encryption Key 3-29 FAX / i-FAX > i-FAX > Defaults 3-29 FAX / i-FAX > i-FAX > SMTP 3-29 FAX / i-FAX > i-FAX > POP3 3-30 FAX / i-FAX ...Summary 3-35 Advanced > Protocols > TCP/IP > General 3-35 Advanced > Protocols > TCP/IP > IP Filters 3-37 Advanced > Protocols > TCP/IP > Logical Printers 3-38 Advanced > Protocols > NetWare 3-39 Advanced > Protocols > IPP 3-40 Advanced > Protocols > ThinPrint 3-40 Advanced > Protocols > AppleTalk 3-40 Advanced > ...
.../ i-FAX > FAX > FAX Restrictions > Permit ID List 3-28 FAX / i-FAX > FAX > FAX Restrictions > Reject Number List 3-28 FAX / i-FAX > FAX > Encryption Key 3-29 FAX / i-FAX > i-FAX > Defaults 3-29 FAX / i-FAX > i-FAX > SMTP 3-29 FAX / i-FAX > i-FAX > POP3 3-30 FAX / i-FAX ...Summary 3-35 Advanced > Protocols > TCP/IP > General 3-35 Advanced > Protocols > TCP/IP > IP Filters 3-37 Advanced > Protocols > TCP/IP > Logical Printers 3-38 Advanced > Protocols > NetWare 3-39 Advanced > Protocols > IPP 3-40 Advanced > Protocols > ThinPrint 3-40 Advanced > Protocols > AppleTalk 3-40 Advanced > ...