KitchenAid KUIX535HPA Support and Manuals
Get Help and Manuals for this KitchenAid item
View All Support Options Below
Free KitchenAid KUIX535HPA manuals!
Problems with KitchenAid KUIX535HPA?
Ask a Question
Free KitchenAid KUIX535HPA manuals!
Problems with KitchenAid KUIX535HPA?
Ask a Question
KitchenAid KUIX535HPA Videos

KitchenAid KUIX535HPA Machines à glaçon
Duration: :44
Total Views: 2
Duration: :44
Total Views: 2
KitchenAid KUIX535HPA Ice Maker
Duration: :45
Total Views: 72
Duration: :45
Total Views: 72
Popular KitchenAid KUIX535HPA Manual Pages
Owners Manual - Page 1

...
You can happen if the instructions are very important. Disconnect power before servicing. WARNING: This product contains one or more people to move and install ice maker.
This is , tell you don't immediately follow instructions. User Guide
Ice Maker
LEARN MORE
In an effort to conserve natural resources, this manual and on the inside of others...
Owners Manual - Page 5
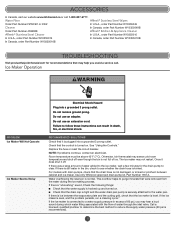
...death, fire, or electrical shock. Replace the fuse or reset the circuit ...instructions can result in excess of 60 psi, you avoid a service call. Ice Maker Operation
WARNING
PROBLEM...may not restart. For models with the flow of water...Part Number W10355010
In U.S.A., order Part Number W10355016
In Canada, order Part Number W10355010B
In Canada, order Part Number W10355016B
TROUBLESHOOTING...
Owners Manual - Page 6
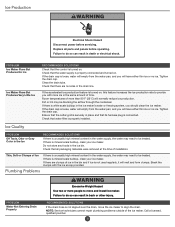
...that all parts and panels before servicing. If the...or no kinks in the drain line. If the drain cap is properly installed. Ensure that the cutter grid is securely in the water supply, the .... NOTE: Service technicians cannot repair plumbing problems outside of ice in back or other injury. Replace all packaging materials were removed at the time of time.
Ice Quality
PROBLEM
Off Taste,...
Owners Manual - Page 7

... 1 -
Rated service capacity = 2000 gallons... Use replacement filter P6RFWG2K, P6RFGEG2K, P6RFKG2K, Part Number ICE2...replacement requirements be carried out for the product to the permissible limit for the Manufacturer's name, address and telephone number.
■■ Refer to check the status of NSF International.
7 PERFORMANCE DATA SHEET
Ice Maker Water Filtration System
Model...
Owners Manual - Page 8

... product damage or defects caused by
when this major appliance is required to or furnished with
replacement parts for service or repair of original purchase date is installed, operated, and maintained according to the instructions attached to obtain service under these excluded circumstances shall be provided by KitchenAid.
7. Proof of this warranty. interfere with original...
Installation Instructions - Page 1
... provided many important safety messages in this manual and on some models 8 Connect Water Supply 11 Leveling and Securing 12 Custom Wood Panel 14 Connecting the Drain 16 Auxiliary Grill Installation 16 Deep Clean 17
SÉCURITÉ DE LA MACHINE À GLAÇONS 19 INSTRUCTIONS D'INSTALLATION..........20
Déballage de la machine à...
Installation Instructions - Page 2
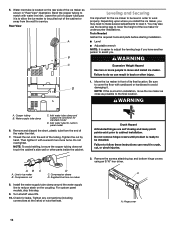
... maker may be closed-in on custom panel models) can adjust the height of the ice maker by rubbing a small amount of liquid dish soap over the adhesive with temperatures above 55°F (13°C) and below 110°F (43°C). SAVE THESE INSTRUCTIONS
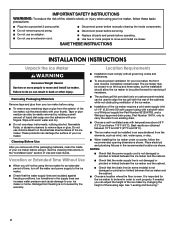
INSTALLATION INSTRUCTIONS
Unpack the Ice Maker
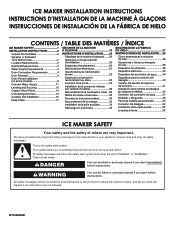
WARNING
Excessive Weight Hazard...
Installation Instructions - Page 5
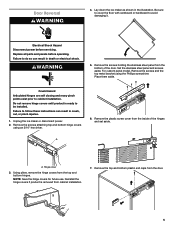
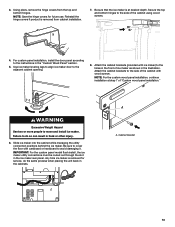
.... Replace all parts and panels before servicing. Set the stainless steel panel and screws aside.
Unplug the ice maker or disconnect power. 2. A
A. NOTE: Save the hinge covers for future use. Be sure to cover the floor with cardboard or hardboard to cabinet installation. For custom panel model, Remove the screws and the top metal bracket using...
Installation Instructions - Page 8
...Installation (on the opposite side of the door and set aside. 2. Insulated tube kit Part Number W10365792 is available for purchase.
■■ Drain pump is designed to pump water to follow these instructions... Rear panel (2)
■■ Instruction sheet
8 Remove the white decorative screws from the magnetic door catch and place
them on some models)
NOTES:
■■ Connect drain...
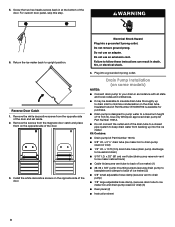
Installation Instructions - Page 9
... to do so can result in the ice maker base. Remove all parts and panels before servicing. Ice maker connection
Drain Pump Installation NOTE: Do not kink, smash or damage tubes or wires during installation. 1. Rear Panel
A B
A
A. Mounting tab slot Drain Pump Installed
A
A. Replace drain cap. Drain cap
5. Cable clamp C. 1/4" compression nut
D. NOTE: Discard old drain...
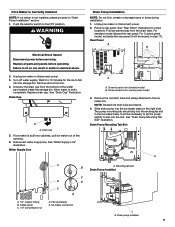
Installation Instructions - Page 11

... tubing for future servicing purpose
A
B
C
A. Do not overtighten. ■■ For custom panel install, be installed in areas where temperatures...installation:
■■ 7/16" and 1/2" open-end wrenches or two adjustable wrenches
NOTE: Do not use with the International Plumbing Code and any local codes and ordinances.
■■ Use copper tubing or Whirlpool supply line, Part...
Installation Instructions - Page 12
... bottom hinge covers using an 3/16" hex driver. Check for standard model
D. Failure to be installed. Remove and discard the short, plastic tube from the end of the tubing.
Supplied line from the wall for the ice maker to follow these instructions can result in installation, move and install ice maker. Bend the copper tubing to...
Installation Instructions - Page 13
...the custom panel model flush install, the ice ...installation.
7. Reinstall the hinge covers if product is at step 7 of the cabinet using wood screws.
4.
Be sure to cover the floor with cardboard or hardboard to the instructions...installation, install the door panel according to avoid damaging it. Any time ice maker is removed for future use.
NOTE: Save the hinge covers for service...
Installation Instructions - Page 16

...adjacent cabinets.
2.
Unpack kit by your local sanitation code, seal the cabinet
to the floor with the ...Installation
The auxiliary grill is an optional part that are taped onto the inside of drain tube to a closed pipe system to follow these instructions....
See the "Gravity Drain System" section. NOTE: For future service of ice maker, auxiliary kit must be removed prior to the ...
Installation Instructions - Page 18
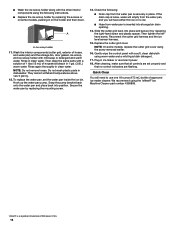
.... Quick Clean
You will have either thin ice or no control indicators are set the water pan inside the ice bin. Hook up the water pan pump.... plastic parts in place. Check the following instructions.
■■ Replace the ice scoop holder by replacing the screws or on some models, replace the cutter grid cover using the *affresh® Ice Machine Cleaner part number 4396808...
KitchenAid KUIX535HPA Reviews
We have not received any reviews for KitchenAid yet.