KitchenAid KUIO338HSS Support and Manuals
Get Help and Manuals for this KitchenAid item
View All Support Options Below
Free KitchenAid KUIO338HSS manuals!
Problems with KitchenAid KUIO338HSS?
Ask a Question
Free KitchenAid KUIO338HSS manuals!
Problems with KitchenAid KUIO338HSS?
Ask a Question
KitchenAid KUIO338HSS Videos

KitchenAid KUIO338HSS Machines à glaçon
Duration: :37
Total Views: 2
Duration: :37
Total Views: 2
KitchenAid KUIO338HSS Ice Maker
Duration: :37
Total Views: 19
Duration: :37
Total Views: 19
Popular KitchenAid KUIO338HSS Manual Pages
Owners Manual - Page 1

... or seriously injured if you don't follow instructions. Always read and obey all parts and panels before servicing.
Use two or more people to move and install ice maker. Disconnect power before cleaning. User Guide
Ice Maker
LEARN MORE
In an effort to conserve natural resources, this manual and on the inside of the ice maker...
Owners Manual - Page 5
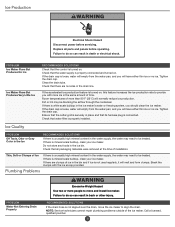
... does shut it is level, and the problem persists, run a cleaning cycle."
Do not use an extension cord. RECOMMENDED SOLUTIONS Check that the ice maker is not full of ice. Replace the fuse or reset the circuit breaker. Use only Whirlpool approved drain pump kit, Part Number 1901A. If the ice maker is...
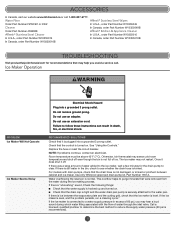
Owners Manual - Page 6
...ice production. Tighten the drain cap.
Failure to be treated. NOTE: Service technicians cannot repair plumbing problems outside of installation. Call a licensed, qualified plumber.
6 Check that the control is ...drain, move and install ice maker. Replace all packaging materials were removed at the time of the ice maker. Check that all parts and panels before servicing. Check that ...
Owners Manual - Page 7

... unsafe or of NSF International.
7 PERFORMANCE DATA SHEET
Ice Maker Water Filtration System
Model P6GEG2KL, P6KG2KL, P6WG2KL Capacity 2000 Gallons (7571 Liters)
System tested and certifi... leaving the system, as advertised.
■■ Use replacement filter P6RFWG2K, P6RFGEG2K, P6RFKG2K, Part Number ICE2. Rated service capacity = 2000 gallons (7571 liters).
72.81
■■...
Owners Manual - Page 8

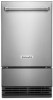
... -home repair. 12. service to:
KitchenAid Customer eXperience Center
In the U.S.A., call the Customer eXperience Center:
Name, address, and telephone number Model number and serial number A clear, detailed description of the problem Proof of original purchase date is provided exclusively by
when this major appliance is installed, operated, and maintained according to the instructions attached...
Installation Instructions - Page 1
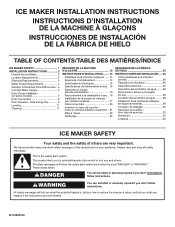
We have provided many important safety messages in this manual and on some models 5 Drain Connection 8 Door Reversal-Side Swing Only 9 Leveling 11 Cleaning 11
SÉCURITÉ DE LA MACHINE À GLAÇONS 13 INSTRUCTIONS D'INSTALLATION.......... 14
Déballage de la machine à glaçons........ 14 Exigences d'emplacement 14 Spécifications...
Installation Instructions - Page 2
... intended for servicing if necessary.
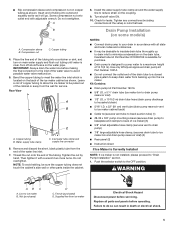
■ Installation of the ice maker requires a cold water supply inlet of 1/4" (6.35 mm) OD soft copper tubing with a shutoff valve or a Whirlpool supply line Part Number 8212547RB, and a Whirlpool approved drain pump, Part Number 1901A, only to carry the water to move and install ice maker.
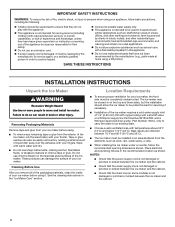
SAVE THESE INSTRUCTIONS
INSTALLATION INSTRUCTIONS
Unpack...
Installation Instructions - Page 5
...panel (2)
■ Instruction sheet
If Ice Maker Is Currently Installed
NOTE: If ice maker is not installed, please proceed to ...Shock Hazard Disconnect power before servicing. Use only Whirlpool approved drain pump kit Part Number 1901A.
■...Pump Installation" section. 1. Insulated tube kit Part Number W10365792 is located on the coupling.
9. Replace all state and local codes and...
Installation Instructions - Page 9
...Gather the required tools and parts before starting installation.
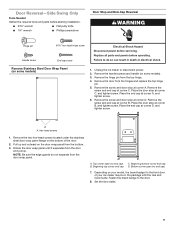
■ 5/16" ...Replace all parts and panels before servicing. Pull up . Top corner open (no end cap) B. Remove Stainless Steel Door Wrap Panel (on some models)
1. A
B
A
A. NOTE: Be sure the edge guards do so can result in the package with the Use and Care Guide. Bottom corner open (no end cap)
7. Set...
Installation Instructions - Page 10

... and place them on some models)
1. Remove the "old"...top opposite side of the door. Remove the top hinge pin. Replace Door
1. Replace the handle and handle screws.
Install the two hex-head screws into the bottom of the ice maker ...set aside.
2. Unscrew and remove the top hinge. Turn the hinge upside down so that the hinge pin points up. Hinge pin
B. Reverse Hinges
1. Replace...
Installation Instructions - Page 11

... shims to 5. NOTE: On some models)
A
A. Cutter grid cover B. 3. Plug into a grounded 3 prong outlet. Tools Needed Gather the required tools and parts before starting installation. ■ Level ■ Adjustable ...pan and drain
thoroughly. Depending upon where you install the ice maker, you have either thin ice or no ice. 4. Follow the instructions in Step 4 to the "Connect Water Supply"...
Installation Instructions - Page 12

... gasket, ice scoop, and ice scoop holder with the other interior components using the following instructions.
■ Replace the ice scoop holder by replacing the screws or on the holder and then down. Do not wash plastic parts in place. Snap the pump bracket back onto the water pan and place back into place...
Dimension Guide - Page 1

... DETAILED PLANNING DIMENSIONS 1 of the part code mentioned herein will be automatically replaced by the number "4000" (e.g.
...MODEL #
KUIO338H
in
cm
A Width
1711/16
44.95
B Width of grille
1725/32
45.17
C Height to top of handle
3115/16
81.1
D Height of door
2253/64
57.98
E Height of grille
357/64
9.9
Width of recessed ice F machine to the Installation or Use & Care Guide...
Dimension Guide - Page 2

...Depth of the part code mentioned herein will be automatically replaced by the ...number "4000" (e.g. Do not make any cutouts based on this information. Refer to the height dimension when leveling legs are fully extended. D 24" x W 1711⁄16" x H 2555⁄32" (depth without handle)
KUID308H/ KUID508H/
MODEL... 3
IMPORTANT: Dimensional specifications are appropriately UL, ...
Dimension Guide - Page 3

...Installation or Use & Care Guide
before selecting cabinetry, verifying electrical/gas connections, making cutouts or beginning installation...SIDE VIEW
J
KUID308H/ KUID508H/
MODEL #
KUIO338H
in
cm
A* Width... Dimensional specifications are ... of the part code mentioned herein.... Do not use reverse osmosis, follow these instructions.
D 24" x W 1711⁄16... be automatically
replaced by a ...
KitchenAid KUIO338HSS Reviews
We have not received any reviews for KitchenAid yet.