User Guide
Page 3
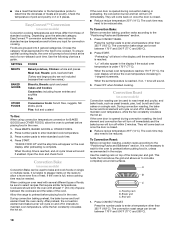
... a fire or explosion may result causing property damage, personal injury or death. - Installation and service must be performed by a qualified installer, service agency or the gas supplier. WARNING: This product contains a chemical known to the State of California to cause cancer, birth defects, or other reproductive harm, and requires businesses to... warn of potential exposure to some of the substances listed, including benzene, formaldehyde, carbon monoxide, toluene, and soot. 3 RANGE SAFETY Your safety and the safety of others .
... a fire or explosion may result causing property damage, personal injury or death. - Installation and service must be performed by a qualified installer, service agency or the gas supplier. WARNING: This product contains a chemical known to the State of California to cause cancer, birth defects, or other reproductive harm, and requires businesses to... warn of potential exposure to some of the substances listed, including benzene, formaldehyde, carbon monoxide, toluene, and soot. 3 RANGE SAFETY Your safety and the safety of others .
User Guide
Page 4
...size should be adjusted so it does not extend beyond the edge of the cooking utensil. Anti-Tip Bracket Range Foot Making sure the anti-tip bracket is installed: • Slide range forward. • Look for details. Do not cut or remove the grounding prong from the misuse of the... appliance doors or drawers such as aluminum foil. TO CHECK IF THE DEVICES ARE INSTALLED PROPERLY, SLIDE RANGE FORWARD, LOOK FOR ANTI-TIP BRACKET SECURELY ATTACHED TO FLOOR, AND SLIDE RANGE BACK SO REAR RANGE FOOT IS UNDER ANTI-TIP BRACKET. s CAUTION: Do not store items of interest to children ...
...size should be adjusted so it does not extend beyond the edge of the cooking utensil. Anti-Tip Bracket Range Foot Making sure the anti-tip bracket is installed: • Slide range forward. • Look for details. Do not cut or remove the grounding prong from the misuse of the... appliance doors or drawers such as aluminum foil. TO CHECK IF THE DEVICES ARE INSTALLED PROPERLY, SLIDE RANGE FORWARD, LOOK FOR ANTI-TIP BRACKET SECURELY ATTACHED TO FLOOR, AND SLIDE RANGE BACK SO REAR RANGE FOOT IS UNDER ANTI-TIP BRACKET. s CAUTION: Do not store items of interest to children ...
User Guide
Page 5
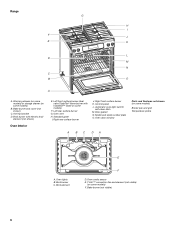
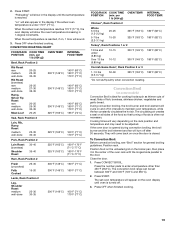
... Btu/h) E. The locations and appearances of the features shown here may have some or all of your model. Left rear control knob (6000 Btu/h) D. The range you have purchased may not match those of the items listed. Surface burner locator B. Right rear control knob (12,500 Btu/h) Glass Touch-Activated Electronic...
... Btu/h) E. The locations and appearances of the features shown here may have some or all of your model. Left rear control knob (6000 Btu/h) D. The range you have purchased may not match those of the items listed. Surface burner locator B. Right rear control knob (12,500 Btu/h) Glass Touch-Activated Electronic...
User Guide
Page 6
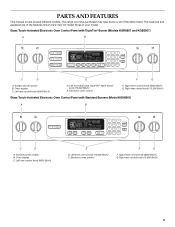
... A. Oven vent H. Model and serial number plate O. Bake burner and cover (not shown) C. Anti-tip bracket D. Broil element E F D. Right front surface burner K. Oven cavity sensor E. Range G H I . Left rear surface burner G. Right rear surface burner J. Automatic oven light switch/ self-clean latch M. Door gasket N. Oven lights B.
... A. Oven vent H. Model and serial number plate O. Bake burner and cover (not shown) C. Anti-tip bracket D. Broil element E F D. Right front surface burner K. Oven cavity sensor E. Range G H I . Left rear surface burner G. Right rear surface burner J. Automatic oven light switch/ self-clean latch M. Door gasket N. Oven lights B.
User Guide
Page 7
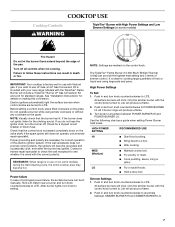
... Units]) can be lit manually. Only the simmer burner with the correct polarity. Simmer Settings 1. If you wish to LITE. REMEMBER: When range is ideal for cooking large quantities of the pan. Use the following chart as a guide when setting Power Burner heat levels. s Bring liquid... provide correct polarity, the igniters will click. All 3 burner rings will click. s Hold a slow boil. Push in use LP Gas, an LP Gas Conversion Kit is pressed completely down on some models) OFF Lite SHIMi MEMReBdURLNoER R Lo Fire Hazard Do not let the burner flame extend...
... Units]) can be lit manually. Only the simmer burner with the correct polarity. Simmer Settings 1. If you wish to LITE. REMEMBER: When range is ideal for cooking large quantities of the pan. Use the following chart as a guide when setting Power Burner heat levels. s Bring liquid... provide correct polarity, the igniters will click. All 3 burner rings will click. s Hold a slow boil. Push in use LP Gas, an LP Gas Conversion Kit is pressed completely down on some models) OFF Lite SHIMi MEMReBdURLNoER R Lo Fire Hazard Do not let the burner flame extend...
User Guide
Page 8
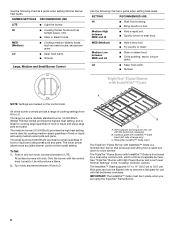
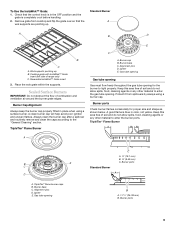
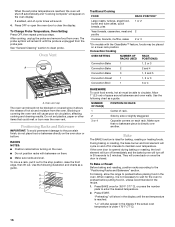
... and using medium-sized pots and pans. The medium burner (12,500 Btu/h) provides the high heat setting, and is ideal for small quantities of range only) C. All surface burners will produce a flame. 2. Only the burner with flat-bottomed cookware. Cooktop grate with flat-bottomed cookware) B. B C A. MED (Medium) s Hold... InstaWok™ Grate is functioned by a dual valve control knob, which controls 2 separate burners. The InstaWok™ Grate supports 12" to 14" (30.5 cm to LO. IMPORTANT: The InstaWok™ Grate must be flipped over to a boil.
... and using medium-sized pots and pans. The medium burner (12,500 Btu/h) provides the high heat setting, and is ideal for small quantities of range only) C. All surface burners will produce a flame. 2. Only the burner with flat-bottomed cookware. Cooktop grate with flat-bottomed cookware) B. B C A. MED (Medium) s Hold... InstaWok™ Grate is functioned by a dual valve control knob, which controls 2 separate burners. The InstaWok™ Grate supports 12" to 14" (30.5 cm to LO. IMPORTANT: The InstaWok™ Grate must be flipped over to a boil.
User Guide
Page 9
... Grate insert (left side of combustion and ventilation air around the burner grate edges. Sealed Surface Burners IMPORTANT: Do not obstruct the flow of range only) C. Igniter E. Burner base C. Protect it from cooktop and flip the grate over so that the control knob is in place when ... a spillover and routinely remove and clean the caps according to light properly. Burner ports 9 Burner base C. Gas tube opening Gas tube opening Gas must flow freely throughout the gas tube opening for proper size and shape as shown below. Keep this area free of soil and do not ...
... Grate insert (left side of combustion and ventilation air around the burner grate edges. Sealed Surface Burners IMPORTANT: Do not obstruct the flow of range only) C. Igniter E. Burner base C. Protect it from cooktop and flip the grate over so that the control knob is in place when ... a spillover and routinely remove and clean the caps according to light properly. Burner ports 9 Burner base C. Gas tube opening Gas tube opening Gas must flow freely throughout the gas tube opening for proper size and shape as shown below. Keep this area free of soil and do not ...

User Guide
Page 12
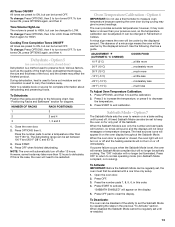
... and counts down the control panel pads to unlock and remove "CONTROL LOCK" from MIN/SEC and HR/MIN. 2. will be used either when the range is the default setting, but can also press the OPTIONS selection pad and number pad to set time ends, timer completion tones will sound, then...
... and counts down the control panel pads to unlock and remove "CONTROL LOCK" from MIN/SEC and HR/MIN. 2. will be used either when the range is the default setting, but can also press the OPTIONS selection pad and number pad to set time ends, timer completion tones will sound, then...
User Guide
Page 13
...To Deactivate: The oven can be disabled of the Sabbath. Various factors, such as a guide. Close the oven door. 2. The dehydrating range can be turned OFF. Option 6 IMPORTANT: Do not use a thermometer to measure oven temperature because opening the oven door during cycling may.... ADJUSTMENT °F (AUTOMATIC °C CHANGE) COOKS FOOD 10°F (5°C) ...a little more 20°F (10°C) ...moderately more 30°F (15°C) ...much more than your previous oven, so the temperature calibration can be changed in the previous "To Activate" section. NOTE...
...To Deactivate: The oven can be disabled of the Sabbath. Various factors, such as a guide. Close the oven door. 2. The dehydrating range can be turned OFF. Option 6 IMPORTANT: Do not use a thermometer to measure oven temperature because opening the oven door during cycling may.... ADJUSTMENT °F (AUTOMATIC °C CHANGE) COOKS FOOD 10°F (5°C) ...a little more 20°F (10°C) ...moderately more 30°F (15°C) ...much more than your previous oven, so the temperature calibration can be changed in the previous "To Activate" section. NOTE...
User Guide
Page 14
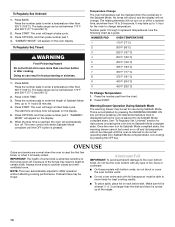
... room. To Regularly Set, Timed: WARNING Food Poisoning Hazard Do not let food sit in oven more than 325°F (163°C). The bake range can be able to move birds to the oven bottom finish, do not line the oven bottom with bottom vents, do not block or cover... and 500°F (77°C and 260°C). 2. Number pads 1 through 0 represent temperatures. Once the oven is in the Sabbath Mode. Press BAKE. The bake range can result in death to enter a temperature other than the dish and that it is pressed. Press START. The oven will begin a bake cycle. 3. Press...
... room. To Regularly Set, Timed: WARNING Food Poisoning Hazard Do not let food sit in oven more than 325°F (163°C). The bake range can be able to move birds to the oven bottom finish, do not line the oven bottom with bottom vents, do not block or cover... and 500°F (77°C and 260°C). 2. Number pads 1 through 0 represent temperatures. Once the oven is in the Sabbath Mode. Press BAKE. The bake range can result in death to enter a temperature other than the dish and that it is pressed. Press START. The oven will begin a bake cycle. 3. Press...
User Guide
Page 16
..., the bake burner and broil element will cycle on and off automatically and "Cooking Complete" will appear on a lower rack position. For baking, allow the range to preheat before placing food in the display until the probe is unplugged from the probe jack. Press START. "Preheating" will show in the oven... or covered since it is opened during baking or roasting, the broil element will turn off immediately and the bake burner will also appear in 30 seconds to preheat before turning on them. If the oven door is not necessary to wait for the oven to 2 minutes. They will remain ...
..., the bake burner and broil element will cycle on and off automatically and "Cooking Complete" will appear on a lower rack position. For baking, allow the range to preheat before placing food in the display until the probe is unplugged from the probe jack. Press START. "Preheating" will show in the oven... or covered since it is opened during baking or roasting, the broil element will turn off immediately and the bake burner will also appear in 30 seconds to preheat before turning on them. If the oven door is not necessary to wait for the oven to 2 minutes. They will remain ...
User Guide
Page 17
...range has both a gas burner and an electric halo element that surface areas remain exposed to the circulating air, allowing browning and crisping. Full Broil uses both the broil burner and the broil element. s For proper draining, do not cover the grid with an alternative method such as 30... foil for maximum browning coverage of the oven rack. TOTAL TIME MIN. s Choose cookie sheets without sides and roasting pans with the range. Close oven door. 2. Broiling uses direct radiant heat to avoid curling. Choose Full Broil to broil smaller amounts of juices. Choose ...
...range has both a gas burner and an electric halo element that surface areas remain exposed to the circulating air, allowing browning and crisping. Full Broil uses both the broil burner and the broil element. s For proper draining, do not cover the grid with an alternative method such as 30... foil for maximum browning coverage of the oven rack. TOTAL TIME MIN. s Choose cookie sheets without sides and roasting pans with the range. Close oven door. 2. Broiling uses direct radiant heat to avoid curling. Choose Full Broil to broil smaller amounts of juices. Choose ...
User Guide
Page 18
...enter standard cook time. 4. Press the number pads to preheat before putting food in, unless recommended in 1-degree increments. The convection roast range can be set temperature is not necessary to wait for the food to enter standard cook temperature. 3. To ensure optimal cooking results, ...pork, beef and ham (Turkey and large poultry are grouped into 3 general categories. Broiler grid C. Open the door and check food. The convection bake range can be cooked. They will also appear in the oven. 1. A B C A. When cooking an oven meal with at the end of meats and...
...enter standard cook time. 4. Press the number pads to preheat before putting food in, unless recommended in 1-degree increments. The convection roast range can be set temperature is not necessary to wait for the food to enter standard cook temperature. 3. To ensure optimal cooking results, ...pork, beef and ham (Turkey and large poultry are grouped into 3 general categories. Broiler grid C. Open the door and check food. The convection bake range can be cooked. They will also appear in the oven. 1. A B C A. When cooking an oven meal with at the end of meats and...
User Guide
Page 19
...-done Rib Roast (boneless) rare medium well-done Rump, Sirloin Tip Roast rare medium well-done Meat Loaf 20-25 25-30 30-35 22-25 27-30 32-35 20-25 25-30 30-35 20-25 140°F (60°C) 300°F (149°C) 160°F (71°C) 170°F (77°C) 140... back on and off . 3. The set between 300°F and 500°F (149°C and 260°C). 2. Press START. filets of meat; The convection broil range can be adjusted. CONVECTION ROASTING CHART FOOD/RACK COOK TIME POSITION (min. The circulating air creates a seal on some models) Convection Broil is closed.
...-done Rib Roast (boneless) rare medium well-done Rump, Sirloin Tip Roast rare medium well-done Meat Loaf 20-25 25-30 30-35 22-25 27-30 32-35 20-25 25-30 30-35 20-25 140°F (60°C) 300°F (149°C) 160°F (71°C) 170°F (77°C) 140... back on and off . 3. The set between 300°F and 500°F (149°C and 260°C). 2. Press START. filets of meat; The convection broil range can be adjusted. CONVECTION ROASTING CHART FOOD/RACK COOK TIME POSITION (min. The circulating air creates a seal on some models) Convection Broil is closed.
User Guide
Page 21
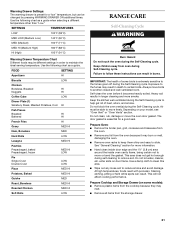
... grid, cookware and bakeware from the cooktop because they may burn or melt, damaging the oven. At high temperatures, foods react with porcelain. Failure to slide. Depending on door frame. s Hand clean inside door edge and the 1½" (3.8 cm) area around the inside oven cavity frame, being certain not...Double Crust LOW LOW Pizza MED HI Potatoes, Baked MED HI Quiche MED Roast, Boneless MED HI Roasted Chicken MED HI Soft Rolls LOW RANGE CARE Self-Cleaning Cycle WARNING Burn Hazard Do not touch the oven during self-cleaning to remove soil. Do not block the oven vent...
... grid, cookware and bakeware from the cooktop because they may burn or melt, damaging the oven. At high temperatures, foods react with porcelain. Failure to slide. Depending on door frame. s Hand clean inside door edge and the 1½" (3.8 cm) area around the inside oven cavity frame, being certain not...Double Crust LOW LOW Pizza MED HI Potatoes, Baked MED HI Quiche MED Roast, Boneless MED HI Roasted Chicken MED HI Soft Rolls LOW RANGE CARE Self-Cleaning Cycle WARNING Burn Hazard Do not touch the oven during self-cleaning to remove soil. Do not block the oven vent...
User Guide
Page 23
...cool and empty before cleaning. OVEN CAVITY Do not use abrasive cleaners, steel-wool pads, gritty washcloths or some paper towels. Unplug range or disconnect power. 2. Plug in the back of the oven counterclockwise to soft cloth or sponge, not directly on some models). ...) ammonia to 1 gal. (3.75 L) water: Soak for both) s KitchenAid® Stainless Steel Cleaner and Polish (sample included): See "Assistance or Service" section to slide. Do not soak knobs. Remove racks or they will help them slide. COOKTOP CONTROLS Do not use steel wool, abrasive cleansers or oven cleaner....
...cool and empty before cleaning. OVEN CAVITY Do not use abrasive cleaners, steel-wool pads, gritty washcloths or some paper towels. Unplug range or disconnect power. 2. Plug in the back of the oven counterclockwise to soft cloth or sponge, not directly on some models). ...) ammonia to 1 gal. (3.75 L) water: Soak for both) s KitchenAid® Stainless Steel Cleaner and Polish (sample included): See "Assistance or Service" section to slide. Do not soak knobs. Remove racks or they will help them slide. COOKTOP CONTROLS Do not use steel wool, abrasive cleansers or oven cleaner....
User Guide
Page 24
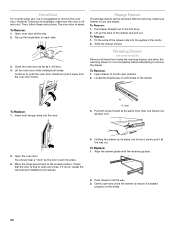
... and installation procedures. 4. Check that the door is free to push the oven door closed . 3. Fit the ends of the drawer rails into place. 3. Slide the drawer closed and pull it away from inside the warming drawer, and allow the warming drawer to cool completely before attempting to the first... door all the way. 3. Before removing, make sure the oven is off and cool. To Replace: 1. If it will shut. 4. Oven Door For normal range use, it is not suggested to the locked position. Push drawer in the cavity. 2. The oven door is set into the guides in all the...
... and installation procedures. 4. Check that the door is free to push the oven door closed . 3. Fit the ends of the drawer rails into place. 3. Slide the drawer closed and pull it away from inside the warming drawer, and allow the warming drawer to cool completely before attempting to the first... door all the way. 3. Before removing, make sure the oven is off and cool. To Replace: 1. If it will shut. 4. Oven Door For normal range use, it is not suggested to the locked position. Push drawer in the cavity. 2. The oven door is set into the guides in all the...
User Guide
Page 25
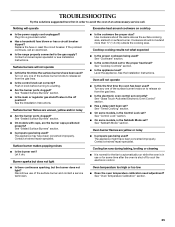
...adjustment? TROUBLESHOOTING Try the solutions suggested here first in order to a setting. If the problem continues, call . s Is the range properly connected to cool the electronic control. The appliance might have been converted improperly. Contact a trained repair specialist. See "Sealed ...Surface Burners" section. See "Glass Touch-Activated Electronic Oven Control" section. Oven burner flames are yellow or noisy s Is propane gas being used ? Plug into a grounded outlet. s Is the cookware the proper size? See "Cooktop Controls" section. s Has a delay...
...adjustment? TROUBLESHOOTING Try the solutions suggested here first in order to a setting. If the problem continues, call . s Is the range properly connected to cool the electronic control. The appliance might have been converted improperly. Contact a trained repair specialist. See "Sealed ...Surface Burners" section. See "Glass Touch-Activated Electronic Oven Control" section. Oven burner flames are yellow or noisy s Is propane gas being used ? Plug into a grounded outlet. s Is the cookware the proper size? See "Cooktop Controls" section. s Has a delay...
User Guide
Page 28
...must provide proof of purchase or installation date for in which it is used in materials or workmanship and is reported to KitchenAid within 30 days from the date of purchase. 6. Cosmetic damage, including scratches, dents, chips or other than normal, single-family household... date 28 Expenses for travel and transportation for product service if your authorized KitchenAid dealer to better help by checking the "Assistance or Service" section or by this warranty. 7. KITCHENAID® GAS RANGE WARRANTY LIMITED WARRANTY For one year from the date of purchase, when this...
...must provide proof of purchase or installation date for in which it is used in materials or workmanship and is reported to KitchenAid within 30 days from the date of purchase. 6. Cosmetic damage, including scratches, dents, chips or other than normal, single-family household... date 28 Expenses for travel and transportation for product service if your authorized KitchenAid dealer to better help by checking the "Assistance or Service" section or by this warranty. 7. KITCHENAID® GAS RANGE WARRANTY LIMITED WARRANTY For one year from the date of purchase, when this...


