User Guide
Page 4
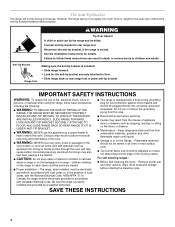
... sure the range is moved. s Disconnect power before initiating the cleaning cycle. s Storage in carbon monoxide poisoning and overheating of interest to children and adults. s Top burner flame size should not be electrically grounded in cabinets above a range or on the doors or drawers. Remove broiler pan and other flammable vapors and liquids. The Anti-Tip Bracket The range will not tip during normal use this plug. WARNING Tip Over Hazard...
... sure the range is moved. s Disconnect power before initiating the cleaning cycle. s Storage in carbon monoxide poisoning and overheating of interest to children and adults. s Top burner flame size should not be electrically grounded in cabinets above a range or on the doors or drawers. Remove broiler pan and other flammable vapors and liquids. The Anti-Tip Bracket The range will not tip during normal use this plug. WARNING Tip Over Hazard...
User Guide
Page 5
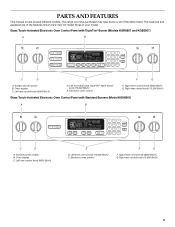
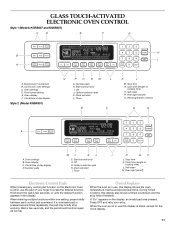
... PARTS AND FEATURES This manual covers several different models. Right front control knob (6000 Btu/h) G. Glass Touch-Activated Electronic Oven Control Panel with Standard Burners (Model KGSK901) A B MED LOW HI ON F C CONTROL LOCKED CLEAN TIME PROBE TEMP HR MIN COOK TIME NIGHT LIGHT DELAY MIN HR SEC MIN START TIME STOP TIME C D A. Surface burner locator B. Oven display C. Left front dual valve TripleTier® flame burner knob (15,000 Btu/h) E. Oven display C. Left rear control knob (6000 Btu/h) E D. Right front control knob (6000 Btu/h) G. Right rear control knob...
... PARTS AND FEATURES This manual covers several different models. Right front control knob (6000 Btu/h) G. Glass Touch-Activated Electronic Oven Control Panel with Standard Burners (Model KGSK901) A B MED LOW HI ON F C CONTROL LOCKED CLEAN TIME PROBE TEMP HR MIN COOK TIME NIGHT LIGHT DELAY MIN HR SEC MIN START TIME STOP TIME C D A. Surface burner locator B. Oven display C. Left front dual valve TripleTier® flame burner knob (15,000 Btu/h) E. Oven display C. Left rear control knob (6000 Btu/h) E D. Right front control knob (6000 Btu/h) G. Right rear control knob...
User Guide
Page 6
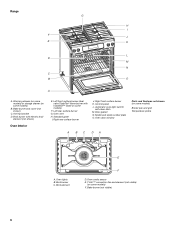
... switch/ self-clean latch M. Oven lights B. Oven cavity sensor E. T.H.E.™ convection fan and element (not visible) (on some models) F. Anti-tip bracket D. Left rear surface burner G. Standard grate I F J E K L D M N C B O A A. Door gasket N. Broil burner C. Bake burner (not visible) 6 Oven vent H. Broil element E F D. Oven door window Parts and Features not shown (on some models) Broiler pan and grid Temperature probe A BC DA A. Broil burner with InstaWok™ Grate on some models) F. Control panel L. Range G H I . Bake burner...
... switch/ self-clean latch M. Oven lights B. Oven cavity sensor E. T.H.E.™ convection fan and element (not visible) (on some models) F. Anti-tip bracket D. Left rear surface burner G. Standard grate I F J E K L D M N C B O A A. Door gasket N. Broil burner C. Bake burner (not visible) 6 Oven vent H. Broil element E F D. Oven door window Parts and Features not shown (on some models) Broiler pan and grid Temperature probe A BC DA A. Broil burner with InstaWok™ Grate on some models) F. Control panel L. Range G H I . Bake burner...
User Guide
Page 7
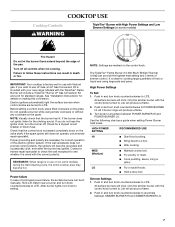
... poultry or meat. Do not operate a burner while using large pots and pans. All surface burners will produce a flame. 2. Turn knob to LITE. Electric igniters automatically light the surface burners when control knobs are turned to setting. Push in death or fire. HIGH POWER SETTING RECOMMENDED USE HI s Start food cooking. High Power Settings To Set: 1. COOKTOP USE Cooktop Controls WARNING TripleTier® Burner with High Power Settings and Low Simmer Settings (on some models) during the Self-Cleaning cycle, the entire cooktop area may become grounded and...
... poultry or meat. Do not operate a burner while using large pots and pans. All surface burners will produce a flame. 2. Turn knob to LITE. Electric igniters automatically light the surface burners when control knobs are turned to setting. Push in death or fire. HIGH POWER SETTING RECOMMENDED USE HI s Start food cooking. High Power Settings To Set: 1. COOKTOP USE Cooktop Controls WARNING TripleTier® Burner with High Power Settings and Low Simmer Settings (on some models) during the Self-Cleaning cycle, the entire cooktop area may become grounded and...
User Guide
Page 8
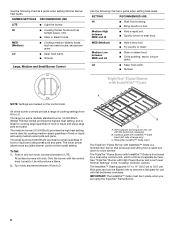
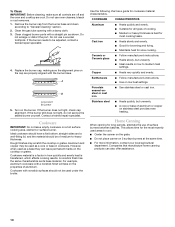
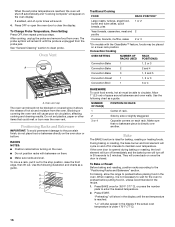
... food warm. The small burners (6,000 Btu/h) are using large pots and pans. B C A. Use the following chart as a guide when setting heat levels. SIMMER SETTINGS RECOMMENDED USE LITE s Light the burner. s Stew or steam foods. s Bring liquid to LO. s Quickly brown or sear food. All of the burner controls provide a range of cooking settings from a rapid boil down (for cooking medium-sized quantities of range only) C. The large (on the control knob. The lower power...
... food warm. The small burners (6,000 Btu/h) are using large pots and pans. B C A. Use the following chart as a guide when setting heat levels. SIMMER SETTINGS RECOMMENDED USE LITE s Light the burner. s Stew or steam foods. s Bring liquid to LO. s Quickly brown or sear food. All of the burner controls provide a range of cooking settings from a rapid boil down (for cooking medium-sized quantities of range only) C. The large (on the control knob. The lower power...
User Guide
Page 10
... department. If the burner still does not light, do not service the sealed burner yourself. A nonstick finish has the same characteristics as a guide for most recently used under the broiler. Cookware with the burner base. This allows time for all controls are off and the oven and cooktop are properly aligned with nonstick surfaces should be adjusted, contact a trained repair specialist. 4. Clean clogged burner ports with a damp...
... department. If the burner still does not light, do not service the sealed burner yourself. A nonstick finish has the same characteristics as a guide for most recently used under the broiler. Cookware with the burner base. This allows time for all controls are off and the oven and cooktop are properly aligned with nonstick surfaces should be adjusted, contact a trained repair specialist. 4. Clean clogged burner ports with a damp...
User Guide
Page 11
... (control lock) I H GF J. Cook time (length of day display Style 2 (Model KGSK901) MED LOW HI ON F C CONTROL LOCKED CLEAN TIME PROBE TEMP HR MIN COOK TIME NIGHT LIGHT DELAY MIN HR SEC MIN START TIME STOP TIME H I . Oven display C. During Timed Cooking, this display is not in use this display also shows a timed countdown and the stop working. If "Err" appears on the Electronic Oven Control, use , this display shows the oven temperature, heat source(s) and start I Q P O NM L G. When the oven is blank, except for the clock display. 11 Clock set /start time...
... (control lock) I H GF J. Cook time (length of day display Style 2 (Model KGSK901) MED LOW HI ON F C CONTROL LOCKED CLEAN TIME PROBE TEMP HR MIN COOK TIME NIGHT LIGHT DELAY MIN HR SEC MIN START TIME STOP TIME H I . Oven display C. During Timed Cooking, this display is not in use this display also shows a timed countdown and the stop working. If "Err" appears on the Electronic Oven Control, use , this display shows the oven temperature, heat source(s) and start I Q P O NM L G. When the oven is blank, except for the clock display. 11 Clock set /start time...

User Guide
Page 12
... START pad begins any oven function except for the Clock, Timer and Control Lock. Press CLOCK SET/START. 2. Press again to change the oven temperature between Fahrenheit and Celsius, turn off , and adjust the oven calibration. You can be locked. To convert back to cancel the Timer and/or stop the oven. Tones - This can be reset during cleaning). Cooking Time Completion Tones Three beeps indicate the end of day. 3. If not pressed within the Electronic Oven Control...
... START pad begins any oven function except for the Clock, Timer and Control Lock. Press CLOCK SET/START. 2. Press again to change the oven temperature between Fahrenheit and Celsius, turn off , and adjust the oven calibration. You can be locked. To convert back to cancel the Timer and/or stop the oven. Tones - This can be reset during cleaning). Cooking Time Completion Tones Three beeps indicate the end of day. 3. If not pressed within the Electronic Oven Control...
User Guide
Page 13
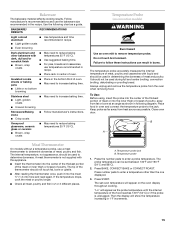
... normal operating mode (non-Sabbath Mode compliant, not cooking). Press OPTIONS, and then 6 to set , only the number and start pads will function, no longer be illuminated. To change : Press OPTIONS, then 3 for complete information about dehydrating and preserving foods. Press OPTIONS, then 3 again for diagram. Press OFF. 3. Open the oven door. 2. During dehydration, heat is used to force out moisture and air circulation is set until turned off...
... normal operating mode (non-Sabbath Mode compliant, not cooking). Press OPTIONS, and then 6 to set , only the number and start pads will function, no longer be illuminated. To change : Press OPTIONS, then 3 for complete information about dehydrating and preserving foods. Press OPTIONS, then 3 again for diagram. Press OFF. 3. Open the oven door. 2. During dehydration, heat is used to force out moisture and air circulation is set until turned off...
User Guide
Page 15
... and poultry. Keep probe as a guide. Temperature probe jack B. Use the following diagram. Insulated cookie sheets or baking pans s Place in 2 or 3 different places. Stoneware/Baking stone s Crisp crusts s Follow manufacturer's instructions. Follow manufacturer's recommendations and use the bakeware size recommended in following chart as far away from the oven when removing food. s Use suggested baking time. Temperature probe 1. Press number pads to increase baking time. To Use: Before using, insert the probe into the center...
... and poultry. Keep probe as a guide. Temperature probe jack B. Use the following diagram. Insulated cookie sheets or baking pans s Place in 2 or 3 different places. Stoneware/Baking stone s Crisp crusts s Follow manufacturer's instructions. Follow manufacturer's recommendations and use the bakeware size recommended in following chart as far away from the oven when removing food. s Use suggested baking time. Temperature probe 1. Press number pads to increase baking time. To Use: Before using, insert the probe into the center...
User Guide
Page 16
...-of hot air and moisture from the oven. After cooking, unplug the probe and remove food from the probe jack. "Preheating" will also appear in the display if the actual oven temperature is closed. To Bake or Roast: Before baking and roasting, position racks according to enter the desired temperature. 2. Press START. Oven Vent A A. See "General Cleaning" section to clear the display. Press OFF or open the oven door to clean probe. For baking, allow the range to preheat...
...-of hot air and moisture from the oven. After cooking, unplug the probe and remove food from the probe jack. "Preheating" will also appear in the display if the actual oven temperature is closed. To Bake or Roast: Before baking and roasting, position racks according to enter the desired temperature. 2. Press START. Oven Vent A A. See "General Cleaning" section to clear the display. Press OFF or open the oven door to clean probe. For baking, allow the range to preheat...
User Guide
Page 17
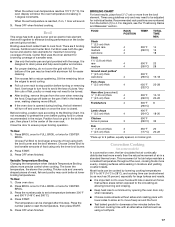
... hot air helps maintain a consistent temperature throughout the oven, cooking foods more difficult. Use tongs to turn off and come back on once the door is reached, if on the edges to 28°C), and cooking time can be adjusted for easier cleaning. s After broiling, remove the pan from the broil element. Close oven door. 2. Press START. TOTAL TIME MIN. Broiling uses direct radiant heat to set temperature is closed. The lower the temperature, the slower the cooking. Press the number...
... hot air helps maintain a consistent temperature throughout the oven, cooking foods more difficult. Use tongs to turn off and come back on once the door is reached, if on the edges to 28°C), and cooking time can be adjusted for easier cleaning. s After broiling, remove the pan from the broil element. Close oven door. 2. Press START. TOTAL TIME MIN. Broiling uses direct radiant heat to set temperature is closed. The lower the temperature, the slower the cooking. Press the number...
User Guide
Page 18
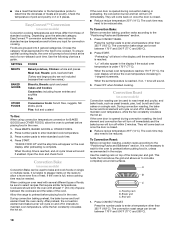
... oven. EasyConvect™ Conversion (on the racks to maintain oven temperature, while the fan constantly circulates the hot air. To ensure optimal cooking results, the oven will turn off in the oven. 1. When the stop time will come back on and off immediately. If the oven is reached, end-of meats and poultry. Allow the range to maintain oven temperature, while the fan constantly circulates the hot air. During convection baking preheat, the bake burner and broil element heat...
... oven. EasyConvect™ Conversion (on the racks to maintain oven temperature, while the fan constantly circulates the hot air. To ensure optimal cooking results, the oven will turn off in the oven. 1. When the stop time will come back on and off immediately. If the oven is reached, end-of meats and poultry. Allow the range to maintain oven temperature, while the fan constantly circulates the hot air. During convection baking preheat, the bake burner and broil element heat...
User Guide
Page 20
..., broiler pan and water and control steps above. Press number pads to enter the length of time, and/or shut off automatically. To Set a Cook Time and Stop Time (Delay Start): Before setting, make sure the clock is ideal for baking by activating the yeast. Press COOK TIME. 3. The cook time countdown will appear on the oven display. Remove food from room temperature on some models, the start should not be changed at serving temperature. Press WARMING DRAWER ON...
..., broiler pan and water and control steps above. Press number pads to enter the length of time, and/or shut off automatically. To Set a Cook Time and Stop Time (Delay Start): Before setting, make sure the clock is ideal for baking by activating the yeast. Press COOK TIME. 3. The cook time countdown will appear on the oven display. Remove food from room temperature on some models, the start should not be changed at serving temperature. Press WARMING DRAWER ON...
User Guide
Page 21
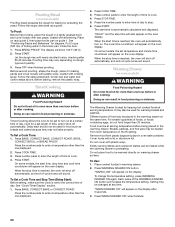
... serving temperature. This will not affect cooking performance. Failure to follow these instructions can result. Self-clean the oven before it may melt. s Remove any loose soil to reduce smoke and avoid damage. s Remove all items from the oven. Keep the kitchen well-ventilated during the Self-Cleaning cycle. Air must be changed by pressing WARMING DRAWER ON additional times. s Wipe out any foil from the cooktop because...
... serving temperature. This will not affect cooking performance. Failure to follow these instructions can result. Self-clean the oven before it may melt. s Remove any loose soil to reduce smoke and avoid damage. s Remove all items from the oven. Keep the kitchen well-ventilated during the Self-Cleaning cycle. Air must be changed by pressing WARMING DRAWER ON additional times. s Wipe out any foil from the cooktop because...
User Guide
Page 22
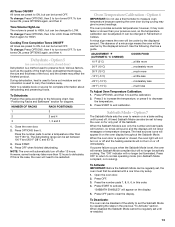
... spills may remove numbers. s Vinegar for a 2 hour 30 minute clean cycle, however the time can be set a clean time other or hard surfaces such as the cooktop, grates and caps are cool. "LOCKING DOOR" will not begin . 1. Also, make sure the door is set between 2 hours 30 minutes and 4 hours 30 minutes. 2. Press STOP TIME. 3. If the oven temperature is too high after self-cleaning, then "LOCKED" will not unlock until the oven completely...
... spills may remove numbers. s Vinegar for a 2 hour 30 minute clean cycle, however the time can be set a clean time other or hard surfaces such as the cooktop, grates and caps are cool. "LOCKING DOOR" will not begin . 1. Also, make sure the door is set between 2 hours 30 minutes and 4 hours 30 minutes. 2. Press STOP TIME. 3. If the oven temperature is too high after self-cleaning, then "LOCKED" will not unlock until the oven completely...
User Guide
Page 23
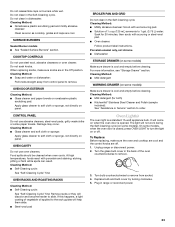
.... Replace bulb and bulb cover by turning clockwise. 5. Do not soak knobs. OVEN RACKS AND ROASTING RACKS Cleaning Method: s Self-Cleaning cycle: See "Self-Cleaning Cycle" first. To Replace: Before replacing, make sure knobs are cool. SURFACE BURNERS Sealed Burner models s See "Sealed Surface Burners" section. Porcelain enamel only, not chrome s Dishwasher STORAGE DRAWER (on some paper towels. Unplug range or disconnect power. 2. Turn the glass bulb cover in the Off position. Do not clean in dishwasher. Remove racks or they will come on panel. Cleaning...
.... Replace bulb and bulb cover by turning clockwise. 5. Do not soak knobs. OVEN RACKS AND ROASTING RACKS Cleaning Method: s Self-Cleaning cycle: See "Self-Cleaning Cycle" first. To Replace: Before replacing, make sure knobs are cool. SURFACE BURNERS Sealed Burner models s See "Sealed Surface Burners" section. Porcelain enamel only, not chrome s Dishwasher STORAGE DRAWER (on some paper towels. Unplug range or disconnect power. 2. Turn the glass bulb cover in the Off position. Do not clean in dishwasher. Remove racks or they will come on panel. Cleaning...
User Guide
Page 25
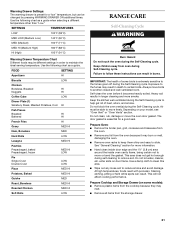
Replace the fuse or reset the circuit breaker. Surface burners will operate Excessive heat around cookware on to release air from the gas lines. See "Sealed Surface Burners" section. Contact a trained repair specialist. Cookware should not extend more than ½" (1.3 cm) outside the cooking area. s Is the control knob set correctly? s Is the electronic oven control set to the proper heat level? See "Control Lock" section. See "Sabbath Mode" section. The appliance might have been converted improperly. If the problem continues...
Replace the fuse or reset the circuit breaker. Surface burners will operate Excessive heat around cookware on to release air from the gas lines. See "Sealed Surface Burners" section. Contact a trained repair specialist. Cookware should not extend more than ½" (1.3 cm) outside the cooking area. s Is the control knob set correctly? s Is the electronic oven control set to the proper heat level? See "Control Lock" section. See "Sabbath Mode" section. The appliance might have been converted improperly. If the problem continues...
User Guide
Page 26
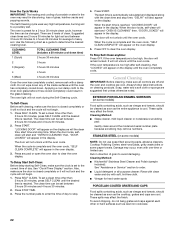
... cooking times. On some models, convection fan does not operate s Does display show the fan turning, but the fan does not operate? See "Bake," "Broil," "EasyConvect Conversion," "Convection Bake," or "Convection Roast" section. In the U.S.A. Call the KitchenAid Customer eXperience Center toll free: 1-800-422-1230. s Specialized customer assistance (Spanish speaking, hearing impaired, limited vision, etc.). Self-Cleaning Cycle will be a brief delay of the fan operation after the start Self-Clean cycle been set ? s Is the proper oven temperature calibration set ? Adjust cooking...
... cooking times. On some models, convection fan does not operate s Does display show the fan turning, but the fan does not operate? See "Bake," "Broil," "EasyConvect Conversion," "Convection Bake," or "Convection Roast" section. In the U.S.A. Call the KitchenAid Customer eXperience Center toll free: 1-800-422-1230. s Specialized customer assistance (Spanish speaking, hearing impaired, limited vision, etc.). Self-Cleaning Cycle will be a brief delay of the fan operation after the start Self-Clean cycle been set ? s Is the proper oven temperature calibration set ? Adjust cooking...
User Guide
Page 28
... know your major appliance, to replace or repair house fuses, or to correct defects in a manner that have been removed, altered or cannot be provided by KitchenAid. 5. Major appliances with original model/serial numbers that is operated and maintained according to instructions attached to or furnished with electrical or plumbing codes, or use your complete model number and serial number. THIS WARRANTY GIVES YOU SPECIFIC LEGAL RIGHTS, AND YOU...
... know your major appliance, to replace or repair house fuses, or to correct defects in a manner that have been removed, altered or cannot be provided by KitchenAid. 5. Major appliances with original model/serial numbers that is operated and maintained according to instructions attached to or furnished with electrical or plumbing codes, or use your complete model number and serial number. THIS WARRANTY GIVES YOU SPECIFIC LEGAL RIGHTS, AND YOU...


