User Guide
Page 3
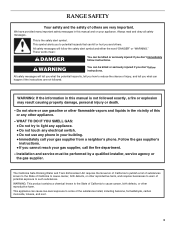
... mean: DANGER You can be performed by a qualified installer, service agency or the gas supplier. All safety messages will follow the safety alert symbol...GAS: • Do not try to reduce the chance of injury, and tell you what the potential hazard is, tell you don't immediately follow instructions. Installation...in this or any phone in this manual and on your gas supplier, call your gas supplier from a neighbor's phone. WARNING: This product contains a... personal injury or death. - Follow the gas supplier's instructions. • If you and others are not followed. WARNING You...
... mean: DANGER You can be performed by a qualified installer, service agency or the gas supplier. All safety messages will follow the safety alert symbol...GAS: • Do not try to reduce the chance of injury, and tell you what the potential hazard is, tell you don't immediately follow instructions. Installation...in this or any phone in this manual and on your gas supplier, call your gas supplier from a neighbor's phone. WARNING: This product contains a... personal injury or death. - Follow the gas supplier's instructions. • If you and others are not followed. WARNING You...
User Guide
Page 4
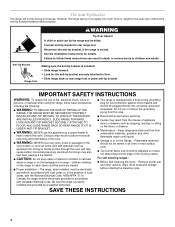
...from combustible materials, gasoline, and other utensils. TO CHECK IF THE DEVICES ARE INSTALLED PROPERLY, SLIDE RANGE FORWARD, LOOK FOR ANTI-TIP BRACKET SECURELY ATTACHED TO FLOOR, AND SLIDE RANGE BACK SO REAR RANGE FOOT IS UNDER ANTI-TIP BRACKET. Remove broiler pan and other flammable vapors and... REDUCE THE RISK OF TIPPING OF THE RANGE, THE RANGE MUST BE SECURED BY PROPERLY INSTALLED ANTI-TIP DEVICES. Anti-Tip Bracket Range Foot Making sure the anti-tip bracket is installed: • Slide range forward. • Look for details. However, the range can tip if you apply too much ...
...from combustible materials, gasoline, and other utensils. TO CHECK IF THE DEVICES ARE INSTALLED PROPERLY, SLIDE RANGE FORWARD, LOOK FOR ANTI-TIP BRACKET SECURELY ATTACHED TO FLOOR, AND SLIDE RANGE BACK SO REAR RANGE FOOT IS UNDER ANTI-TIP BRACKET. Remove broiler pan and other flammable vapors and... REDUCE THE RISK OF TIPPING OF THE RANGE, THE RANGE MUST BE SECURED BY PROPERLY INSTALLED ANTI-TIP DEVICES. Anti-Tip Bracket Range Foot Making sure the anti-tip bracket is installed: • Slide range forward. • Look for details. However, the range can tip if you apply too much ...
User Guide
Page 7
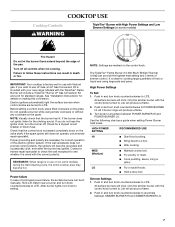
...or sauté foods. Simmer Settings 1. Only the simmer burner with the control knob turned to use LP Gas, an LP Gas Conversion Kit is wired with your new range. Electric igniters automatically light the surface burners when control knobs are marked on the control knob. NOTE: Visually check... click. MED (Medium) s Maintain a slow boil. s Fry poultry or meat. IMPORTANT: Your cooktop is in death or fire. See "Installation Instructions" for correct operation of food or liquid and using empty cookware or without any cookware on the grate. All surface burners will produce a flame...
...or sauté foods. Simmer Settings 1. Only the simmer burner with the control knob turned to use LP Gas, an LP Gas Conversion Kit is wired with your new range. Electric igniters automatically light the surface burners when control knobs are marked on the control knob. NOTE: Visually check... click. MED (Medium) s Maintain a slow boil. s Fry poultry or meat. IMPORTANT: Your cooktop is in death or fire. See "Installation Instructions" for correct operation of food or liquid and using empty cookware or without any cookware on the grate. All surface burners will produce a flame...
User Guide
Page 24
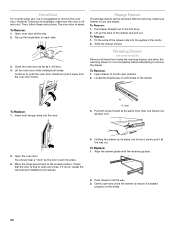
...in all the way. 2. To Remove: 1. Continue to open position. 2. Locate the blackloops on the slides. 24 If it away from inside the warming drawer, and allow the warming drawer to cool completely before ...the oven door. Move the hinge levers back to the first stop. 2. Oven Door For normal range use, it all the way out. Warming Drawer (on each side. Holding the drawer by its... sides, not its front, slowly pull it is not, repeat the removal and installation procedures. 4. Fit the ends of the drawer rails into place. 3. Flip up the back of the ...
...in all the way. 2. To Remove: 1. Continue to open position. 2. Locate the blackloops on the slides. 24 If it away from inside the warming drawer, and allow the warming drawer to cool completely before ...the oven door. Move the hinge levers back to the first stop. 2. Oven Door For normal range use, it all the way out. Warming Drawer (on each side. Holding the drawer by its... sides, not its front, slowly pull it is not, repeat the removal and installation procedures. 4. Fit the ends of the drawer rails into place. 3. Flip up the back of the ...
User Guide
Page 25
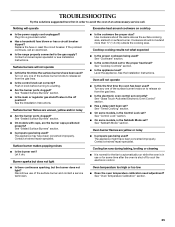
... Is the cookware the proper size? See "Glass Touch-Activated Electronic Oven Control" section. s Is the range properly connected to release air from the gas lines. See the Installation Instructions. See "Sealed Surface Burners" section. See "Timed Cooking" section. See "Sabbath Mode" section.... Oven burner flames are yellow or noisy s Is propane gas being used ? Surface burner makes popping noises ...
... Is the cookware the proper size? See "Glass Touch-Activated Electronic Oven Control" section. s Is the range properly connected to release air from the gas lines. See the Installation Instructions. See "Sealed Surface Burners" section. See "Timed Cooking" section. See "Sabbath Mode" section.... Oven burner flames are yellow or noisy s Is propane gas being used ? Surface burner makes popping noises ...
User Guide
Page 26
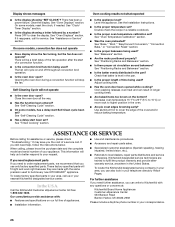
... a convection function. s Installation information. Clear the display. See "Self-Cleaning Cycle" section. s Is the proper oven temperature calibration set ? Check that you still need further assistance, you the cost of appliances. Use aluminum foil to order replacement parts, we recommend that batter is level in the oven. Call the KitchenAid Customer eXperience...
... a convection function. s Installation information. Clear the display. See "Self-Cleaning Cycle" section. s Is the proper oven temperature calibration set ? Check that you still need further assistance, you the cost of appliances. Use aluminum foil to order replacement parts, we recommend that batter is level in the oven. Call the KitchenAid Customer eXperience...
User Guide
Page 28
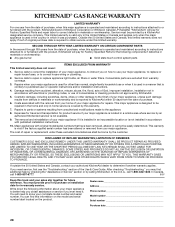
...Dealer name Address Phone number Model number Serial number Purchase date 28 KITCHENAID® GAS RANGE WARRANTY LIMITED WARRANTY For one year from the date of purchase. 6. Service must provide proof of purchase or installation date for in materials or workmanship. Proof of your major appliance to... following information about your major appliance, unless such damage results from defects in materials or workmanship and is reported to KitchenAid within 30 days from the date of consumables or cleaning products not approved by this limited warranty. Repairs to parts or systems ...
...Dealer name Address Phone number Model number Serial number Purchase date 28 KITCHENAID® GAS RANGE WARRANTY LIMITED WARRANTY For one year from the date of purchase. 6. Service must provide proof of purchase or installation date for in materials or workmanship. Proof of your major appliance to... following information about your major appliance, unless such damage results from defects in materials or workmanship and is reported to KitchenAid within 30 days from the date of consumables or cleaning products not approved by this limited warranty. Repairs to parts or systems ...


