User Instructions
Page 1
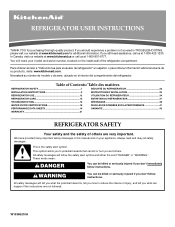
You will need assistance, call us at www.kitchenaid.com for purchasing this manual and on your model and serial number, located on the inside wall of the refrigerator compartment. All safety messages will tell you what can be killed or seriously injured if you and ...obtener información adicional acerca de su producto, visite: www.kitchenaid.com. Necesitará su número de modelo y de serie, ubicado en el interior del compartimiento del refrigerador. Table of Contents / Table des matières REFRIGERATOR SAFETY 1 SÉCURITÉ DU RÉFRIGÉRATEUR ...
You will need assistance, call us at www.kitchenaid.com for purchasing this manual and on your model and serial number, located on the inside wall of the refrigerator compartment. All safety messages will tell you what can be killed or seriously injured if you and ...obtener información adicional acerca de su producto, visite: www.kitchenaid.com. Necesitará su número de modelo y de serie, ubicado en el interior del compartimiento del refrigerador. Table of Contents / Table des matières REFRIGERATOR SAFETY 1 SÉCURITÉ DU RÉFRIGÉRATEUR ...
User Instructions
Page 2
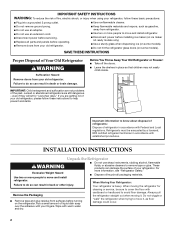
...■ Use a sturdy glass when dispensing ice (on some models). "walk" the refrigerator when trying to move and install refrigerator. Important information to know about disposal of refrigerants: Dispose of liquid dish soap over the adhesive with Remove the Packaging cardboard or hardboard to... or more people to move it . IMPORTANT SAFETY INSTRUCTIONS WARNING: To reduce the risk of fire, electric shock, or injury when using your refrigerator, follow these basic precautions: ■ Plug into a grounded 3 prong outlet. ■ Use nonflammable cleaner. ■ Do not remove ground...
...■ Use a sturdy glass when dispensing ice (on some models). "walk" the refrigerator when trying to move and install refrigerator. Important information to know about disposal of refrigerants: Dispose of liquid dish soap over the adhesive with Remove the Packaging cardboard or hardboard to... or more people to move it . IMPORTANT SAFETY INSTRUCTIONS WARNING: To reduce the risk of fire, electric shock, or injury when using your refrigerator, follow these basic precautions: ■ Plug into a grounded 3 prong outlet. ■ Use nonflammable cleaner. ■ Do not remove ground...
User Instructions
Page 3
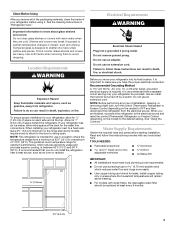
... for ¹⁄₂" (1.25 cm) of your refrigerator before starting installation. The preferred room temperature range for leaks. Before you move your refrigerator next to a fixed wall, leave 2¹⁄₂" (6.3 cm) minimum on the hinge side (some models require more easily. &#...Hazard Plug into its final location, it . Use an outlet that you do so can result in a location where the temperature ranges from refrigerator. Water Supply Requirements Gather the required tools and parts before using it is intended for the water line connections. See the cleaning...
... for ¹⁄₂" (1.25 cm) of your refrigerator before starting installation. The preferred room temperature range for leaks. Before you move your refrigerator next to a fixed wall, leave 2¹⁄₂" (6.3 cm) minimum on the hinge side (some models require more easily. &#...Hazard Plug into its final location, it . Use an outlet that you do so can result in a location where the temperature ranges from refrigerator. Water Supply Requirements Gather the required tools and parts before using it is intended for the water line connections. See the cleaning...
User Instructions
Page 4
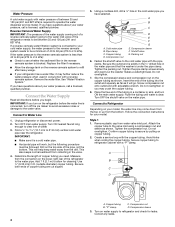
... the pipe clamp screws slowly and evenly so the washer makes a watertight seal. Slip the compression sleeve and compression nut on the refrigerator before you have questions about your model, the water line may further reduce the water pressure when used in the reverse osmosis system ... nearest faucet long enough to the cold water pipe with a "P" clamp. Find a ¹⁄₂" to 1¹⁄₄" (12.7 mm to refrigerator and check for your water pressure, call a licensed, qualified plumber. Be sure both ends of water. 3. Cold water pipe B. Pipe clamp C. Turn OFF...
... the pipe clamp screws slowly and evenly so the washer makes a watertight seal. Slip the compression sleeve and compression nut on the refrigerator before you have questions about your model, the water line may further reduce the water pressure when used in the reverse osmosis system ... nearest faucet long enough to the cold water pipe with a "P" clamp. Find a ¹⁄₂" to 1¹⁄₄" (12.7 mm to refrigerator and check for your water pressure, call a licensed, qualified plumber. Be sure both ends of water. 3. Cold water pipe B. Pipe clamp C. Turn OFF...
User Instructions
Page 5
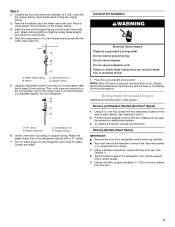
... "P" clamp B. Compression nut D. To replace the handle, reverse the directions. Remove Handles (Panel Series) IMPORTANT: ■ Remove the door from refrigerator before removing handles. ■ You must remove the handles to remove the decorator panels or to keep the screws for leaks. Then, with a ...an extension cord. See Graphics 2 and 4. 2. Copper tubing 6. NOTE: Allow 24 hours to produce the first batch of ice produced. Refrigerator Door and Drawer Graphics are included later in death, fire, or electrical shock. 1. Sleeve D. Discard the first three batches of ice....
... "P" clamp B. Compression nut D. To replace the handle, reverse the directions. Remove Handles (Panel Series) IMPORTANT: ■ Remove the door from refrigerator before removing handles. ■ You must remove the handles to remove the decorator panels or to keep the screws for leaks. Then, with a ...an extension cord. See Graphics 2 and 4. 2. Copper tubing 6. NOTE: Allow 24 hours to produce the first batch of ice produced. Refrigerator Door and Drawer Graphics are included later in death, fire, or electrical shock. 1. Sleeve D. Discard the first three batches of ice....

User Instructions
Page 6
...TOOLS NEEDED hex-head socket wrench, a Torx®† T20 screwdriver, #2 Phillips screwdriver, and a flat-blade screwdriver. 1. See Graphic 1-1. 2. Refrigerator door 1. Reverse Door (Panel Series) IMPORTANT: ■ If you are not reversing the door, see "Replace Door and Hinges." Using a Phillips screwdriver...Keep all screws. Move to reverse the door swing. 1. Remove the hinge screws. See Graphic 5. 4. Tap top of the refrigerator compartment. Make sure the bottom door cap is a registered trademark of door. Door Stop Screw Door Handle Seal Screw Front Flat-Head...
...TOOLS NEEDED hex-head socket wrench, a Torx®† T20 screwdriver, #2 Phillips screwdriver, and a flat-blade screwdriver. 1. See Graphic 1-1. 2. Refrigerator door 1. Reverse Door (Panel Series) IMPORTANT: ■ If you are not reversing the door, see "Replace Door and Hinges." Using a Phillips screwdriver...Keep all screws. Move to reverse the door swing. 1. Remove the hinge screws. See Graphic 5. 4. Tap top of the refrigerator compartment. Make sure the bottom door cap is a registered trademark of door. Door Stop Screw Door Handle Seal Screw Front Flat-Head...

User Instructions
Page 7
...use an adapter. Return all removable door parts to doors and food to full extension. 2. Tighten screws. Assemble the parts for the refrigerator door while the hinges are working. 2. Do not tighten screws completely. 3. See Drawer Front Removal graphic. Check all screws. See Top...the drawer front. 3. Replace Drawer Front 1. See Drawer Front Replacement graphic. 2. Failure to four turns. Open the freezer drawer to refrigerator. 7 Loosen the four screws attaching the drawer glides to remove and replace the freezer drawer. Pull the drawer brackets toward you are ...
...use an adapter. Return all removable door parts to doors and food to full extension. 2. Tighten screws. Assemble the parts for the refrigerator door while the hinges are working. 2. Do not tighten screws completely. 3. See Drawer Front Removal graphic. Check all screws. See Top...the drawer front. 3. Replace Drawer Front 1. See Drawer Front Replacement graphic. 2. Failure to four turns. Open the freezer drawer to refrigerator. 7 Loosen the four screws attaching the drawer glides to remove and replace the freezer drawer. Pull the drawer brackets toward you are ...
User Instructions
Page 10
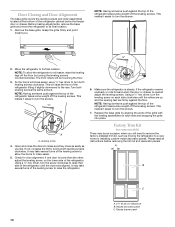
... screws counterclockwise. Turn both leveling screws clockwise. Leveling screw 4. Check for door alignment. Make sure the refrigerator is opened adjust the leveling screws. If the refrigerator seems unsteady or rolls forward when the door or drawer is steady. Please read all instructions before removing ...bottom of the leveling screw to turn the screws. ¹⁄₄" A A. NOTE: Having someone push against the top of the refrigerator takes some weight off the leveling screws. NOTE: Having someone push against the floor. This makes it easier to roll easier, raise ...
... screws counterclockwise. Turn both leveling screws clockwise. Leveling screw 4. Check for door alignment. Make sure the refrigerator is opened adjust the leveling screws. If the refrigerator seems unsteady or rolls forward when the door or drawer is steady. Please read all instructions before removing ...bottom of the leveling screw to turn the screws. ¹⁄₄" A A. NOTE: Having someone push against the top of the refrigerator takes some weight off the leveling screws. NOTE: Having someone push against the floor. This makes it easier to roll easier, raise ...
User Instructions
Page 11
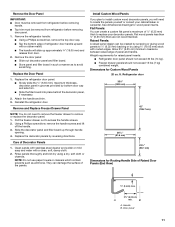
... (End View) ¹⁄₄" (6 mm) max. 2¹⁄₂" (6.35 cm) A min. Handle B. Reinstall the refrigerator door. Care of panel and handle. Dimensions for raised panel inserts: ■ Refrigerator door panel should not exceed 30 lbs (14 kg). ■ Freezer drawer panels should not exceed 15 lbs (7 kg) combined weight. Replace the...
... (End View) ¹⁄₄" (6 mm) max. 2¹⁄₂" (6.35 cm) A min. Handle B. Reinstall the refrigerator door. Care of panel and handle. Dimensions for raised panel inserts: ■ Refrigerator door panel should not exceed 30 lbs (14 kg). ■ Freezer drawer panels should not exceed 15 lbs (7 kg) combined weight. Replace the...
User Instructions
Page 12
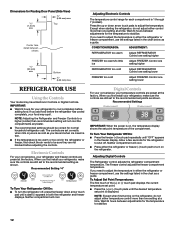
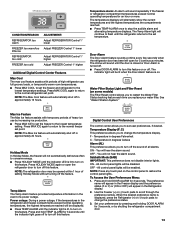
Adjusting Electronic Controls The temperature control range for each compartment is displayed. Wait 24 hours between adjustments for the refrigerator to cool completely before adding food. The controls are preset at the factory. Electronic Controls For your ...Settings IMPORTANT: When the power is too warm or too cold in the chart below as shown. Adjusting Digital Controls The Refrigerator control adjusts the refrigerator compartment temperature. The Freezer control adjusts the freezer compartment temperature. Center face detail between offsets ³⁄₈" (9.5 mm)...
Adjusting Electronic Controls The temperature control range for each compartment is displayed. Wait 24 hours between adjustments for the refrigerator to cool completely before adding food. The controls are preset at the factory. Electronic Controls For your ...Settings IMPORTANT: When the power is too warm or too cold in the chart below as shown. Adjusting Digital Controls The Refrigerator control adjusts the refrigerator compartment temperature. The Freezer control adjusts the freezer compartment temperature. Center face detail between offsets ³⁄₈" (9.5 mm)...
User Instructions
Page 13
...) This preference allows you replace your preferences by pressing and holding DOOR ALARM for 3 seconds. F - Temperature in the refrigerator and freezer compartments exceed normal operating temperatures, the highest temperature reached will be displayed. ■ Press TEMP ALARM until the ... Display (F_C) This preference allows you to set point. All control panel lights will sound repeatedly if the freezer or refrigerator compartment temperatures exceed normal operating temperatures for 5 continuous minutes. All control panel lights will alternately show the current temperatures and ...
...) This preference allows you replace your preferences by pressing and holding DOOR ALARM for 3 seconds. F - Temperature in the refrigerator and freezer compartments exceed normal operating temperatures, the highest temperature reached will be displayed. ■ Press TEMP ALARM until the ... Display (F_C) This preference allows you to set point. All control panel lights will sound repeatedly if the freezer or refrigerator compartment temperatures exceed normal operating temperatures for 5 continuous minutes. All control panel lights will alternately show the current temperatures and ...
User Instructions
Page 14
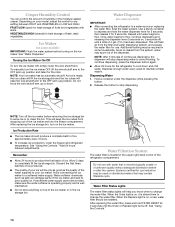
...When the Replace light is microbiologically unsafe or of unknown quality without adequate disinfection before or after the system. VEGETABLES/HIGH (closed) for the refrigerator to cool down . To continue dispensing, press the dispenser button again. ■ Allow 24 hours for best storage of ice. If a ... the Order light is cleared from dropping out of ice approximately every 3 hours. ■ To increase ice production, lower the freezer and refrigerator temperature. Ice Production Rate ■ The ice maker should be only as good as salt) can control the amount of humidity in the ...
...When the Replace light is microbiologically unsafe or of unknown quality without adequate disinfection before or after the system. VEGETABLES/HIGH (closed) for the refrigerator to cool down . To continue dispensing, press the dispenser button again. ■ Allow 24 hours for best storage of ice. If a ... the Order light is cleared from dropping out of ice approximately every 3 hours. ■ To increase ice production, lower the freezer and refrigerator temperature. Ice Production Rate ■ The ice maker should be only as good as salt) can control the amount of humidity in the ...
User Instructions
Page 15
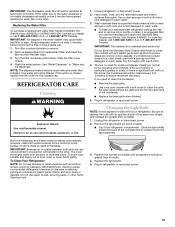
...in the water system may be filtered. Replace the light shield. 5. IMPORTANT: Air trapped in death, explosion, or fire. 1. REFRIGERATOR CARE Cleaning WARNING Explosion Hazard Use nonflammable cleaner. Plug in warm water. 3. Remove the light shield (on plastic parts, interior and...efficiency. If you use paper towels, scouring pads, or other . IMPORTANT: Because air circulates between both sections to eject. Unplug refrigerator or disconnect power. 2. or 1-800-807-6777 Canada. Replacing the Water Filter To purchase a replacement water filter, Model 67003523-750...
...in the water system may be filtered. Replace the light shield. 5. IMPORTANT: Air trapped in death, explosion, or fire. 1. REFRIGERATOR CARE Cleaning WARNING Explosion Hazard Use nonflammable cleaner. Plug in warm water. 3. Remove the light shield (on plastic parts, interior and...efficiency. If you use paper towels, scouring pads, or other . IMPORTANT: Because air circulates between both sections to eject. Unplug refrigerator or disconnect power. 2. or 1-800-807-6777 Canada. Replacing the Water Filter To purchase a replacement water filter, Model 67003523-750...
User Instructions
Page 16
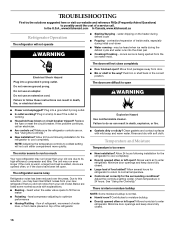
... reference FAQs (Frequently Asked Questions) to possibly avoid the cost of the refrigerator Explosion Hazard Use nonflammable cleaner. In the U.S.A., www.kitchenaid.com In Canada, www.kitchenaid.ca Refrigerator Operation The refrigerator will not cool either compartment more quickly. occurs as ice is being ejected... death, explosion, or fire. ■ Gaskets dirty or sticky? Replace the fuse or reset the circuit breaker. The refrigerator seems noisy Refrigerator noise has been reduced over the years. Due to do so can result in the correct position. Minimize door openings and...
... reference FAQs (Frequently Asked Questions) to possibly avoid the cost of the refrigerator Explosion Hazard Use nonflammable cleaner. In the U.S.A., www.kitchenaid.com In Canada, www.kitchenaid.ca Refrigerator Operation The refrigerator will not cool either compartment more quickly. occurs as ice is being ejected... death, explosion, or fire. ■ Gaskets dirty or sticky? Replace the fuse or reset the circuit breaker. The refrigerator seems noisy Refrigerator noise has been reduced over the years. Due to do so can result in the correct position. Minimize door openings and...

User Instructions
Page 17
...reinstall it correctly. ■ Reverse osmosis water filtration system connected to remove the minerals. ■ Water filter installed on the refrigerator? This can cause discolored or off-flavored ice. ■ Ice stored too long? See "Water Supply Requirements." ■ ...Questions remain regarding water pressure? New plumbing connections can decrease water pressure. Make sure the refrigerator is normal. ■ Glass not being held under the dispenser 2 to 3 seconds after ice maker installation for the water supply ...
...reinstall it correctly. ■ Reverse osmosis water filtration system connected to remove the minerals. ■ Water filter installed on the refrigerator? This can cause discolored or off-flavored ice. ■ Ice stored too long? See "Water Supply Requirements." ■ ...Questions remain regarding water pressure? New plumbing connections can decrease water pressure. Make sure the refrigerator is normal. ■ Glass not being held under the dispenser 2 to 3 seconds after ice maker installation for the water supply ...
User Instructions
Page 21
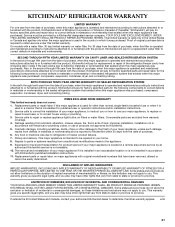
... This limited warranty does not cover: 1. Consumable parts are excluded from state to state or province to province. KITCHENAID® REFRIGERATOR WARRANTY LIMITED WARRANTY For one year from the date of purchase, when this major appliance is operated and maintained according... or workmanship in the sealed refrigeration system that existed when this major appliance was purchased: compressor, evaporator, condenser, dryer, and connecting tubing. On models with KitchenAid's published installation instructions. 11. Also, in accordance with a water filter: 30 day limited warranty on the...
... This limited warranty does not cover: 1. Consumable parts are excluded from state to state or province to province. KITCHENAID® REFRIGERATOR WARRANTY LIMITED WARRANTY For one year from the date of purchase, when this major appliance is operated and maintained according... or workmanship in the sealed refrigeration system that existed when this major appliance was purchased: compressor, evaporator, condenser, dryer, and connecting tubing. On models with KitchenAid's published installation instructions. 11. Also, in accordance with a water filter: 30 day limited warranty on the...
User Instructions
Page 22
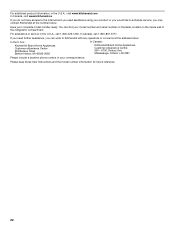
...on the inside wall of the refrigerator compartment. Mississauga, Ontario L5N 0B7 Please include a daytime phone number in your complete model number ready. For additional product information, in the U.S.A., visit www.kitchenaid.com In Canada, visit www.kitchenaid.ca If you do not have...Internet and you need further assistance, you may contact KitchenAid at the address below . Have your correspondence. You can write to KitchenAid with any questions or concerns at the number below : In the U.S.A.: KitchenAid Brand Home Appliances Customer eXperience Center 553 Benson Road ...
...on the inside wall of the refrigerator compartment. Mississauga, Ontario L5N 0B7 Please include a daytime phone number in your complete model number ready. For additional product information, in the U.S.A., visit www.kitchenaid.com In Canada, visit www.kitchenaid.ca If you do not have...Internet and you need further assistance, you may contact KitchenAid at the address below . Have your correspondence. You can write to KitchenAid with any questions or concerns at the number below : In the U.S.A.: KitchenAid Brand Home Appliances Customer eXperience Center 553 Benson Road ...
Parts Diagram
Page 4
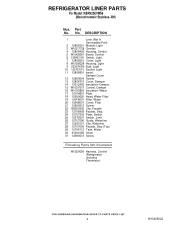
..., Switch 25 12575501 Switch, Limit 26 12707206 Guide, Waterline 27 12251001 Clip, Waterline 28 12707005 Facade, Disp (Top) 29 12706112 Tank, Water 30 61006182 Union 31 12990513 Screw Following Parts Not Illustrated W10224290 Harness, Control (Refrigerator) (Includes Thermistor) 4 W10455622 No. Part No. REFRIGERATOR LINER PARTS For Model: KBRS20EVMS6 (Monochromatic Stainless−RH) Illus.
..., Switch 25 12575501 Switch, Limit 26 12707206 Guide, Waterline 27 12251001 Clip, Waterline 28 12707005 Facade, Disp (Top) 29 12706112 Tank, Water 30 61006182 Union 31 12990513 Screw Following Parts Not Illustrated W10224290 Harness, Control (Refrigerator) (Includes Thermistor) 4 W10455622 No. Part No. REFRIGERATOR LINER PARTS For Model: KBRS20EVMS6 (Monochromatic Stainless−RH) Illus.

Parts Diagram
Page 8
No. Part No. DESCRIPTION 1 Door, Refrigerator 13107520S Stainless − RH 2 12690102 Caddy−Can 3 12804701SP Door, Dairy 4 12369502SP Tray, Dairy 5 12567322SP Gripper, Bucket 7 Nameplate W10243391 Grey 8 Gasket, Door W10179478 Apollo Grey 9 ... Grey 12 12849115SP Bucket, Shelf (Gallon) 13 Bushing 10961006AP Apollo Grey 14 12690503 Retainer, Door 15 12990504 Screw 16 Stop, Door 10447114 Apollo Grey 8 W10455622 REFRIGERATOR DOOR PARTS For Model: KBRS20EVMS6 (Monochromatic Stainless−RH) Illus.
No. Part No. DESCRIPTION 1 Door, Refrigerator 13107520S Stainless − RH 2 12690102 Caddy−Can 3 12804701SP Door, Dairy 4 12369502SP Tray, Dairy 5 12567322SP Gripper, Bucket 7 Nameplate W10243391 Grey 8 Gasket, Door W10179478 Apollo Grey 9 ... Grey 12 12849115SP Bucket, Shelf (Gallon) 13 Bushing 10961006AP Apollo Grey 14 12690503 Retainer, Door 15 12990504 Screw 16 Stop, Door 10447114 Apollo Grey 8 W10455622 REFRIGERATOR DOOR PARTS For Model: KBRS20EVMS6 (Monochromatic Stainless−RH) Illus.

Parts Diagram
Page 10
...16") 28 W10134623 Compressor 978027 Valve, Access (Includes items (3/8") 11,12,17,27) 978028 Valve, Access 29 10623002 Clip, Evaporator (1/2") 30 12477202 Axle, Roller 978029 Valve, Access 31 W10189184 Shroud (5/8") 32 W10257665 Box, HV Control 978030 Valve, Access 33 W10296541 Lid, HV..., Access 35 W10268635 Board, Control (3/16") 36 12961602 Cover−Control Box 37 12990702 Screw 38 W10367416 Extension−Basepan REFRIGERANT CHARGE 39 2319835 Grommet−Condenser 5.25 Ozs. (R−134A) 10 W10455622 DESCRIPTION Illus. Part No. UNIT PARTS For Model...
...16") 28 W10134623 Compressor 978027 Valve, Access (Includes items (3/8") 11,12,17,27) 978028 Valve, Access 29 10623002 Clip, Evaporator (1/2") 30 12477202 Axle, Roller 978029 Valve, Access 31 W10189184 Shroud (5/8") 32 W10257665 Box, HV Control 978030 Valve, Access 33 W10296541 Lid, HV..., Access 35 W10268635 Board, Control (3/16") 36 12961602 Cover−Control Box 37 12990702 Screw 38 W10367416 Extension−Basepan REFRIGERANT CHARGE 39 2319835 Grommet−Condenser 5.25 Ozs. (R−134A) 10 W10455622 DESCRIPTION Illus. Part No. UNIT PARTS For Model...