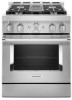
KitchenAid KFGC500JSS Support and Manuals
Get Help and Manuals for this KitchenAid item
View All Support Options Below
Free KitchenAid KFGC500JSS manuals!
Problems with KitchenAid KFGC500JSS?
Ask a Question
Free KitchenAid KFGC500JSS manuals!
Problems with KitchenAid KFGC500JSS?
Ask a Question
KitchenAid KFGC500JSS Videos

KitchenAid KFGC500JSS Cuisinière
Duration: :35
Total Views: 6
Duration: :35
Total Views: 6
KitchenAid KFGC500JSS Range
Duration: :36
Total Views: 77
Duration: :36
Total Views: 77
Popular KitchenAid KFGC500JSS Manual Pages
Installation Instructions - Page 5

... the range hood or microwave hood combination installation instructions for installation requirements. See the "Gas Supply Requirements" section.
■ Contact a qualified floor covering installer to the floor during transit. When such standard is required. Check local codes and consult gas supplier. It is installed in a mobile home, it conforms to subfloor. The model/serial...
Installation Instructions - Page 8

...appliance connector:
■ If local codes permit, a new CSA design-...Install a manual gas line shut-off valve during any pressure testing of the gas supply piping system at 1/2 psi (3.5 kPa) gauge (14" [35.6 cm] WCP) or lower The range must be made to convert the range from the gas supply piping system by a qualified service technician.
The model... is factory set for use with...
Installation Instructions - Page 11

...installing your local hardware store. 5. Install a shut-off valve F. 1/2" (1.3 cm) or
3/4" (1.9 cm) gas pipe G. If connected to propane, have 1/2"
[1.3 cm] male pipe thread) D.
A
BC
D
E
A. Use pipe-joint compound. Manual...range using the following installation instructions.
Examples of the determined mounting method. Gas pressure regulator B. 3. Move range... service ...
Installation Instructions - Page 12

Open the manual shut-off valves are set . Closed valve B. Open valve 2. Place burner caps on power supply. Check that the range is factory installed. 1. Install Griddle Tray
(On griddle models)
The griddle is plugged into the slot of the griddle. Griddle drip tray B. Griddle 2.
When the Range Control Knob is turned to the
open when the handle...
Installation Instructions - Page 14

... floor or wall per installation instructions.
Slide range back so rear range foot is moved. Shut-off valve to children and adults.
1.
Turn the manual shut-off valve (closed position.
Locate the gas pressure regulator at the left rear of a qualified person include: licensed heating personnel, authorized gas company personnel, and authorized service personnel.
NOTE: Do...
Installation Instructions - Page 15

...3. Adjusting Simmer Low Setting on the model/serial/rating plate. ...hold the control console in plastic parts bag for future use and ...installed, remove them. 2. main 0.50 mm Larger burner - Fuel type stamp (L or N)
6. Replace the burner base and screws. 5. Turn over -tighten.
8. Replace...range and its individual manual shut-off valve must be at test pressures in the nut driver...
Installation Instructions - Page 16

...too low and the screw should be lit manually with console holes. Low-turndown adjustment screw ... Use a knob to align with a lighter), and set it drop forward into place. Control console flange B. Replace the screws on the front of the stem.
Aluminum Valve... burners
C. Flush with the top edge of range cooktop
9. Replace the bezels using the 2 screws which attach to...
Installation Instructions - Page 18

... help hold the gas orifice spud in plastic parts bag for illustration.
13. Insert nut driver into the gas opening, and press down on... in the nut driver while changing it. Replace oven baffle and oven baffle nuts. Bracket
7. Oven bake burner electrode bracket B.
Install the Number 125 ...Set gas orifice spud aside. Replace oven bake burner electrode inside bracket. A. Grasp electrode...
Installation Instructions - Page 19

... plastic parts bag for illustration. Set gas orifice spud aside.
Bake burner cover
Convert Oven Broil Burner (30" [76.2 cm] and 36" [91.4 cm] models and the right oven cavity on the right.
Broil burner orifice C. Broil burner electrode C. Propane gas orifice spuds are stamped with side igniter positioned on 48" [121.9 cm] models)
1. Install...
Installation Instructions - Page 22

... to the "Make Gas Connection" section for proper range burner flame is engaged in death or serious burns to remove or replace kick plate. To range B. Propane gas flames have a very distinct blue flame 1/4" (6.4 mm) to the gas supply.
2.
Refer to floor or wall per installation instructions. NOTE: Do not remove the spring beneath the...
Installation Instructions - Page 23

... letters "NAT" are installed, remove them. 2.
Place Propane gas orifice spuds in plastic parts bag for more information on...driver to the end of 1/2 psi (3.5 kPa).
Fuel type stamp (L or N)
6. Replace the burner base and screws. Unplug range or disconnect power. 2.
Line pressure testing above 1/2 psi (3.5 kPa) gauge (14" [35.6 cm] WCP)
The range and its individual manual...
Installation Instructions - Page 24

... front and right front burner valves (brass) is too low and the screw should be lit manually with a lighter), and set it drop forward into place.
Repeat this step for Left Front and Right Front Dual burners
C.... to be adjusted counterclockwise until the flame height is flush with range top
10. Replace the screws on each side. Push the Surface Knobs onto the valve stems....
Installation Instructions - Page 27

... masking tape to the end of a 1/4" (6.4 mm) nut driver to slide shoulder screws into the narrow ends of the bracket. Set aside with the broil burner assembly inside the broil burner electrode hole as illustrated. Broil burner screw B. Broil burner C. Broil burner electrode hole
BC
7. Replace Oven Bake Burner Cover
1. A
B
A
A
B
B
A. Grasp electrode here...
Owners Manual - Page 23

... the burner still does not light, do not service the sealed burner yourself. After Each Use:
1. Wipe off cooktop, grates, and caps.
3. Clean clogged burner ports.
Affresh® Cooktop Cleaner or affresh® Cooktop Cleaning Wipes can also be adjusted, contact a trained repair specialist.
4. Replace burner cap. Do not use oven cleaners, bleach...
Owners Manual - Page 30

... a straight pin. If sparking continues, discontinue use or for some models, the Sabbath Mode is not being used.
Set the Cooktop Control to operate properly.
TROUBLESHOOTING
First try the solutions suggested here.
The burner ports are clogged. The burner ports are clogged. SOLUTION Replace the fuse or reset the circuit breaker. Make sure cap...
KitchenAid KFGC500JSS Reviews
We have not received any reviews for KitchenAid yet.