Use & Care Guide
Page 3
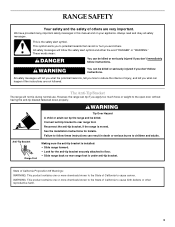
.... Connect anti-tip bracket to follow instructions. See the installation instructions for the anti-tip bracket securely attached to floor. • Slide range back so rear range foot is , tell you how to cause birth defects or other reproductive harm. 3 State of California Proposition 65 Warnings: WARNING: ... cancer. WARNING You can kill or hurt you don't immediately follow these instructions can result in this manual and on your appliance. This symbol alerts you to potential hazards that can be killed or seriously injured if you and others are not followed. Failure ...
.... Connect anti-tip bracket to follow instructions. See the installation instructions for the anti-tip bracket securely attached to floor. • Slide range back so rear range foot is , tell you how to cause birth defects or other reproductive harm. 3 State of California Proposition 65 Warnings: WARNING: ... cancer. WARNING You can kill or hurt you don't immediately follow these instructions can result in this manual and on your appliance. This symbol alerts you to potential hazards that can be killed or seriously injured if you and others are not followed. Failure ...
Use & Care Guide
Page 4
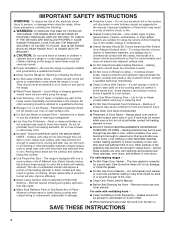
...near surface units. ■ Do Not Use Water on Broken Cooktop - The range is in a risk of electric shock, or fire. ■ Glazed Cooking Utensils - Boilover causes smoking and ... immediately. ■ Clean Cooktop With Caution - SAVE THESE INSTRUCTIONS 4 Other surfaces of the appliance may result in use , do not let potholder contact hot heating element in ignition of clothing...CHECK IF THE DEVICES ARE INSTALLED PROPERLY, SLIDE RANGE FORWARD, LOOK FOR ANTI-TIP BRACKET SECURELY ATTACHED TO FLOOR, AND SLIDE RANGE BACK SO REAR RANGE FOOT IS UNDER ANTI-TIP BRACKET. ■...
...near surface units. ■ Do Not Use Water on Broken Cooktop - The range is in a risk of electric shock, or fire. ■ Glazed Cooking Utensils - Boilover causes smoking and ... immediately. ■ Clean Cooktop With Caution - SAVE THESE INSTRUCTIONS 4 Other surfaces of the appliance may result in use , do not let potholder contact hot heating element in ignition of clothing...CHECK IF THE DEVICES ARE INSTALLED PROPERLY, SLIDE RANGE FORWARD, LOOK FOR ANTI-TIP BRACKET SECURELY ATTACHED TO FLOOR, AND SLIDE RANGE BACK SO REAR RANGE FOOT IS UNDER ANTI-TIP BRACKET. ■...
Use & Care Guide
Page 20
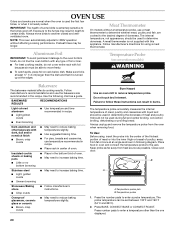
..., do not line the oven bottom with any type of foil or liner. ■ For best cooking results, do not cover entire rack with this appliance. Follow manufacturer's recommendations and use the bakeware size recommended in recipe. BAKEWARE/ RESULTS RECOMMENDATIONS Light colored aluminum ■ Light golden crusts ■ Even browning ■...
..., do not line the oven bottom with any type of foil or liner. ■ For best cooking results, do not cover entire rack with this appliance. Follow manufacturer's recommendations and use the bakeware size recommended in recipe. BAKEWARE/ RESULTS RECOMMENDATIONS Light colored aluminum ■ Light golden crusts ■ Even browning ■...
Use & Care Guide
Page 28
...the Self-Cleaning cycle (on when the oven door is heavy. It will help them slide. ■ Steel-wool pad STORAGE DRAWER (on panel. Turn bulb counterclockwise to soft ...and paper towel. Cleaning Method: ■ KitchenAid® Stainless Steel Cleaner and Polish (sample included): See "Assistance or Service" section to order. ■ All-Purpose Appliance Cleaner (not included): See "Assistance or...is off . 1. Replace bulb and bulb cover by turning clockwise. 5. Oven Door For normal range use steel wool, abrasive cleansers or oven cleaner. Do not remove seals under knobs. OVEN AND...
...the Self-Cleaning cycle (on when the oven door is heavy. It will help them slide. ■ Steel-wool pad STORAGE DRAWER (on panel. Turn bulb counterclockwise to soft ...and paper towel. Cleaning Method: ■ KitchenAid® Stainless Steel Cleaner and Polish (sample included): See "Assistance or Service" section to order. ■ All-Purpose Appliance Cleaner (not included): See "Assistance or...is off . 1. Replace bulb and bulb cover by turning clockwise. 5. Oven Door For normal range use steel wool, abrasive cleansers or oven cleaner. Do not remove seals under knobs. OVEN AND...
Use & Care Guide
Page 30
... they are trained to your telephone directory Yellow Pages. 30 Oven temperature too high or too low ■ Does the oven temperature calibration need help us or your appliance. This helps cool the electronic control. See "Self-...appliance. There has been a power failure. On some models, has a delay start been set ? See "Self-Cleaning Cycle" section. ■ On some models, reset the clock, if needed. Double-check the recipe in your model. ■ Is the range level? See "Bakeware" section. ■ Are the racks positioned properly? To locate the KitchenAid...
... they are trained to your telephone directory Yellow Pages. 30 Oven temperature too high or too low ■ Does the oven temperature calibration need help us or your appliance. This helps cool the electronic control. See "Self-...appliance. There has been a power failure. On some models, has a delay start been set ? See "Self-Cleaning Cycle" section. ■ On some models, reset the clock, if needed. Double-check the recipe in your model. ■ Is the range level? See "Bakeware" section. ■ Are the racks positioned properly? To locate the KitchenAid...
Use & Care Guide
Page 31
... applies only when the major appliance is operated and maintained according to instructions attached to or furnished with : ■ Features and specifications on our full line of Whirlpool Corporation or Whirlpool Canada LP (hereafter "KitchenAid") will pay for the following components if defective in materials or workmanship. KITCHENAID® ELECTRIC RANGE WARRANTY LIMITED WARRANTY For...
... applies only when the major appliance is operated and maintained according to instructions attached to or furnished with : ■ Features and specifications on our full line of Whirlpool Corporation or Whirlpool Canada LP (hereafter "KitchenAid") will pay for the following components if defective in materials or workmanship. KITCHENAID® ELECTRIC RANGE WARRANTY LIMITED WARRANTY For...
Use & Care Guide
Page 32
... Service calls to know your major appliance to correct house wiring or plumbing. 2. Major appliances with electrical or plumbing codes, or use of purchase or installation date for product service if your authorized KitchenAid dealer to the appliance. 8. THIS WARRANTY GIVES YOU SPECIFIC ...If you on the product. Service calls to correct the installation of your major appliance, to KitchenAid within 30 days from your home of purchase. 6. Repairs when your major appliance is used in U.S.A. Costs associated with published installation instructions. 10. The removal...
... Service calls to know your major appliance to correct house wiring or plumbing. 2. Major appliances with electrical or plumbing codes, or use of purchase or installation date for product service if your authorized KitchenAid dealer to the appliance. 8. THIS WARRANTY GIVES YOU SPECIFIC ...If you on the product. Service calls to correct the installation of your major appliance, to KitchenAid within 30 days from your home of purchase. 6. Repairs when your major appliance is used in U.S.A. Costs associated with published installation instructions. 10. The removal...

Installation Guide
Page 2
... 7 INSTALLATION INSTRUCTIONS 7 Unpack Range 7 Measure for Proper Height 7 Adjust Leveling Legs 8 Install Anti-Tip Bracket 8 Electrical Connection - Only 9 Verify Anti-Tip Bracket Location 14 Level Range 14 Complete Installation 14 Moving the Range 14 ANTI-TIP BRACKET TEMPLATE 24...range and be killed or seriously injured if you don't immediately follow these instructions can kill or hurt you to children and adults. 2 We have provided many important safety messages in death or serious burns to potential hazards that can result in this manual and on your appliance...
... 7 INSTALLATION INSTRUCTIONS 7 Unpack Range 7 Measure for Proper Height 7 Adjust Leveling Legs 8 Install Anti-Tip Bracket 8 Electrical Connection - Only 9 Verify Anti-Tip Bracket Location 14 Level Range 14 Complete Installation 14 Moving the Range 14 ANTI-TIP BRACKET TEMPLATE 24...range and be killed or seriously injured if you don't immediately follow these instructions can kill or hurt you to children and adults. 2 We have provided many important safety messages in death or serious burns to potential hazards that can result in this manual and on your appliance...

Installation Guide
Page 4
...Part 280). Slide-in Range A B A F B* D* C* G E** C D F** E A. 5³⁄₄" (14.6 cm) B. 30" (76...range** F. 23" (58.4 cm) countertop notch to rear of range** G. The appliance wiring will need to the floor during transit. from handle to standoff at back of cooktop *Range...range is installed in * E. 30" (76.2 cm) F. 27¹⁄₄" (69.2 cm) max. Product Dimensions Freestanding Range Mobile home installations require: ■ When this range must be raised approximately 1" (2.5 cm) by adjusting the leveling legs. **When installed in * C. See "Electrical...
...Part 280). Slide-in Range A B A F B* D* C* G E** C D F** E A. 5³⁄₄" (14.6 cm) B. 30" (76...range** F. 23" (58.4 cm) countertop notch to rear of range** G. The appliance wiring will need to the floor during transit. from handle to standoff at back of cooktop *Range...range is installed in * E. 30" (76.2 cm) F. 27¹⁄₄" (69.2 cm) max. Product Dimensions Freestanding Range Mobile home installations require: ■ When this range must be raised approximately 1" (2.5 cm) by adjusting the leveling legs. **When installed in * C. See "Electrical...

Installation Guide
Page 5
Slide-in Range A C B D A C B D F E E F G H A. 13" (33.0 cm) upper cabinet depth B. 30" (76.2 cm) min. Cabinet ...the cooking platform and the bottom of the above the cooktop surface. D. 30" (76.2 cm) min. Electrical Connection To properly install your range, you must be installed next to combustible walls with the neutral terminal ... Requirements" section. ■ This range is manufactured with zero clearance. Square cut or ¹⁄₄" (6.2 cm) radius both corners G. Refer to whether the appliance is properly grounded. Cabinet Dimensions Cabinet...
Slide-in Range A C B D A C B D F E E F G H A. 13" (33.0 cm) upper cabinet depth B. 30" (76.2 cm) min. Cabinet ...the cooking platform and the bottom of the above the cooktop surface. D. 30" (76.2 cm) min. Electrical Connection To properly install your range, you must be installed next to combustible walls with the neutral terminal ... Requirements" section. ■ This range is manufactured with zero clearance. Square cut or ¹⁄₄" (6.2 cm) radius both corners G. Refer to whether the appliance is properly grounded. Cabinet Dimensions Cabinet...

Installation Guide
Page 6
... load is less than the total connected load listed on the appliance end must be provided at the point the power supply cord enters the appliance. For 50-amp rated cord kits, use kits that the electrical connection and wire size are : 40-amp circuit 2 No...must be identified by a green or green/yellow cover and the neutral conductor by a white cover. See the "Electrical Connection" section. Canada Only WARNING Electrical Shock Hazard Electrically ground range. This cord contains 3 copper conductors with ring terminals or open -end spade terminals with upturned ends, terminating in...
... load is less than the total connected load listed on the appliance end must be provided at the point the power supply cord enters the appliance. For 50-amp rated cord kits, use kits that the electrical connection and wire size are : 40-amp circuit 2 No...must be identified by a green or green/yellow cover and the neutral conductor by a white cover. See the "Electrical Connection" section. Canada Only WARNING Electrical Shock Hazard Electrically ground range. This cord contains 3 copper conductors with ring terminals or open -end spade terminals with upturned ends, terminating in...
Parts Diagram
Page 2
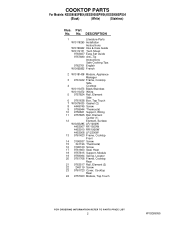
... W10190622 Use & Care Guide W10112131 Tech Sheet 9763467 Easy Set Guide 9757680 Anti−Tip Instructions Safe Cooking Tips 9762761 English W10065852 French 2 W10181438 Module, Appliance Manager 3 9761422 Frame, Cooktop Side 4 Cooktop W10110273 Black/Stainless W10110272 White 5 9757824 Rail, Element Side 6 9761638 Box, Tap Touch 7 W10076030 Gasket (2) 8 4449745 Screw 9 9759944 Thermostat...
... W10190622 Use & Care Guide W10112131 Tech Sheet 9763467 Easy Set Guide 9757680 Anti−Tip Instructions Safe Cooking Tips 9762761 English W10065852 French 2 W10181438 Module, Appliance Manager 3 9761422 Frame, Cooktop Side 4 Cooktop W10110273 Black/Stainless W10110272 White 5 9757824 Rail, Element Side 6 9761638 Box, Tap Touch 7 W10076030 Gasket (2) 8 4449745 Screw 9 9759944 Thermostat...
Parts Diagram
Page 4
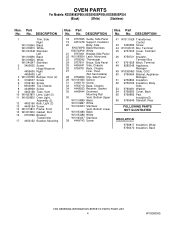
... 3400080 Screw 44 W10165135 Box, Terminal 45 9757405 Cover, Termianl Box 46 9759721 Insulator, Termianl Box 47 9761958 Block, Terminal 48 8285348 Appliance, Manager 49 W10083460 Slide, GOC 50 9756454 Bracket, Appliance Manager 51 9759884 Insulation 52 9759722 Insulation, Body Side 53 9760481 Washer 54 9758583 Cover, Back 55 9759885 Pad, Insulation(2) 56...
... 3400080 Screw 44 W10165135 Box, Terminal 45 9757405 Cover, Termianl Box 46 9759721 Insulator, Termianl Box 47 9761958 Block, Terminal 48 8285348 Appliance, Manager 49 W10083460 Slide, GOC 50 9756454 Bracket, Appliance Manager 51 9759884 Insulation 52 9759722 Insulation, Body Side 53 9760481 Washer 54 9758583 Cover, Back 55 9759885 Pad, Insulation(2) 56...