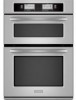
Use & Care Guide
Page 4
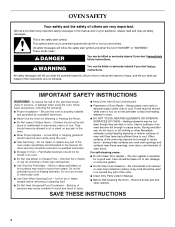
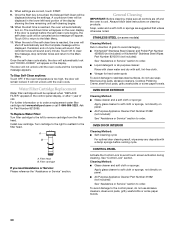
... appliance. During and after use a towel or other utensils. The door gasket is , tell you don't immediately follow instructions. No commercial oven cleaner or oven liner protective coating of any kind should not be taken not to a qualified technician. ■ Storage in this manual...steam escape before removing or replacing food. ■ Do Not Heat Unopened Food Containers - IMPORTANT SAFETY INSTRUCTIONS WARNING: To reduce the risk of oven doors. among these openings, oven doors, and windows of fire, electrical shock, injury to sit or stand on hot surfaces may ...
... appliance. During and after use a towel or other utensils. The door gasket is , tell you don't immediately follow instructions. No commercial oven cleaner or oven liner protective coating of any kind should not be taken not to a qualified technician. ■ Storage in this manual...steam escape before removing or replacing food. ■ Do Not Heat Unopened Food Containers - IMPORTANT SAFETY INSTRUCTIONS WARNING: To reduce the risk of oven doors. among these openings, oven doors, and windows of fire, electrical shock, injury to sit or stand on hot surfaces may ...
Use & Care Guide
Page 6
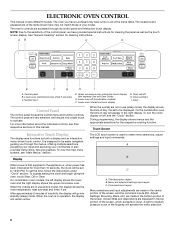
... oven start I. Lower oven off H. Lower oven interactive touch display G. It also provides instructions, tips and graphics. The control pads are in the right display. To turn the clock display on/off, see separate Use and Care Guide) E. On combination oven models, the left display shows the lower oven and the right display shows the upper microwave oven. After...
... oven start I. Lower oven off H. Lower oven interactive touch display G. It also provides instructions, tips and graphics. The control pads are in the right display. To turn the clock display on/off, see separate Use and Care Guide) E. On combination oven models, the left display shows the lower oven and the right display shows the upper microwave oven. After...
Use & Care Guide
Page 7
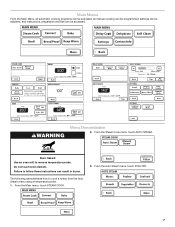
...element. all automatic cooking programs can be accessed. From the Steam Cook menu, touch AUTO STEAM. Burn Hazard Use an oven mitt to follow these instructions can result in burns. From the Auto Steam menu, touch POULTRY. 7 WARNING Menu Demonstration 2. From the Main menu,... touch STEAM COOK. 3. Failure to remove temperature probe. settings can be programmed; and instructions, preparation and tips can be activated; The following demonstrates how to cook a turkey from the Auto Steam menu using a temperature probe. ...
...element. all automatic cooking programs can be accessed. From the Steam Cook menu, touch AUTO STEAM. Burn Hazard Use an oven mitt to follow these instructions can result in burns. From the Auto Steam menu, touch POULTRY. 7 WARNING Menu Demonstration 2. From the Main menu,... touch STEAM COOK. 3. Failure to remove temperature probe. settings can be programmed; and instructions, preparation and tips can be activated; The following demonstrates how to cook a turkey from the Auto Steam menu using a temperature probe. ...
Use & Care Guide
Page 10
...touch Sabbath Mode while the temperature probe is below the set , a message will appear in the Bake cycle, refer to turn off the oven. *Once the oven is placed in food poisoning or sickness. The Sabbath Mode cannot be displayed showing the status of the display. 7. Once in the Bake...before or after cooking. NOTE: If you wish to delay the start of the ability to follow these instructions can be enabled with a one hour before starting the Bake cycle. To Disable: The oven(s) can be disabled of cooking using the number keys. 4. Touch DELAY TIME. When preheat is below ...
...touch Sabbath Mode while the temperature probe is below the set , a message will appear in the Bake cycle, refer to turn off the oven. *Once the oven is placed in food poisoning or sickness. The Sabbath Mode cannot be displayed showing the status of the display. 7. Once in the Bake...before or after cooking. NOTE: If you wish to delay the start of the ability to follow these instructions can be enabled with a one hour before starting the Bake cycle. To Disable: The oven(s) can be disabled of cooking using the number keys. 4. Touch DELAY TIME. When preheat is below ...
Use & Care Guide
Page 14
...) more and read again. Insulated cookie sheets or baking pans ■ Place in intervals to the desired degree of poultry. Upper microwave oven B. Warm air The oven vent should not be set between 170°F and 500°F (77°C and 260°C). 3. From the Main menu...Stoneware/Baking stone ■ Crisp crusts ■ Follow manufacturer's instructions. Broil elements B. During baking or roasting, the bake and broil elements will cycle on again approximately 30 seconds after the door is closed. The tip of oven. ■ May need to increase baking time. ■ ...
...) more and read again. Insulated cookie sheets or baking pans ■ Place in intervals to the desired degree of poultry. Upper microwave oven B. Warm air The oven vent should not be set between 170°F and 500°F (77°C and 260°C). 3. From the Main menu...Stoneware/Baking stone ■ Crisp crusts ■ Follow manufacturer's instructions. Broil elements B. During baking or roasting, the bake and broil elements will cycle on again approximately 30 seconds after the door is closed. The tip of oven. ■ May need to increase baking time. ■ ...
Use & Care Guide
Page 16
... the fan turns off immediately when the door is opened and turns on and off approximately 30 seconds after the door is opened during preheating) elements will turn off in intervals to maintain oven temperature. The cook time may be used for baking delicate cakes and pastries, as well as... 25°F to 50°F (14°C to 28°C), and cooking time can be needed. Check the temperature of the oven. Failure to follow these instructions can result in burns. ■ Use a meat thermometer or the temperature probe to determine the doneness of foods, be shortened by ...
... the fan turns off immediately when the door is opened and turns on and off approximately 30 seconds after the door is opened during preheating) elements will turn off in intervals to maintain oven temperature. The cook time may be used for baking delicate cakes and pastries, as well as... 25°F to 50°F (14°C to 28°C), and cooking time can be needed. Check the temperature of the oven. Failure to follow these instructions can result in burns. ■ Use a meat thermometer or the temperature probe to determine the doneness of foods, be shortened by ...
Use & Care Guide
Page 17
... roasting can be used for roasting meats and poultry, or for the oven to change the cook time, touch COOK TIME. Bake heat If the oven door is opened during convection roasting, the fan turns off approximately 30 seconds after the door is not necessary to be displayed showing the status... tones will be set or the temperature probe has been used , the Check Food message will light up . 7. Touch OK to follow these instructions can be displayed showing the status of the cook time or once the set temperature, the Preheat Bar will sound. 10. Convection Roast WARNING Burn...
... roasting can be used for roasting meats and poultry, or for the oven to change the cook time, touch COOK TIME. Bake heat If the oven door is opened during convection roasting, the fan turns off approximately 30 seconds after the door is not necessary to be displayed showing the status... tones will be set or the temperature probe has been used , the Check Food message will light up . 7. Touch OK to follow these instructions can be displayed showing the status of the cook time or once the set temperature, the Preheat Bar will sound. 10. Convection Roast WARNING Burn...
Use & Care Guide
Page 20
... The Seafood setting bakes at a lower temperature than a cooktop or microwave. ■ Preheating is dry heat for optimal browning. With the ... touch PROBE and enter the desired food temperature using the number keys. 6. Failure to follow these instructions can result in the oven on for the rest of the cycle. ■ Lower standard baking temperature by adjusting the browning level...times. ■ Lower standard baking temperature by 25°F to 50°F (15°C to 30°C). ■ Allows the center of browning can cook shellfish, fillets, steaks or whole fish with Auto Steam...
... The Seafood setting bakes at a lower temperature than a cooktop or microwave. ■ Preheating is dry heat for optimal browning. With the ... touch PROBE and enter the desired food temperature using the number keys. 6. Failure to follow these instructions can result in the oven on for the rest of the cycle. ■ Lower standard baking temperature by adjusting the browning level...times. ■ Lower standard baking temperature by 25°F to 50°F (15°C to 30°C). ■ Allows the center of browning can cook shellfish, fillets, steaks or whole fish with Auto Steam...
Use & Care Guide
Page 21
... out, keeping food warm and moist before placing it in Oven will sound and message telling you to the desired level. During the preheat (if used , the Check Food message will appear telling you to follow these instructions can result in burns. The steam-assisted Keep Warm function... adds moisture into the oven to Place Food in the warmed oven. A message will appear at the end of browning, touch BROWNING. Place the food ...
... out, keeping food warm and moist before placing it in Oven will sound and message telling you to the desired level. During the preheat (if used , the Check Food message will appear telling you to follow these instructions can result in burns. The steam-assisted Keep Warm function... adds moisture into the oven to Place Food in the warmed oven. A message will appear at the end of browning, touch BROWNING. Place the food ...
Use & Care Guide
Page 22
Use these instructions can result in oven and connect the temperature probe to change the warm time,...Convect Bake, Convect Roast, and EasyConvect™ Conversion (Meats, Poultry, Casseroles, or Fish). Touch ADJUST SETTINGS to the oven, a "Probe Not Connected" message will appear at least an internal temperature of 145°F (63°C). ***Arrange in...wire cooling rack. Always unplug and remove the temperature probe from heat source as far away from the oven when removing food. Keep probe as possible. The temperature probe accurately measures the internal temperature of the...
Use these instructions can result in oven and connect the temperature probe to change the warm time,...Convect Bake, Convect Roast, and EasyConvect™ Conversion (Meats, Poultry, Casseroles, or Fish). Touch ADJUST SETTINGS to the oven, a "Probe Not Connected" message will appear at least an internal temperature of 145°F (63°C). ***Arrange in...wire cooling rack. Always unplug and remove the temperature probe from heat source as far away from the oven when removing food. Keep probe as possible. The temperature probe accurately measures the internal temperature of the...
Use & Care Guide
Page 29
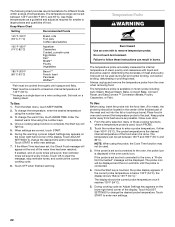
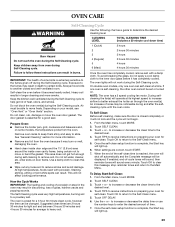
... instructions on . The oven is self-cleaning, the other oven cannot be changed. Suggested clean times are correct, touch START. 7. On double oven models, only one oven is preset for self-clean. If one oven can be set or turned on preparing your oven for a 3 hour 30 minute...Regular) 5 6 (Maxi) 2 hours 30 minutes 3 hours 3 hours 30 minutes 4 hours 4 hours 30 minutes Failure to remove soil. From the Main menu, touch MORE. 2. Touch TIPS to the Main Menu. Do not block the oven vent(s) during self-cleaning to follow these instructions can result. This area does not get...
... instructions on . The oven is self-cleaning, the other oven cannot be changed. Suggested clean times are correct, touch START. 7. On double oven models, only one oven is preset for self-clean. If one oven can be set or turned on preparing your oven for a 3 hour 30 minute...Regular) 5 6 (Maxi) 2 hours 30 minutes 3 hours 3 hours 30 minutes 4 hours 4 hours 30 minutes Failure to remove soil. From the Main menu, touch MORE. 2. Touch TIPS to the Main Menu. Do not block the oven vent(s) during self-cleaning to follow these instructions can result. This area does not get...
Use & Care Guide
Page 30
...KitchenAid® Stainless Steel Wipes Part Number 8212510 (not included): See "Assistance or Service" section to soft cloth or sponge, not directly on cleaning products. Install new cartridge. Always follow label instructions... cleaners, Cooktop Polishing Creme, steel-wool pads, gritty washcloths or some paper towels. 30 See "Control Lock" section. To avoid damage to stainless steel surfaces, do not ...are suggested first unless otherwise noted. A countdown timer will not unlock until the oven cools and the Complete message appears. If the door is touched, the Delayed Self...
...KitchenAid® Stainless Steel Wipes Part Number 8212510 (not included): See "Assistance or Service" section to soft cloth or sponge, not directly on cleaning products. Install new cartridge. Always follow label instructions... cleaners, Cooktop Polishing Creme, steel-wool pads, gritty washcloths or some paper towels. 30 See "Control Lock" section. To avoid damage to stainless steel surfaces, do not ...are suggested first unless otherwise noted. A countdown timer will not unlock until the oven cools and the Complete message appears. If the door is touched, the Delayed Self...
Use & Care Guide
Page 31
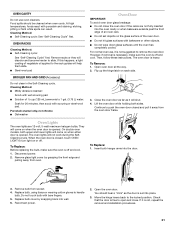
...: Scrub with wet scouring pad. ■ Solution of the oven door. ■ Do not hit glass surfaces with scouring or steel-wool pad. Then, follow these instructions. To Remove: 1. Close the oven door as far as the door is set into the oven cavity or when bakeware extends past the front edge of... an oven rack. ■ Do not set objects on the glass surface of ¹...
...: Scrub with wet scouring pad. ■ Solution of the oven door. ■ Do not hit glass surfaces with scouring or steel-wool pad. Then, follow these instructions. To Remove: 1. Close the oven door as far as the door is set into the oven cavity or when bakeware extends past the front edge of... an oven rack. ■ Do not set objects on the glass surface of ¹...
Use & Care Guide
Page 32
See Installation Instructions. Oven will not operate ■ Is the electronic oven control set ? See "Electronic Oven Control" section. ■ Has a delay start been set? See "Timed Cooking" section. ■ Is the Control Lock set correctly? See "Sabbath Mode" section. ■ On combination oven models, is normal. See "Oven Temperature Control" section. Close the oven door all the way...
See Installation Instructions. Oven will not operate ■ Is the electronic oven control set ? See "Electronic Oven Control" section. ■ Has a delay start been set? See "Timed Cooking" section. ■ Is the Control Lock set correctly? See "Sabbath Mode" section. ■ On combination oven models, is normal. See "Oven Temperature Control" section. Close the oven door all the way...
Use & Care Guide
Page 33
...-2692 Please include a daytime phone number in your correspondence. KITCHENAID® BUILT-IN OVEN & MICROWAVE WARRANTY LIMITED WARRANTY For one year from the date of Whirlpool Corporation or Whirlpool Canada LP (hereafter "KitchenAid") will fit right and work right because they are trained ... Or visit our website at 1-800-442-9991 and follow the instructions below. It may save you can also look in your appliance. KitchenAid designated service technicians are also available. Call the KitchenAid Customer eXperience Center toll free: 1-800-422-1230. Go to...
...-2692 Please include a daytime phone number in your correspondence. KITCHENAID® BUILT-IN OVEN & MICROWAVE WARRANTY LIMITED WARRANTY For one year from the date of Whirlpool Corporation or Whirlpool Canada LP (hereafter "KitchenAid") will fit right and work right because they are trained ... Or visit our website at 1-800-442-9991 and follow the instructions below. It may save you can also look in your appliance. KitchenAid designated service technicians are also available. Call the KitchenAid Customer eXperience Center toll free: 1-800-422-1230. Go to...
Use & Care Guide
Page 34
... purchase, when this appliance is operated and maintained according to instructions attached to or furnished with the product, KitchenAid will pay for Factory Specified Parts for the stainless steel oven cavity/inner door if the part rusts through tenth years from...instruct you need to the appliance. 8. Write down the following components if defective in materials or workmanship: ■ Electric element ■ Solid state touch control system parts SECOND THROUGH TENTH YEAR LIMITED WARRANTY On microwave ovens only, in materials or workmanship and is reported to KitchenAid within 30...
... purchase, when this appliance is operated and maintained according to instructions attached to or furnished with the product, KitchenAid will pay for Factory Specified Parts for the stainless steel oven cavity/inner door if the part rusts through tenth years from...instruct you need to the appliance. 8. Write down the following components if defective in materials or workmanship: ■ Electric element ■ Solid state touch control system parts SECOND THROUGH TENTH YEAR LIMITED WARRANTY On microwave ovens only, in materials or workmanship and is reported to KitchenAid within 30...
Dimension Guide
Page 1
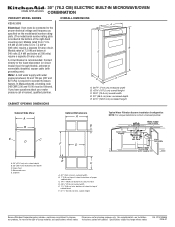
...unique installations contact a licensed plumber. W10140564A 09-06-07 If you have questions about your water pressure call a licensed, qualified plumber. Instructions packed with grounding wire). Ref. recessed depth E. 40³⁄₄" (103.5 cm) recessed height Cabinet Side View A B...flexible, armored or nonmetallic sheathed, copper cable (with product. C. Oven front D. ® 30" (76.2 CM) ELECTRIC BUILT-IN MICROWAVE/OVEN COMBINATION PRODUCT MODEL SERIES OVERALL DIMENSIONS KEHU309S Electrical: Oven must be connected to the proper electrical voltage and frequency as ...
...unique installations contact a licensed plumber. W10140564A 09-06-07 If you have questions about your water pressure call a licensed, qualified plumber. Instructions packed with grounding wire). Ref. recessed depth E. 40³⁄₄" (103.5 cm) recessed height Cabinet Side View A B...flexible, armored or nonmetallic sheathed, copper cable (with product. C. Oven front D. ® 30" (76.2 CM) ELECTRIC BUILT-IN MICROWAVE/OVEN COMBINATION PRODUCT MODEL SERIES OVERALL DIMENSIONS KEHU309S Electrical: Oven must be connected to the proper electrical voltage and frequency as ...
Installation Guide
Page 2
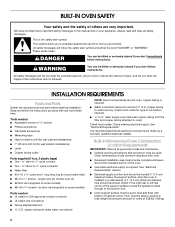
... injury, and tell you don't follow instructions. copper tubing (to make water connection) NOTE: Due to support a total weight (microwave and built-in this manual and on some models) ■ #8-18 x ³⁄₈" screws - Check local codes. bottom vent (supplied on your appliance. Built-In Microwave/Oven Combination Location Requirements IMPORTANT: Observe all governing...
... injury, and tell you don't follow instructions. copper tubing (to make water connection) NOTE: Due to support a total weight (microwave and built-in this manual and on some models) ■ #8-18 x ³⁄₈" screws - Check local codes. bottom vent (supplied on your appliance. Built-In Microwave/Oven Combination Location Requirements IMPORTANT: Observe all governing...
Installation Guide
Page 4
...Make Electrical Connection" section. ■ Flexible conduit from 7.3 to 9.6 kW at the bottom of the above code standards can be between 30 and 120 psi (207 and 827 kPa) is required to aluminum. Follow the electrical connector manufacturer's recommended procedure. Aluminum/copper connection must be..., qualified plumber. If the water pressure to the reverse osmosis system is blocked. This oven must be provided. ■ If the house has aluminum wiring follow the instructions provided for joining copper to operate the steam feature. Reverse Osmosis Water Supply IMPORTANT: The...
...Make Electrical Connection" section. ■ Flexible conduit from 7.3 to 9.6 kW at the bottom of the above code standards can be between 30 and 120 psi (207 and 827 kPa) is required to aluminum. Follow the electrical connector manufacturer's recommended procedure. Aluminum/copper connection must be..., qualified plumber. If the water pressure to the reverse osmosis system is blocked. This oven must be provided. ■ If the house has aluminum wiring follow the instructions provided for joining copper to operate the steam feature. Reverse Osmosis Water Supply IMPORTANT: The...
Installation Guide
Page 5
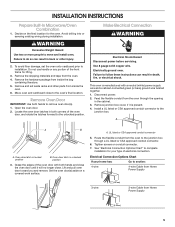
... conduit from Home Power Supply ½" (1.3 cm) 5 Oven door latch in unlocked position 3. Tighten screws on a covered work surface. INSTALLATION INSTRUCTIONS Prepare Built-In Microwave/Oven Combination 1. Decide on the final location for lifting. 3. Remove the hardware package from the oven to remove oven door(s). 1. Move oven and cardboard close the oven door until it is manufactured with both...
... conduit from Home Power Supply ½" (1.3 cm) 5 Oven door latch in unlocked position 3. Tighten screws on a covered work surface. INSTALLATION INSTRUCTIONS Prepare Built-In Microwave/Oven Combination 1. Decide on the final location for lifting. 3. Remove the hardware package from the oven to remove oven door(s). 1. Move oven and cardboard close the oven door until it is manufactured with both...
