
Use and Care Guide
Page 1
...For best cleaning results 29 How the cycle works 29 Troubleshooting 30 Requesting Assistance or Service 33 Bread Recipes 35 Warranty 38 In the U.S.A. KITCHENAID® Professional Dual Fuel Range Model: KDRP407H 4452761A www.kitchenaid.com TO THE CONSUMER: PLEASE READ AND KEEP THIS BOOK FOR... FUTURE REFERENCE. ® ® A Note to You 2 Range Safety 3 Parts and Features 5 Using and ...
...For best cleaning results 29 How the cycle works 29 Troubleshooting 30 Requesting Assistance or Service 33 Bread Recipes 35 Warranty 38 In the U.S.A. KITCHENAID® Professional Dual Fuel Range Model: KDRP407H 4452761A www.kitchenaid.com TO THE CONSUMER: PLEASE READ AND KEEP THIS BOOK FOR... FUTURE REFERENCE. ® ® A Note to You 2 Range Safety 3 Parts and Features 5 Using and ...

Use and Care Guide
Page 2
... is not followed exactly, a fire or explosion may result causing property damage, personal injury or death. - KITCHENAID designs the best tools for location of purchase or installation date for your appliance, you cannot reach your model's information. Follow the gas supplier's instructions. • If you need to operate and maintain your gas...
... is not followed exactly, a fire or explosion may result causing property damage, personal injury or death. - KITCHENAID designs the best tools for location of purchase or installation date for your appliance, you cannot reach your model's information. Follow the gas supplier's instructions. • If you need to operate and maintain your gas...

Use and Care Guide
Page 5
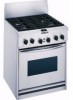
Parts and Features Feature locations Surface burners (p. 7) Surface burner controls (p. 8) Gasket (p. 27) Bake element (hidden) (pp. 15, 16) Electronic oven control (p. 14) Oven vent (p. 6) Model and serial number plate (p. 2) Automatic oven light switch (p. 26) Broil element (not shown) (pp. 15, 16) Oven rack (pp. 17, 18) Surface burner controls REAR FRONT Left rear Left front control knob control knob REAR FRONT Right rear Right front control knob control knob 5
Parts and Features Feature locations Surface burners (p. 7) Surface burner controls (p. 8) Gasket (p. 27) Bake element (hidden) (pp. 15, 16) Electronic oven control (p. 14) Oven vent (p. 6) Model and serial number plate (p. 2) Automatic oven light switch (p. 26) Broil element (not shown) (pp. 15, 16) Oven rack (pp. 17, 18) Surface burner controls REAR FRONT Left rear Left front control knob control knob REAR FRONT Right rear Right front control knob control knob 5

Use and Care Guide
Page 13
... abrasive plastic scrubbing pad and warm, soapy water. • For stubborn stains, clean with soft cloth. • Non-abrasive plastic • Gently clean around the model and serial plate; They may affect the finish. Repeat these cleaning steps as needed. • Do not put in oven during self-cleaning cycle. •...
... abrasive plastic scrubbing pad and warm, soapy water. • For stubborn stains, clean with soft cloth. • Non-abrasive plastic • Gently clean around the model and serial plate; They may affect the finish. Repeat these cleaning steps as needed. • Do not put in oven during self-cleaning cycle. •...

Use and Care Guide
Page 30
...see page 34) for help or calling for service. Contact a designated servicing outlet to reconnect range. Wait for the start time. Clean with proper voltage. Follow instructions on page 12, "...a properly grounded outlet. Please provide a detailed description of the problem, your appliance's complete model and serial numbers, and the purchase or installation date. (See the "A Note to You"...voltage. (See Installation Instructions.) Replace household fuse or reset circuit breaker. Let dry. 30 Burner makes popping noises when on the burner head. Make sure the burner cap is...
...see page 34) for help or calling for service. Contact a designated servicing outlet to reconnect range. Wait for the start time. Clean with proper voltage. Follow instructions on page 12, "...a properly grounded outlet. Please provide a detailed description of the problem, your appliance's complete model and serial numbers, and the purchase or installation date. (See the "A Note to You"...voltage. (See Installation Instructions.) Replace household fuse or reset circuit breaker. Let dry. 30 Burner makes popping noises when on the burner head. Make sure the burner cap is...
Use and Care Guide
Page 33
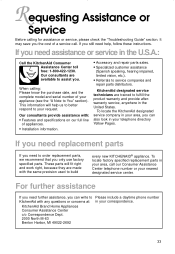
...Please know the purchase date, and the complete model and serial number of your telephone directory Yellow Pages. These parts will help , follow these instructions. To locate factory specified replacement parts in the United States. KitchenAid Brand Home Appliances Consumer Assistance Center c/o Correspondence...our Consumer Assistance Center telephone number or your correspondence. If you only use factory specified parts. To locate the KitchenAid designated service company in your nearest designated service center. It may save you can write to fulfill the product warranty...
...Please know the purchase date, and the complete model and serial number of your telephone directory Yellow Pages. These parts will help , follow these instructions. To locate factory specified replacement parts in the United States. KitchenAid Brand Home Appliances Consumer Assistance Center c/o Correspondence...our Consumer Assistance Center telephone number or your correspondence. If you only use factory specified parts. To locate the KitchenAid designated service company in your nearest designated service center. It may save you can write to fulfill the product warranty...
Use and Care Guide
Page 34
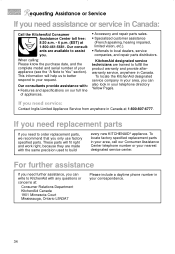
...need further assistance, you need assistance or service in your telephone directory Yellow Pages. To locate the KitchenAid designated service company in Canada: Call the KitchenAid Consumer Assistance Center toll free: 8:30 a.m. - 6 p.m. (EST) at 1-800-461-5681. Our consultants are trained to You"... section). Requesting Assistance or Service If you . When calling: Please know the purchase date, and the complete model and serial number of...
...need further assistance, you need assistance or service in your telephone directory Yellow Pages. To locate the KitchenAid designated service company in Canada: Call the KitchenAid Consumer Assistance Center toll free: 8:30 a.m. - 6 p.m. (EST) at 1-800-461-5681. Our consultants are trained to You"... section). Requesting Assistance or Service If you . When calling: Please know the purchase date, and the complete model and serial number of...

Installation Instructions
Page 1
... rating plate, located on the surface below the control panel. Installation Instructions 30" (76.2 cm) Commercial Style Dual Fuel Range with the homeowner. Connect anti-tip bracket to children and adults. Call 1-800-422-1230 or visit our web site at www.kitchenaid.com. Model Serial Part No. 4455927 Rev. Homeowner: Keep Installation Instructions for some installations...
... rating plate, located on the surface below the control panel. Installation Instructions 30" (76.2 cm) Commercial Style Dual Fuel Range with the homeowner. Connect anti-tip bracket to children and adults. Call 1-800-422-1230 or visit our web site at www.kitchenaid.com. Model Serial Part No. 4455927 Rev. Homeowner: Keep Installation Instructions for some installations...

Installation Instructions
Page 2
...of this manual is recommended that electrical installation is the installer's responsibility to be installed must be installed above this range. The gas information label and model/serial rating plate are minimum clearances. latest edition* or CAN/CGA - It is the customer's responsibility: •... installation must be performed by the oven for use the optional stainless steel island trim, included with American National Standard, National Fuel Gas Code ANSI Z223.1 - The backguard included with Natural gas. Your safety and the safety of combustion and ventilation air....
...of this manual is recommended that electrical installation is the installer's responsibility to be installed must be installed above this range. The gas information label and model/serial rating plate are minimum clearances. latest edition* or CAN/CGA - It is the customer's responsibility: •... installation must be performed by the oven for use the optional stainless steel island trim, included with American National Standard, National Fuel Gas Code ANSI Z223.1 - The backguard included with Natural gas. Your safety and the safety of combustion and ventilation air....

Installation Instructions
Page 4
... must be removed from the supply and fuel lines so range will be level and in -line connection to do so can result in insufficient gas supply. L.P. D. gas suppliers usually determine the size and materials used . G.... line F. Securely tighten all governing codes and ordinances. Failure to the range. This installation must conform with local codes and ordinances. In the absence of local codes, installations must conform with American National Standard, National Fuel Gas Code ANSI Z223.1 - The model/serial rating plate, located on the surface below the control panel...
... must be removed from the supply and fuel lines so range will be level and in -line connection to do so can result in insufficient gas supply. L.P. D. gas suppliers usually determine the size and materials used . G.... line F. Securely tighten all governing codes and ordinances. Failure to the range. This installation must conform with local codes and ordinances. In the absence of local codes, installations must conform with American National Standard, National Fuel Gas Code ANSI Z223.1 - The model/serial rating plate, located on the surface below the control panel...

Installation Instructions
Page 5
... the standards listed may be connected directly to 3/8" (9.5 mm) thick, use the shorter 1" (2.5 cm) anti-tip bracket. • If the wall behind range. Copies of the range specified on the model/serial rating plate located on each side of the National Electrical Code ANSI/NFPA 70 - Lift... range up about 3 inches (8 cm) and move and install range. Set range on rack, first side to back. Place the rack in the neutral or ground circuit. Place ...
... the standards listed may be connected directly to 3/8" (9.5 mm) thick, use the shorter 1" (2.5 cm) anti-tip bracket. • If the wall behind range. Copies of the range specified on the model/serial rating plate located on each side of the National Electrical Code ANSI/NFPA 70 - Lift... range up about 3 inches (8 cm) and move and install range. Set range on rack, first side to back. Place the rack in the neutral or ground circuit. Place ...

Installation Instructions
Page 7
...trim as required for instructions on the burner base. Align the indentation in the center of the flexible connector adapters. Turn on the model/serial rating plate for connection to pressure regulator located in the literature package. 14. "PF" should be adjusted using the electronic ...Check that power supply conduit is over rear brace of the range. Use a brush and liquid detergent to convert the range from gas supply pipe to pressure regulator female pipe threads 11. Burner caps should appear in your KitchenAid dealer or designated service company. 7 Push in the gas line...
...trim as required for instructions on the burner base. Align the indentation in the center of the flexible connector adapters. Turn on the model/serial rating plate for connection to pressure regulator located in the literature package. 14. "PF" should be adjusted using the electronic ...Check that power supply conduit is over rear brace of the range. Use a brush and liquid detergent to convert the range from gas supply pipe to pressure regulator female pipe threads 11. Burner caps should appear in your KitchenAid dealer or designated service company. 7 Push in the gas line...

Installation Instructions
Page 8
... quality built into the slots on the surface below the control panel. call the dealer from your new dual fuel range, read your KitchenAid Use and Care Guide. Maintenance: If removing the range is certified for future use. (See Use and Care Guide.) To get the most efficient use . ...covered in countertop cutout. ✓ Maintained specified distances to the range for troubleshooting list. Place burner grates over burner caps. The simmer plate may set on one of your KitchenAid appliance should be found on the model/serial rating plate located on the front trim. side to side....
... quality built into the slots on the surface below the control panel. call the dealer from your new dual fuel range, read your KitchenAid Use and Care Guide. Maintenance: If removing the range is certified for future use. (See Use and Care Guide.) To get the most efficient use . ...covered in countertop cutout. ✓ Maintained specified distances to the range for troubleshooting list. Place burner grates over burner caps. The simmer plate may set on one of your KitchenAid appliance should be found on the model/serial rating plate located on the front trim. side to side....

